power steering OLDSMOBILE BRAVADA 1998 Owners Manual
[x] Cancel search | Manufacturer: OLDSMOBILE, Model Year: 1998, Model line: BRAVADA, Model: OLDSMOBILE BRAVADA 1998Pages: 380, PDF Size: 19.2 MB
Page 74 of 380
The liftgate and glass will automatically lock when shut.
To
lock the power lock system from the outside, insert
the key
in the lock button and turn it to the right. All
doors will lock.
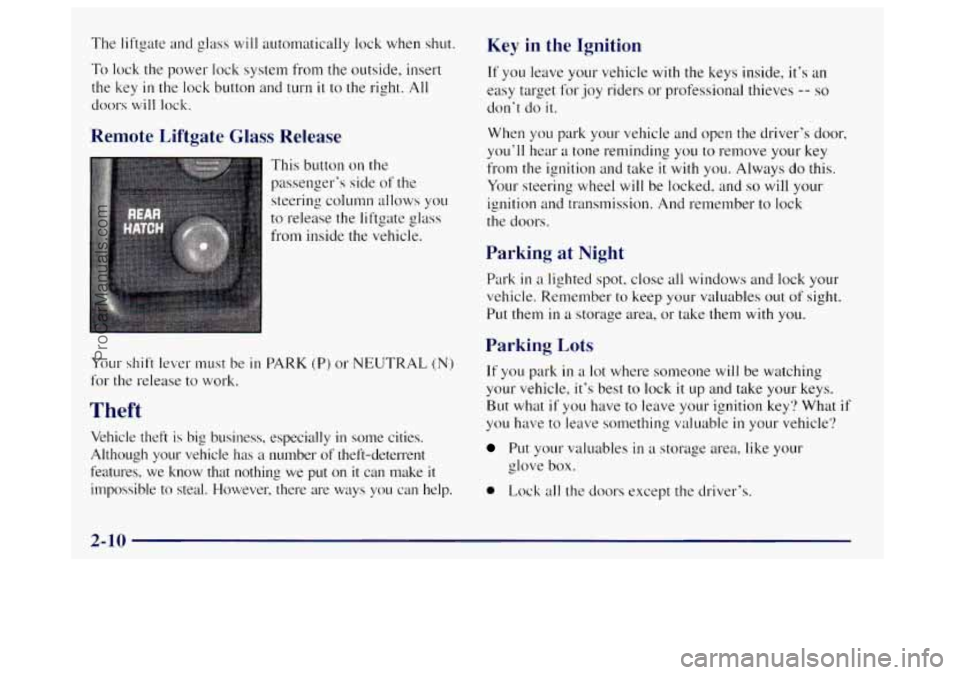
Remote Liftgate Glass Release
This button on the
passenger’s side
of the
steering column allows you
to release the liftgate glass
from inside
the vehicle.
Key in the Ignition
If you leave your vehicle with the keys inside, it’s an
easy target for joy riders or professional thieves
-- so
don’t do it.
When you park your vehicle and open the driver’s door,
you’ll hear
a tone reminding you to remove your key
from the ignition
and take it with you. Always do this.
Your steering wheel
will be locked, and so will your
ignition and transmission. And remember to lock
the doors.
Parking at Night
Park in a lighted spot, close all windows and lock your
vehicle. Remember
to keep your valuables out of sight.
Put
them in a storage area, or take them with you.
Your shift lever must be
in PARK (P) or NEUTRAL (N)
for the release to work.
Theft
Vehicle theft is big business, especially in some cities.
Although your vehicle
has a number of theft-deterrent
features, we know that nothing we put
on it can make it
impossible to steal. However, there are ways you can help.
Parking Lots
If you park in a lot where someone will be watching
your vehicle, it’s best to lock
it up and take your keys.
But what
if you have to leave your ignition key‘? What if
you have to leave something valuable in your vehicle?
Put your valuables in a storage area, like your
glove box.
0 Lock all the doors except the driver’s.
2-10
ProCarManuals.com
Page 77 of 380
NOTICE:
Don’t operate accessories in the ACCESSORY
position for long periods of time. Prolonged
operation of accessories in the
ACCESSORY
position could drain your battery and prevent
you from starting your vehicle.
LOCK (B): This position locks your ignition, steering
wheel and transmission. It’s
a theft-deterrent feature.
You will only be able to remove your key when the
ignition is turned to
LOCK.
OFF (C): This position lets you turn off the engine but
still turn the steering wheel. Use
OFF if you must have
your vehicle
in motion while the engine is off (for
example,
if your vehicle is being towed).
RUN (D): This is the position for driving.
START (E): This position starts your engine.
NOTICE:
If your key seems stuck in LOCK and you can’t
turn it, be sure you are using the correct key; if
so, is it all the way in? If it is, then turn the
steering wheel left and right while you turn the
key hard. But turn the key only with your hand.
Using
a tool to force it could break the key or the
ignition switch.
If none of this works, then your
vehicle needs service.
Retained Accessory Power
Your vehicle is equipped with a Retained Accessory
Power (RAP) feature which will allow certain features
of your vehicle to continue to work up to 20 minutes
after the ignition
key is turned to OFF.
Your radio, power windows, sunroof and overhead
console
will work when the ignition key is in RUN or
ACCESSORY. Once the key is turned from
RUN to
OFF, these ,features will continue to work for up to
20 minutes or until a door is opened.
ProCarManuals.com
Page 89 of 380
Windows
Power Windows
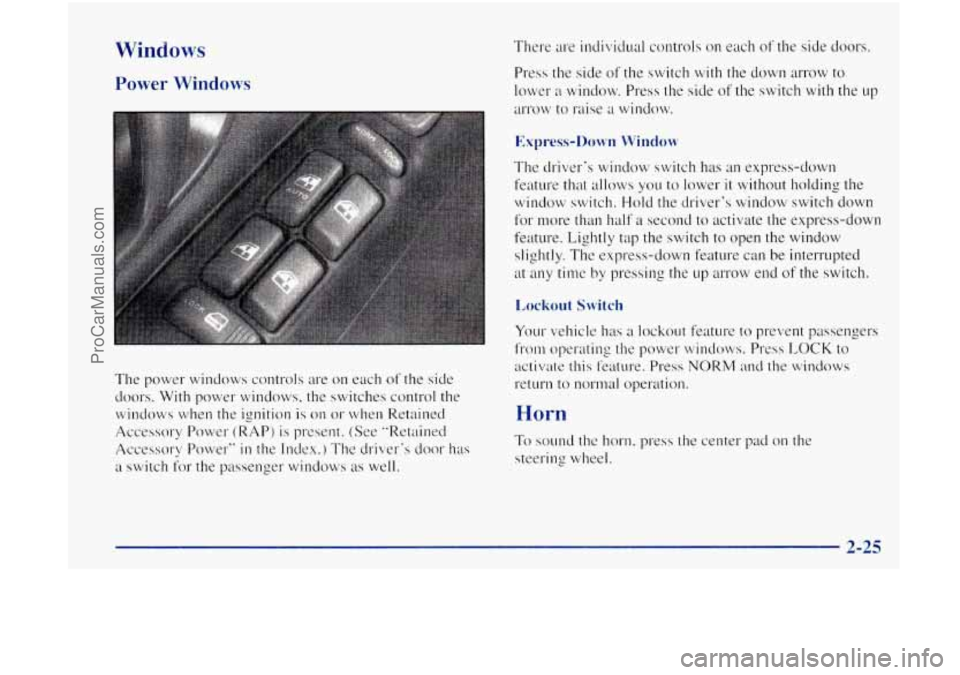
The power windows controls are on each of the side
doors. With power windows, the switches control the
windows when the ignition is on or when Retained
Accessory Power (RAP) is present. (See "Retained
Accessory Power"
in the Index.') The driver's door has
a switch for the passenger windows as well. There
are individual controls
on each of the side doors.
Press the side of the switch with the down arrow to
lower a window. Press the side of the switch with the up
arrow
to raise a window.
Express-Down Window
The driver's window switch has an express-down
feature
that allows you to lower it without holding the
window switch. Hold the driver's window switch down
,for more than half a second to activate the express-down
feature. Lightly tap the switch
to open the window
slightly. The express-dawn feature can be interrupted
at any time by pressing the up arrow end of the switch.
Lockout Switch
Your vehicle has a lockout feature to prevent passengers
fro111 operating the power windows. Press LOCK to
activate this feature. Press NORM and the windows
return
to norrnal operation.
Horn
To sound the horn. press the center pad on the
steering wheel.
2-25
ProCarManuals.com
Page 161 of 380

Remember: Anti-lock doesn’t change the time you need
to get your foot up to the brake pedal or always decrease stopping distance. If you get too close to the vehicle in
front
of you, you won’t have time to apply your brakes
if that vehicle suddenly slows
or stops. Always leave
enough room up ahead to stop, even though you have
anti-lock brakes.
Using Anti-Lock
Don’t pump the brakes. Just hold the brake pedal down firmly and let anti-lock work for you. You may feel the
brakes vibrate, or you may notice some noise, but this
is normal.
Braking in Emergencies
With anti-lock, you can steer and brake at the same
time. In many emergencies, steering can help you more than even
the very best braking.
Steering
Power Steering
If you lose power steering assist because the engine
stops or the system is not functioning, you can steer but
it will take much more effort.
Steering Tips
Driving on Curves
It’s important to take curves at a reasonable speed.
A lot of the “driver lost control” accidents mentioned on
the news happen on curves. Here’s why:
Experienced driver or beginner, each of us is subject to
the same laws of physics when driving on curves. The
traction of the tires against the road surface makes it
possible for the vehicle to change its path when you
turn
the front wheels. If there’s no traction, inertia will keep
the vehicle going in the same direction. If you’ve ever
tried to steer a vehicle on wet ice, you’ll understand this.
4-9
ProCarManuals.com
Page 172 of 380
Approaching a Hill
When you approach a hill, you need to decide if it’s one
of those hills that’s just too steep
to climb, descend or
cross. Steepness can be hard
to judge. On a very small
hill, for example, there may be
a smooth, constant
incline
with only a small change in elevation where you
can easily see all the way to the top. On a large
hill, the
incline may get steeper
as you near the top, but you may
not see this because the crest of the
hill is hidden by
bushes, grass
or shrubs.
Here are some other things to consider as you approach
a
hill.
0 Is there a constant incline, or does the hill get sharply
steeper
in places?
Is there good traction on the hillside, or will the
surface cause tire slipping?
0 Is there a straight path up or down the hill so you
won’t have to make turning maneuvers‘?
0 Are there obstructions on the hill that can block your
path (boulders, trees,
logs or ruts)?
What’s beyond the hill? Is there a cliff, an
embankment,
a drop-off, a fence? Get out and
walk the
hill if you don’t know. It’s the smart way
to find out.
Is the hill simply too rough‘? Steep hills often have
ruts, gullies, troughs and exposed rocks because they
are more susceptible to the effects of erosion.
Driving Uphill
Once you decide you can safely drive up the hill, you
need to take some special steps.
0
0
0
Use a low gear and get a firm grip on the
steering wheel.
Get a smooth start
up the hill and try to maintain
your speed. Don’t use more power than you need,
because you don’t want your wheels to start spinning
or sliding.
Try to drive straight
up the hill if at all possible. If
the path twists and turns, you might want to find
another route.
4-20
ProCarManuals.com
Page 243 of 380
Section 6 Service and Appearance Care
Here you will find information about the care of your vehicle. This section begins with service and fuel information,
and then it shows how to check important fluid and lubricant levels. There is also t\
echnical information about your
vehicle, and a part devoted to its appearance care.
6-2
6- 3
6-5
6-6
6-8
6-8
6-11
6- 15
6- 16
6-20
6-22
6-22
6-26
6-26
6-26 6-27 Service
Fuel
Fuels in Foreign Countries
Filling Your Tank
Filling a Portable Fuel Container
Checking Things Under the
Hood
Engine Oil
Air Cleaner
Automatic Transmission Fluid
All-Wheel Drive
Rear Axle
Engine Coolant Radiator Pressure Cap
Thermostat
Power Steering Fluid
Windshield Washer Fluid
6-29
6-32
6-33
6-35
6-37
6-44
6-45
6-47
6-48
6-52
6-53
6-53
6-54
6-60 6-60
6-6
1
Brakes
Battery
Bulb Replacement
Windshield Wiper Blade Replacement
Tires Appearance Care
Cleaning the Inside of Your Vehicle
Care
of Safety Belts
Cleaning the Outside of Your Vehicle
Appearance Care Materials Chart
Vehicle Identification Number (VIN)
Service Parts Identification Label
Electrical System
Replacement Bulbs
Capacities and Specifications
Air Conditioning Refrigerants
ProCarManuals.com
Page 252 of 380

When you lift the hood, you’ll see these items:
A. Battery
B. Coolant Recovery Tdnk
C. Engine Oil Dipstick
D. Engine Oil Fill
E. Transmission Dipstick
F. Power Steering Reservoir
G. Brake Master Cylinder
H. Air Cleaner
I. Engine Compartment
J. Windshield Washer Fluid
Fuse Block
6-10
ProCarManuals.com
Page 268 of 380

Radiator Pressure Cap NOTICE:
Your radiator cap is a 15 psi (105 kPa)
pressure-type cap and must be tightly installed to
prevent coolant loss and possible engine damage
from overheating. Be sure the arrows on the cap
line up with the overflow tube on the radiator
filler neck.
Thermostat
Engine coolant temperature is controlled by a thermostat
in the engine coolant system. The thermostat stops the
flow of coolant through the radiator until the coolant
reaches
a preset temperature.
Power Steering Fluid
6-26
ProCarManuals.com
Page 269 of 380

When to Check Power Steering Fluid
It is not necessary to regularly check power steering fluid
unless you suspect there is a leak
in the system or you hear
an unusual noise. A fluid loss
in this system could indicate
a problem. Have the system inspected and repaired.
How To Check Power Steering Fluid
When the engine compartment is cool, wipe the cap and
the top of the reservoir clean, then unscrew the cap and
wipe the dipstick with
a clean rag. Replace the cap and
completely tighten it. Then remove
the cap again and
look at the fluid level on the dipstick.
The level should be between the ADD and
FULL marks.
If necessary, add only enough fluid to bring the level up
to
the proper range.
What to Use
To determine what kind of fluid to use, see
”Recommended Fluids and Lubricants” in the Index.
Always use
the proper fluid. Failure to use the proper
fluid can cause leaks and damage hoses and seals.
Windshield Washer Fluid
What to Use
When you need windshield washer fluid, be sure to read
the manufacturer’s instructions before use.
If you will be
operating your vehicle
in an area where the temperature
may fall below freezing, use
a fluid that has sufficient
protection against freezing.
ProCarManuals.com
Page 347 of 380

Part C: Periodic Maintenance
Inspections
Listed below are inspections and services which should
be performed at least twice a year (for instance, each
spring and fall). You should
let your retailer’s service
department or other qualified service center do these
jobs. Make sure any necessary repairs are completed
at once.
Proper procedures to perform these services may be
found in a service manual. See “Service and Owner
Publications” in the Index.
Steering, Suspension and Front Drive Axle
Boot and Seal Inspection
Inspect the front and rear suspension and steering
system for damaged, loose or missing parts, signs of
wear or
lack of lubrication. Inspect the power steering
lines and hoses for proper hook-up, binding, leaks,
cracks, chafing, etc. Clean and then inspect the drive
axle boot seals for damage, tears
or leakage. Replace
seals
if necessary.
Exhaust System Inspection
Inspect the complete exhaust system. Inspect the body
near the exhaust system.
Look for broken, damaged,
missing or out-of-position parts
as well as open seams,
holes, loose connections or other conditions which could
cause
a heat build-up in the floor pan or could let
exhaust fumes into the vehicle. See “Engine Exhaust”
in
the Index.
Engine Cooling System Inspection
Inspect the hoses and have them replaced if they are
cracked, swollen or deteriorated. Inspect all pipes,
fittings and clamps; replace
as needed. Clean the outside
of the radiator and air conditioning condenser.
To help
ensure proper operation, a pressure test of the cooling
system and pressure cap is recommended at least once
a year.
ProCarManuals.com