tow Oldsmobile Bravada 2003 s User Guide
[x] Cancel search | Manufacturer: OLDSMOBILE, Model Year: 2003, Model line: Bravada, Model: Oldsmobile Bravada 2003Pages: 410, PDF Size: 20.1 MB
Page 91 of 410

2. Move the shift lever
into PARK (P) like this:
Press and hold in the button on the lever.
Push the lever all the way toward the front of the
vehicle.
3. Turn the ignition key to LOCK.
4. Remove the key and take it with you. If you can
leave your vehicle with the key, your vehicle is in
PARK
(P).
Leaving Your Vehicle With the Engine
Running
It can be dangerous ,I leave your vehicle --ith
the engine running. Your vehicle could move
suddenly
if the shift lever is not fully in
PARK (P) with the parking brake firmly set.
And,
if you leave the vehicle with the engine
running,
it could overheat and even catch fire.
You or others could be injured. Don’t leave
, your vehicle with the engine running.
If you have to leave your vehicle with the engine
running, be sure your vehicle is in PARK (P) and your
parking brake is firmly set before you leave it. After
you’ve moved the shift lever into PARK (P), hold
the regular brake pedal down. Then, see
if you can
move the shift lever away from PARK (P) without first
pressing the button on the console shift lever. If you can,
it means that the shift lever wasn’t fully locked into
PARK (P).
2-26
Page 94 of 410
Running Your Engine While You
Are Parked
It’s better not to park with the engine running. But if you
eve- to, here are some
things to know.
Idling the engine with the climate control
system
off could allow dangerous exhaust into
your vehicle. See the earlier Caution under
“Engine Exhaust.”
Also, idling in a closed-in place can let deadly
carbon monoxide (CO) into your vehicle even if
the fan
is at the highest setting. One place this
can happen is a garage. Exhaust - with
CO - can come in easily. NEVER park in a
garage with the engine running.
Another closed-in place can be a blizzard. See
“Winter Driving” in the Index.
It can be dangerous to get out of your vehicle
if the shift lever is not fully in
PARK (P) with
the parking brake firmly set. Your vehicle can
roll. Don’t leave your vehicle when the engine
is running unless you have to. If you’ve left the
engine running, the vehicle can move
suddenly. You or others could be injured.
To
be sure your vehicle won’t move, even when
you’re on fairly level ground, always set your parking brake and move the shift lever to
PARK (P).
Follow the proper steps to be sure your vehicle won’t
move. See
Shifting Into Park (P) on page 2-25.
If you’re pulling a trailer, see Towing a Trailer on
page
4-45.
2-29
Page 97 of 410

Outside Manual Mirrors
Adjust your outside mirrors so you can see a little of the
side
of your vehicle.
Fold the mirrors in before entering a car wash. To do
this,
pull the mirrors in toward the vehicle. Push the
mirrors back out when finished.
Outside Power Mirror
The control is located on the driver’s door.
1. Twist the knob toward the mirror you desire to
2. Move the control in the direction you want the
3. Adjust the mirror in all four directions.
adjust.
mirror to
go.
4. After you are satisfied with the position of the
mirror, twist the control
to the center position or twist
it
to the other mirror to adjust that mirror.
If you reach the mirror’s end of the travel position in any
direction, the mirror will enter a ratcheting mode. This
action is harmless.
It is a warning that the mirror can go
no further. To stop this action, back the mirror up by
moving the control in the opposite direction.
When the control is twisted
to the center position, the
mirrors can not be moved with the control knob.
2-32
Page 108 of 410
To slide the crossrails to where you want them, pull up
on the lever on each side of the crossrail. This will
release the crossrail and allow you
to slide it. When the
crossrail is where you want it, press down on the
levers to lock it into place.
Notice: Loading cargo that weighs more than
220 Ibs. (100 kg) on the luggage carrier may damage
your vehicle.
Don’t exceed the maximum vehicle capacity when
loading your vehicle. For more information on vehicle
capacity and loading, see
Loading Your Vehicle on
page
4-4 1.
To prevent damage or loss of cargo as you’re driving,
check now and then to make sure the luggage carrier is
locked and cargo is still securely fastened.
When the luggage carrier is not in use, place the
crossrails
at the following positions for wind noise
reduction. Place one crossrail at the rear most point of
the vehicle and the other crossrail above the opening
of the rear door.
Rear Floor Storage Lid
If any removable convenience item isn’t
secured properly, it can move around in a
collision or sudden stop. People in the vehicle
could be injured. Be sure
to secure any such
item properly.
Your vehicle has a rear floor storage lid located in the
rear cargo area that allows you to put items underneath
it.
To remove the rear floor storage lid, do the following:
1. Press the latch release and lift up the latch handle.
2. Raise the lid slightly to unhook it.
3. Pull the lid toward you to release it from the forward
mounting tabs.
To reinstall the rear floor storage lid, reverse the
previous steps. Make sure the lid
is secure by applying
slight pressure to the latch until you hear it click.
2-43
Page 119 of 410
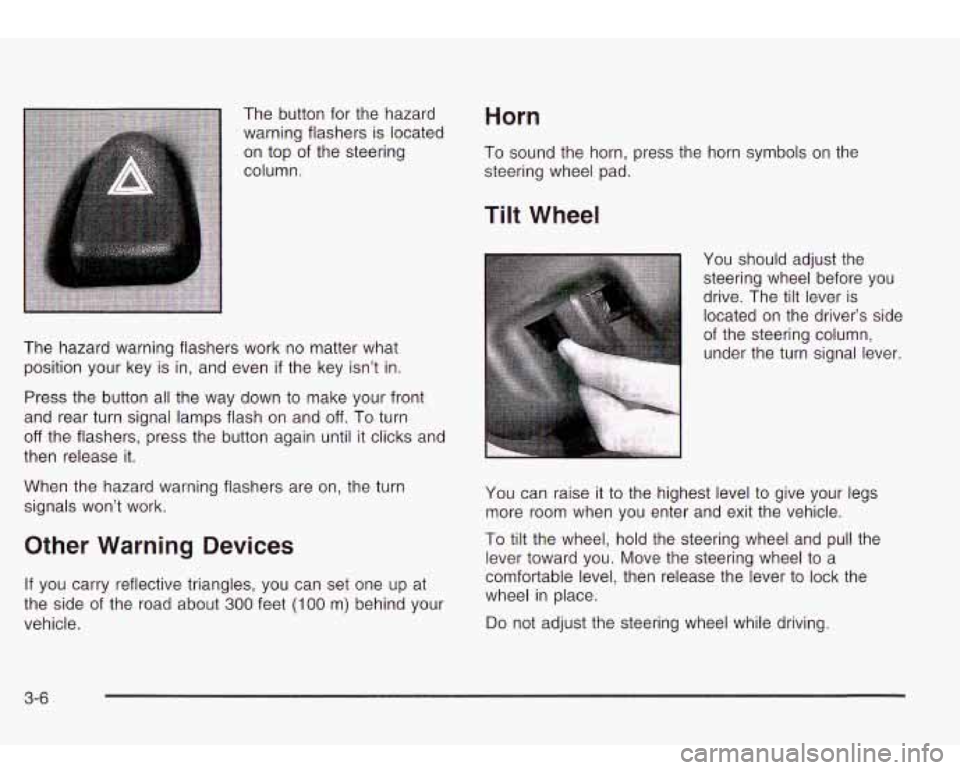
The button for the hazard
warning flashers is located
on top of the steering
column. Horn
To sound the horn, press the horn symbols on the
steering wheel pad.
The hazard warning flashers work no matter what
position your key is in, and even
if the key isn’t in.
Press the button all the way down to make your front
and rear turn signal lamps flash on and
off. To turn
off the flashers, press the button again until it clicks and
then release it.
When the hazard warning flashers are on, the turn
signals won’t work.
Other Warning Devices
If you carry reflective triangles, you can set one up at
the side of the road about
300 feet (I00 m) behind your
vehicle.
Tilt Wheel
You should adjust the
steering wheel before you
drive. The tilt lever is
located on the driver’s side
of the steering column,
under the turn signal lever.
You can raise it to the highest level to give your legs
more room when you enter and exit the vehicle.
To tilt the wheel, hold the steering wheel and pull the
lever toward you. Move the steering wheel to a
comfortable level, then release the lever to lock the
wheel in place.
Do not adjust the steering wheel while driving.
3-6
Page 121 of 410
If a bulb is burned out, replace it to help avoid an
accident. If the arrows don’t go on at all when you signal
a turn, check the fuse. See
Fuses and Circuit Breakers
on page 5-86 and check for burned-out bulbs.
If you have a trailer towing option with added wiring for
the trailer lamps, a different turn signal flasher is
used. With this flasher installed, the signal indicator will
flash even
if a turn signal bulb is burned out. Check
the front and rear turn signal lamps regularly
to make
sure they are working.
Turn Signal On Chime
If your turn signal is left on for more than 3/4 of a mile
(1.2 km), a chime will sound at each flash of the
turn signal.
To turn off the chime, move the turn signal
lever to the off position.
Headlamp High/Low-Beam Changer
To change the headlamps from low to high beam, push
the lever toward the instrument panel. To return
to
low-beam headlamps, pull the multifunction lever toward
you. Then release it.
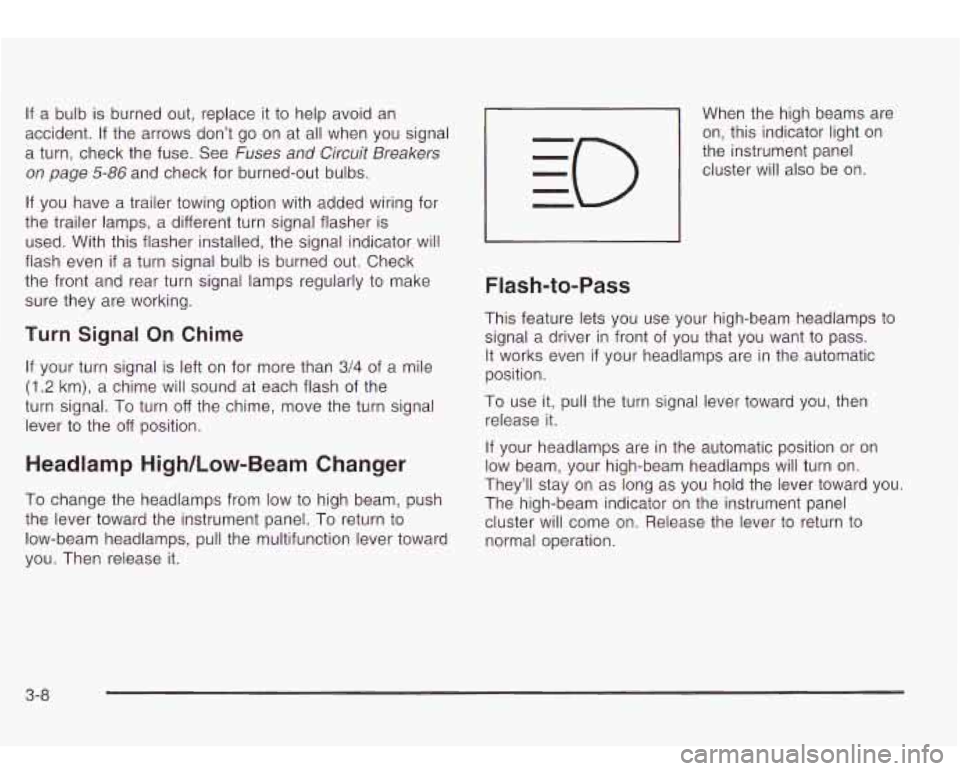
-1 When the high beams are
on, this indicator light on
the instrument panel
cluster will also be on.
Flash-to-Pass
This feature lets you use your high-beam headlamps to
signal a driver in front of you that you want to pass.
It works even if your headlamps are in the automatic
position.
To use it, pull the turn signal lever toward you, then
release it.
If your headlamps are in the automatic position or on
low beam, your high-beam headlamps will turn on.
They’ll stay on as long as you hold the lever toward you.
The high-beam indicator on the instrument panel
cluster will come on. Release the lever to return
to
normal operation.
3-8
Page 135 of 410
Automatic Operation Manual Operation
AUTO
(Automatic): When automatic operation is
active, the system will control the inside temperature,
the air delivery mode, and the fan speed.
Use the steps below to place the entire system in
automatic mode:
1. Press the AUTO button.
When AUTO is selected, the air conditioning
operation and air inlet will be automatically
controlled. The air conditioning compressor will run
when the outside temperature is over approximately
40°F (4°C). The air inlet will normally be set to
outside air. If it’s hot outside, the air inlet will
automatically switch to recirculate inside air to help
quickly cool down your vehicle.
2. Set the driver’s and passenger’s temperature.
To find your comfort setting, start with a 72°F (22°C)
temperature setting and allow about 20 minutes
for the system to regulate. Turn the driver’s or
passenger’s side temperature knob to adjust the
temperature setting as necessary. If you choose the
temperature setting
of 60°F (15”C), the system
will remain at the maximum cooling setting.
If you
choose the temperature setting of 90°F
(32”C),
the system will remain at the maximum heat setting.
Choosing either maximum setting may not cause
the vehicle to heat or cool any faster. To change
the current setting, select one of the
following:
v (Fan): This button allows you to manually
adjust the fan speed. Press the up arrow to increase fan
speed and the down arrow to decrease fan speed.
The display will change to show you the selected fan
speed and the driver’s side temperature setting for five
seconds.
@* *d (Mode): Press this button to manually change the
direction of the airflow in your vehicle. Keep pressing the
button until the desired mode appears on the display.
The display will change to show you the selected
air delivery mode and the driver’s temperature setting
for five seconds.
2 (Vent): This mode directs air to the instrument
panel outlets.
+2 (Bi-Level): This mode directs approximately half of
the air to the instrument panel outlets, then directs
the remaining air to the floor outlets. A little air is
directed toward the windshield and the side window
outlets. Cooler air is directed to the upper outlets and
warmer air to the floor outlets.
3-22
Page 139 of 410
Ventilation System
For mild outside temperatures when little heating or
cooling is needed, use the panel outlet setting to direct
outside air through your vehicle. Air will flow through
the instrument panel outlets.
Your vehicle’s flow-through ventilation system supplies outside air into the vehicle when it’s moving. When the
vehicle is not moving, you can get outside air to flow
through by selecting any air delivery mode and any fan
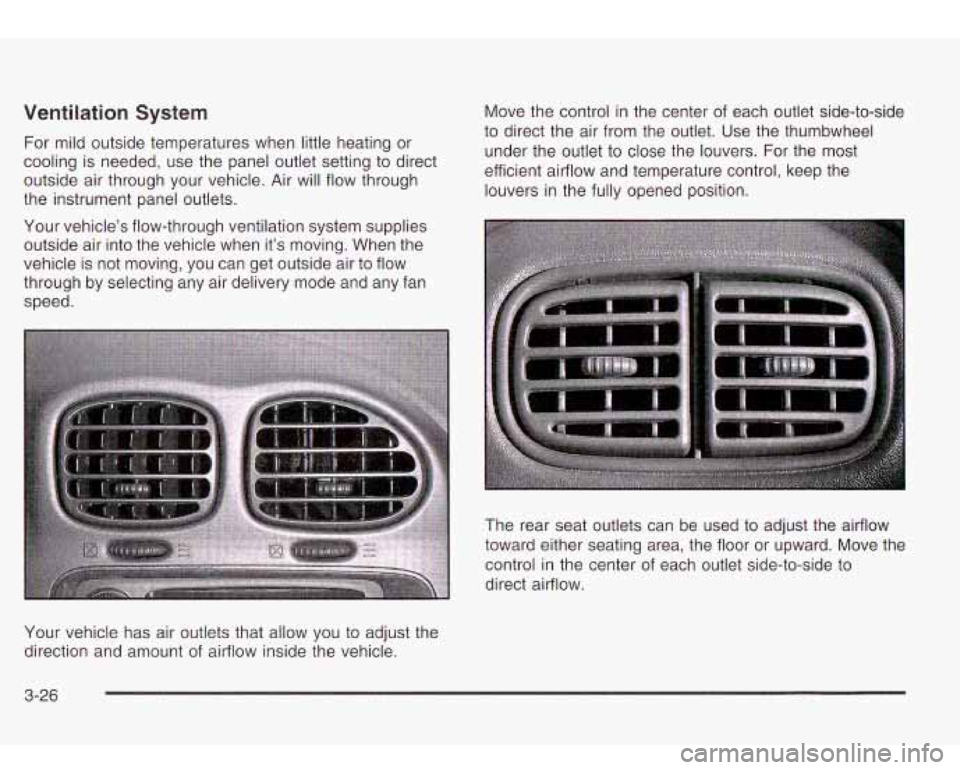
speed. Move the control
in the center of each outlet side-to-side
to direct the air from the outlet. Use the thumbwheel
under the outlet to close the louvers. For the most
efficient airflow and temperature control, keep the
louvers in the fully opened position.
The rear seat outlets can be used to adjust the airflow
toward either seating area, the floor or upward. Move the
control in the center of each outlet side-to-side to
direct airflow.
Your vehicle has air outlets that allow you to adjust the
direction and amount
of airflow inside the vehicle.
3-26
Page 147 of 410
If the light comes on while you are driving, pull off the
road and stop carefully. You may notice that the pedal is
harder to push. Or, the pedal may go closer to the
floor. It may take longer to stop. If the light is still on,
have the vehicle towed for service. See
Towing
Your Vehicle
on page 4-41.
. ,UT brake sl ,,em m,, not be WOL ... ng
properly if the brake system warning light is
on. Driving with the brake system warning light
on can lead to an accident.
If the light is still
on after you’ve pulled
off the road and stopped
carefully, have the vehicle towed for service.
I
Anti-Lock Brake System Warning
Light
With the anti-lock brake
system, this light will come
on when you start your
engine and may stay on for
several seconds. That’s
normal.
A chime may also
sound when the light
comes on.
If the light stays on, or comes on when you’re driving,
your vehicle needs service. If the regular brake
system warning light isn’t on, you still have brakes, but
you don’t have anti-lock brakes. If the regular brake
system warning light is also on, you don’t have anti-lock
brakes and there’s a problem with your regular
brakes. See
Brake System Warning Light on page 3-33
earlier in this section.
The anti-lock brake system warning light should come
on briefly when you turn the ignition key to
RUN. If
the light doesn’t come on then, have it fixed
so it will be
ready to warn you
if there is a problem.
3-34
Page 149 of 410
This system is called OBD II (On-Board
Diagnostics-Second Generation) and is intended
to
assure that emissions are at acceptable levels for the
life of the vehicle, helping to produce a cleaner
environment. The SERVICE ENGINE SOON or CHECK
ENGINE light comes on and a chime will sound
to
indicate that there is a problem and service is required. Malfunctions often will be indicated by the system
before any problem is apparent. This may prevent more
serious damage
to your vehicle. This system is also
designed to assist your service technician in correctly
diagnosing any malfunction.
Notice: If you keep driving your vehicle with this
light on, after a while, your emission controls
may not work as well, your fuel economy may not
be as good and your engine may not run as
smoothly. This could lead to costly repairs that may not be covered by your warranty.
Notice: Modifications made to the engine,
transmission, exhaust, intake or fuel system of your
vehicle or the replacement of the original tires
with other than those of the same Tire Performance Criteria (TPC) can affect your vehicle’s emission
controls and may cause this light to come on.
Modifications to these systems could lead to costly
repairs
not covered by your warranty. This may
also result in a failure to pass a required Emission
Inspection/Maintenance test.
3-36
This light should come on, as a check to show you it is
working, when the ignition is on and the engine is
not running. If the light doesn’t come on, have it
repaired. This light will also come on during a
malfunction in one of two ways:
0 Light Flashing - A misfire condition has been
detected. A misfire increases vehicle emissions
and may damage the emission control system on
your vehicle. Dealer or qualified service center
diagnosis and service may be required.
Light On Steady - An emission control system
malfunction has been detected on your vehicle.
Dealer or qualified service center diagnosis
and service may be required.
If the Light Is Flashing
The following may prevent more serious damage to
your vehicle:
Reducing vehicle speed.
Avoiding hard accelerations.
Avoiding steep uphill grades.
If you are towing a trailer, reduce the amount of
cargo being hauled as soon as it is possible.
If the light stops flashing and remains on steady, see “If
the Light Is On Steady’’ following.