reset Oldsmobile Bravada 2003 s Owner's Guide
[x] Cancel search | Manufacturer: OLDSMOBILE, Model Year: 2003, Model line: Bravada, Model: Oldsmobile Bravada 2003Pages: 410, PDF Size: 20.1 MB
Page 203 of 410
Care of Your Cassette Tape Player
A tape player that is not cleaned regularly can cause
reduced sound quality, ruined cassettes or a damaged
mechanism. Cassette tapes should be stored in their
cases away from contaminants, direct sunlight and
extreme heat.
If they aren’t, they may not operate
properly or may cause failure of the tape player.
Your tape player should be cleaned regularly after every
50 hours of use. Your radio may display CLEAN
PLAYR
to indicate that you have used your tape player
for
50 hours without resetting the tape clean timer. If
this message appears on the display, your cassette tape
player needs
to be cleaned. It will still play tapes, but
you should clean it as soon as possible to prevent
damage
to your tapes and player. If you notice a
reduction in sound quality, try a known good cassette to
see
if the tape or the tape player is at fault. If this
other cassette has no improvement in sound quality,
clean the tape player.
For best results, use a scrubbing action, non-abrasive
cleaning cassette with pads which scrub the tape
head as the hubs of the cleaner cassette turn. The
recommended cleaning cassette is available through
your dealership.
The cut tape detection feature of your cassette tape
player may identify the cleaning cassette as a damaged
tape,
in error. To prevent the cleaning cassette from
being ejected, use the following steps.
I. Turn the ignition on.
2. Turn the radio off.
3. Press and hold the TP CD button for five seconds.
4. Insert the scrubbing action cleaning cassette.
5. Eject the cleaning cassette after the manufacturer’s
recommended cleaning time.
You may also choose a non-scrubbing action, wet-type
cleaner which uses a cassette with a fabric belt
to
clean the tape head. This type of cleaning cassette will
not eject on its own. A non-scrubbing action cleaner
may not clean as thoroughly as the scrubbing type
cleaner. The use
of a non-scrubbing action, dry-type
cleaning cassette is not recommended.
After you clean the player, press and hold the eject
button for five seconds to reset the CLEAN PLAYR
indicator. The radio will display CLEANED
to show the
indicator was reset.
Cassettes are subject
to wear and the sound quality
may degrade over time. Always make sure the cassette
tape
is in good condition before you have your tape
player serviced.
3-90
Page 276 of 410
As in the chart shown previously, SAE 5W-30 is the
only viscosity grade recommended for your vehicle. You
should look for and use only oils which have the API
Starburst symbol and which are also identified as
SAE 5W-30.
If you cannot find such SAE 5W-30 oils,
you can use an SAE IOW-30 oil which has the API
Starburst symbol,
if it's going to be 0°F (-18°C)
or above. Do not use other viscosity grade oils, such as
SAE IOW-40 or SAE 20W-50 under any conditions.
Notice: Use only engine oil with the American
Petroleum Institute Certified For Gasoline Engines
starburst symbol. Failure to use the recommended
oil can result in engine damage not covered by
your warranty.
GM Goodwrench@ oil meets all the requirements for
your vehicle.
If you are in an area of extreme cold, where the
temperature falls below -20°F (-29"C), it is
recommended that you use either an SAE 5W-30
synthetic
oil or an SAE OW-30 oil. Both will provide
easier cold starting and better protection for your engine
at extremely low temperatures.
Engine Oil Additives
Don't add anything to your oil. The recommended oils
with the starburst symbol are all you will need for
good performance and engine protection.
When to Change Engine Oil
(GM Oil Life System)
Your vehicle has a computer system that lets YO
when to change the engine oil-and filter. This is
IU know
based on engine revolutions and engine temperature,
and not on mileage. Based on driving conditions,
the mileage at which an oil change will be indicated can
vary considerably. For the oil life system to work
properly, you must reset the system every time the oil is
changed.
When the system has calculated that oil life has been
diminished, it will indicate that an oil change
is
necessary. A CHANGE ENG OIL light in the Driver
Information Center (DIC) will come on. Change your oil
as soon
as possible within the next two times you
stop for fuel. It is possible that,
if you are driving under
the best conditions, the oil life system may not
indicate that an oil change is necessary for over a year.
However, your engine oil and filter must be changed
at least once a year and at this time the system must be
reset. It is also important to check your oil regularly
and keep it at the proper level.
If the system is ever reset accidentally, you must
change your oil at 3,000 miles (5
000 km) since your
last oil change. Remember to reset the oil life system
whenever the oil is changed.
5-1
7
Page 277 of 410
How to Reset the CHANGE ENG OIL Light
The GM Oil Life System calculates when to change
your engine oil and filter based on vehicle use. Anytime
your oil is changed, reset the system
so it can
calculate when the next oil change is required. If a
situation occurs where you change your oil prior to a
CHANGE ENG OIL light being turned on, reset the
system.
To reset the CHANGE ENG OIL light, do the following:
1. Turn the ignition key to RUN with the
2. Fully press and release the accelerator pedal three
engine
off.
times within five seconds.
For vehicles with the Driver Information Center, see
Driver Information Center (DE) on page 3-43 to reset
the system.
What to Do with Used Oil
Used engine oil contains certain elements that may be
unhealthy for your skin and could even cause cancer.
Don’t let used oil stay on your skin for very long. Clean
your skin and nails with soap and water, or a good
hand cleaner. Wash or properly dispose of clothing or
rags containing used engine oil. See the manufacturer’s
warnings about the use and disposal of oil products. Used oil can be a threat
to the environment. If you
change your own oil, be sure to drain all the oil from the
filter before disposal. Never dispose
of oil by putting it
in the trash, pouring it on the ground, into sewers, or into
streams
or bodies of water. Instead, recycle it by
taking it to a place that collects used oil. If you have a
problem properly disposing
of your used oil, ask
your dealer, a service station or a local recycling center
for help.
Engine Air CleanedFilter
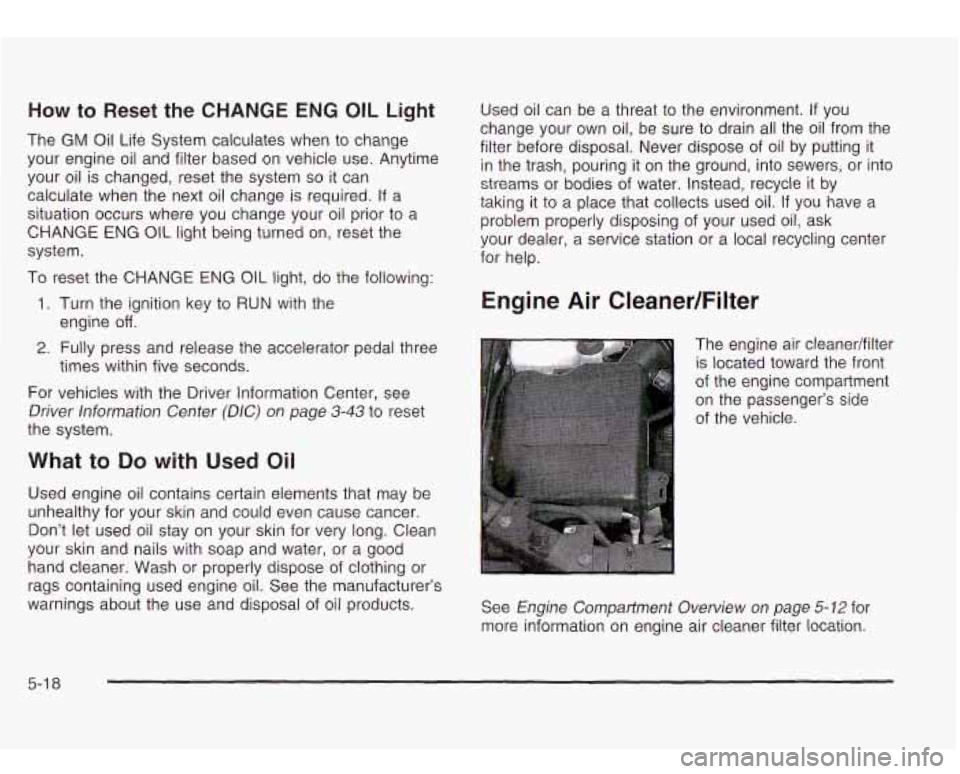
The engine air cleanedfilter
is located toward the front
of the engine compartment
on the passenger’s side
of the vehicle.
See
Engine Compartment Overview on page 5-12 for
more information on engine air cleaner filter location.
5-1 8
Page 278 of 410
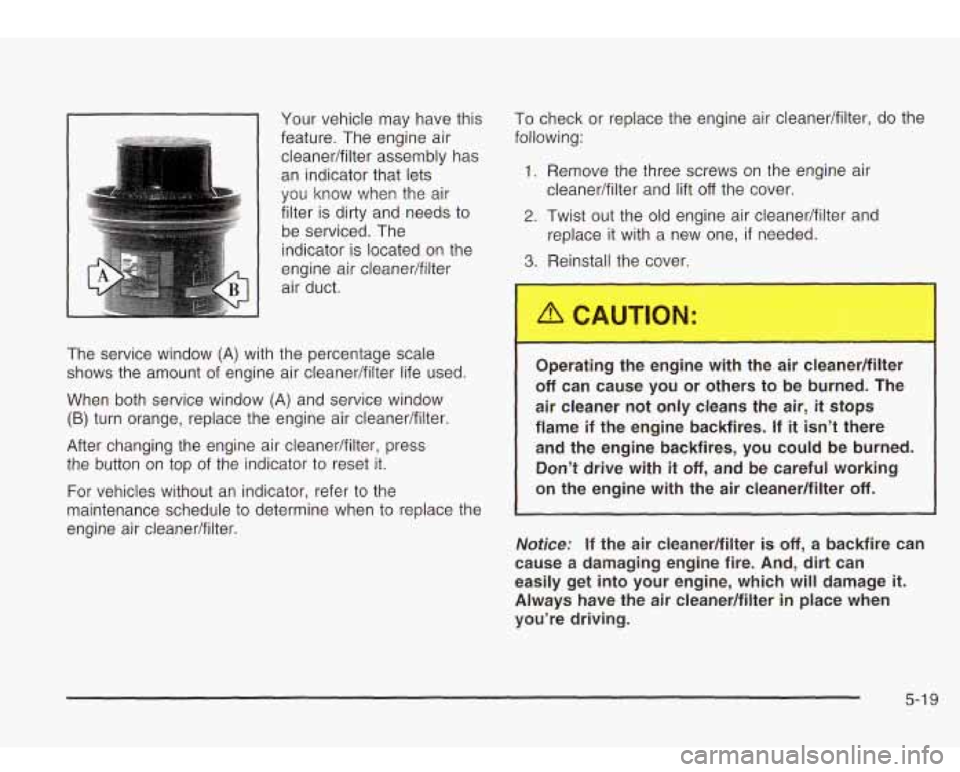
1-1 Your vehicle may have this
feature. The engine air cleanedfilter assembly has
an indicator that lets
you know when the air
filter is dirty and needs to
be serviced. The
indicator is located on the
engine air cleaner/filter
air duct.
The service window
(A) with the percentage scale
shows the amount of engine air cieanedfilter life used.
When both service window
(A) and service window
(B) turn orange, replace the engine air cleanedfilter
After changing the engine air cleaner/filter, press
the button on top of the indicator to reset it.
For vehicles without an indicator, refer
to the
maintenance schedule to determine when
to replace the
engine air cleaner/filter. To
check or replace the engine air cleaner/filter, do the
following:
1. Remove the three screws on the engine air
2. Twist out the old engine air cleaner/filter and
3. Reinstall the cover.
cleanedfilter and lift
off the cover.
replace it with a new one,
if needed.
per
______ ~ ---e eng.--> with the air cleaner/filter
off can cause you or others to be burned. The
air cleaner not only cleans the air,
it stops
flame if the engine backfires.
If it isn’t there
and the engine backfires, you could be burned. Don’t drive with
it off, and be careful working
on the engine with the air cleanedfilter
off.
Notice: If the air cleaner/filter is off, a backfire can
cause a damaging engine fire.
And, dirt can
easily get into your engine, which will damage
it.
Always have the air cleaner/filter in place when
you’re driving.
5-1 9
Page 317 of 410
Temperature - A, B, C
The temperature grades are A (the highest), B, and C,
representing the tire’s resistance to the generation
of heat and its ability
to dissipate heat when tested
under controlled conditions on a specified indoor
laboratory test wheel. Sustained high temperature can
cause the material of the tire to degenerate and
reduce tire life, and excessive temperature can lead to
sudden tire failure. The grade
C corresponds to a
level of performance which all passenger car tires must
meet under the Federal Motor Vehicle Safety Standard
No. 109. Grades B and A represent higher levels of
performance on the laboratory test wheel than the
minimum required by law.
Warning: The temperature grade for this tire is
established for a tire that is properly inflated and not
overloaded. Excessive speed, underinflation, or
excessive loading, either separately or in combination,
can cause heat buildup and possible tire failure.
Wheel Alignment and Tire Balance
The wheels on your vehicle were aligned and balanced
carefully at the factory
to give you the longest tire life
and best overall performance.
Scheduled wheel alignment and wheel balancing are
not needed. However, if you notice unusual tire wear or
your vehicle pulling one way or the other, the alignment
may need
to be reset. If you notice your vehicle
vibrating when driving on a smooth road, your wheels
may need
to be rebalanced.
Wheel Replacement
Replace any wheel that is bent, cracked, or badly rusted
or corroded.
If wheel nuts keep coming loose, the
wheel, wheel bolts and wheel nuts should be replaced.
If the wheel leaks air, replace
it (except some
aluminum wheels, which can sometimes be repaired).
See your dealer
if any of these conditions exist.
Your dealer will know the kind of wheel you need.
Each new wheel should have the same load-carrying
capacity, diameter, width, offset and be mounted
the same way as the one it replaces.
5-58
Page 358 of 410
Scheduled Maintenance
The services shown in this schedule up to 100,000 miles
(166 000 km) should be repeated after 100,000 miles
(166 000 km) at the same intervals for the life of
this vehicle. The services shown at
150,000 miles
(240 000 km) should be repeated at the same interval
after
150,000 miles (240 000 km) for the life of this
vehicle.
See
Part B: Owner Checks and Services on page 6- 10
and Part C: Periodic Maintenance Inspections on
page 6- 15.
Footnotes
t The US. Environmental Protection Agency or the
California Air Resources Board has determined that the
failure to perform this maintenance item will not nullify
the emission warranty or limit recall liability prior
to
the completion of the vehicle 's useful life. We, however,
urge that all recommended maintenance services be
performed at the indicated intervals and the
maintenance be recorded.
+ A good time to check your brakes is during tire
rotation. See Brake System Inspection
on page 6- 16.
Engine Oil Scheduled Maintenance
Change engine oil and filter as indicated by the GM
Oil Life System (or every 12 months, whichever
occurs first). Reset the system.
Your vehicle has a computer system that lets you know
when
to change the engine oil and filter. This is
based on engine revolutions and engine temperature,
and not on mileage. Based on driving conditions,
the mileage
at which an oil change will be indicated can
vary considerably. For the
oil life system to work
properly, you must reset the system every time the oil is
changed.
When the system has calculated that oil life has been
diminished, it will indicate that an oil change is
necessary. A CHANGE ENGINE
OIL light will come on.
Change your oil as soon as possible within the next
two times you stop for fuel. It is possible that,
if you are
driving under the best conditions, the oil life system
may not indicate that an oil change is necessary for over
a year. However, your engine oil and filter must be
changed at least once a year and at this time the system
must be reset.
It is also important to check your oil
regularly and keep
it at the proper level.
If the system is ever reset accidentally, you must
change your oil at
3,000 miles (5 000 km) since your
last oil change. Remember
to reset the oil life system
whenever the oil is changed. See
Engine Oil on
page 5-13 for information on resetting the system.
After the services are performed, record the date, odometer reading and who performed the service on the
maintenance record pages in Part
E of this schedule.
An Emission Control Service.
6-5
Page 399 of 410
Removing the Flat Tire and Installing the
Spare Tire
.................................................. 5-69
Replacement Bulbs
......................................... 5-48
Replacing Restraint System Parts
Reporting Safety Defects
Removing
the Spare Tire and
Tools ................... 5-63
Replacing Brake System Parts
.......................... 5-37
After a Crash
.............................................. 1-56
Canadian Government
................................... 7-9
General Motors
............................................. 7-9
United States Government
.............................. 7-9
Reprogramming a Single HomeLink@ Button
...... 2-40
Resetting Defaults
........................................... 2-40
Restraint System Check
................................... 6-1 1
Checking Your Restraint Systems ................... 1-56
Replacing Restraint System Parts
After a Crash
.................................... , .. 1-56
Checking
.................................................... 1-56
Replacing Parts
........................................... 1-56
Restraints, Head
............................................... 1-5
Retained Accessory Power (RAP)
...................... 2-19
Restraint Systems
RFA
## BATTERY LOW .................................... 3-55
Right Front Passenger Position, Safety Belts
...... 1-21
RIGHT REAR DOOR AJAR
.............................. 3-55
Roadside
Assistance Program
....................................... 7-5
Rocking Your Vehicle To Get It Out
................... 4-40
Running Your Engine While You Are Parked
....... 2-29
S
................... 3-30 ............
Safety Belt
Safety Belts Reminder Light
.....
Care
of ...................................................... 5-80
Driver Position
............................................ 1-13
How to Wear Safety Belts Properly ................ 1-13
Questions and Answers About Safety Belts
..... 1-12
Rear Safety Belt Comfort Guides for Children
and Small Adults
...................................... 1-24
Rear Seat Passengers
................................. 1-21
Right Front Passenger Position
...................... 1-21
Safety Belt Extender
.................................... 1-26
Safety Belt Use During Pregnancy
................. 1-20
Safety Belts Are for Everyone
......................... 1-8
Safety Chains
................................................. 4-49
Safety Warnings and Symbols III ...
Scanning the Terrain ....................................... 4-18
..............................
Scheduled Maintenance ..................................... 6-5
Seats
Head Restraints
............................................ 1-5
Heated Seats
............................................... 1-3
Memory
..................................................... 2-47
Power Lumbar
.............................................. 1-2
Power Reclining Seatbacks
............................. 1-4
Power Seats
................................................. 1-2
Rear Seat Operation
...................................... 1-6
Designed for the LATCH System
................... 1-40
Securing a Child
Restraint
12
Page 400 of 410
Securing a Child Restraint (cont.)
Rear Outside Seat Position
........................... 1-40
Right Front Seat Position .............................. 1-42
Security Light ................................................. 3-39
Security While You Travel .................................. 7-5
Select ........................................................... 3-52
Service ........................................................ 5-3
Adding Equipment to the Outside of Your
Vehicle
........................................... ... 5-4
All-Wheel-Drive Light .................................... 3-41
Doing Your Own Work ................................... 5-4
Engine Soon Light ....................................... 3-35
Publications Ordering Information ................... 7-10
SERVICE AIR BAG ......................................... 3-53
SERVICE BRAKE SYSTEM ............................. 3-53
Service Bulletins ............................................. 7-1 0
Service Engine Soon Light in the United States
Service Manuals
............................................. 7-10
Setting Preset PTYs ................................ 3-61, 3-70
Setting Preset Stations ............................ 3-58, 3-67
Setting the Time ............................................. 3-56
Setting the Tone (Bassnreble) .................. 3-58, 3-68
Sheet Metal Damage ....................................... 5-82
Shift Lock Release .......................................... 2-24
Shifting Into Park (P) ....................................... 2-25
Shifting Out of Park (P) ................................... 2-27
Skidding ........................................................ 4-1 4
Snow Plow .................................................... 4-44
Some Other Rainy Weather Tips ....................... 4-30
or Check Engine Light in Canada .................. 3-35
Spare Tire Check ............................................ 6-11
Specifications, Capacities ................................. 5-93
Stalling on an incline ....................................... 4-24
Starting Your Engine ....................................... 2-19
Steering in Emergencies .................................. 4-11
Special Fabric Cleaning Problems ..................... 5-78
Speedometer .................................................. 3-30
Starter Switch Check ....................................... 6-12
Steering ........................................................ 4-10
Steering, Suspension and Front Drive Axle
Boot and Seal Inspection
.............................. 6-15
Steering Tips .................................................. 4-11
Steering Wheel Comfort Controls ...................... 3-27
Steering Wheel Controls, Audio ......................... 3-89
Storage Areas Stereo RCA Jacks
.......................................... 3-77
Convenience Net ..... ...... 2-44
Front Storage Area ...................................... 2-42
Glove Box .................................................. 2-41
Overhead Consok ....................................... 2-41
Rear Floor Storage Lid ................................. 2-43
Storing a Flat or Spare Tire and Tools ............... 5-74
Stuck in Sand, Mud, Ice or Snow ...................... 4-40
Sunglasses Storage Compartment ..................... 2-41
Luggage Carrier .......................................... 2-42
Sun Visors ..................................................... 2-15
Sunroof ......................................................... 2-46
13