cruise control Oldsmobile Bravada 2003 Owner's Manuals
[x] Cancel search | Manufacturer: OLDSMOBILE, Model Year: 2003, Model line: Bravada, Model: Oldsmobile Bravada 2003Pages: 410, PDF Size: 20.1 MB
Page 114 of 410
Section 3 Instrument Panel
Instrument Panel Overview ............................... 3.4
Hazard Warning Flashers
................................ 3.5
Other Warning Devices
................................... 3.6
Horn
............................................................. 3.6
Tilt Wheel
..................................................... 3.6
Turn SignaVMultifunction Lever
......................... 3.7
Exterior Lamps
............................................. 3.14
Interior Lamps
.............................................. 3.17
Accessory Power Outlets
............................... 3.19
Ashtrays and Cigarette Lighter
........................ 3.20
Climate Controls ......................................... 3.21
Dual Automatic Climate Control System
........ 3.21
Rear Climate Control System
......................... 3.25
Steering Wheel Climate Controls
..................... 3.27
Climate Controls Personalization
..................... 3.27
Warning Lights, Gages and Indicators ............. 3.28
Instrument Panel Cluster
................................ 3.29
Speedometer and Odometer
........................... 3.30
Tachometer
................................................. 3.30
Safety Belt Reminder Light
............................. 3.30
Air Bag Readiness Light
................................ 3-31
Charging System Light
.................................. 3.32 Voltmeter Gage
............................................ 3.32
Anti-Lock Brake System Warning Light
......... 3.34
Engine Coolant Temperature Gage
.............. 3.35
Malfunction Indicator Lamp
............................. 3.35
Oil Pressure Gage
........................................ 3.38
Change Engine Oil Light
................................ 3-39
Security Light
............................................... 3.39
Cruise Control Light
...................................... 3.40
Reduced Engine Power Light
......................... 3.40
Service All-Wheel Drive Light
......................... 3.41
Check Gages Warning Light
........................... 3.41
Gate Ajar Light
............................................. 3.42
Fuel Gage
................................................... 3.42
Low Fuel Warning Light
............................. 3.42
Driver information Center (DiC) .. .............. 3.43
DIC Operation and Displays
........................... 3.43
DIC Warnings and Messages
......................... 3.52
Audio System(s) ............................................. 3.56
Setting the Time
........................................... 3.56
Radio with Cassette and CD
.......................... 3.57
Radio with Six-Disc CD
................................. 3.66
Brake System Warning
Light
.......................... 3-33
3- 1
Page 120 of 410
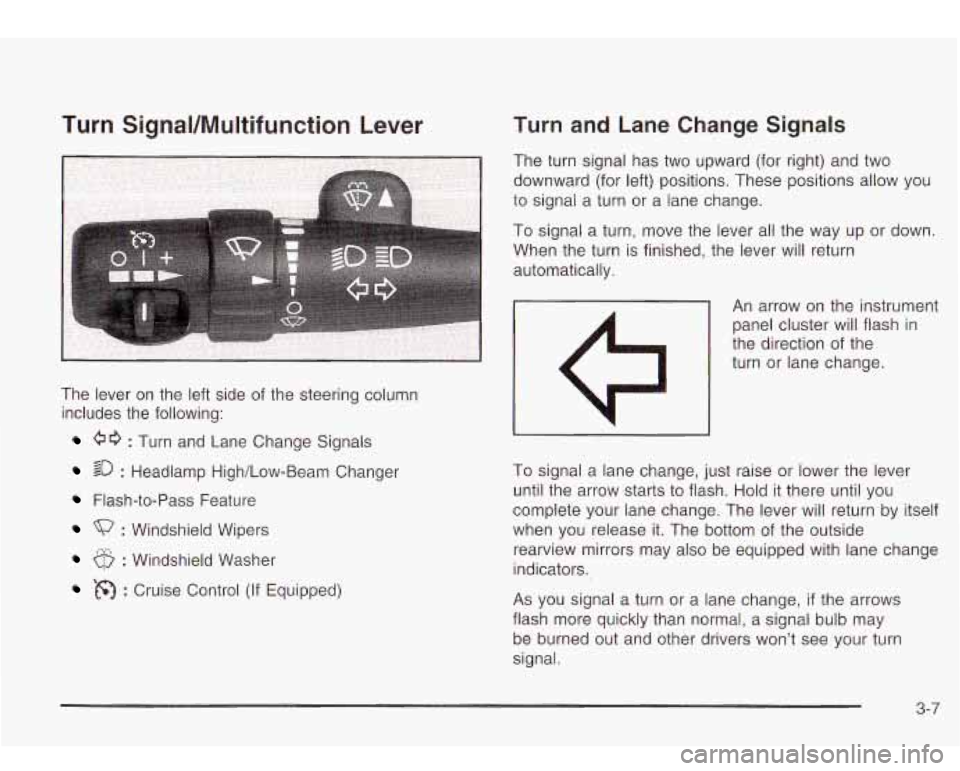
Turn Signal/Multifunction Lever Turn and Lane Change Signals
The turn signal has two upward (for right) and two
downward (for left) positions. These positions allow you
to signal a turn or a lane change.
The lever on the left side of the steering column
includes the following:
60 : Turn and Lane Change Signals
20 : Headlamp High/Low-Beam Changer
Flash-to-Pass Feature
: Windshield Wipers
6 : Windshield Washer
: Cruise Control (If Equipped) To
signal a lane change, just raise or lower the lever
until the arrow starts to flash. Hold
it there until you
complete your lane change. The lever will return by itself
when you release it. The bottom of the outside
rearview mirrors may also be equipped with lane change
indicators.
As you signal a turn or a lane change, if the arrows
flash more quickly than normal,
a signal bulb may
be burned out and other drivers won’t see your turn
signal.
3-7
Page 124 of 410
Cruise Control
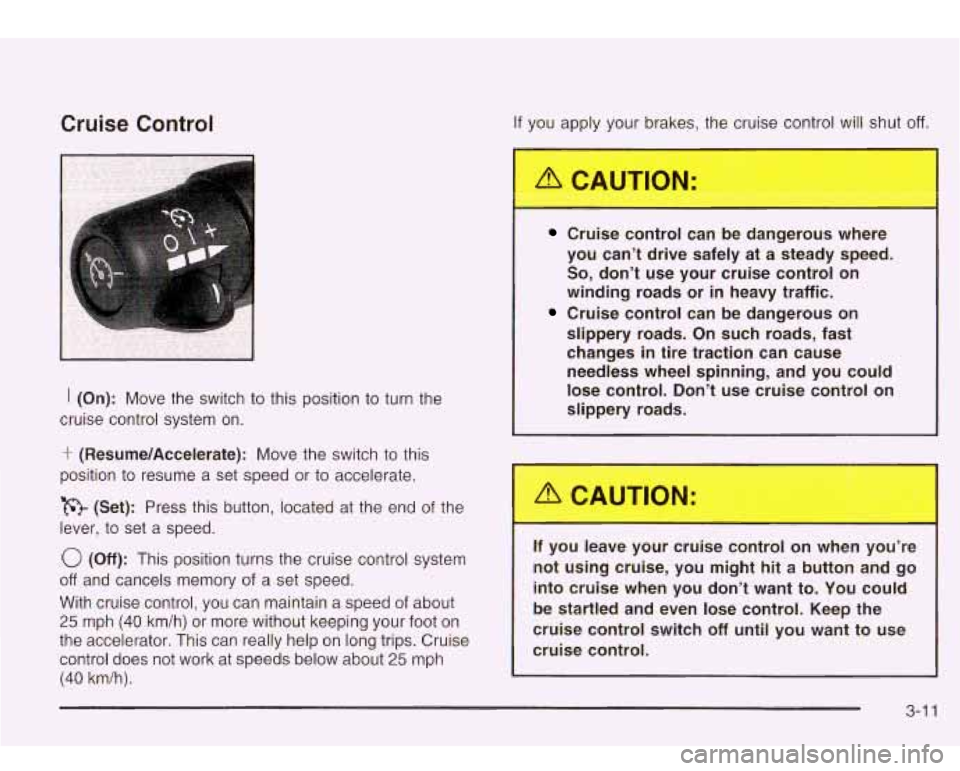
I (On): Move the switch to this position to turn the
cruise control system on.
‘r (Resume/Accelerate): Move the switch to this
position
to resume a set speed or to accelerate.
(Set): Press this button, located at the end
of the
lever,
to set a speed.
0 (Off): This position turns the cruise control system
off and cancels memory of a set speed.
With cruise control, you can maintain a speed
of about
25 mph (40 km/h) or more without keeping your foot on
the accelerator. This can really help on long trips. Cruise
control does not work at speeds below about
25 mph
(40 km/h).
If you apply your brakes, the cruise control will shut off.
Cruise control can be dangerous where
you can’t drive safely
at a steady speed.
So, don’t use your cruise control on
winding roads or in heavy traffic.
Cruise control can be dangerous on
slippery roads. On such roads, fast
changes in tire traction can cause needless wheel spinning, and you could
lose control. Don’t use cruise control on
slippery roads.
If you leavc our cruise control on wher
- ou’re
not using cruise, you might hit a button and go into cruise when you don’t want to. You could
be startled and even lose control. Keep the
cruise control switch
off until you want to use
cruise control.
3-1 1
Page 125 of 410
Setting Cruise Control
1. Move the cruise control switch to on.
2. Get up to the speed you want.
3. Press in the set button at the end of the lever and
4. Take your foot off the accelerator pedal. The
release
it.
accelerator pedal will
not go down.
CRUISE
United States Canada
Resuming a Set Speed
Suppose you set your cruise control at a desired speed
and then you apply the brake. This, of course, shuts
off the cruise control. But you don’t need to reset it.
Once you’re going about
25 mph (40 km/h) or more, you
can move the cruise control switch briefly from on to
resume/accelerate.
You’ll go right back up to your chosen speed and stay
there.
If you hold the switch at resume/accelerate, the vehicle
will keep going faster until you release the switch or
apply the brake.
So unless you want to go faster, don’t
hold the switch at resume/accelerate.
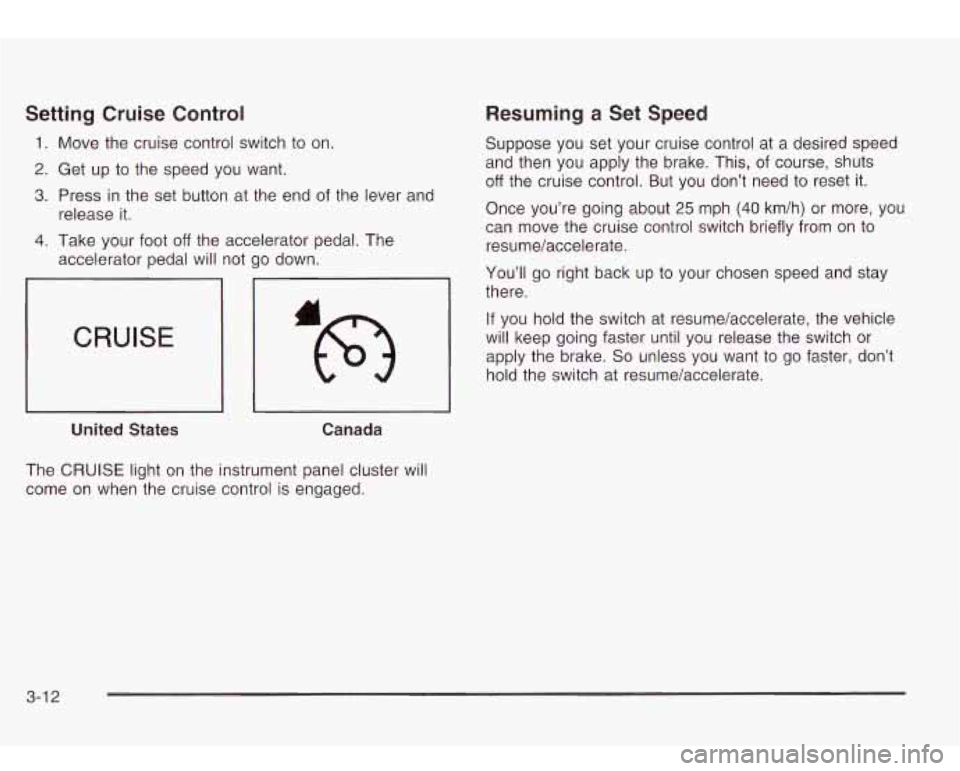
The CRUISE light on the instrument panel cluster will
come on when the cruise control is engaged.
3-1 2
Page 126 of 410

Increasing Speed While Using Cruise
Control
There are two ways to go to a higher speed:
0
e
Use the accelerator pedal to get to the higher
speed. Press the button at the end of the lever, then
release the button and the accelerator pedal.
You’ll now cruise at the higher speed.
Move the cruise switch from on
to
resume/accelerate. Hold it there until you get up to
the speed you want, and then release the switch.
To increase your speed in very small amounts,
move the switch briefly
to resume/accelerate. Each
time you do this, your vehicle will go about
1 rnph (1.6 km/h) faster.
Reducing Speed While Using Cruise
Control
Press in the set button at the end of the lever until
you reach the lower speed you want, then release it.
0 To slow down in very small amounts, briefly press
the set button. Each time you do this, you’ll
go about
1 mph (1.6 km/h) slower.
Passing Another Vehicle While Using
Cruise Control Using Cruise Control on Hills
How well
your cruise control will work on hills depends
upon your speed, load and the steepness
of the
hills. When going up steep hills, you may want
to step
on the accelerator pedal to maintain your speed.
When going downhill, you may have
to brake or shift to
a lower gear to keep your speed down. Of course,
applying the brake takes you out of cruise control. Many
drivers find this
to be too much trouble and don’t use
cruise control on steep hills.
Ending Cruise Control
There are three ways to turn off the cruise control:
Step lightly on the brake pedal.
Move the cruise switch to off, or
Shift the transmission to NEUTRAL (N).
Erasing Speed Memory
When you turn off the cruise control or the ignition, your
cruise control set speed memory is erased.
Use the accelerator pedal
to increase your speed.
When you take your foot
off the pedal, your vehicle will
slow down
to the cruise control speed you set earlier.
3-1 3
Page 153 of 410
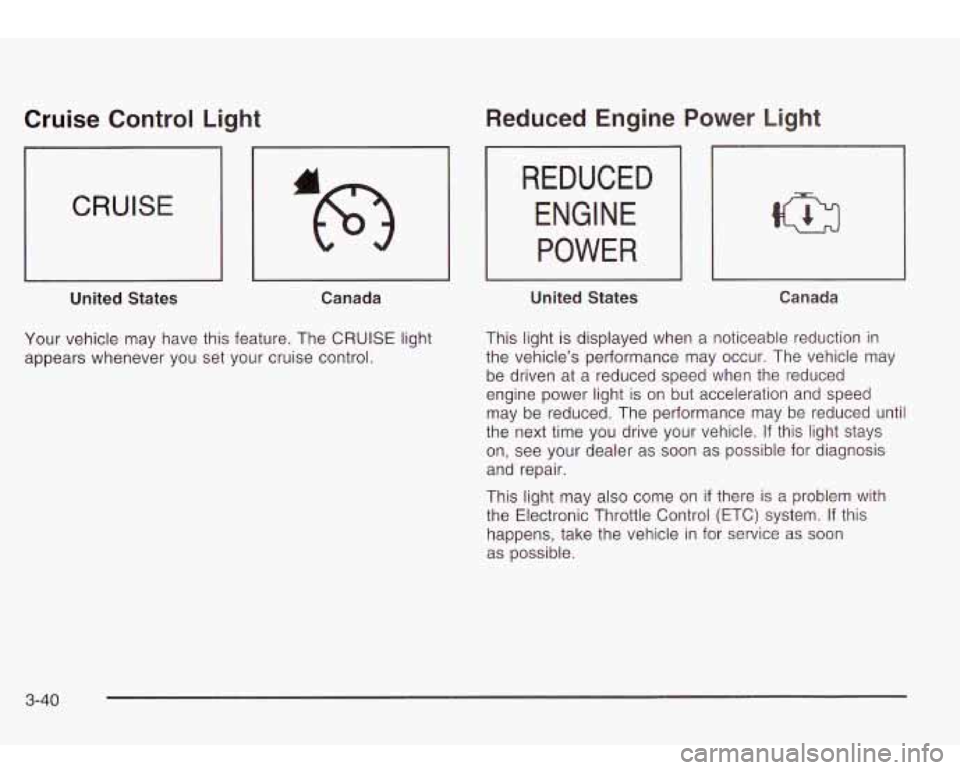
Cruise Control Light
CRUISE
'L
United States Canada
Your vehicle may have this feature. The CRUISE light
appears whenever you set your cruise control.
Reduced Engine
REDUCED
ENGINE
POWER
United States
Power Light
Canada
This light is displayed when a noticeable reduction in
the vehicle's performance may occur. The vehicle may
be driven at a reduced speed when the reduced
engine power light is on but acceleration and speed
may be reduced. The performance may be reduced until
the next time you drive your vehicle. If this light stays
on, see your dealer as soon as possible for diagnosis
and repair.
This light may also come on
if there is a problem with
the Electronic Throttle Control (ETC) system. If this
happens, take the vehicle in for service as soon
as possible.
3-40
Page 214 of 410
Traction Assist System (TAS)
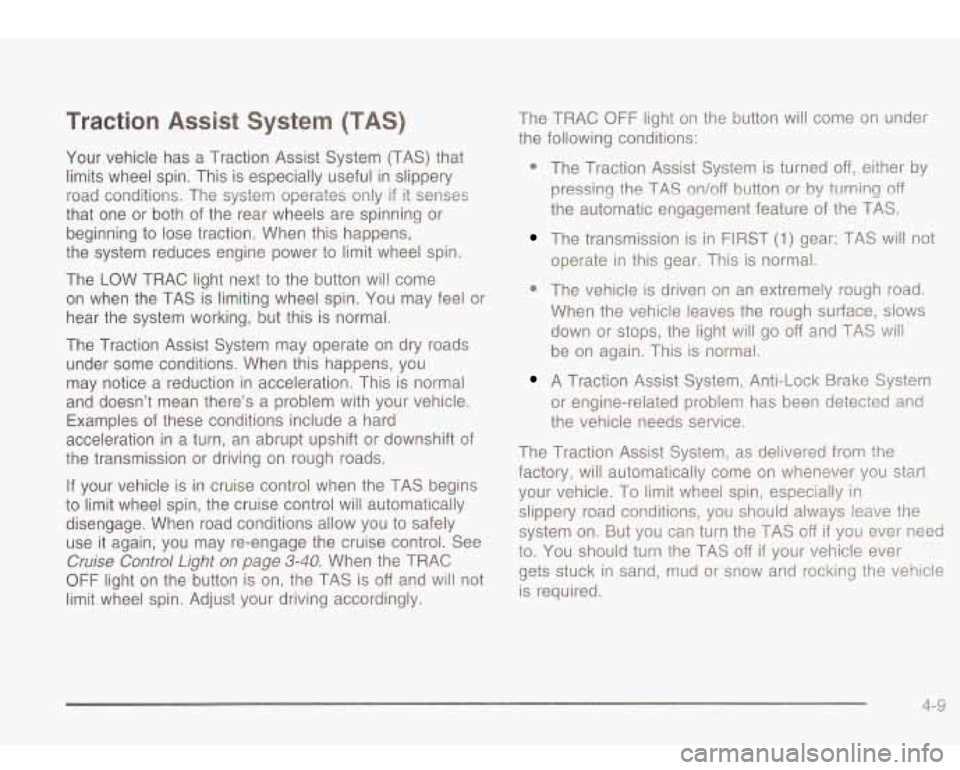
Your vehicle has a Traction Assist System (TAS) that
limits wheel spin. This is especially useful in slippery
road conditions. The system operates only
if it senses
that one or both of the rear wheels are spinning or
beginning to lose traction. When this happens,
the system reduces engine power to limit wheel spin.
The LOW TRAC light next
to the button will come
on when the TAS is limiting wheel spin. You may feel or
hear the system working, but this is normal.
The Traction Assist System may operate on dry roads
under some conditions. When this happens, you
may notice a reduction in acceleration. This is normal
and doesn’t mean there’s a problem with your vehicle.
Examples of these conditions include a hard
acceleration in a turn, an abrupt upshift or downshift
of
the transmission or driving on rough roads.
If your vehicle is in cruise control when the TAS begins
to limit wheel spin, the cruise control will automatically
disengage. When road conditions allow you to safely
use it again, you may re-engage the cruise control. See
Cruise Control Light on page 3-40. When the TRAC
OFF light on the button is on, the TAS is off and will not
limit wheel spin. Adjust your driving accordingly. The TRAC
OFF light
on the button will come on under
the following conditions:
0 The Traction Assist System is turned off, either by
pressing the TAS on/off button or by turning
off
the automatic engagement feature of the TAS.
The transmission is in FIRST (1) gear; TAS will not
operate in this gear. This is normal.
0 The vehicle is driven on an extremely rough road.
When the vehicle leaves the rough surface,
slows
down or stops, the light will go off and TAS will
be on again. This is normal.
A Traction Assist System, Anti-Lock Brake System
or engine-related problem has been detected and
the vehicle needs service.
The Traction Assist System, as delivered from the factory, will automatically come on whenever you start
your vehicle. To limit wheel spin, especially in
slippery road conditions, you should always leave the
system on. But you can turn the TAS
off if you ever need
to. You shouid turn the TAS
off if your vehicle ever
gets stuck in sand, mud or snow and rocking the vehicle
is required.
4.- 9
Page 350 of 410
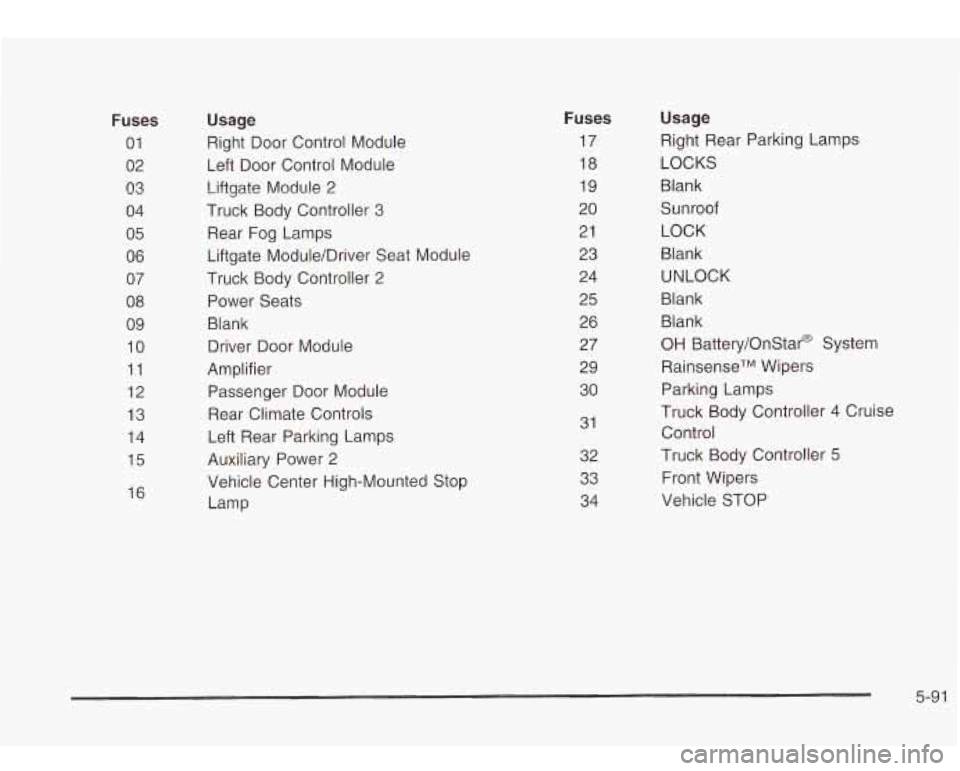
Fuses
01 02
03
04
05
06
07
08 09
10
11
12
13
14
15
16
Usage
Right Door Control Module
Left Door Control Module
Liftgate Module 2
Truck Body Controller 3
Rear Fog Lamps
Liftgate Module/Driver Seat Module
Truck Body Controller 2
Power Seats
Blank
Driver Door Module
Amplifier
Passenger Door Module
Rear Climate Controls
Left Rear Parking Lamps
Auxiliary Power
2
Vehicle Center High-Mounted Stop
Lamp
Fuses
17
18
19
20 21 23
24 25
26 27
29
30
31
32
33 34
Usage
Right Rear Parking Lamps
LOCKS
Blank
Sunroof LOCK
Blank
UNLOCK
Blank Blank
OH Battery/OnStar@ System
RainsenseTM Wipers
Parking Lamps
Truck Body Controller 4 Cruise
Control
Truck Body Controller
5
Front Wipers
Vehicle STOP
5-9 1
Page 390 of 410
CHECK WASHER FLUID ............. ......... 3-54
Checking Brake Fluid
................................... 5-35
Checking Coolant
......................................... 5-23
Checking Engine Oil
........................................ 5-14
Checking Things Under the Hood
...................... 5-10
Checking Your Restraint Systems
...................... 1-56
Chemical Paint Spotting
................................... 5-83
Child Restraints Center Seat Position
.................................... 1-45
Child Restraint Systems
... .................... 1-32
Infants and Young Children
........................... 1-29
Lower Anchorages and Top Tethers for
Children (LATCH System)
.............. ..... 1-38
Older Children
.................................... . 1-27
Securing a Child Restraint Designed for the LATCH System
.............................. 1-40
Securing a Child Restraint in a
Rear Outside Seat Position
........................ 1-40
Securing a Child Restraint in the
Right Front Seat Position
.......................... 1-42
Top Strap
................................................... 1-36
Top Strap Anchor Location
............................ 1-37
Where to Put the Restraint
........................... 1-35
Chime Level Adjustment
.................................. 3-91
Cigarette Lighter
............................................. 3-20
Cleaning Inside of Your Vehicle
.................................. 5-77
Outside of Your Vehicle
................................ 5-80
Underbody Maintenance
............................... 5-83
Video Screen
.............................................. 3-91 Cleaning
(cont.)
Weatherstrips
.............................................. 5-80
Cleaning Exterior Lamps/Lenses
....................... 5-80
Climate Controls Personalization
.................... 3-27
Dual Automatic
............................................ 3-21
Rear
.......................................................... 3-25
Steering Wheel Controls
............................... 3-27
Compact Disc Messages
.......................... 3-65, 3-76
Compass Calibration
.......... ..................... 2-31
Compass Operation
..................................... 2-30
Compass Variance
.......................................... 2-31
Content Theft-Deferrent
.................................... 2-16
Control of
a Vehicle ....................................... 4-5
Convenience Net
.................................. .. 2-44
Coolant Engine Temperature Gage
............................ 3-35
Climate Control System
Heater, Engine
............................................ 2-20
Cooling System
.............................................. 5-26
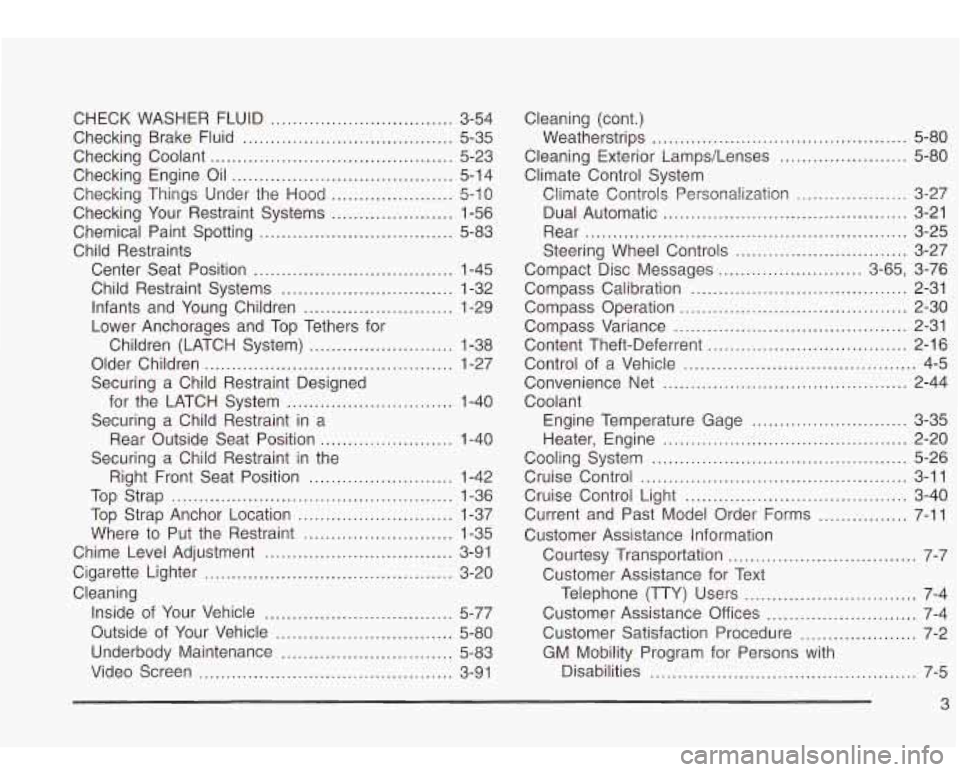
Cruise Control
................................................ 3-11
Cruise Control Light
........................................ 3-40
Current and Past Model Order Forms
................ 7-11
Customer Assistance Information Courtesy Transportation
...................... 7-7
Customer Assistance for Text
Telephone (TTY) Users
............................... 7-4
Customer Assistance Offices
........................... 7-4
Customer Satisfaction Procedure
..................... 7-2
GM Mobility Program for Persons with
Disabilities
................................................ 7-5
3
Page 395 of 410
Key Lock Cylinders Service .............................. 6-12
Keyless Entry System ....................................... 2-4
Keys ............................................................... 2-3
L
Lamps Light (cont.)
Charging System
...............
Check Gages Warning .......
Cruise Control ...................
Gate Ajar .........................
Low Fuel Warning .............
Malfunction Indicator ..........
Reduced Engine Power ......
Safety Belt Reminder ......... -
.......................... 3-32
.......................... 3-41
.......................... 3-40
.......................... 3-42
.......................... 3-42
.......................... 3-35
.......................... 3-40
.......................... 3-30
Exterior 3-1 4
Interior 3-1 7
Security ..................................................... 3-39
Service All-Wheel-Drive ................................ 3-41 ......................................................
.......................................................
Lamps On Reminder ....................................... 3-15 Lighted Visor Vanity Mirror ............................... 2-15
Lap-Shoulder Belt ................................... 1-1 4, 1-22 Loading Your Vehicle ....................................... 4-41
Child Restraints ........................................... 1-38 Locking Rear Axle ........................................... 4-10
Securing a Child Restraint Designed for the
Lockout Protection .......................................... 2-12
LATCH System Loading Your Vehicle for Off-Road Driving .......... 4-16
LATCH System ........................................ 1-40 Locks
Leather
......................................................... 5-79
Leaving Your Vehicle ....................................... 2-12
Leaving Your Vehicle With the
Engine Running
.......................................... 2-26
Liftgate Release .............................................. 2-1 3
Liftgate/Liftglass .............................................. 2-1 3
LiftglassILiftgate .............................................. 2-1 3
Light
Air Bag Readiness
....................................... 3-31
Anti-Lock Brake System Warning ................... 3-34
Brake System Warning ................................. 3-33
Change Engine Oil ...................................... 3-39
LEFT REAR DOOR AJAR ................................ 3-54
Delayed Locking ........................................... 2-9
Door ........................................................... 2-8
Leaving Your Vehicle .................................... 2-12
Lockout Protection ....................................... 2-12
Power Door .................................................. 2-9
Programmable Automatic Door Locks ............. 2-10
Rear Door Security Locks ............................. 2-12
Loss of Control ............................................... 4-14
Low Fuel Warning Light ................................... 3-42
Luggage Carrier .............................................. 2-42
Lumbar
Power Controls
............................................. 1-2
8