buttons Oldsmobile Bravada 2004 s User Guide
[x] Cancel search | Manufacturer: OLDSMOBILE, Model Year: 2004, Model line: Bravada, Model: Oldsmobile Bravada 2004Pages: 420, PDF Size: 4.37 MB
Page 160 of 420
Display Language
To select your personalization for display language,
press the select button while DISPLAY LANGUAGE is
displayed on the DIC. Pressing the select button
will scroll through the available languages:
Choosing a language will display all of the information
on the DIC in the desired language.
If your vehicle is equipped with an Information Center,
press and hold the trip stem while the odometer is
displayed. While holding down the trip stem button, the
Information Center will begin to list the available
languages. The name of each language will be
displayed in its native language (ENGLISH for English,
FRANCAIS for French and ESPANOL for Spanish).
When you see the language that you would like, release
the trip stem. The Information Center will then display
the information in the language you chose.
If you accidentaly choose a language you do not want
or understand, press and hold the trip information button
and the personalization button at the same time. After
a short time, the display will begin cycling through
the available languages. Release the buttons when you
see a language you would like. This will also reset
all of the current driver’s personalization features to their
factory default settings.
For vehicles with redundant steering wheel controls, see
“Personalization” under the DIC.
Select
The select button is used to reset certain functions and
turn off or acknowledge messages on the DIC display.
The select button also toggles through the options
available in each personalization menu. For example, this
button will reset the trip odometers, turn off the FUEL
LEVEL LOW message, and toggle through the languages
you can select the DIC to display information in.
DIC Warnings and Messages
Messages are displayed on the DIC to notify the driver
that the status of the vehicle has changed and that
some action may be needed by the driver to correct the
condition. More than one message may appear at
one time. They will appear one behind the other. Some
messages may not require immediate action but you
should press the trip stem to acknowledge that you
received the message and clear it from the display.
Pressing any of the DIC steering wheel buttons
(Trip Information, Fuel Information, Personalization or
Select button) will also acknowledge any warnings
or service messages. Some messages cannot be
cleared from the display because they are more urgent.
These messages require action before they can be
removed from the DIC display. The following are
the possible messages that can be displayed and some
information about them.
3-54
Page 164 of 420
Audio System(s)
Notice:Before you add any sound equipment to
your vehicle – like a tape player, CB radio, mobile
telephone or two-way radio – be sure you can
add what you want. If you can, it’s very important to
do it properly. Added sound equipment may
interfere with the operation of your vehicle’s engine,
radio or other systems, and even damage them.
Your vehicle’s systems may interfere with the
operation of sound equipment that has been added
improperly.
So, before adding sound equipment, check with
your dealer and be sure to check federal rules
covering mobile radio and telephone units.
Your audio system has been designed to operate easily
and to give years of listening pleasure. You will get
the most enjoyment out of it if you acquaint yourself with
it �rst. Figure out which radio you have in your vehicle,
�nd out what your audio system can do and how to
operate all of its controls to be sure you’re getting the
most out of the advanced engineering that went into it.
Your vehicle has a feature called Retained Accessory
Power (RAP). With RAP, you can play your audio
system even after the ignition is turned off. See
“Retained Accessory Power (RAP)” underIgnition
Positions on page 2-19.
Setting the Time
Your radio may have a button marked with an H or HR
to represent hours and an M or MN to represent
minutes.
Press and hold the hour button until the correct hour
appears on the display. AM or PM will appear on
the display. Press and hold the minute button until the
correct minute appears on the display. The time may be
set with the ignition on or off.
To synchronize the time with an FM station broadcasting
Radio Data System (RDS) information, press and
hold the hour and minute buttons at the same time for
two seconds until UPDATED and the clock symbol
appear on the display. If the time is not available from
the station, NO UPDAT will appear on the display.
RDS time is broadcast once a minute. Once you have
tuned to an RDS broadcast station, it may take a
few minutes for your time to update.
3-58
Page 166 of 420
Finding a Station
BAND:Press this button to switch between AM, FM1
and FM2. The display will show your selection.
TUNE:Turn this knob to select radio stations.
SSEEKT:Press the right or the left arrow to go to
the next or to the previous station and stay there.
The radio will seek only to stations to stations that are
in the selected band and only to those with a strong
signal.
SSCANT:Press and hold either arrow for two
seconds until SC appears on the display and you hear a
beep. The radio will go to a station, play for a few
seconds, then go on to the next station. Press either
SCAN arrow again to stop scanning.
To scan preset stations, press and hold either SCAN
arrow for more than four seconds. PRESET SCAN will
appear on the display. You will hear a double beep
and the P will blink with the preset number. The radio
will go to the �rst preset station stored on your
pushbuttons, play for a few seconds, then go on to the
next preset station. Press either SCAN arrow again
to stop scanning presets.
The radio will scan only to stations that are in the
selected band and only to those with a strong signal.
Setting Preset Stations
The six numbered pushbuttons let you return to your
favorite stations. You can set up to 18 stations (six AM,
six FM1 and six FM2), by performing the following steps:
1. Turn the radio on.
2. Press BAND to select AM, FM1 or FM2.
3. Tune in the desired station.
4. Press AUTO EQ to select the equalization that best
suits the type of station selected.
5. Press and hold one of the six numbered
pushbuttons until you hear a beep. Whenever you
press that numbered pushbutton, the station
you set will return and the equalization that you
selected will also be automatically selected for that
pushbutton.
6. Repeat the steps for each pushbutton.
3-60
Page 169 of 420

Finding a PTY Station
To select and �nd a desired PTY perform the following:
1. Press the P-TYPE button. PTY will be displayed
on the screen.
2. Select a category by turning the P-TYPE knob.
3. Once the desired category is displayed, press either
SEEK arrow to select the category and take you to
the category’s �rst station.
4. If you want to go to another station within that
category and the category is displayed, press
either SEEK arrow once. If the category is not
displayed, press either SEEK arrow twice to display
the category and then to go to another station.
5. If PTY times out and is no longer on the display,
go back to Step 1.
SCAN:You can also scan through the stations within a
category by performing the following:
1. Press the P-TYPE button. PTY will be displayed on
the screen.
2. Select a category by turning the P-TYPE knob.
3. Once the desired category is displayed, press and
hold either SCAN arrow, and the radio will begin
scanning within your chosen category.
4. Press either SCAN arrow again to stop at a
particular section.BAND (Alternate Frequency):Alternate frequency
allows the radio to switch to a stronger station with the
same program type. Press and hold BAND for two
seconds to turn alternate frequency on. AF ON
will appear on the display. The radio may switch to
stronger stations. Press and hold BAND again for two
seconds to turn alternate frequency off. AF OFF
will appear on the display. The radio will not switch to
other stations. When you turn the ignition off and then on
again, the alternate frequency feature will automatically
be turned on.
Setting Preset PTYs
The six numbered pushbuttons let you return to your
favorite Program Types (PTYs). These pushbuttons
have factory PTY presets. You can set up to 12 PTYs
(six FM1 and six FM2) by performing the following steps:
1. Press BAND to select FM1 or FM2.
2. Press the P-TYPE button to activate program type
select mode.
3. Turn the P-TYPE knob to select a PTY.
4. Press and hold one of the six numbered
pushbuttons until you hear a beep. Whenever you
press that numbered pushbutton, the PTY you
set will return.
5. Repeat the steps for each pushbutton.
3-63
Page 177 of 420
Finding a Station
AM FM:Press this button to switch between AM, FM1
and FM2. The display will show your selection.
TUNE:Turn this knob to select radio stations.
sSEEKt:Press the right or the left arrow to go to
the next or to the previous station and stay there.
The radio will seek only to stations that are in the
selected band and only to those with a strong signal.
sSCANt:Press and hold either SCAN arrow
for two seconds until SC appears on the display and
you hear a beep. The radio will go to a station, play for
a few seconds, then go on to the next station. Press
either SCAN arrow again to stop scanning.
To scan preset stations, press and hold either SCAN
arrow for more than four seconds. PRESET SCAN will
appear on the display. You will hear a double beep.
The radio will go to a preset station stored on your
pushbuttons, play for a few seconds, then go on to the
next preset station. Press either SCAN arrow again
to stop scanning presets.
The radio will scan only to stations that are in the
selected band and only to those with a strong signal.
Setting Preset Stations
The six numbered pushbuttons let you return to your
favorite stations. You can set up to 18 stations (six AM,
six FM1 and six FM2) by performing the following steps:
1. Turn the radio on.
2. Press AM FM to select AM, FM1 or FM2.
3. Tune in the desired station.
4. Press AUTO EQ to select the equalization that best
suits the type of station selected.
5. Press and hold one of the six numbered
pushbuttons until you hear a beep. Whenever you
press that numbered pushbutton, the station
you set will return and the equalization that you
selected will also be automatically selected for that
pushbutton.
6. Repeat the steps for each pushbutton.
3-71
Page 180 of 420
SCAN:You can also scan through the channels within
a category by performing the following:
1. Press the P-TYPE button. P-TYPE and the last
selected PTY will be displayed on the screen.
2. Select a category by turning the P-TYPE knob.
3. Once the desired category is displayed, press and
hold either SCAN arrow, and the radio will begin
scanning within your chosen category.
4. Press either SCAN arrow again to stop at a
particular station.
AM FM (Alternate Frequency):Alternate frequency
allows the radio to switch to a stronger station with the
same program type. Press and hold AM FM for two
seconds to turn alternate frequency on. AF ON
will appear on the display. The radio may switch to
stronger stations. Press and hold AM FM again for two
seconds to turn alternate frequency off. AF OFF will
appear on the display. The radio will not switch to other
stations. When you turn the ignition off and then on
again, the alternate frequency feature will automatically
be turned on.Setting Preset PTYs
The six numbered pushbuttons let you return to your
favorite PTYs. These buttons have factory PTY presets.
You can set up to 12 PTYs (six FM1 and six FM2) by
performing the following steps:
1. Press BAND to select FM1 or FM2.
2. Press the P-TYPE button to activate program type
select mode.
3. Turn the P-TYPE knob to select a PTY.
4. Press and hold one of the six numbered
pushbuttons until you hear a beep. Whenever you
press that numbered pushbutton, the PTY you
set will return.
5. Repeat the steps for each pushbutton.
3-74
Page 188 of 420

Rear Seat Entertainment System
Your vehicle may have the optional Digital Versatile Disc
(DVD) Rear Seat Entertainment (RSE) system. The
RSE system includes a DVD player, a video display
screen, two sets of wireless headphones, and a remote
control.
Before You Drive
The RSE system is for rear seat passengers. The driver
cannot safely view the video screen while driving and
should not try to do so.
DVD Player
The DVD player is located in the overhead console. The
DVD player can be controlled by the buttons on the
DVD player or by the buttons on the remote control. See
“Remote Control” later in this section for more
information.
The DVD player power may be turned on when the
ignition is in RUN, ACCESSORY, or when Retained
Accessory Power (RAP) is active.
The RSE system DVD player is only compatible with
DVDs of the appropriate DVD region code for the
country that the vehicle was sold in. The DVD region
code is printed on the jacket of most DVDs.Standard audio CDs (CD-R and CD-RW discs) can also
be played in this DVD player.
When using the wired headphones, if the front seat
passengers play a CD in the Radio with Six-Disc CD
(if equipped) or use XM™ Satellite Radio Service
(48 contiguous US states, if equipped), you will hear the
audio for these sources, instead of the DVD or CD that is
currently playing through the RSE.
If an error message appears on the video screen, see
“DVD Messages” later in this section.
3-82
Page 189 of 420
DVD Player Buttons
O(Power):Press this button to turn the RSE system
on or off. The power indicator light will illuminate
when the power is on.
X(Eject):Press this button to eject a DVD or a CD.
SRCE (Source):Press this button to toggle between
the DVD player and an auxiliary source.
c(Stop):Press this button to stop playing, rewinding,
or fast forwarding a DVD or CD. Press this button
twice to return to the beginning of the DVD.
k(Play/Pause):Press this button to start play of a
DVD or CD. Press this button while a DVD or CD
is playing to pause it. Press this button again to continue
the play of the DVD or CD.
y(Main DVD Menu):Press this button to access the
DVD menu. The DVD menu is different on every
DVD. Use the up, down, left, and right arrow buttons to
move the cursor around the DVD menu. After making
a selection press the enter button. This button only
operates when using a DVD.
z(Set-up Menu):Press this button to adjust the
color, tint, brightness, contrast, and display mode
(normal, full, or zoom). The dynamic range compression
feature can be used to reduce loud audio and increase
low audio produced by some DVDs.
n,q,p,o(Menu Navigation Arrows):Use the
arrow buttons to navigate through a menu.
r(Enter):Press this button to select the choices
that are highlighted in any menu.
Playing a Disc
To play a disc, gently insert the disc with the label side
up into the loading slot. The DVD player will continue
loading the disc and the player will automatically start,
if the vehicle ignition is in RUN, ACCESSORY, or
when RAP is active.
If a disc is already in the player, press the play/pause
button on the face of the DVD player or on the
remote control.
Some DVDs will not allow you to fast forward or skip
the copyright information or previews. Some DVDs will
begin playing after the previews have �nished. If the
DVD does not begin to play the main title, refer to the
on-screen instructions, as the DVD may be displaying
its main title menu.
3-83
Page 190 of 420

Stopping and Resuming Playback
To stop a disc, press and release the stop button on the
DVD player or the remote control. To resume playback,
press the play/pause button on the DVD player or
the remote control. As long as the disc has not been
ejected and the stop button has not been pressed twice,
the movie should resume play from where it was last
stopped. If the disc has been ejected, or if the stop
button has been pressed twice, the disc will resume play
at the beginning of the DVD or CD.
Ejecting a Disc
Press the eject button on the DVD player to eject the
disc.
If a disc is ejected from the player, but is not removed,
the DVD player will reload the disc after a short
period of time. The disc will then be stored in the DVD
player. The DVD player will not resume play of this
disc automatically.
There is not an eject button on the remote control.
DVD Messages
The following errors may be displayed on the video
screen:
Disc Format Error:This message will be displayed if a
disc is inserted upside down, not readable, or the
format is not compatible with the DVD player.Load/Eject Error:This message will be displayed if the
disc is not properly loaded or ejected.
Disc Play Error:This message will be displayed if the
DVD player cannot play the disc. Scratched or
damaged discs will cause this error.
Region Code Error:This message will be displayed if
the region code of the DVD is not compatible with
the region code of the DVD player.
No Disc:This message will be displayed if any of the
buttons on the DVD faceplate or remote control are
pressed and no disc is present in the DVD player.
Parental Control Button:This button is located behind
the video screen. Press this button while a DVD or
CD is playing to freeze the video and mute the audio.
The video screen will display Parental Control ON
and the power indicator light on the DVD player will
�ash. It will also disable all other button operations from
the remote control and the DVD player, with the
exception of the eject button. Press this button again to
restore operation of the DVD player.
This button may also be used to turn the DVD player
power on and automatically resume play if the ignition is
in RUN, ACCESSORY, or if RAP is active.
3-84
Page 192 of 420
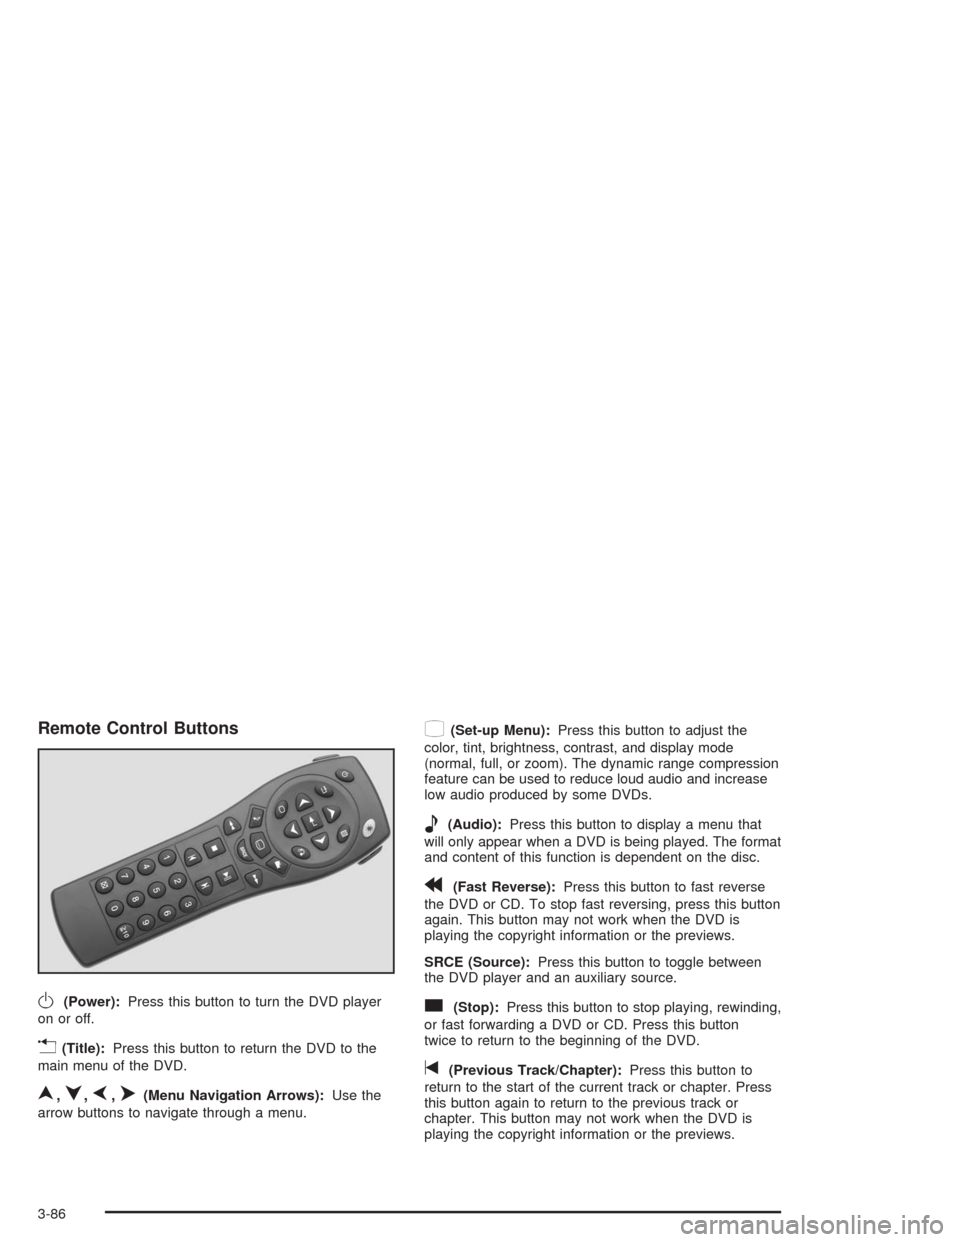
Remote Control Buttons
O(Power):Press this button to turn the DVD player
on or off.
v(Title):Press this button to return the DVD to the
main menu of the DVD.
n,q,p,o(Menu Navigation Arrows):Use the
arrow buttons to navigate through a menu.
z(Set-up Menu):Press this button to adjust the
color, tint, brightness, contrast, and display mode
(normal, full, or zoom). The dynamic range compression
feature can be used to reduce loud audio and increase
low audio produced by some DVDs.
e(Audio):Press this button to display a menu that
will only appear when a DVD is being played. The format
and content of this function is dependent on the disc.
r(Fast Reverse):Press this button to fast reverse
the DVD or CD. To stop fast reversing, press this button
again. This button may not work when the DVD is
playing the copyright information or the previews.
SRCE (Source):Press this button to toggle between
the DVD player and an auxiliary source.
c(Stop):Press this button to stop playing, rewinding,
or fast forwarding a DVD or CD. Press this button
twice to return to the beginning of the DVD.
t(Previous Track/Chapter):Press this button to
return to the start of the current track or chapter. Press
this button again to return to the previous track or
chapter. This button may not work when the DVD is
playing the copyright information or the previews.
3-86