check engine Oldsmobile Cutlass 1998 s Owner's Guide
[x] Cancel search | Manufacturer: OLDSMOBILE, Model Year: 1998, Model line: Cutlass, Model: Oldsmobile Cutlass 1998Pages: 348, PDF Size: 17.46 MB
Page 232 of 348
Checking Engine Oil
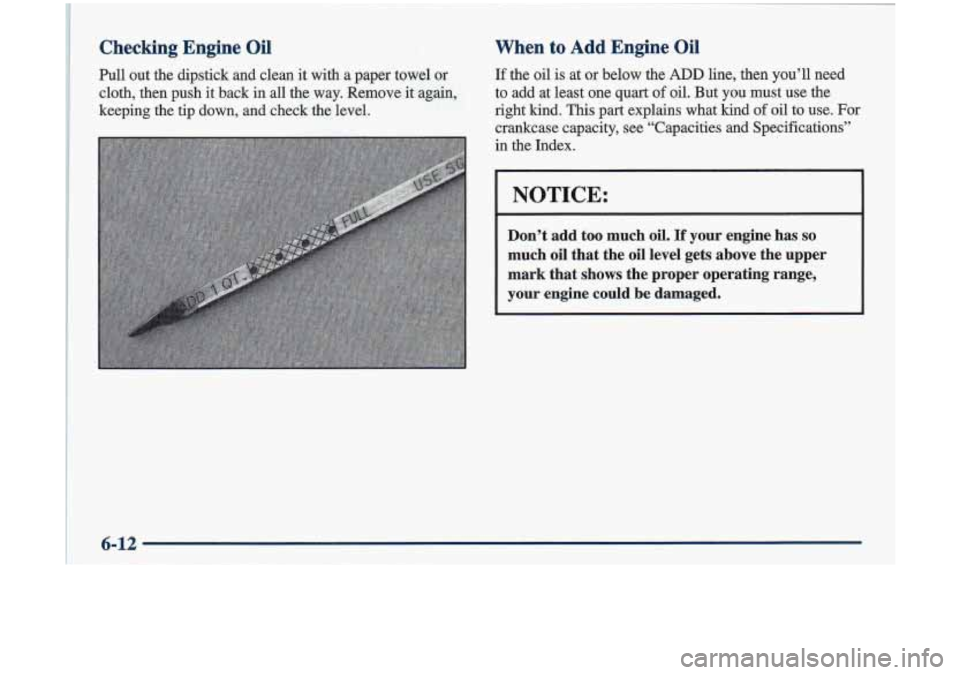
Pull out the dipstick and clean it with a paper towel or
cloth, then push it back in all the way. Remove it again,
keeping the tip down, and check the level.
When to Add Engine Oil
If the oil is at or below the ADD line, then you’ll need
to add at least one
quart of oil. But you must use the
right kind.
This part explains what kind of oil to use. For
crankcase capacity, see “Capacities and Specifications”
in the Index.
NOTICE: - . -.
. ~~i ~ - ~~
Don’t add too much oil. If your engine has so
much oil that the oil level gets above the upper
mark that shows the proper operating range,
your engine could be damaged.
6-12
Page 236 of 348
If none of them is true, use the long triphighway
maintenance schedule. Change the oil and filter every
7,500 miles (12 500 km) or 12 months -- whichever
occurs first. Driving a vehicle with a fully warmed
engine under highway conditions causes engine oil
to
break down slower.
What to Do with Used Oil
Did you know that used engine oil contains certain
elements that may be unhealthy for your skin and could
even cause cancer? Don’t let used oil stay on your skin
for very long. Clean your skin and nails with soap and
water, or
a good hand cleaner. Wash or properly throw
away clothing or rags containing used engine oil. (See
the manufacturer’s warnings about the use and disposal
of oil products.)
Used oil can be a real threat to the environment.
If you
change your own
oil, be sure to drain all free-flowing oil
from the filter before disposal. Don’t ever dispose of oil
by putting it in the trash, pouring it on the ground, into
sewers, or into streams or bodies of water. Instead,
recycle it
by taking it to a place that collects used oil. If
you have
a problem properly disposing of your used oil,
ask your retailer, a service station or a local recycling
center for help.
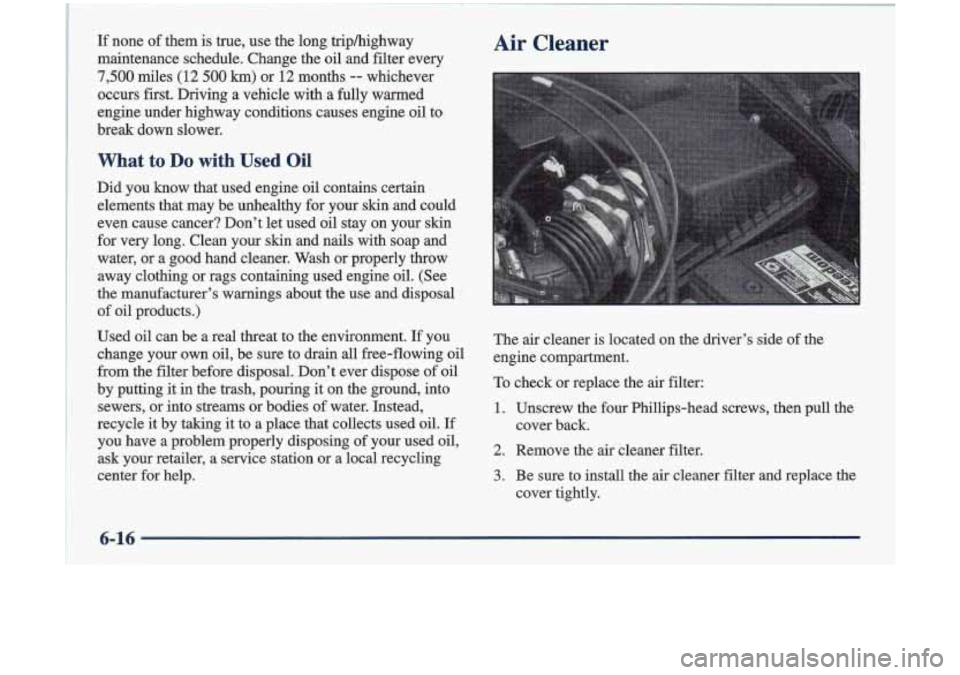
The air cleaner is located on the driver’s side of the
engine compartment.
To check or replace the air filter:
1. Unscrew the four Phillips-head screws, then pull the
cover back.
2. Remove the air cleaner filter.
3. Be sure to install the air cleaner filter and replace the
cover tightly.
6-16
Page 237 of 348
Refer to the Maintenance Schedule to determine when to
replace the air filter.
See “Scheduled Maintenance Services” in the Index.
Operating the engine with the air cleaner off can
cause you or others to be burned. The air cleaner
not
only cleans the air, it stops flame if the engine
backfires.
If it isn’t there, and the engine
backfires, you could be burned. Don’t drive with
it off, and be careful working on the engine with
the air cleaner off.
NOTICE:
If the air cleaner is off, a backfire can cause a
damaging engine fire. And,
dirt can easily get
into your engine, which will damage it. Always
have the air cleaner
in place when you’re driving.
Automatic Transaxle Fluid
It is not necessary to check the transaxle fluid level. A
transaxle fluid leak is the only reason for fluid loss. If a
leak occurs, take the vehicle to your Oldsmobile retail
facility Service Department and have it repaired as soon
as possible. You may also have your fluid level checked
by your retailer or service center when you have your oil changed.
Change both the fluid and filter every
50,000 miles
(83 000 km) if the vehicle is mainly driven under one or
more of these conditions:
In heavy city h.aff.3~ where the outside temperature
0 In hilly or mountainous terrain.
When doing frequent trailer towing.
Uses such as found in taxi, police or delivery service.
If you do not use your vehicle under any of these
conditions, the fluid and filter do not require changing.
regularly reaches
90°F (32” C) or higher.
6-17
Page 239 of 348
What to Use
Use a mixture of one-half clean water (preferably
distilled) and one-half
DEX-COOL@ coolant which
won’t damage aluminum
parts. If you use this mixture,
you don’t need to add anfthing else.
Adding only plain water to your coorrng system
can be dangerous. Plain water, or some other
liquid like alcohol, can boil before the proper
coolant mixture
will. Your vehicle’s coolant
warning system is set for the proper coolant
mixture. With plain water or the wrong mixture,
your engine could get too hot but you wouldn’t
get the overheat warning. Your engine could
catch fire and
you or others could be burned.
Use
a 50/50 mixture of clean water and
DEX-COOL@ coolant.
NOTICE:
If you use an improper coolant mixture, your
engine could overheat and be badly damaged.
The repair cost wouldn’t be covered by your
warranty. Too much water
in the mixture can
freeze and crack the engine, radiator, heater core
and other parts.
If you have to add coolant more than four times a year,
have your retailer check your cooling system.
I NOTICE:
If you use the proper coolant, you don’t have to
add extra inhibitors or additives which claim to
improve the system. These can be harmful.
6-19
Page 240 of 348
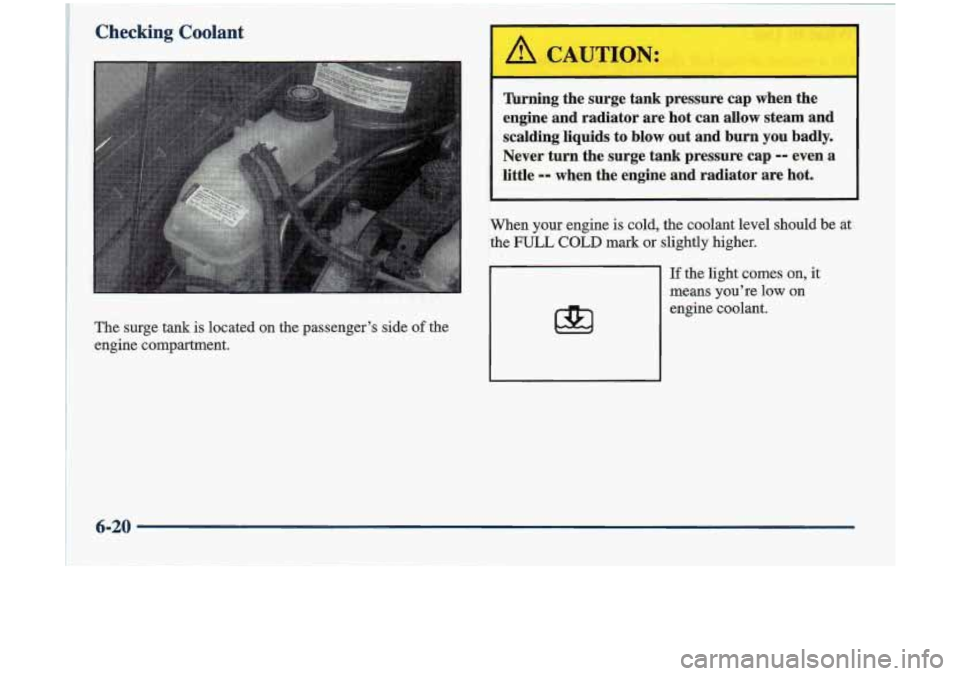
Checking Coolant
The surge tank is located on the passenger’s side of the
engine compartment.
Turning the surge tank pressure cap when the
engine and radiator are hot can allow steam and
scalding liquids to
blow out and burn you badly.
Never turn the surge
tank pressure cap -- even a
little
-- when the engine and radiator are hot.
When you engine is cold, the coolant level should be at
the
FULL COLD mark or slightly higher.
If the light comes on, it
means you’re
low on
engine coolant.
6-20
Page 310 of 348

Starter Switch Check
=
Brake-Traasaxle Shift Interlock (BTSI) Check
When you are doing this check, the vehicle could
move suddenly.
If’ it does, you or others could be
---1 injured. Follow the steps below.
1.
2.
3.
Before you start, be sure you have enough room around the vehicle.
Firmly apply both the parking brake (see “Parking
Brake” in the Index if necessary) and the
regular brake.
NOTE: Do not use the accelerator pedal, and be
ready to
turn off the engine immediately if it starts.
Try to start the engine in each gear. The starter should work only in PARK (P) or NEUTRAL (N).
If
the starter works in any other position, your vehicle
needs service.
1
When you are doing this check, the vehicle could
move suddenly.
If it does, you or others could be
injured. Follow the steps below.
1. Before you start, be sure you have enough room
around the vehicle. It should be parked
on a
level surface.
2. Firmly apply the parking brake (see “Parking Brake”
in the Index if necessary).
NOTE: Be ready to apply the regular brake
immediately if the vehicle begins to move.
3. With the engine off, turn the key to the ON position,
but don’t start the engine. Without applying the
regular brake, try to move the shift lever out of
PARK (P) with normal effort. If the shift lever
moves out of PARK
(P), your vehicle’s BTSI
needs service.
7-28
Page 311 of 348
Ignition Transaxle Lock Check
While parked, and with the parking brake set, try to turn
the ignition key to OFF in each shift lever position. The
key should
turn to OFF only when the shift lever is in
PARK
(P).
On all vehicles, the key should come out only in OFF.
Parking Brake and Automatic Transaxle PARK (P)
Mechanism /*"leek
When you are doing this check, your vehicle
could begin to move. You or others could be
injured and property could be damaged. Make
sure there
is room in front of your vehicle in case
it begins to roll. Be ready to apply the regular
brake at once should the vehicle begin to move.
Park on a fairly steep hill, with the vehicle facing
downhill. Keeping your foot on the regular brake, set the
parking brake.
To check the parking brake's holding ability: With
the engine running and transaxle
in NEUTRAL (N),
slowly remove foot pressure from the regular brake
pedal.
Do this until the vehicle is held by the parking
brake only.
To check the PARK (P) mechanism's holding ability:
With the engine running, shift to
PARK (P). Then
release
all brakes.
Underbody Flushing Service
At least every spring, use plain water to flush any
corrosive materials from the underbody. Take care to
clean thoroughly any areas where mud and other debris
can collect.
7-29
Page 328 of 348
1998 OLDSMOBILE SERVICE PUBLICATIONS 0RDERIN.G. INFORMATION
The following publications covering the operation and servicing \
of your vehicle can be purchased by filling out
the ,Setvice Publication Order Form in this book and mailing it in with your check, money order,
or credit card information to Helm, Incorporated (address below\
.).
CURRENT PUBLICATIONS FOR 1998 OLDSMOBILE
SERVICE MANUALS
Service Manuals have the diagnosis and repair information
on engines, transmission, axle, suspension, brakes,
electrical, steering, body, etc. RETAIL SELL PRICE:
$90.00
TRANSMISSION, TRANSAXLE, TRANSFER CASE UNIT REPAIR MANUAL
This manual provides information on unit repair service
procedures, adjustments and specifications for the
1998 GM transmissions, transaxles and transfer cases.
RETAIL SELL PRICE:
$40.00
SERWCE BULLETINS
Service Bulletins give technical service information needed
to knowledgeably service General Motors cars and trucks.
Each bulletin contains instructions to assist in the
diagnosis and service of your vehicle.
OWNER’S INFORMATION
Owner publications are written directly for Owners and
intended to provide basic operational information about the
vehicle. The owner’s manual will include the Maintenance
Schedule for all models.
In-Portfolio: Includes a Portfolio, Owner’s Manual and
Warranty Booklet. RETAIL SELL PRICE:
$15.00
Without Portfolio: Owner’s Manual only.
RETAIL
SELL PRICE: $1 0.00
CURRENT & PAST MODEL ORDER FORMS
Service Publications are available for current and past
model GM vehicles.
To request an order form, please
specify year
and model name of the vehicle.
Page 335 of 348
rrontTowing .................................. 5-10
Fuel
.......................................... 6-3
Filling
Your Tank .............................. 6-5
Gage
....................................... 2-60
In Foreign Countries
........................... 6-5
Fuses and Circuit Breakers
....................... 6-53
Gages Engine Coolant Temperature
.................... 2-54
Fuel
....................................... 2-60
GarmentHook
................................. 2-44
GAWR ....................................... 4-31
Gear Positions, Automatic Transaxle
................ 2- 18
GloveBox
.................................... 2-41
Gross Axle Weight Rating
........................ 4-31
Gross Vehicle Weight Rating ...................... 4-31
GVWR ....................................... 4-31
Halogen Bulbs
................................ 6-28
Hazard Warning Flashers
.......................... 5-2
Head Restraints
................................. 1-5
Bulb Replacement
............................ 6-28
High/Low Beamchanger ...................... 2-30
OnReminder
................................ 2-36
Wiring
..................................... 6-52
Hearing Impaired, Customer Assistance
.............. 8-4
Heating
........................................ 3- 4
Headlamps .................................... 2-36
High-BeamHeadlamps
.......................... 2-30 Highway Hypnosis
.............................. 4-22
HillandMountainRoads
......................... 4-22
Hitches. Trailer
................................. 4-35
Hood Checking Things Under
......................... 6-8
Release
...................................... 6-8
Horn ......................................... 2-28
Hydroplaning
.................................. 4-18
Ignition Positions
.............................. 2-14
Ignition Transaxle Lock Check
.................... 7-29
Illuminated EntryExit
........................... 2-38
Inflation, Tire
.................................. 6-35
Inside Daymight Rearview Mirror
................. 2-40
Inspections
.................................... 7-30
Brakesystem
................................ 7-30
Engine Cooling System
........................ 7-30
Exhaust System
.............................. 7-30
Front-Wheel-Drive Axle Boot
.................. 7-30
Front-Wheel-Drive Axle Seal
................... 7-30
Radiator and Heater Hose
...................... 7-30
Suspension
.................................. 7-30
Throttle System
.............................. 7-30
Instrumentpanel
............................... 2-46
Cleaning
.................................... 6-45
Cluster
..................................... 2-48
Fuse Block
........................ 6-53,6-54,6-5. 5
Intensity Control
............................. 2-38
Interior Lamps
................................. 2-38
Steering
.................................... 7-30
9-5
Page 337 of 348
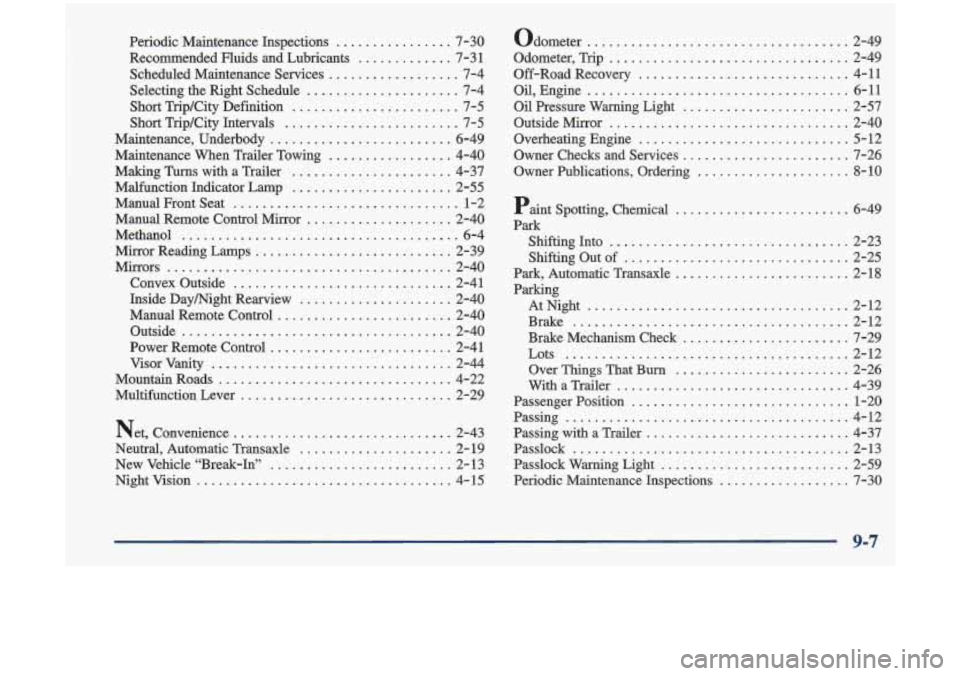
Periodic Maintenance Inspections ................ 7-30
Recommended Fluids and Lubricants
............. 7-3 1
Scheduled Maintenance Services .................. 7-4
Short Trip/City Definition
....................... 7-5
Short Trip/City Intervals
........................ 7-5
Maintenance. Underbody ......................... 6-49
Maintenance When Trailer Towing
................. 4-40
Making
Turns with a Trailer ...................... 4-37
Malfunction Indicator Lamp
...................... 2-55
Manual Front Seat
............................... 1-2
Manual Remote Control Mirror
.................... 2-40
Methanol
...................................... 6-4
Mirror Reading Lamps
........................... 2-39
Mirrors
....................................... 2-40
Convex Outside
.............................. 2-41
Inside Day/Night Rearview
..................... 2-40
Manual Remote Control
........................ 2-40
Outside
..................................... 2-40
Power Remote Control
......................... 2-41
Visor Vanity
................................. 2-44
MountainRoads
................................ 4-22
Multifunction Lever
............................. 2-29
Net. Convenience
.............................. 2-43
Neutral. Automatic Transaxle
..................... 2- 19
New Vehicle “Break-In”
......................... 2-13
Nightvision
................................... 4-15
Selecting the Right Schedule
..................... 7-4
Odometer
.................................... 2-49
Odometer. Trip
................................. 2-49
Off-RoadRecovery
............................. 4-11
Oil. Engine
.................................... 6-11
Oil Pressure Warning Light ....................... 2-57
Outside Mirror
................................. 2-40
Overheating Engine
............................. 5-12
Owner Checks and Services
....................... 7-26
Owner Publications. Ordering
..................... 8-10
Paint Spotting. Chemical ........................ 6-49
Park ShiftingInto
................................. 2-23
Shifting Out of
............................... 2-25
Park. Automatic Transaxle
........................ 2-18
Paxking
AtNight
.................................... 2-12
Brake
...................................... 2-12
Brake Mechanism Check
....................... 7-29
Lots
....................................... 2-12
Over Things That
Bum ........................ 2-26
WithaTrailer
................................ 4-39
Passenger Position
.............................. 1-20
Passing
....................................... 4-12
Passing with a Trailer
............................ 4-37
Passlock
...................................... 2-13
Passlock Warning Light
.......................... 2-59
Periodic Maintenance Inspections
.................. 7-30