bulb Oldsmobile Cutlass Supreme 1996 Owner's Manuals
[x] Cancel search | Manufacturer: OLDSMOBILE, Model Year: 1996, Model line: Cutlass Supreme, Model: Oldsmobile Cutlass Supreme 1996Pages: 356, PDF Size: 18.48 MB
Page 114 of 356
I
0
0
When the ignition is on but the engine is not running,
the light will come on as a test to show you it is
working, but the light will go out when you turn the
ignition to
START. If it doesn’t come on with the
ignition on, you may have a problem with the fuse or
bulb. Have it fixed right away.
If you make a hard
stop, the light may come on for a
moment. This is normal.
A
I
Don’t keep driving if the oil pressure is low. If
you do, your engine can become so hot that it
catches fire.
You or others could be burned.
Check your oil as soon
as possible and have your
vehicle serviced.
I NOTICE:
Damage to your engine from neglected oil
problems can be costly and is not covered by
your warranty.
Page 182 of 356
Thrn Signals When Towing a Trailer
When you tow a trailer, your vehicle may need a different turn signal flasher and/or extra wiring. Check
with your Oldsmobile retailer. The green arrows on your
instrument panel will flash !whenever you signal a
turn
or lane change. Properly hooked up, the trailer lamps
will also flash, telling other drivers you’re about to turn,
change lanes or stop.
When towing a trailer, the green arrows on your
instrument panel will flash for turns even if the bulbs on
the trailer are burned out. Thus, you may think drivers
behind you
are seeing your signal when they are not. It’s
important to check occasionally to be sure the trailer
bulbs
are still working.
Driving On Grades
Reduce speed and shift to a lower gear before you ,start
down
a long or steep downgrade. If you don’t shift
down, you might have to use your brakes
so much that
they would get hot and no longer work well.
On a long uphill grade, shift down and reduce your
speed to. around
45 mph (70 krn/h) to reduce the
possibility
of engine and transaxle overheating. If you
have overdrive, you may prefer to drive in
THIRD
(3) instead of AUTOMATIC OVERDRIVE (a)
(or, as you need to, a lower gear).
Parking on Hills
You really should not park your vehicle, with a trailer
attached, on a hill. If something goes wrong, your rig
could start to move. People can be injured, and both
your vehicle and the trailer can be damaged.
But
if you ever have to park your rig on a hill, here’s
how to do it:
1. Apply your regular brakes, but don’t shift into
2. Have someone place chocks under the trailer wheels.
3. When the wheel chocks are in place, release-the
regular brakes until the chocks absorb the load.
4. Reapply the regular brakes. Then apply your parking
brake, and then shift to PARK
(P).
5. Release the regular brakes. PARK
(P) yet.
4-34
Page 250 of 356
Bulb Replacement Headlamps (2-Door Models)
In this section you’ll find directions for changing the
bulbs in some of the lamps on your Oldsmobile. See
“Replacement Bulbs” in the Index
to find the type of
bulb you should use.
. Halogen Bulbs
Halogen bulbs have pressurized gas inside and
can burst if you drop or scratch the bulb. You or
others could be injured.
Be sure to read and
follow the instructions
on the bulb package. I
’ 1
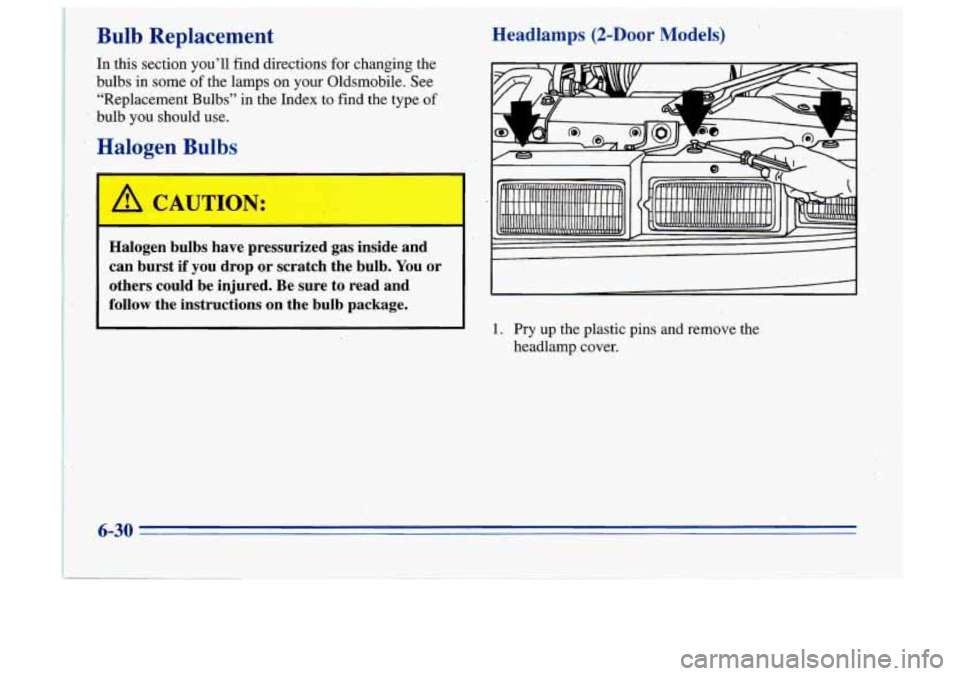
1. Pry up the plastic pins and remove the
headlamp cover.
6-30
Page 252 of 356
7. Plug the electrical connector into the headlamp socket. Headlamps (4-Door Models)
Make sure the locking: tabs snap onto the socket. v L
8. Put the new headlamp in position.
0 Make sure the socket points in the same direction
as it did with the old headlamp.
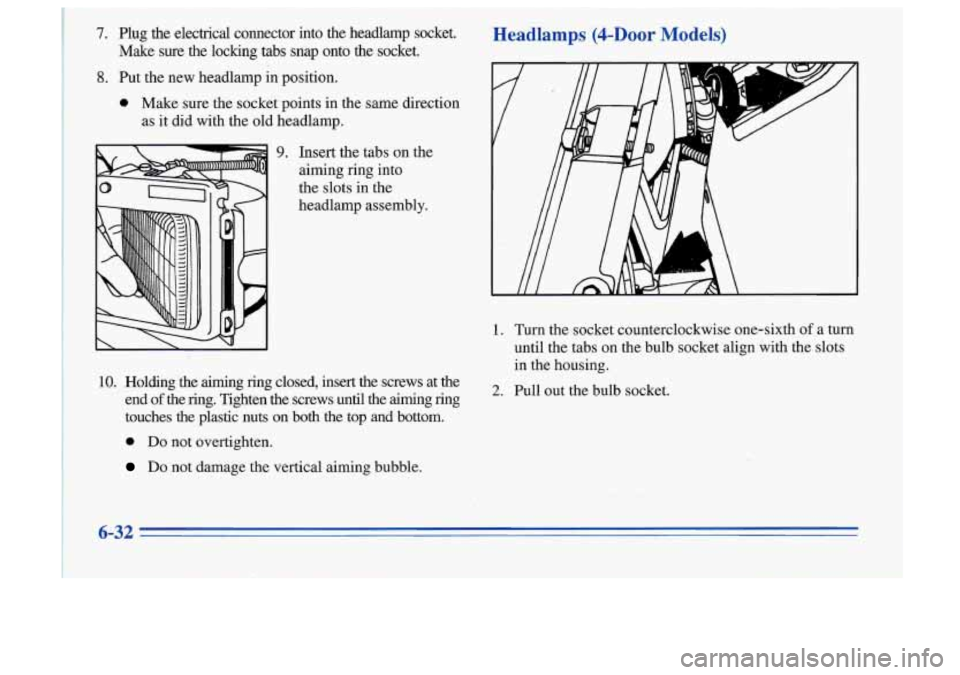
9. Insert the tabs on the
aiming ring into
the slots in the
headlamp assembly.
WI 1. Turn the socket counterclockwise one-sixth of a turn
until the tabs on the bulb socket align with the slots
in the housing.
10. Holding the aiming ring closed, insert the screws at the 2. pull out the bulb socket.
end of the ring. Tighten the screws until the aiming ring
touches the plastic nuts on both the top and bottom.
0 Do not overtighten.
Do not damage the vertical aiming bubble.
6-32
I
Page 253 of 356
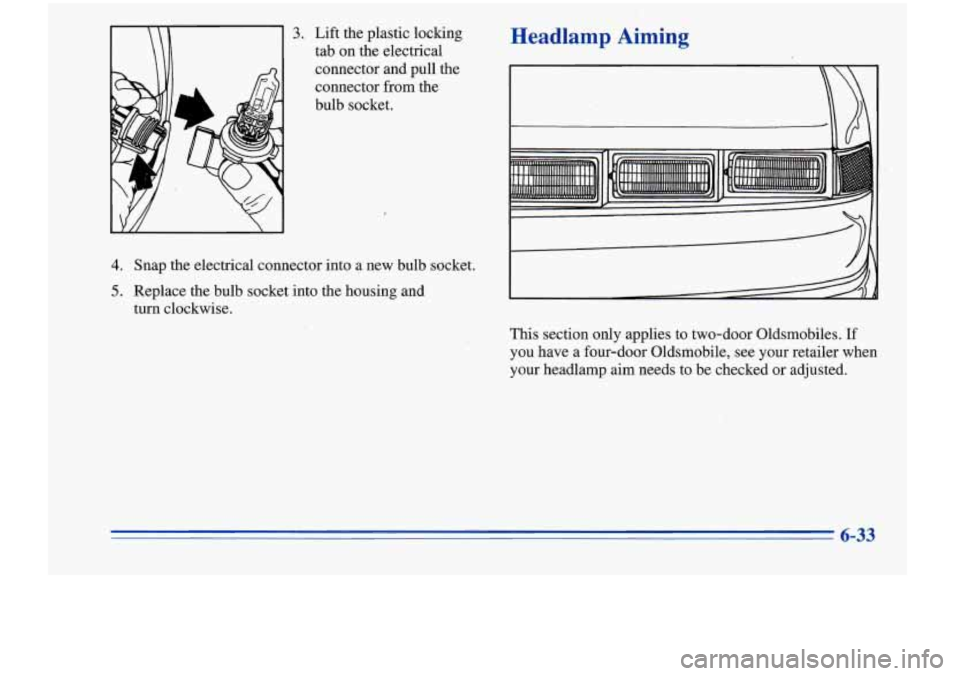
3. Lift the plastic locking
tab on the electrical
.connector and pull the connector from the
bulb socket.
4.
5.
Snap the electrical connector into a new bulb socket.
Replace the bulb socket into the housing and
turn clockwise.
Headlamp Aiming
This section only -applies to two-door Oldsmobiles. If
you have a four-door Oldsmobile, see your retailer when
your headlamp aim needs to be checked or adjusted.
6-33
Page 256 of 356
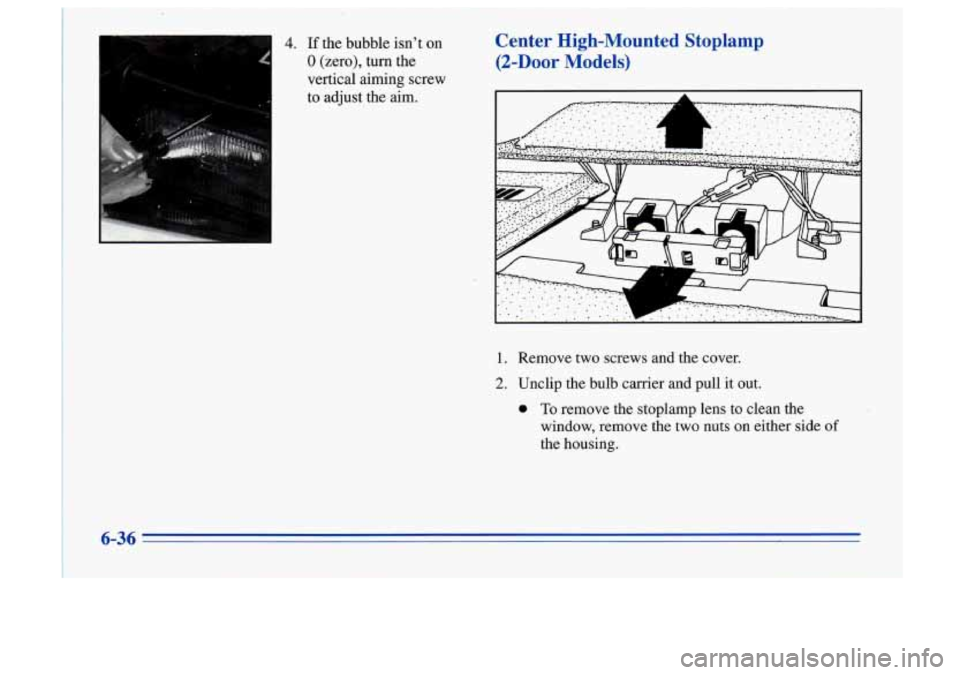
4. If the bubble isn't on
0 (zero), turn the
vertical aiming screw
to adjust the aim.
Center High-Mounted Stoplamp
(2-Door Models)
1. Remove two screws and the cover.
2. Unclip the bulb carrier and pull it out.
0 To remove the stoplamp lens to clean the
window, remove the two nuts on either side
of
the housing.
Page 257 of 356
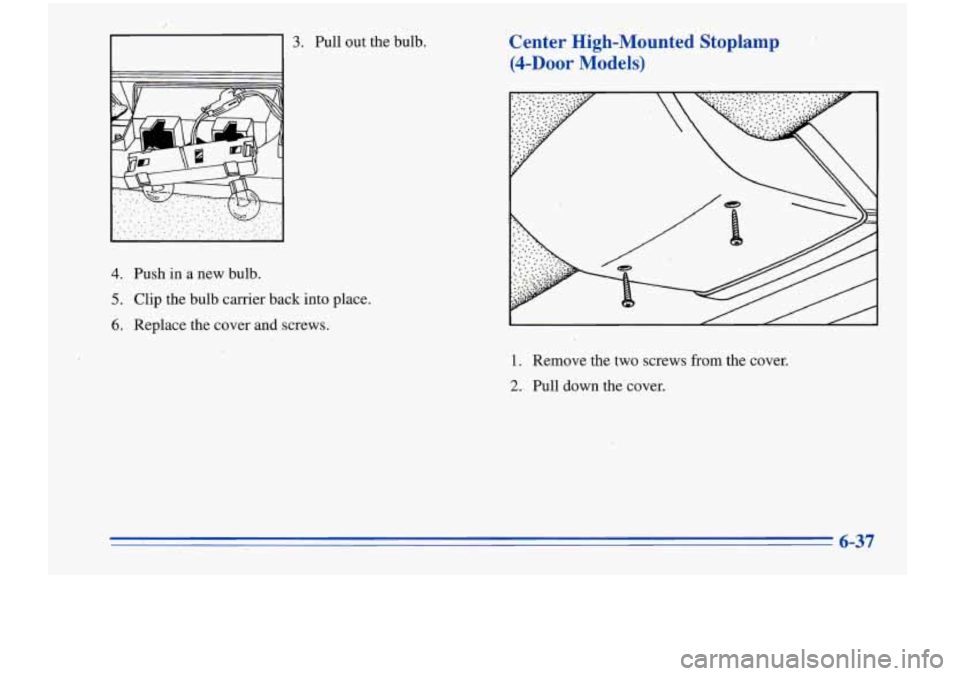
3. Pull out the bulb.
4. Push in a new bulb.
5. Clip the bulb carrier back into place.
6. Replace the cover and screws.
Center High-Mounted Stoplamp
(4-h~ Models)
1. Remove the two screws from the cover.
2. Pull down the cover.
6-37
Page 258 of 356
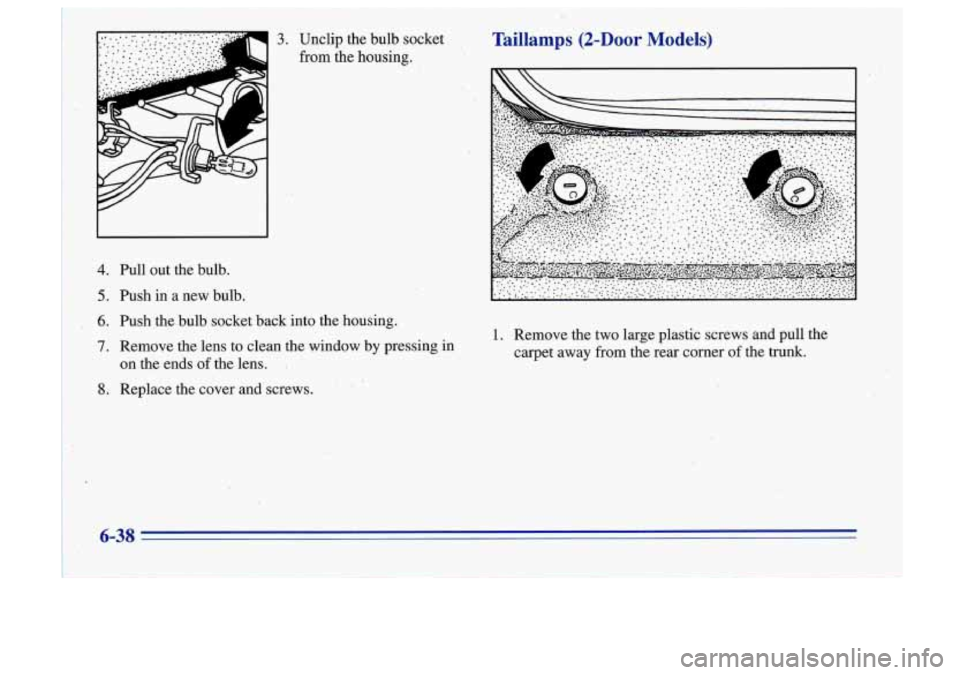
4.
5.
6.
7.
8.
Pull out the bulb.
Push in a new bulb.
Push the bulb socket back into the housing.
Remove the lens to clean the window by pressing in
on the ends of the lens.
Replace the cover and screws.
3. Unclip the bulb socket
from the housing.
1. Remove the two large plastic screws and pull the
carpet away from the rear corner of the trunk.
Page 259 of 356
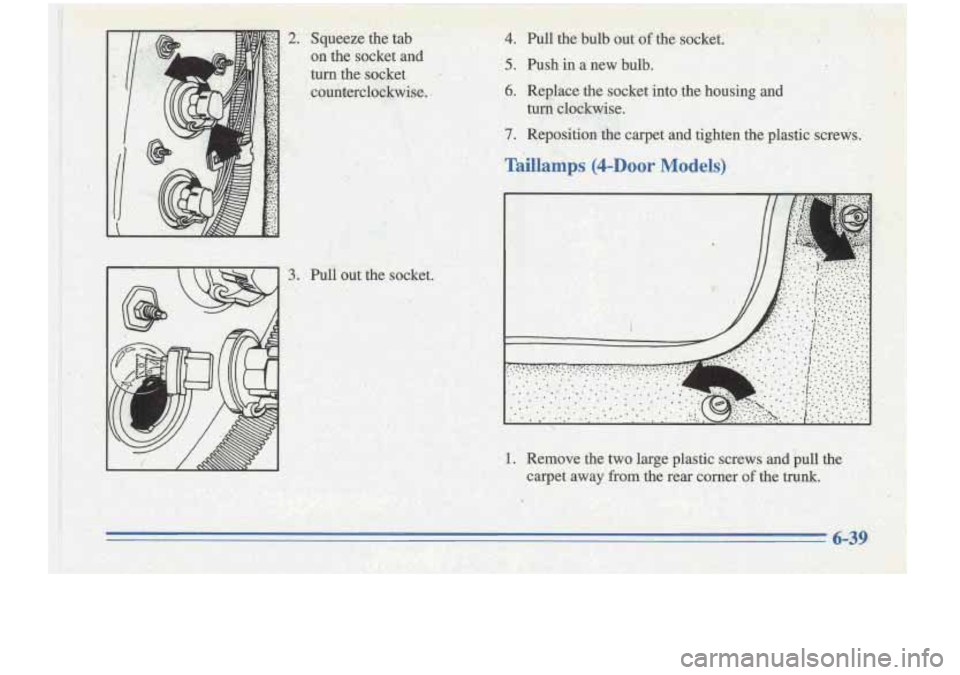
2.
3.
Squeeze the tab
on the socket.and
turn the socket
counterclcsckwise-;
.
Pud out the socket.
.. Jj
4. ell the bulb out of the socket.
5. Push in a new bulb.
.6. Replace the socket into the housing and
tum clockwise. ..
7. Reposition the carpet.and tighten the plastic screws. G>;J;L~ + '... .,::.,,j1 !,.
I p <+: ..< .-\' ', 6 , : :L
1. Remove the two. large plastic screws and pull the
carpet away,from the rear corner
of the trunk.
Page 261 of 356
.. .. ..
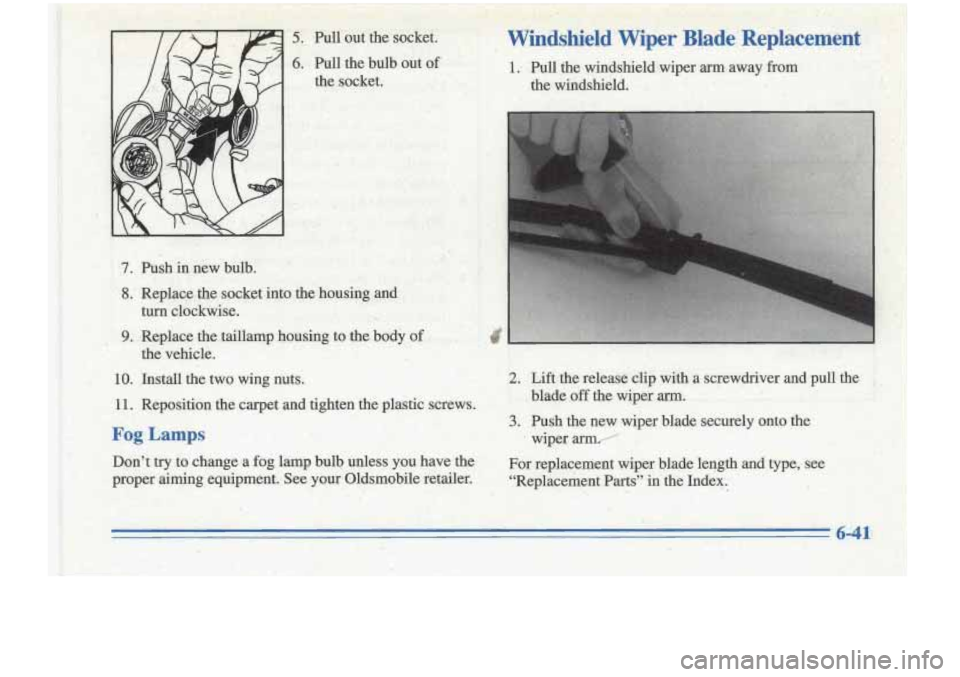
5; Pull out the socket.^ W’indshied’wiper Blade‘Replacement
6. Pull the buIb out of
the socket.
7. Push innew bulb. .’
.’ 8. ’ .Replace the socket into the housing and
turn clockwjse. -
9. Replace the .taillamp housing to -the body of
the vehicle.
10. Install the two wing nuts.
1.1. Reposition the carpet and tighten the plastic screws.
3. Push the new wiper blade securely onto the
Fog Lamps I wiper arm/‘
Don’t trY to change a fog lamp bulb unless.You have the
For replacement wiper blade length and type; see
proper aiming. equipment.
See your Oldsmobile retailer. “Reeplacement Parts” in the Index. -
6-41