engine OLDSMOBILE SILHOUETTE 1994 Repair Manual
[x] Cancel search | Manufacturer: OLDSMOBILE, Model Year: 1994, Model line: SILHOUETTE, Model: OLDSMOBILE SILHOUETTE 1994Pages: 276, PDF Size: 15.82 MB
Page 197 of 276
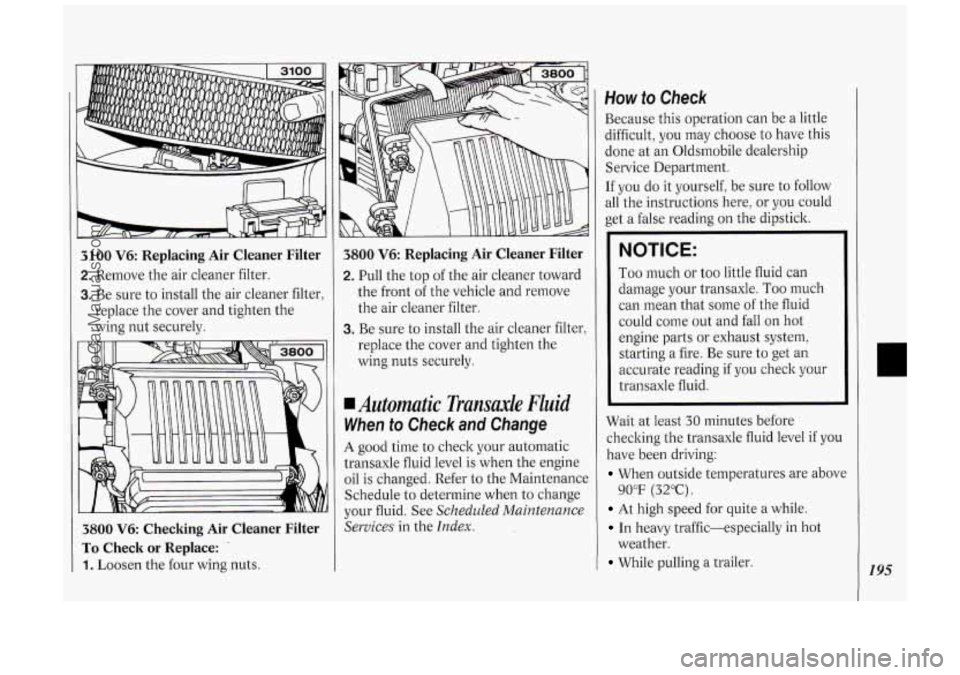
3100 V6: Replacing Air Cleaner Filter
2. Remove the air cleaner filter.
3. Be sure to install the air cleaner filter,
replace the cover and tighten the
wing nut securely.
3800 V6 Checking Air Cleaner Filter
To Check or Replace: .
1. Loosen the four wing nuts.
3800 V6: Replacing Air Cleaner Filter
2. Pull the top of the air cleaner toward
the front of the vehicle and remove
the air cleaner filter.
3. Be sure to install the air cleaner filter,
replace the cover and tighten the
wing nuts securely.
Automatic Transaxle Fluid
When to Check and Change
A good time to check your automatic
transaxle fluid level is when the engine
oil is changed. Refer
to the Maintenance
Schedule to determine when to change
your fluid. See
Scheduled Maintenance
Services
in the Index.
How to Check
Because this operation can be a little
difficult, you may choose to have this
done at an Oldsmobile dealership
Service Department.
If you do it yourself, be sure to follow
all the instructions here, or you could
get a false reading on the dipstick.
NOTICE:
Too much or too little fluid can
damage your transaxle.
Too much
can mean that some of the fluid
could come out and fall on hot
engine parts or exhaust system,
starting a fire. Be sure to get an
accurate reading if you check your
transaxle fluid.
Wait at least
30 minutes before
checking the transaxle fluid level
if you
have been driving:
When outside temperatures are above
At high speed for quite a while.
In heavy traffic-especially in hot
While pulling a trailer.
90°F (32°C).
weather.
195
ProCarManuals.com
Page 198 of 276

Service &Appearance Care
196
To get the right reading, the fluid
should be at normal operating
temperature, which is
180°F to 200°F
(82°C to 93°C).
Get the vehicle warmed up by driving
about
15 miles (24 ltm) when outside
temperatures are above
50°F (10°C). If
it's colder than 50°F ( 10°C), you may
have to drive longer.
To Check the Fluid Level
Park your vehicle on a level place.
With the parking brake applied, place
With your foot on the brake pedal,
the
shift lever in
P (Park).
move the shift lever through each gear
range, pausing for about three
seconds in each range. Then, position
the shift lever in
P (Park).
Let the engine run at idle for three to
five minutes.
Then, Without Shutting Off the
Engine, Follow these Steps:
1. Pull out the dipstick and wipe it with
a clean rag or paper towel.
2. Push it back in all the way, wait three
seconds and then pull it back out
again.
3. Check both sides of the dipstick, and
read the lower level. The fluid level
must be in the cross-hatched area.
4. If the fluid level is in the acceptable
range, push the dipstick back in all
the way.
3100 V6: Checking Automatic
rransaxle Fluid
3800 V6: Checking Automatic
rransaxle Fluid
ProCarManuals.com
Page 199 of 276
How to Add Fluid
Refer to the Maintenance Schedule to
determine what kind of transaxle fluid
to use. See
Recommended Fluids and
Lubricants
in the Index.
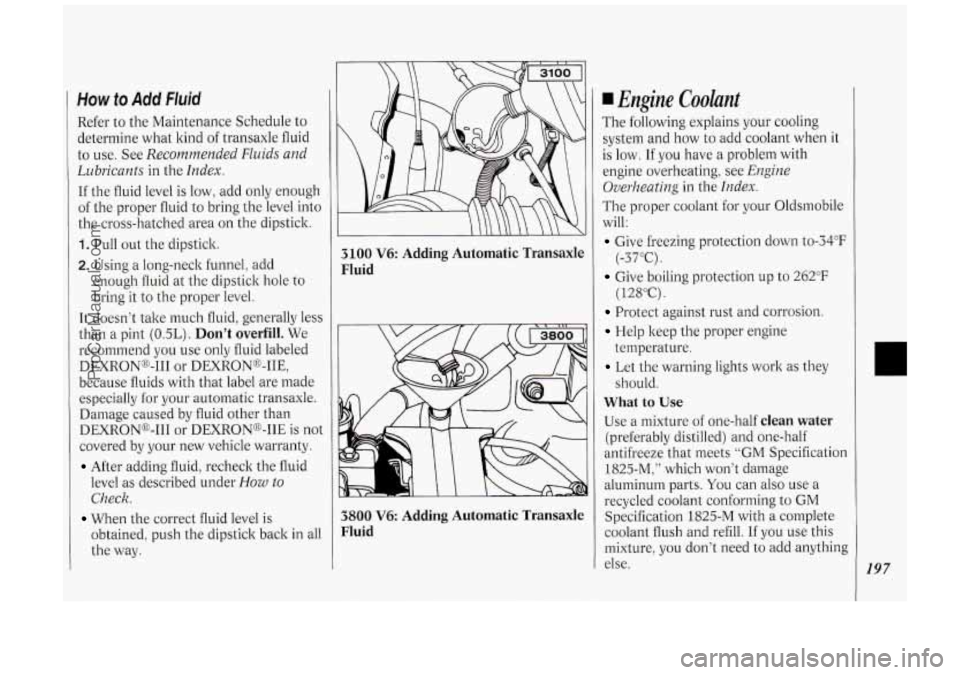
If the fluid level is low, add only enough
of the proper fluid to bring the level into
the cross-hatched area
on the dipstick.
1. Pull out the dipstick.
2. Using a long-neck funnel: add
enough fluid at the dipstick hole to
bring it to the proper level.
It doesn’t take much fluid, generally less
than a pint
(OSL). Don’t overfill. We
recommend you use only fluid labeled
DEXRONo-I11 or DEXRON@-IIE,
because fluids with that label are made
especially for your automatic transaxle.
Damage caused by fluid other than
DEXRONo-I11 or DEXRONB-IIE is not
covered by your new vehicle warranty.
After adding fluid, recheck the fluid
level as described under
How to
Check.
obtained, push the dipstick back in all
the way.
When the correct fluid level is
3100 V6: Adding Automatic Transaxle
Fluid
3800 V6: Adding Automatic Transaxle
Fluid
Engine Coolant
The following explains your cooling
system and how to add coolant when it
is
low. If you have a problem with
engine overheating, see
Engine
Overheating
in the Index.
The proper coolant for your Oldsmobile
will:
Give freezing protection down to-34”F
Give boiling protection up to 262°F
Protect against rust and corrosion.
Help keep the proper engine
Let the warning lights work as they
What to Use
Use a mixture of one-half clean water
(preferably distilled) and one-half
antifreeze that meets
“GM Specification
1825-M:” which won’t damage
aluminum parts.
You can also use a
recycled coolant conforming to
GM
Specification 1825-M with a complete
coolant flush and refill.
If you use this
mixture,
you don’t need to add anything
else.
(-37°C).
( 12SoC).
temperature. should.
197
ProCarManuals.com
Page 200 of 276
Service &Appearance Cure
NOTICE:
198
If you use an improper coolant mix,
your engine could overheat and be
badly damaged. The repair
cost
wouldn’t be covered by your
warranty. Too much water in the
mix can freeze and crack the
engine, radiator, heater core and
other parts.
Adding Coolant
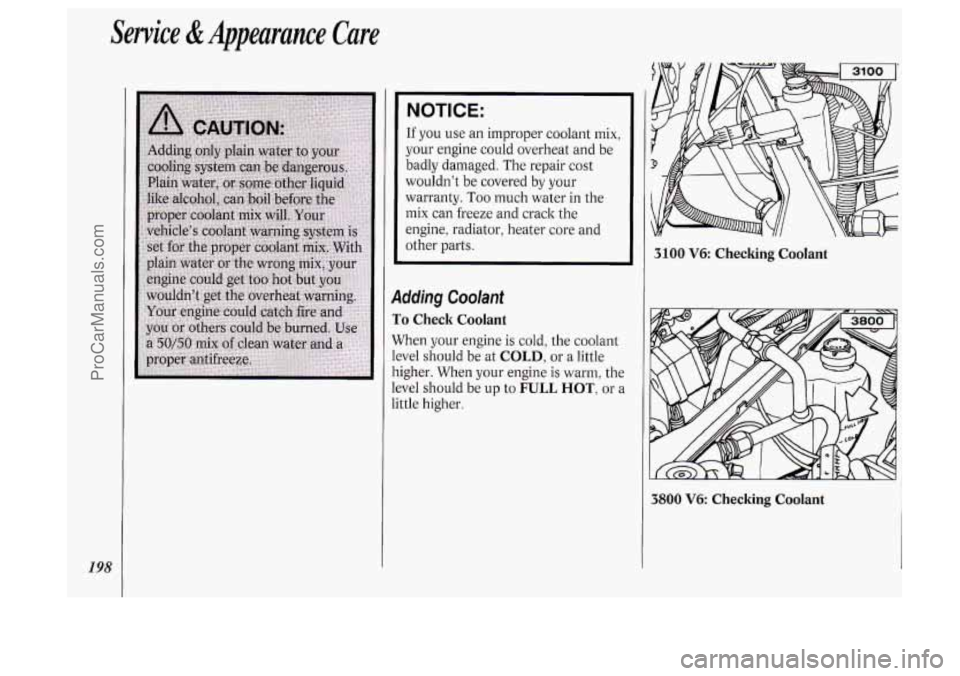
To Check Coolant
When your engine is cold, the coolant
level should be at
COLD, or a little
higher. When your engine is warm, the
level should be up to
FULL HOT, or a
little higher.
3100 V6: Checking Coolant
3800 V6: Checking Coolant
ProCarManuals.com
Page 201 of 276
To Add Coolant
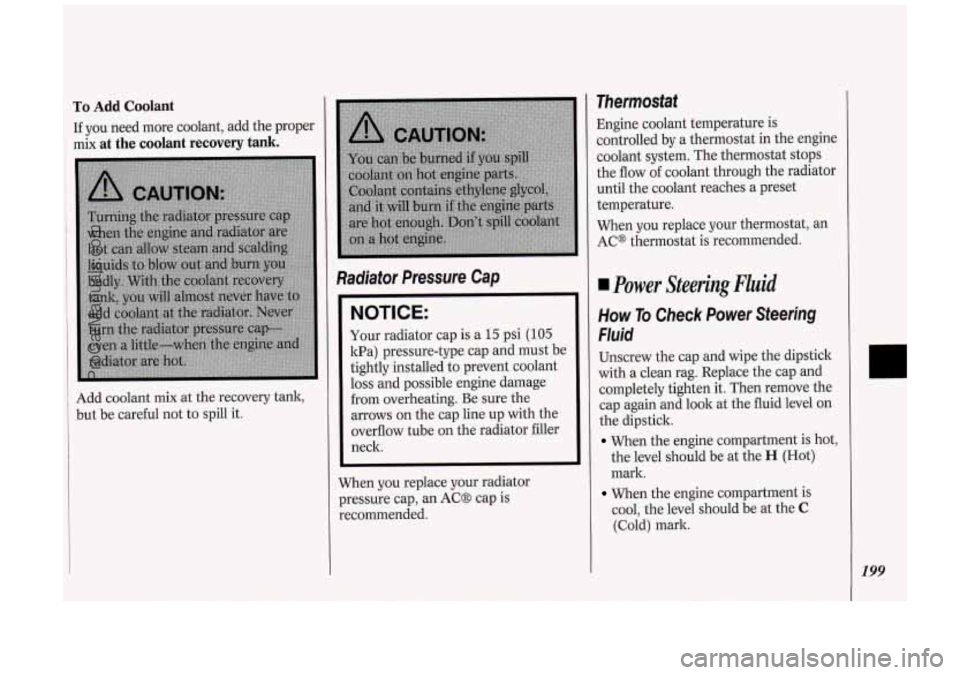
If you need more coolant, add the proper
mix
at the coolant recovery tank.
Add coolant mix at the recovery tank,
but be careful not to spill it.
Radiator Pressure Cap
NOTICE:
Your radiator cap is a 15 psi (105
kPa) pressure-type cap and must be
tightly installed to prevent coolant
loss and possible engine damage
from overheating. Be sure the
arrows on the cap line up with the
overflow tube on the radiator filler
neck.
When you replace your radiator
pressure cap, an AC8 cap is
recommended.
Thermostat
Engine coolant temperature is
controlled by a thermostat in the engine
coolant system. The thermostat stops
the flow of coolant through the radiator
until the coolant reaches a preset
temperature.
When you replace your thermostat, an
AC@ thermostat is recommended.
Power Steering Fluid
How To Check Power Steering
Fluid
Unscrew the cap and wipe the dipstick
with a clean rag. Replace the cap and
completely tighten it. Then remove the
cap again and look at the fluid level on
the dipstick.
When the engine compartment is hot,
the level should be at the
H (Hot)
mark.
When the engine compartment is
cool, the level should be at the
C
(Cold) mark.
199
ProCarManuals.com
Page 204 of 276
Service & Appearance Care
202
container only, and always clean the
brake fluid reservoir cap before
removing it.
NOTICE:
DOT-5 silicone brake fluid can
Don’t let someone put in the
damage
your vehicle. Don’t use it.
wrong kind of fluid. For example,
just a few drops of mineral-based
oil, such
as engine oil, in your
brake system can damage brake
system parts
so badly that they’ll
have to be replaced.
Brake fluid can damage paint, so
be careful not to spill brake fluid
on your vehicle. If you do, wash it
off immediately. See
Appearance
Care
in the Index.
Brake Wear
Your Oldsmobile has front disc brakes
and rear drum brakes.
Disc brake pads have built-in wear
indicators that make
a high-pitched
warning sound when the brake pads are worn
and new pads are needed. The
sound may come and go or be heard all
the time your vehicle is moving (except
when you are pushing on the brake
pedal firmly).
NOTICE:
Continuing to drive with worn-out
brake pads could result in costly
brake repair.
Some driving conditions or climates
may cause
a brake squeal when the
brakes are first applied or lightly
applied. This does not mean something
is wrong with your brakes. Your
rear drum brakes don’t have wear
indicators, but if you ever hear a rear
brake rubbing noise, have the rear brake
linings inspected. Also, the rear brake
drums should be removed and
inspected each time the tires are
removed for rotation or changing. When
you have the front brakes replaced,
have the rear brakes inspected, too.
Brake linings should always be replaced
as complete axle sets.
Brake Pedal Travel
See your dealer if the brake pedal does
not return to normal height, or if there
is a rapid increase in pedal travel. This
could be a sign of brake trouble.
Brake Adjustment
Every time you apply the brakes
moderately, with or without the vehicle
moving, your brakes adjust for wear.
ProCarManuals.com
Page 220 of 276
Service & Appearance Care
218
Yehicle Identijication
Number
(VIN)
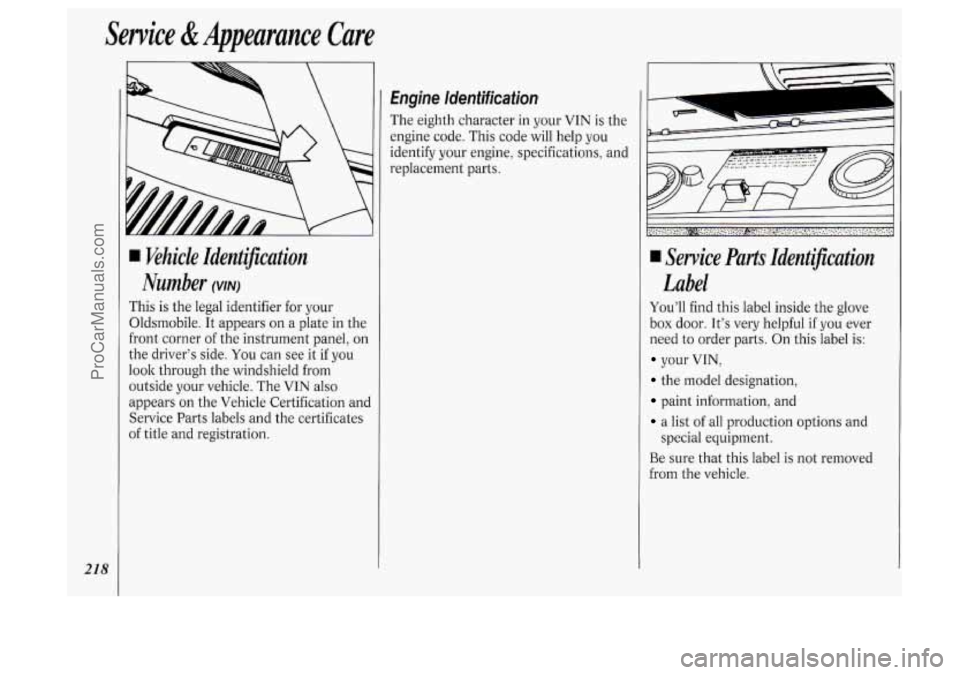
This is the legal identifier for your
Oldsmobile. It appears on a plate in the
front corner of the instrument panel, on
the driver’s side.
You can see it if you
look through the windshield from
outside your vehicle. The
VIN also
appears on the Vehicle Certification and
Service Parts labels and the certificates
of title and registration.
Engine ldenfificafion
The eighth character in your VIN is the
engine code. This code will help you
identify your engine, specifications, and
replacement parts.
1
._. _. .- .. .. .-
~.:~:~.~~~:~~~~:;~~~~~:~;.’:~,‘~~~.~~~~.~:~~~~;~:~,~~~;~~.~~,~;.~~\
~,~~~:~;:~~~::~~~:::.~,~~.’.~:. . . . . . . , . . .
Service Parts Identz!jication
Label
You’ll find this label inside the glove
box door. It’s very helpful if you ever
need to order parts. On this label is:
your VIN,
the model designation,
paint information, and
a list of all production options and
Be sure that this label is not removed
from the vehicle.
special equipment.
ProCarManuals.com
Page 224 of 276
Service &Appearance Care
222
I
1-
9 0
U
Circuit BreakerlRelay Panel
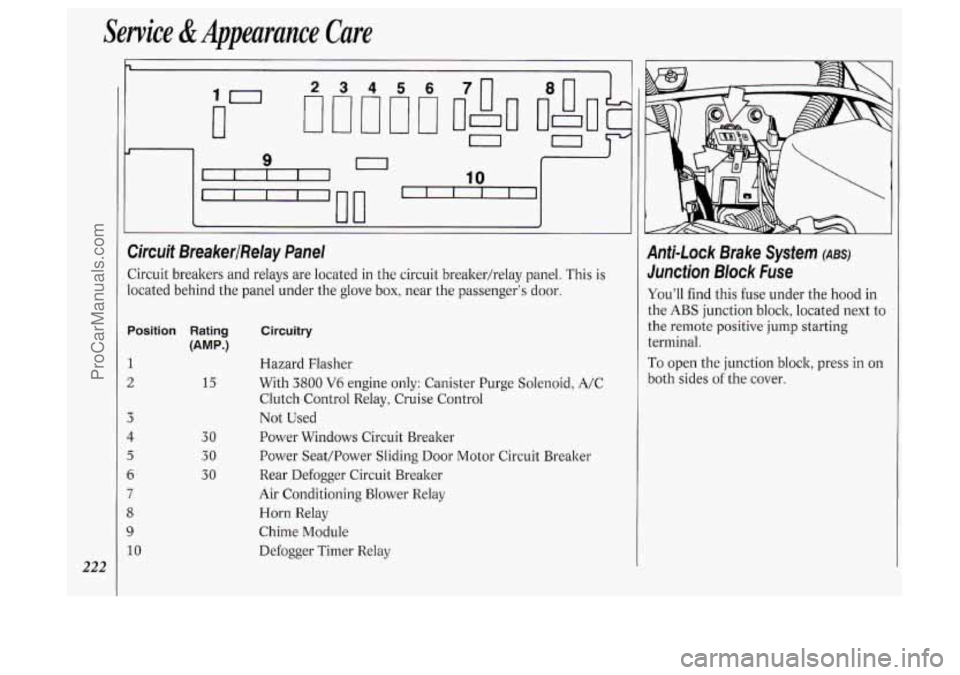
Circuit breakers and relays are located in the circuit breakerhelay panel. This is
located behind the panel under the glove box, near the passenger's door.
Position Rating
(AMP.)
1
2
3
I
5
6
7
3
3
10
15
30
30
30
Circuitry
Hazard Flasher
With
3800 V6 engine only: Canister Purge Solenoid, A/C
Clutch Control Relay, Cruise Control
Not Used
Power Windows Circuit Breaker
Power Seat/Power Sliding
Door Motor Circuit Breaker
Rear Defogger Circuit Breaker
Air Conditioning Blower Relay
Horn Relay
Chime Module
Defogger Timer Relay
Anti-Lock Brake System (ABS)
Junction Block Fuse
You'll find this fuse under the hood in
the
ABS junction block, located next to
the remote positive
jump starting
terminal.
To open the junction block, press in on
both sides of the cover.
ProCarManuals.com
Page 225 of 276
Injector 3365 Fuse
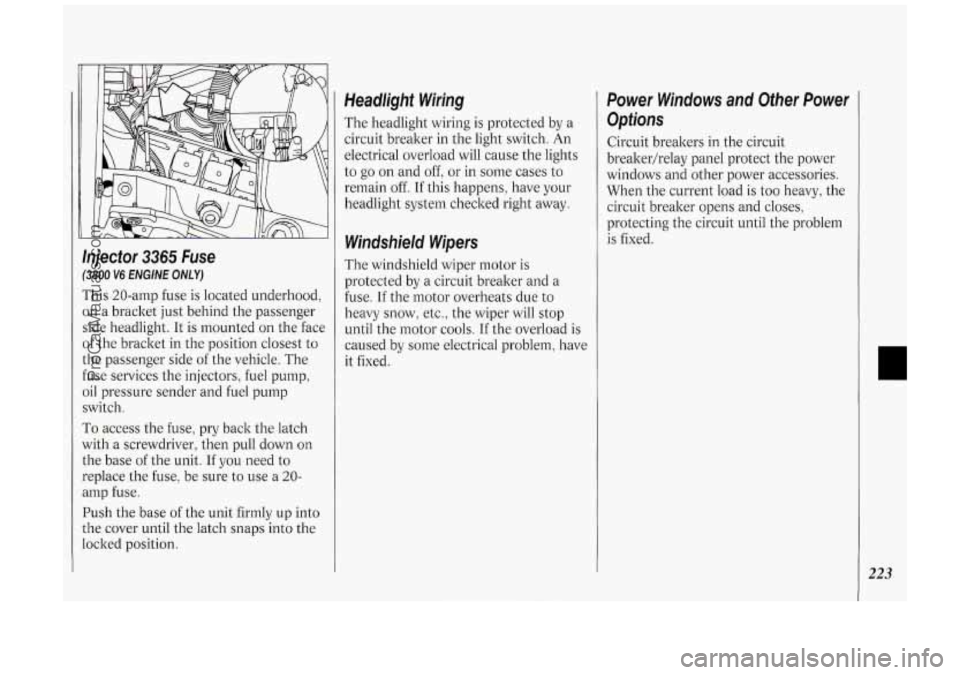
(3800 V6 ENGINE ONLY)
This 20-amp fuse is located underhood,
on a bracket just behind the passenger
side headlight. It is mounted on the face
of the bracket in the position closest to
the passenger side of the vehicle. The
fuse services the injectors, fuel pump,
oil pressure sender and fuel pump
switch.
To access the fuse, pry back the latch
with a screwdriver, then pull down on
the base
of the unit. If you need to
replace the fuse, be sure to use a 20-
amp fuse.
Push the base of the unit firmly up into
the cover until the latch snaps into the
locked position.
Headlight Wiring
The headlight wiring is protected by a
circuit breaker in the light switch. An
electrical overload will cause the lights
to go on and off: or
in some cases to
remain off. If this happens, have your
headlight system checked right away.
Windshield Wipers
The windshield wiper motor is
protected by a circuit breaker and a
fuse.
If the motor overheats due to
heavy snow, etc., the wiper will stop
until the motor cools.
If the overload is
caused by some electrical problem, have
it fixed.
Power Windows and Other Power
Options
Circuit breakers in the circuit
breakerhelay panel protect the power
windows and other power accessories.
When the current load is too heavy, the
circuit breaker opens and closes,
protecting the circuit until the problem
is fixed.
223
ProCarManuals.com
Page 226 of 276
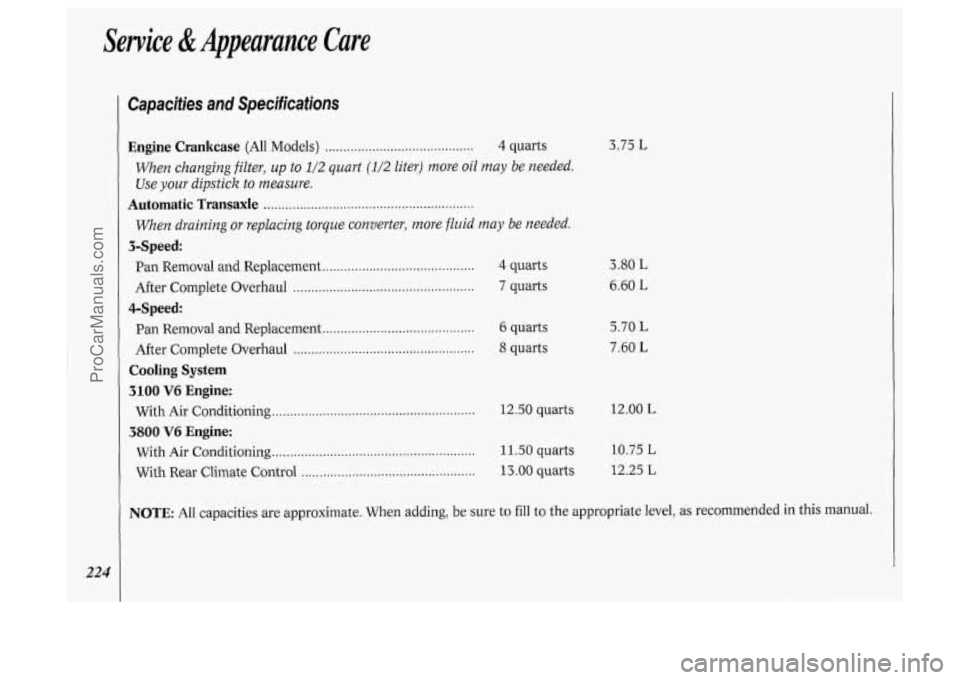
Service & Appearance Care
224
Capacities and Specifications
Engine Crankcase (All Models) ......................................... 4 quarts
When changing filter, up to 112 quart (1/2 liter) more oil may be needed.
Use
your dipstick to measure.
Automatic Transaxle ..........................................................
When draining or replacing torque converter, more fluid may be needed.
Pan Removal and Replacement .......................................... 4 quarts
After Complete Overhaul
.................................................. 7 quarts
3-Speed:
4-Speed:
Pan Removal and Replacement .......................................... 6 quarts
After Complete Overhaul
.................................................. 8 quarts
Cooling System
3100 V6 Engine:
3800 V6 Engine:
With Air Conditioning ........................................................ 12.50 quarts
With Air Conditioning ........................................................ 11.50 quarts
With Rear Climate Control
................................................ 13 .OO quarts
3.75 L
3.80 L
6.60 L
5.70 L
7.60 L
12.00 L
10.75
L
12.25 L
NOTE: All capacities are approximate. When adding, be sure to fill to the appropriate level, as recommended in this manual.
ProCarManuals.com