engine OLDSMOBILE SILHOUETTE 1994 Service Manual
[x] Cancel search | Manufacturer: OLDSMOBILE, Model Year: 1994, Model line: SILHOUETTE, Model: OLDSMOBILE SILHOUETTE 1994Pages: 276, PDF Size: 15.82 MB
Page 159 of 276
Here you’ll find what to do about
some problems that can occur
on the
road
.
Part 5
Problems on the Road
Hazard Warning Flashers ..................... .. ................................................................ 158 .
Jump Starting ........................................................................\
.................................. 158
Towing Your Vehicle
........................................................................\
....................... 162
Engine Overheating
........................................................................\
......................... 165
If a Tire Goes Flat
........................................................................\
........................... 172
Changing a Flat Tire
........................................................................\
........................ 172
Compact Spare Tire ........................................................................\
........................ 178
If You’re Stuck: In Sand, Mud, Ice or Snow ......................................................... 179
157
ProCarManuals.com
Page 162 of 276
Problems on the Road
are some things you should know.
Positive
(+) will go to positive (+)
and negative (-) will go to negative
(-) or a metal engine part. Don’t
connect
(+) to (-) or you’ll get a
short that would damage the battery
and maybe other parts, too.
160
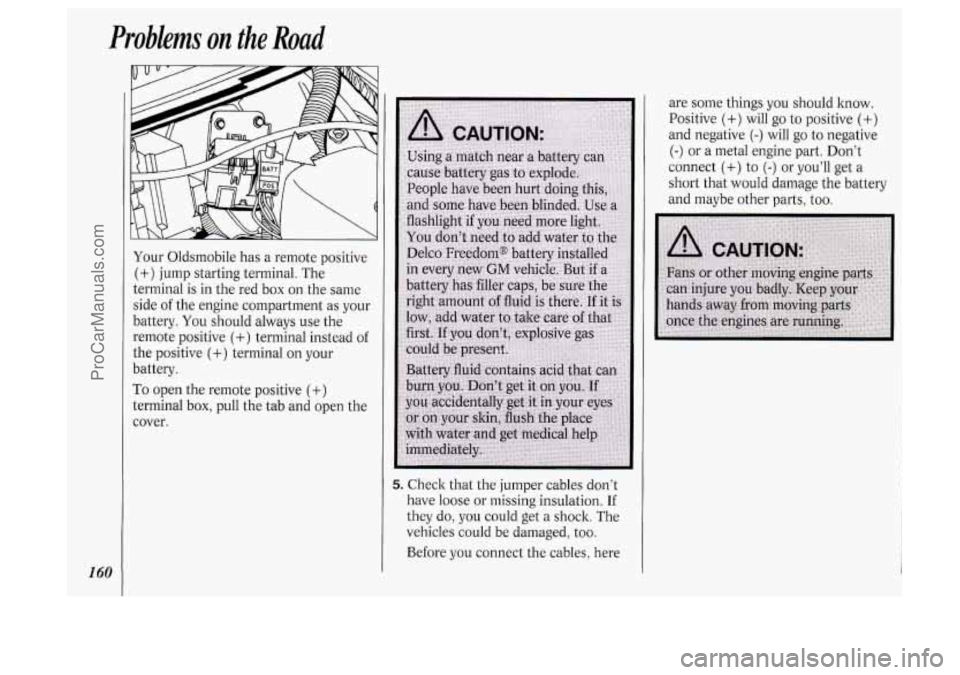
Your Oldsmobile has a remote positive
(+) jump starting terminal. The
terminal
is in the red box on the same
side of the engine compartment as your
battery.
You should always use the
remote positive
(+) terminal instead of
the positive (+) terminal on your
batte
ry.
To open the remote positive (+)
terminal box, pull the tab and open the
cover.
5. Check that the jumper cables don’t
have loose
or missing insulation. If
they do, you could get
a shock. The
vehicles could be damaged, too.
Before you connect the cables, here
ProCarManuals.com
Page 163 of 276
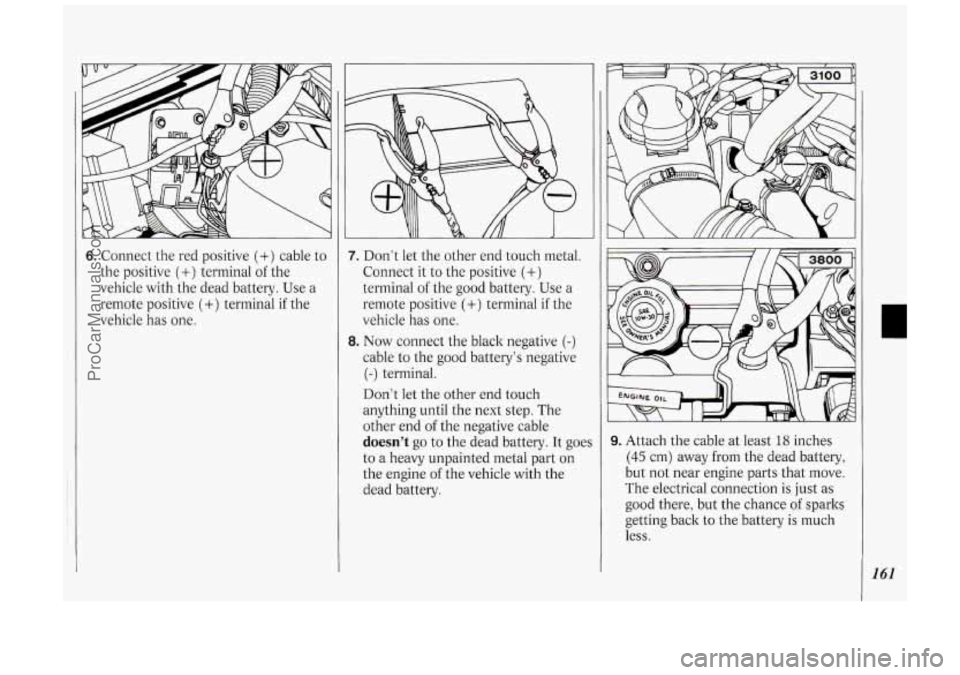
6. Connect the red positive (+) cable to
the positive
(+) terminal of the
vehicle with the dead battery. Use a
remote positive
(+) terminal if the
vehicle has
one.
7. Don‘t let the other end touch metal.
Connect it to the positive
(+)
terminal of the good battery. Use a
remote positive
(+) terminal if the
vehicle has one.
8. Now connect the black negative (-)
cable to the good battery’s negative
(-) terminal.
Don’t let the other end touch
anything until the next step. The
other end of the negative cable
doesn’t go to the dead battery. It goes
to a heavy unpainted metal part on
the engine
of the vehicle with the
dead battery.
I
I \
9. Attach the cable at least 18 inches
(45 cm) away from the dead battery,
but not near engine parts that move.
The electrical connection is
just as
good there, but the chance of sparks
getting back to the battery is much
less.
ProCarManuals.com
Page 164 of 276
Problems on the Road
I62
10. Now start the vehicle with the good
battery and run the engine for a
while.
11. Try to start the vehicle with the
dead battery. If it won’t start after a
few tries,
it probably needs service. w I
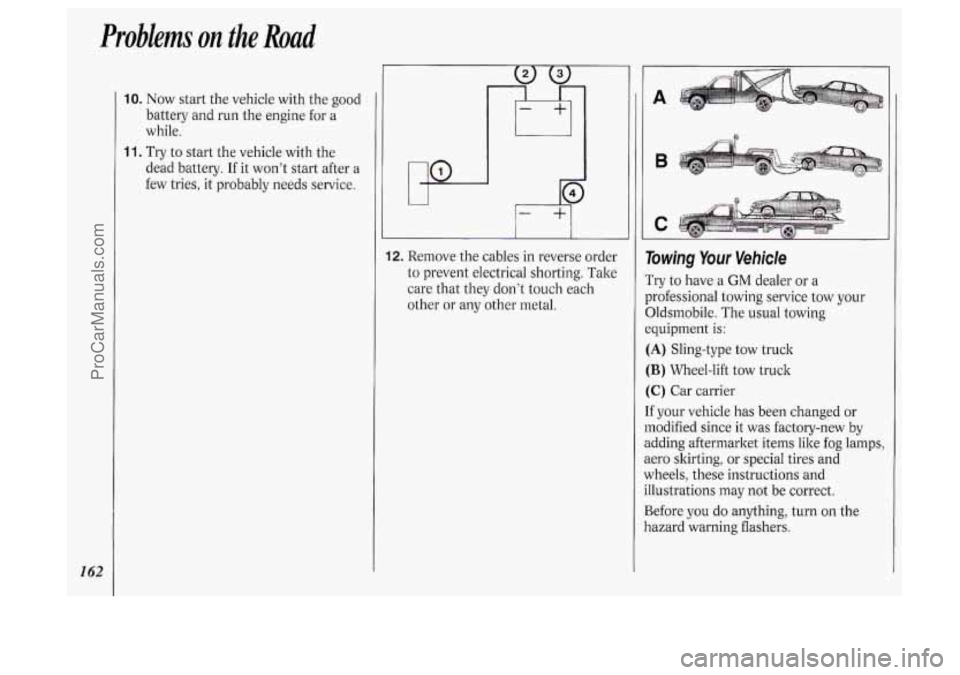
12. Remove the cables in reverse order
to prevent electrical shorting. Take
care that they don’t touch each
other or any other metal.
A
8
liowing Your Vehicle
Try to have a GM dealer or a
xofessional towing service tow your
3ldsmobile. The usual towing
:quipment
is:
[A) Sling-type tow truck
[B) Wheel-lift tow truck
:C) Car carrier
f your vehicle has been changed or
nodified since it was factory-new by
idding aftermarket items like fog lamps,
tero skirting, or special tires and
vheels, these instructions and
llustrations may not be correct.
3efore you do anything, turn on the
lazard warning flashers.
ProCarManuals.com
Page 167 of 276
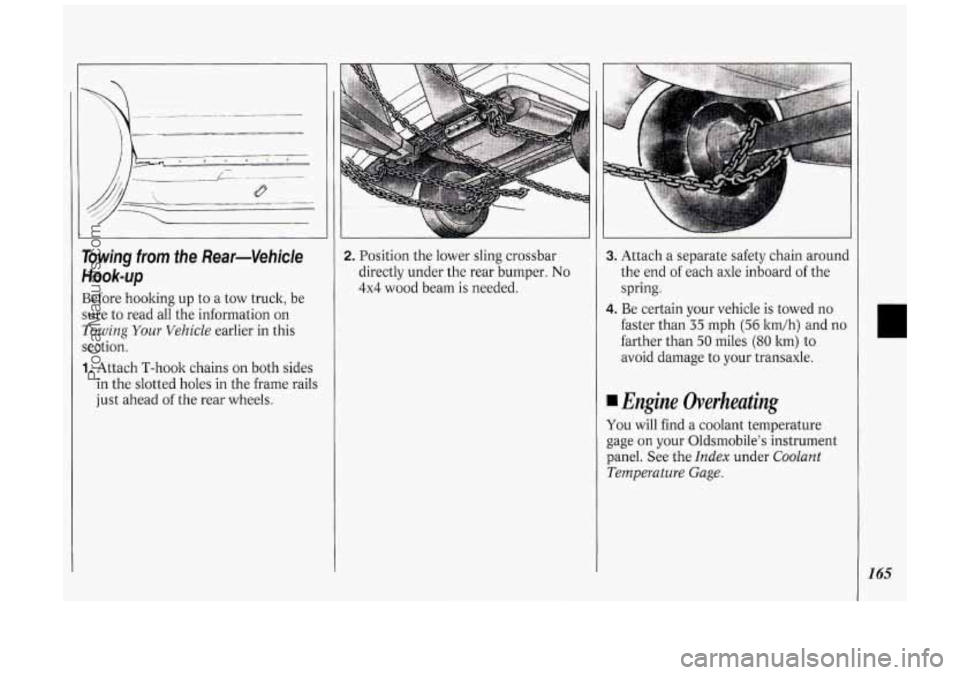
Towing from fhe Rear-Vehicle
HOOk-Up
Before hooking up to a tow truck, be
sure to read all the information
on
Towing Your Vehicle earlier in this
section.
1. Attach T-hook chains on both sides
in the slotted holes in the frame rails
just ahead
of the rear wheels.
I
2. Position the lower sling crossbar
directly under the rear bumper. No
4x4 wood beam is needed.
3. Attach a separate safety chain around
the end of each axle inboard
of the
spring.
4. Be certain your vehicle is towed no
faster than
35 rnph (56 ltm/h) and no
farther than
50 miles (80 ltm) to
avoid damage to your transaxle.
Engine Overheating
You will find a coolant temperature
gage on your Oldsmobile's instrument
panel. See the
Index under Coolant
Temperature Gage.
1
165
ProCarManuals.com
Page 168 of 276
Problems on the Road
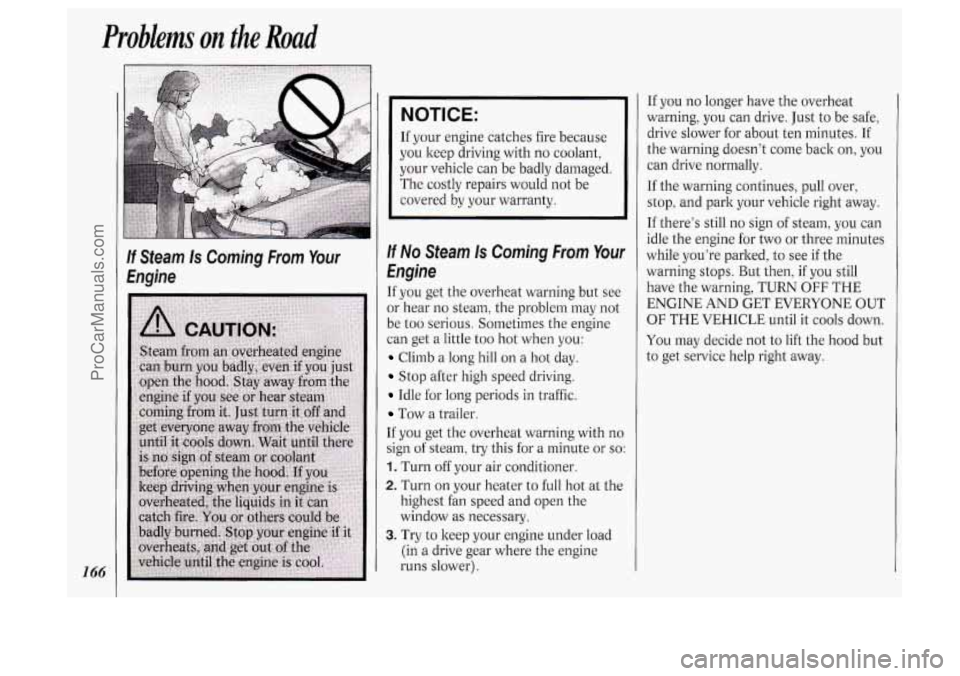
If Steam Is Coming From Your
Engine
NOTICE:
If your engine catches fire because
you keep driving with no coolant,
your vehicle can be badly damaged.
The costly repairs would not be
covered by your warranty.
If No Steam Is Coming From Your
€ngine
If you get the overheat warning but see
or hear no steam, the problem may not
be too serious. Sometimes the engine
can get a little too hot when you:
Climb a long hill on a hot day.
Stop after high speed driving.
Idle for long periods in traffic.
Tow a trailer.
If you get the overheat warning with
no
sign of steam, try this for a minute or so:
1. Turn off your air conditioner.
2. Turn on your heater to full hot at the
highest fan speed
and open the
window as necessary.
3. Try to keep your engine under load
(in a drive gear where the engine
runs slower).
If you no longer have the overheat
warning, you can drive. Just to be safe,
drive slower for about ten minutes. If
the warning doesn't come back
on, you
can drive normally.
If the warning continues, pull over,
stop, and park your vehicle right away.
If there's still no sign of steam, you can
idle the engine for two or three minutes
while you're parked, to see if the
warning stops. But then,
if you still
have the warning, TURN
OFF THE
ENGINE AND GET EVERYONE OUT
OF THE VEHICLE until it cools down.
You may decide not to lift the hood but
to get service help right away.
ProCarManuals.com
Page 169 of 276
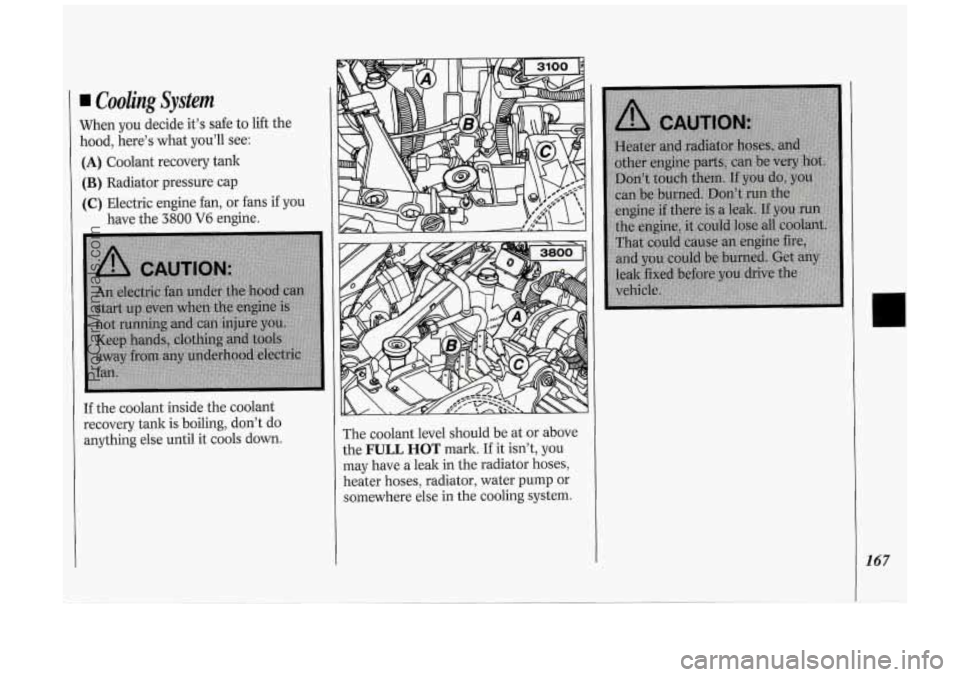
Cooling System
When you decide it’s safe to lift the
hood, here’s what you’ll see:
(A) Coolant recovery tank
(B) Radiator pressure cap
(C) Electric engine fan, or fans if you
have the
3800 V6 engine.
If the coolant inside the coolant
recovery tank is boiling, don’t do
anything else until it cools down. The coolant
level should be at or above
the
FULL HOT mark. If it isn’t, you
may have a leak in the radiator hoses,
heater hoses, radiator, water pump or
somewhere else in the cooling system.
ProCarManuals.com
Page 170 of 276
Problems on the Road
1..
NOTICE:
Engine damage from running your
engine without coolant isn’t
covered by your warranty. If
there seems to be
no leak, check to
see if the electric engine fan is running.
If the engine is overheating, the fan
should be running. If it isn’t, your
vehicle needs service.
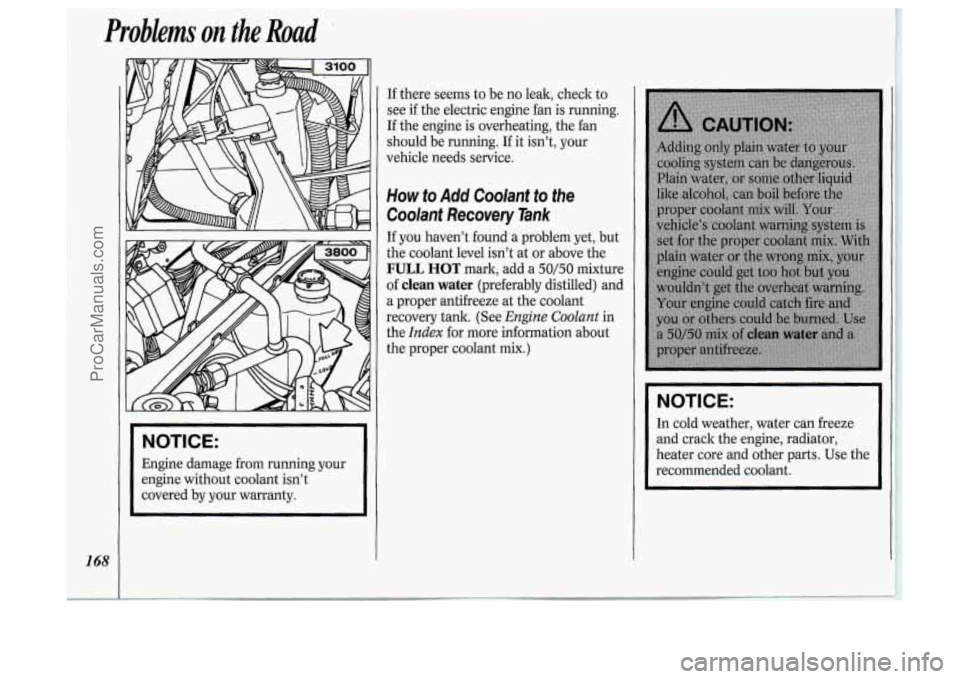
How to Add Coolant to the
Coolant Recovery Tank
If you haven’t found a problem yet, but
the coolant level isn’t at or above the
FULL HOT mark, add a 50/50 mixture
of
clean water (preferably distilled) and
a proper antifreeze at the coolant
recovery tank. (See
Engine Coolant in
the
Index for more information about
the proper coolant mix.)
NOTICE:
In cold weather, water can freeze
and crack the engine, radiator,
heater core and other parts. Use the
recommended coolant.
ProCarManuals.com
Page 173 of 276
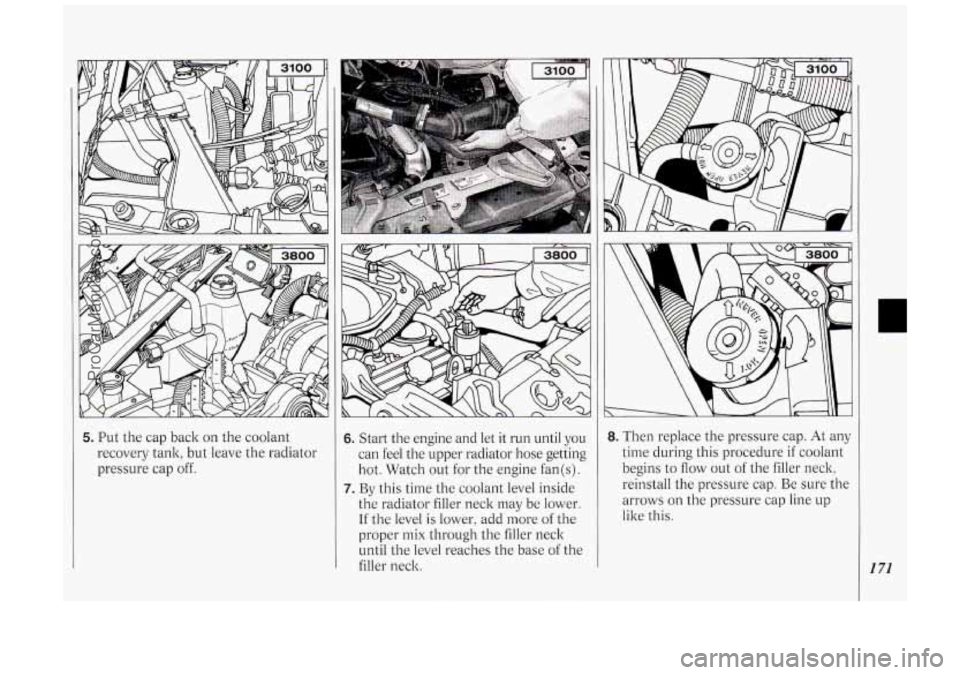
5. Put the cap back on the coolant
recovery tank, but leave the radiator
pressure cap off. 6. Start the engine and let it run until you
can feel the upper radiator hose getting
hot. Watch out for the engine fan(s).
7. By this time the coolant level inside
the radiator filler neck may be lower.
If the level is lower, add more of the
proper mix through the filler neck
until the level reaches the base of the
filler neck.
8. Then replace the pressure cap. At any
time during this procedure if coolant
begins to
flow out of the filler neck,
reinstall the pressure cap. Be sure the
arrows
on the pressure cap line up
like this.
171
ProCarManuals.com
Page 183 of 276
Here you will find information about
the care of
your Oldsmobile . This
part begins with service and fuel
information. and then it shows how
to check important fluid and
lubricant levels
. There is also
technical information about
your
vehicle. and a section devoted to its
appearance care
.
Part 6
Service & Appearance Care
Service ........................................................................\
............................................. 182
Fuel
........................................................................\
.................................................. 183
Hood Release ........................................................................\
................................... 186
Engine Oil ........................................................................\
........................................ 190
Air Cleaner
........................................................................\
...................................... 194
Transaxle Fluid
........................................................................\
................................ 195
Engine Coolant
........................................................................\
................................ 197
Power Steering Fluid
........................................................................\
....................... 199
Windshield Washer Fluid
........................................................................\
................ 200
Brakes
........................................................................\
.............................................. 201
Battery
........................................................................\
............................................. 203
Bulb Replacement
........................................................................\
........................... 203
Windshield Wiper Blade Replacement
................................................................... 205
Loading Your Vehicle
........................................................................\
..................... 206
Tires
........................................................................\
................................................. 207
Appearance Care ........................................................................\
............................. 212
Vehicle Identification Number (VIN)
.................................................................... 218
Add-on Electrical Equipment
........................................................................\
........ 219
Fuses & Circuit Breakers ........................................................................\
................ 219
Capacities and Specifications
........................................................................\
......... 224
Normal Maintenance Replacement Parts
............................................................... 226
Fluids
& Lubricants ........................................................................\
........................ 227
Replacement
Bulbs ........................................................................\
.......................... 228
181
ProCarManuals.com