cooling OLDSMOBILE SILHOUETTE 1994 Owners Manual
[x] Cancel search | Manufacturer: OLDSMOBILE, Model Year: 1994, Model line: SILHOUETTE, Model: OLDSMOBILE SILHOUETTE 1994Pages: 276, PDF Size: 15.82 MB
Page 112 of 276
Comfort Controls &Audio Systems
110
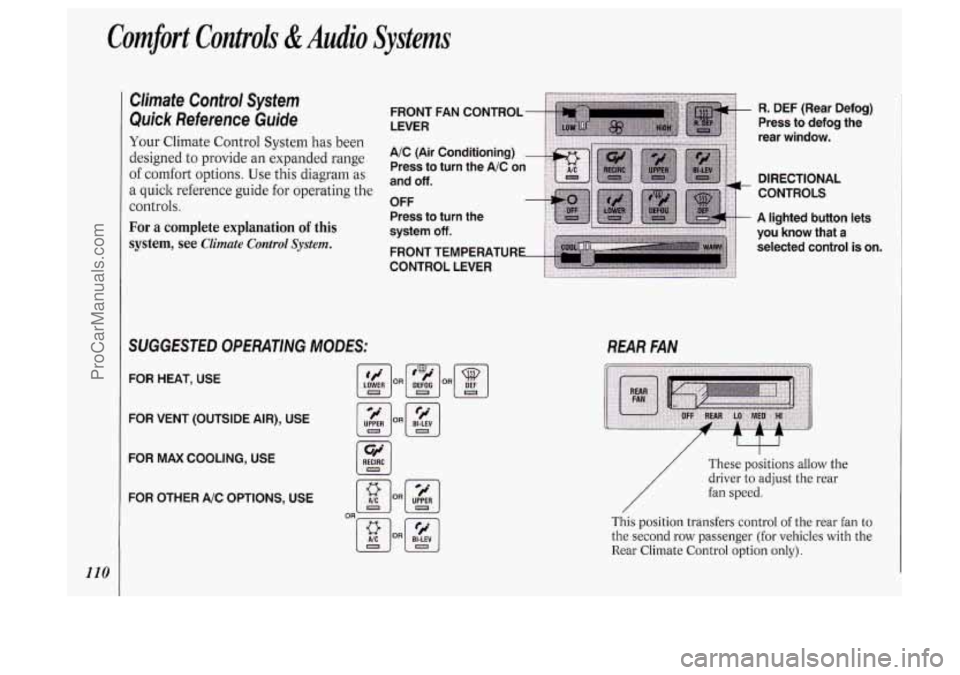
Climate Control System
Quick Reference Guide
Your Climate Control System has been
designed to provide an expanded range
of comfort options. Use this diagram as
a quick reference guide for operating the
controls.
For a complete explanation of this
system,
see Climate Control System.
SUGGESTED OPERATlNG MODES: REAR FAN
FOR HEAT, USE
FOR VENT (OUTSIDE AIR), USE
FOR MAX COOLING, USE
FOR OTHER A/C OPTIONS, USE
[Y] RECiRC
R. DEF (Rear Defog)
Press to defog the
rear window.
DIRECTIONAL
CONTROLS
A lighted button lets
you know that a
selected control
is on.
/ I
/
These positions allow the
driver to adjust the rear
fan speed.
This
position transfers control of the rear fan to
the second row passenger (for vehicles with the
Rear Climate Control option only).
ProCarManuals.com
Page 113 of 276
![OLDSMOBILE SILHOUETTE 1994 Owners Manual I Climate Control System
Your vehicle’s heater and air
conditioner work best if you keep your
windows closed. Your vehicle also has
flow-through ventilation, described late]
in this s OLDSMOBILE SILHOUETTE 1994 Owners Manual I Climate Control System
Your vehicle’s heater and air
conditioner work best if you keep your
windows closed. Your vehicle also has
flow-through ventilation, described late]
in this s](/img/31/58207/w960_58207-112.png)
I Climate Control System
Your vehicle’s heater and air
conditioner work best if you keep your
windows closed. Your vehicle also has
flow-through ventilation, described late]
in this section, to bring outside air into
your vehicle.
If you have the optional engine coolant
heater and use it during cold weather,
0°F (-18°C) or lower, your heating
system will more quicldy provide heat
because the engine coolant is already
warmed. See the
Index under Engine
Coolant Heater.
OFF: Press to turn the system off. Press
any climate control setting to turn the
system on.
8: Slide the lever to the right to increase
fan speed,
decrease fan speed. to the left
to
Temperature Control Lever: Slide
the
lever to the right for warmer, heated air;
slide it to the left for cooled air.
Air Conditioner
When the temperature outside is above
freezing, the air conditioner compressor
will automatically condition the air
when
you press RECIRC (the A/C
indicator light will glow), DEFOG or
DEF (the A/C indicator light will not
Press
A/C (the A/C indicator light will
glow) to condition the air when you
press
UPPER, BI-LEV or LOWER. To
turn off the air conditioner compressor
in these settings, press
A/C again (the
indicator light will go off).
glow).
Each time you turn on the ignition, the
air conditioner will default to the setting
you had selected before last turning off
the ignition.
When the air conditioner compressor is
on, you may sometimes notice slight
changes in your vehicle’s engine
performance and power. This is normal, because
the system is designed to help
fuel economy while it maintains the
desired cooling level.
The air conditioner removes moisture
from the air,
so you may sometimes
notice water dripping from under your
vehicle when it
is idling or after it has
been turned off. This is normal.
On very hot days, your vehicle will cool
down more quickly and economically if
you open the windows long enough to
let hot inside air escape. For all settings,
adjust the temperature control lever and
fan speed as desired.
Directional Controls
RECIRC (Recirculate): Press to get
maximum cooling or quick cool-down
on very hot days. This setting
recirculates much of the air inside your
vehicle. It should not be used for long
periods of time because the air may
become too cold and dry.
Slide the temperature control lever
down to the coolest setting and adjust
the fan speed as desired.
UPPER: For normal cooling on hot
days, press
A/C along with UPPER.
1
111
ProCarManuals.com
Page 149 of 276
There is something about an easy
stretch
of road with the same scenery,
along with the hum
of the tires on the
road, the drone
of the engine, and the
rush
of the wind against the vehicle that
can make you sleepy. Don’t let it
happen to you!
If it does, your vehicle
can leave the road in
less than a
second, and you could crash and be
injured.
What can you do about highway
hypnosis? First, be aware that it can
happen.
Then here are some tips:
Make sure your vehicle is well
ventilated, with a comfortably cool
interior.
ahead and to the sides. Check your
mirrors and your instruments
frequently.
If you get sleepy, pull off the road into
a rest, service, or parking area and
take a nap, get some exercise, or both.
For safety, treat drowsiness on the
highway as an emergency.
Keep your eyes moving. Scan the road
I
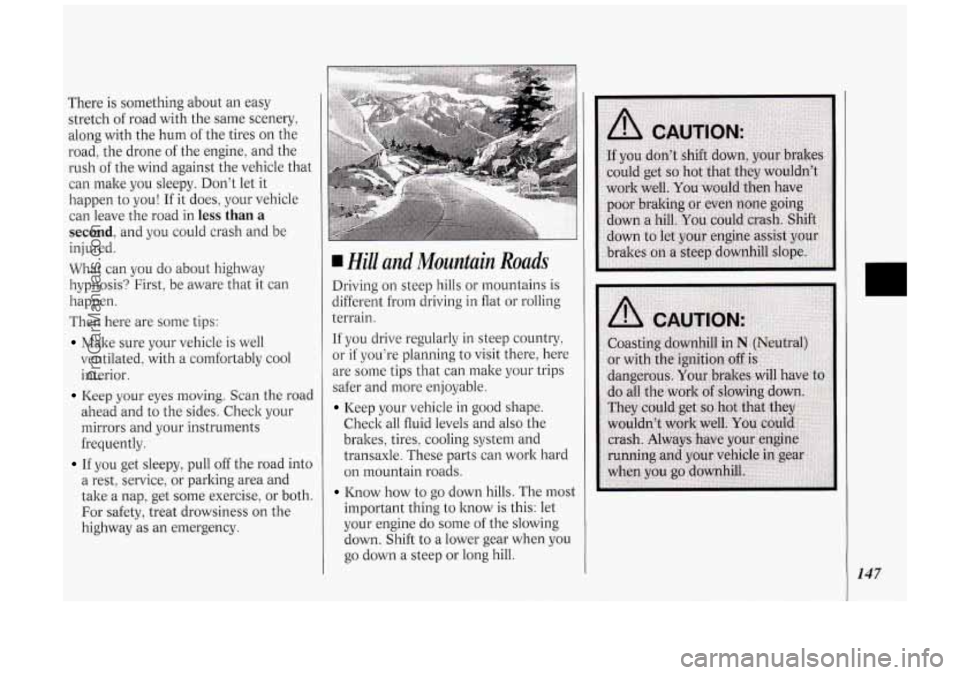
Hill and Mountain Roads
Driving on steep hills or mountains is
different from driving in flat or rolling
terrain.
If you drive regularly in steep countly,
or if you’re planning to visit there, here
are some tips that can make your trips
safer and more enjoyable.
Keep your vehicle in good shape.
Check all fluid levels and also the
brakes, tires, cooling system and
transaxle. These parts can work hard
on mountain roads.
Know how to go down hills. The most
important thing to know
is this: let
your engine do some
of the slowing
down. Shift to a lower gear when you
go down a steep
or long hill.
147
ProCarManuals.com
Page 158 of 276
Your Driving and the Road
156
Parking on Hills
You really should not park your vehicle,
with a trailer attached, on a hill. If
something goes wrong, your rig could
start to move. People can be injured,
and both your vehicle and the trailer
can be damaged.
But
if you ever have to park your rig on
a hill, here’s how to do it:
1. Apply your regular brakes, but don’t
shift into
P (Park) yet.
2. Have someone place choclts under
the trailer wheels.
3. When the wheel chocks are in place,
release the regular brakes until the
chocks absorb the load.
apply your parking brake, and then
shift to
P (Park).
4. Reapply the regular brakes. Then
5. Release the regular brakes.
When You Are Ready to Leave
Affer Parking on a Hill
1. Apply your regular brakes and hold
the pedal down while
you:
Start your engine;
Shift into a gear; and
Release the parking brake.
2. Let up on the brake pedal.
3. Drive slowly until the trailer is clear
4. Stop and have someone pick up and
of
the chocks.
store the chocks.
Maintenance When Trailer Towing
Your vehicle will need service more
often when you’re pulling a trailer. See
the Maintenance Schedule
for more on
this. Things that are especially important in
trailer operation are
automatic transaxle fluid (don’t
overfill), engine oil, belts, cooling
system, and brake adjustment. Each of
these is covered in this manual, and the
Index will help you find them quicltly. If
you’re trailering, it’s a good idea to
review these sections before you start
your trip.
Check periodically to see that all hitch
nuts and bolts are tight.
ProCarManuals.com
Page 169 of 276
Cooling System
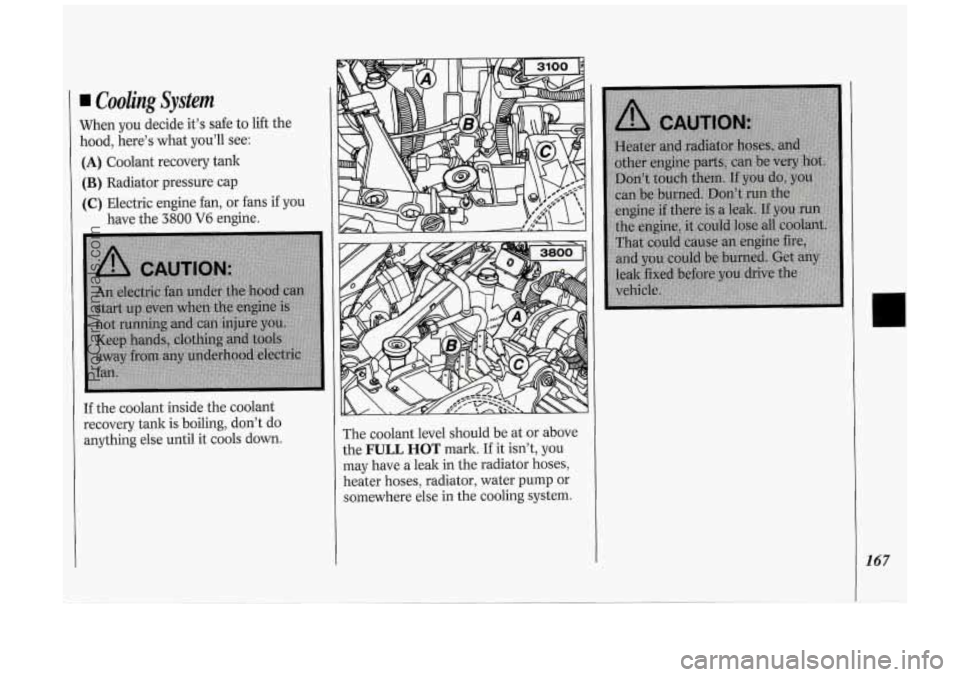
When you decide it’s safe to lift the
hood, here’s what you’ll see:
(A) Coolant recovery tank
(B) Radiator pressure cap
(C) Electric engine fan, or fans if you
have the
3800 V6 engine.
If the coolant inside the coolant
recovery tank is boiling, don’t do
anything else until it cools down. The coolant
level should be at or above
the
FULL HOT mark. If it isn’t, you
may have a leak in the radiator hoses,
heater hoses, radiator, water pump or
somewhere else in the cooling system.
ProCarManuals.com
Page 171 of 276
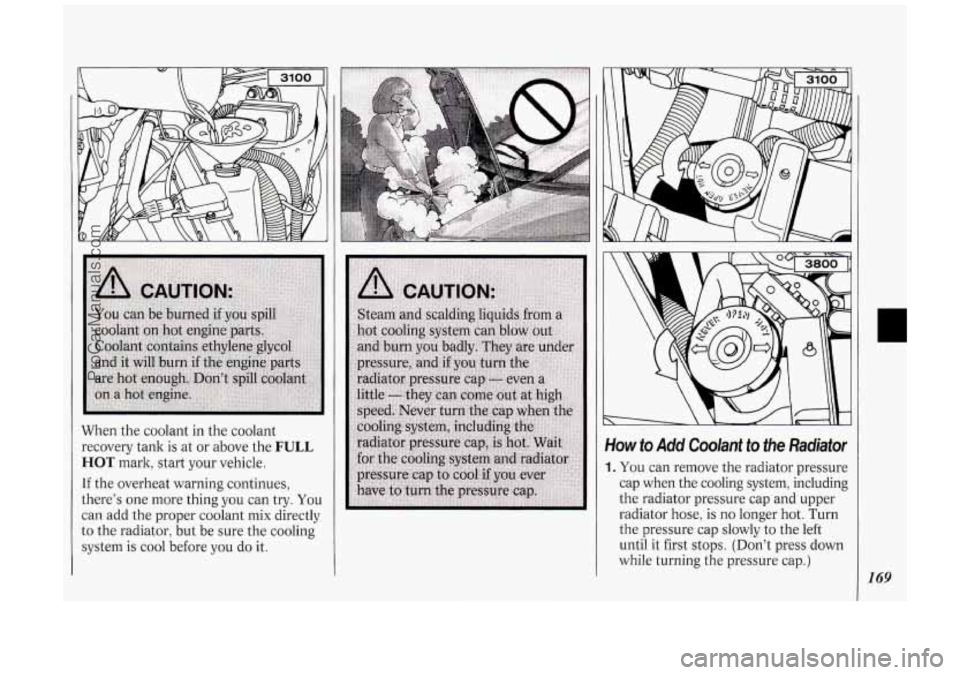
When the coolant in the coolant
recovery tank is
at or above the FULL
HOT mark, start your vehicle.
If the overheat warning continues,
there's one more thing you can try.
You
can add the proper coolant mix directly
to the radiator, but be sure the cooling
system is cool before you
do it.
Yow to Add Coolant to the Radiator
I. You can remove the radiator pressure
cap when the cooling system, including
the radiator pressure cap and upper
radiator hose, is
no longer hot. Turn
the pressure cap slowly to the left
until it first stops. (Don't press down
while turning the pressure cap.)
I69
ProCarManuals.com
Page 199 of 276
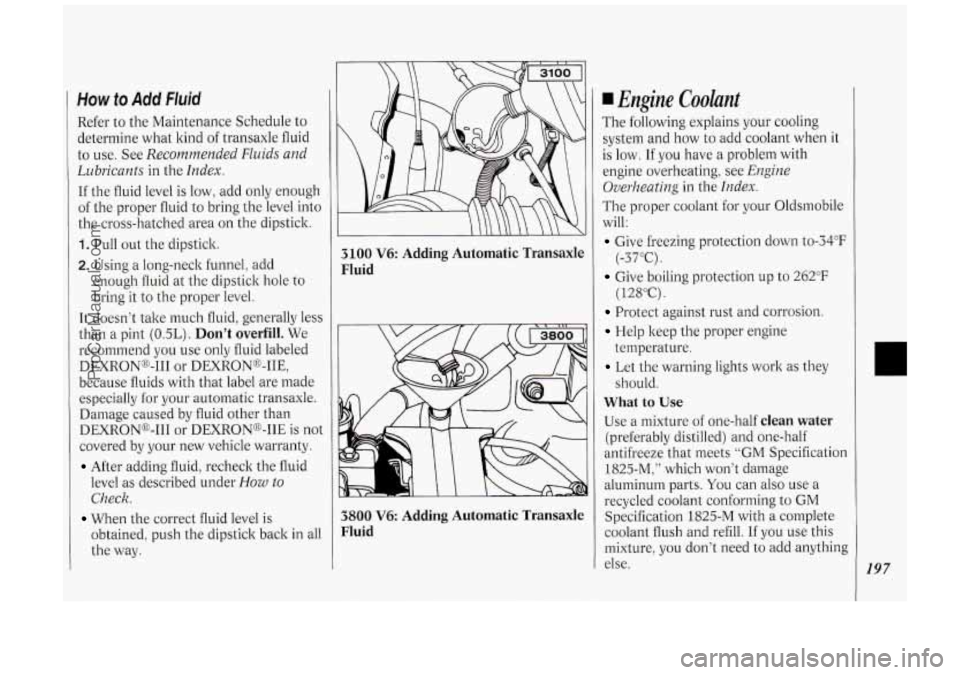
How to Add Fluid
Refer to the Maintenance Schedule to
determine what kind of transaxle fluid
to use. See
Recommended Fluids and
Lubricants
in the Index.
If the fluid level is low, add only enough
of the proper fluid to bring the level into
the cross-hatched area
on the dipstick.
1. Pull out the dipstick.
2. Using a long-neck funnel: add
enough fluid at the dipstick hole to
bring it to the proper level.
It doesn’t take much fluid, generally less
than a pint
(OSL). Don’t overfill. We
recommend you use only fluid labeled
DEXRONo-I11 or DEXRON@-IIE,
because fluids with that label are made
especially for your automatic transaxle.
Damage caused by fluid other than
DEXRONo-I11 or DEXRONB-IIE is not
covered by your new vehicle warranty.
After adding fluid, recheck the fluid
level as described under
How to
Check.
obtained, push the dipstick back in all
the way.
When the correct fluid level is
3100 V6: Adding Automatic Transaxle
Fluid
3800 V6: Adding Automatic Transaxle
Fluid
Engine Coolant
The following explains your cooling
system and how to add coolant when it
is
low. If you have a problem with
engine overheating, see
Engine
Overheating
in the Index.
The proper coolant for your Oldsmobile
will:
Give freezing protection down to-34”F
Give boiling protection up to 262°F
Protect against rust and corrosion.
Help keep the proper engine
Let the warning lights work as they
What to Use
Use a mixture of one-half clean water
(preferably distilled) and one-half
antifreeze that meets
“GM Specification
1825-M:” which won’t damage
aluminum parts.
You can also use a
recycled coolant conforming to
GM
Specification 1825-M with a complete
coolant flush and refill.
If you use this
mixture,
you don’t need to add anything
else.
(-37°C).
( 12SoC).
temperature. should.
197
ProCarManuals.com
Page 213 of 276
have been approved for use on General
~ Motors vehicles. All passenger type
(P Metric) tires must conform to
Federal safety requirements in addition
to these grades.
Wheel Alignment and Tire
Balance
The wheels on your vehicle were
aligned and balanced carefully at the
factory to give you the longest tire life
and best overall performance.
In most cases, you will not need to have
your wheels aligned again. However,
if
you notice unusual tire wear or your
vehicle pulling one way or the other, the
alignment may need to be reset. If you
notice your vehicle vibrating when
driving on a smooth road, your wheels
may need
to be rebalanced.
Wheel Replacement
Replace any wheel that is bent, cracked
or badly rusted. If wheel nuts keep
coming loose, the wheel, wheel bolts,
and wheel nuts should be replaced.
If
the wheel leala air, replace it (except
some aluminum wheels, which can
sometimes be repaired). See your Oldsmobile dealer
if any of these
conditions exist.
Your dealer will know the kind of wheel
you need.
Each new wheel should have the same
load carrying capacity, diameter, width,
offset, and be mounted the same way as
the one it replaces.
If you need to replace any of your
wheels, wheel bolts, or wheel nuts,
replace them only with new GM
original equipment parts. This way, you
will be sure to have the right wheel,
wheel bolts, and wheel nuts for your
Oldsmobile model.
NOTICE:
The wrong wheel can also cause
problems with bearing life, brake
cooling, speedometer/odometer
calibration, headlight aim, bumper
height, vehicle ground clearance,
and tire or tire chain clearance to
the body and chassis.
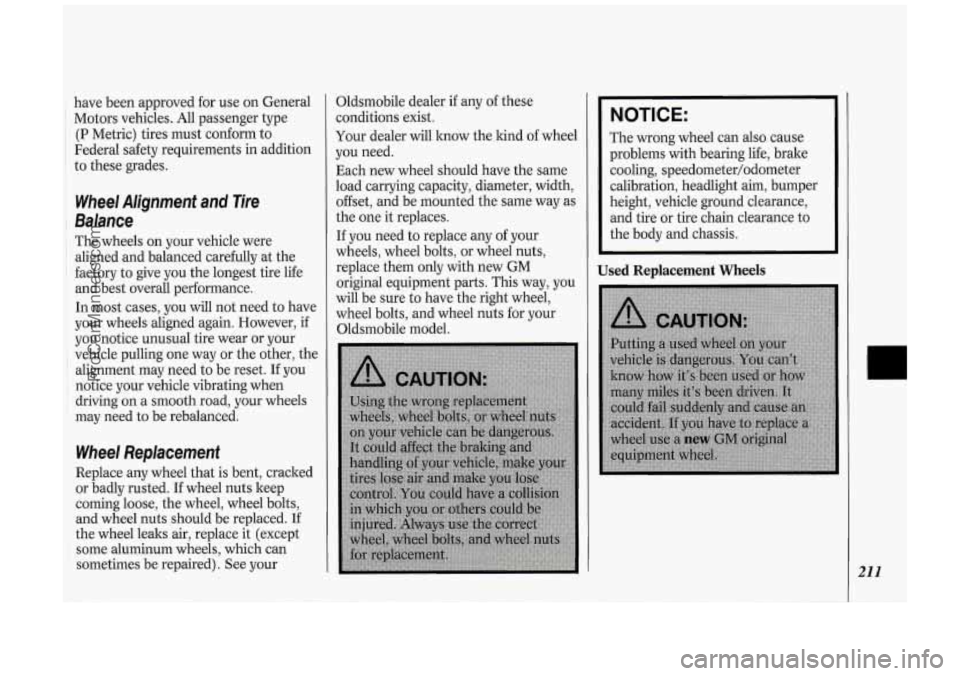
Used Replacement Wheels
21 1
ProCarManuals.com
Page 222 of 276
![OLDSMOBILE SILHOUETTE 1994 Owners Manual Service &Appeurunce Cure
220
+I
r=J
HORN
prpl
m
STOP-HA2 F-PUMP
m3 AUX
r?]
.pg
TURN BIU
GAGE
prpl LPS
(31 ABS
RDO 2
pTo4
ca
rn
ca
R-WIPER F-WIPER
rfpl IGN
HTR-A/C R-BLWR
Posi OLDSMOBILE SILHOUETTE 1994 Owners Manual Service &Appeurunce Cure
220
+I
r=J
HORN
prpl
m
STOP-HA2 F-PUMP
m3 AUX
r?]
.pg
TURN BIU
GAGE
prpl LPS
(31 ABS
RDO 2
pTo4
ca
rn
ca
R-WIPER F-WIPER
rfpl IGN
HTR-A/C R-BLWR
Posi](/img/31/58207/w960_58207-221.png)
Service &Appeurunce Cure
220
+I
r=J
HORN
prpl
m
STOP-HA2 F-PUMP
m3 AUX
r?]
.pg
TURN BIU
GAGE
prpl LPS
(31 ABS
RDO 2
pTo4
ca
rn
ca
R-WIPER F-WIPER
rfpl IGN
HTR-A/C R-BLWR
Position Rating (AMP.)
CTSY
ELC
HORN STOP HAZ
F PUMP
AUX
TAIL
ECM
TURN B/U
GAGE
LPS
ABS RD02
WIPER
FflIPER
IGN
HTR A/C
R BLWR 15
20
15
15
10
20
15
10
15
7.5
7.5
3
15
20
25 15
25
25
Circuitry
Dome Lamps, Courtesy Lamps, Power Door Lock Switches, Glove
Box Lamp, Power Mirrors, Power Sliding Delay Lock Module
Auto Level Control, Underhood Lamp
Horns, Horn Relay, Safety Belt Buzzer
Front/Rear Turn Lamps, Front Side Marker Lamps, Rear Stop Lamps,
Instrument Cluster Turn Indicator Lamps, Cruise Brake Switch
Fuel Pump, Oil Pressure Sender/Fuel Pump Switch
Radio, Front Cigar Lighter, Accessory Power Outlet
Front Park Lamps, Rear Tail Lamps, Front Side Marker Lamps,
License Plate Lamp, Radio, Heat/Vent/AC Control Head, Power
Sliding Door
Throttle Body Fuel Injection, Fuel Pump Relay, Elec. Vac. Reg. Valve,
Elec. Control Module, Elec. Spark Control Module
Front/Rear Turn Lamps, Front Side Marker Lamps, Cluster Turn
Telltale, Back-up Lamps, Fog Lamps
Cluster, Anti-Lock Brake System Lamp Module, Elec. Level Control Sensor
Cluster, Radio, Wiper Switch, Headlamp Switch? Rear Blower Switch,
Heat/Vent/AC Control Head, Door Switch Illumination, Front/Rear
Ashtray Illumination Bulbs
Anti-Lock Brake System Radio
Rear WiperNasher Motors; Overhead Console Compass
Front Wiperflasher Motor
A/C Compressor, A/C Solenoid Box, Compressor Relay, Temp.
Door
Motor, Low Blower Relay; Heat/Vent/AC Control Head; Cruise
Module; Cooling Fan Relay; Rear Defogger Relay; Key Chime; Vehicle
Speed Sensor Buffer and Generator Charge Discrete, Transaxle
Converter Clutch Switch
Front/Rear Blower Motors, High Blower Relay
Rear Blower, Rear Heat/Vent/AC
ProCarManuals.com
Page 223 of 276

r&
p.L34
R-WIPER
F-WIPER
c-,
HTR-AIC
m3 R-BLWR
1
Position Rating
(AMP.)
CTSY
ELC HORN
STOP HAZ
RDOl/AUX
TAIL
ABS ECM
TURN B/U
GAGE
LPS
RD02
WIPER
FmIPER
IGN
HTR A/C
R BLWR 15
20
15
15
20
15
3
10
15
7.5
7.5
15
20
25
15
25
25
Circuitry
Dome
Lamps! Courtesy Lamps, Power Door Lock Switches, Glove Box
Lamp, Power Mirrors, Power Sliding Delay Lock Module
Auto Level Control, Underhood Lamp
Horns, Horn Relay, Safety Belt Buzzer
Front/Rear Turn Lamps, Front Side Marker Lamps, Rear Stop Lamps,
Instrument Cluster Turn Indicator Lamps
Radio, Front Cigar Lighter, Accessory Power Outlet
Front Park Lamps, Rear Tail Lamps, Front Side Marker Lamps, License
Plate Lamp, Radio, Heat/Vent/AC Control Head, Power Sliding Door
Anti-Lock Bralte/Traction Control System
Mass Air Flow Sensor, Electronic Control Module
Front/Rear Turn Lamps, Front Side Marker Lamps, Cluster Turn Telltale,
Back-up Lamps,
Fog Lamps
Cluster, Anti-Lock Brake System Lamp Module, Elec. Level Control Sensor
Cluster, Radio, Wiper Switch, Headlamp Switch, Rear Blower Switch,
Heat/Vent/AC Control Head, Door Switch Illumination, Front/Rear
Ashtray Illumination Bulbs
Radio
Rear Wiper/Washer Motors; Overhead Console Compass
Front Wipermasher Motor
A/C Solenoid Box, Temp. Door Motor, Low Blower Relay; Heat/Vent/AC
Control Head; Cooling Fan Relay; Rear Defogger Relay; Key Chime;
Transaxle Converter Clutch Solenoid and Generator Charge Discrete
Front/Rear Blower Motors, High Blower Relay
Rear Blower, Rear Heat/Vent/AC
221
ProCarManuals.com