flat tire OLDSMOBILE SILHOUETTE 1994 Owners Manual
[x] Cancel search | Manufacturer: OLDSMOBILE, Model Year: 1994, Model line: SILHOUETTE, Model: OLDSMOBILE SILHOUETTE 1994Pages: 276, PDF Size: 15.82 MB
Page 8 of 276
How to Use this Manual
MANY PEOPLE READ THEIR OWNER’S
manual from beginning to end when
they
first receive their new vehicle.
This
wdl help you learn about the
features and controls for your vehicle.
In
this manual, you’ll find that
pictures and words work together
to explain things quickly.
There are nine parts with thumb-
tabbed pages in this manual.
Each part begins with
a brief list of
contents,
so you can usually tell at a
glance if that part contains the
information you want.
You can bend the manual slightly
to
reveal the tabs that help you find a
part.
6
Part 1: Seats & Restraint Systems
This part tells you how to use your
seats and safety belts properly.
Part 2: Features 8 Controls
This part explains how to start and
operate your Oldsmobile.
Part 4: Your Driving and the Road
Here you’ll find helpful information
and tips about the road and how to
drive under different conditions.
Part 5: Problems on the Road
This part tells you what to do if you
have
a problem while driving, such as
Part 3: Comfort Controls & Audio Systems a flat tire or engine overheating.
This
part tells you how to adjust the
ventilation and comfort controls and
how to operate your audio system.
ProCarManuals.com
Page 87 of 276

When not in use, always cover the
outlet with the protective cap.
NOTICE:
When using the accessory power
outlet:
Maximum load of any electrical
equipment should not exceed
20
amps.
Be sure to turn off any electrical
equipment when not in use. Leaving electrical equipment on
for extended periods can drain
your battery.
Air Infitor System (omow
Your vehicle may be equipped with an
air inflator. With it, you can inflate
things like air mattresses and
basketballs, and you can also use it to
bring your tires up to the proper
pressure.
The air inflator
is located in the rear
compartment on the driver’s side.
To
open, slide the latch down and remove
the cover. The
air inflator kit is stored in a pouch
in the glove box. It includes a 20-foot
(6
m) hose with an air pressure gage,
nozzle adapters and instructions.
85
ProCarManuals.com
Page 148 of 276
Your Driving and the Road
146
flow. Try to merge into the gap at close
to the prevailing speed. Switch on your
turn signal, check your mirrors and
glance over your shoulder as often as
necessary. Try to blend smoothly with
the traffic flow.
Once
you are on the freeway, adjust
your speed to the posted limit or to the
prevailing rate
if it’s slower. Stay in the
right lane unless you want to pass.
Before changing lanes, check your
mirrors. Then use your turn signal.
Just before you leave the lane, glance
quickly over your shoulder to make sure
there isn’t another vehicle in your
“blind” spot.
Once you are moving
on the freeway,
make certain you allow a reasonable
following distance. Expect to move
slightly slower at night.
When you want to leave the freeway,
move to the proper lane well in
advance. If you
miss your exit do not,
under any circumstances, stop and back
up. Drive on to the next exit.
The exit ramp can be curved, sometimes quite sharply. The exit
speed
is usually posted.
Reduce your speed according to your
speedometer, not to your sense of
motion. After driving for any distance at
higher speeds, you may tend to think
you are going slower than you actually
are.
I Before Leaving on a Long
Trip
Make sure you’re ready. Try to be well
rested. If you must start when you‘re
not fresh
- such as after a day’s work
- don’t plan to make too many miles
that first part of the journey. Wear
comfortable clothing and shoes you can
easily drive in.
Is your vehicle ready for a long trip? If
you keep it serviced and maintained, it’s
ready to go. If
it needs service, have it
done before starting out. Of course,
you’ll find experienced and able service
experts in Oldsmobile dealerships all
across North America. They‘ll be ready
and willing to help
if you need it.
Here are some things you can check
before a trip:
Windshield Washer Fluid: Is the
reservoir full? Are
all windows clean
inside and outside?
shape?
you checked all levels?
lenses clean?
safe, trouble-free trip.
Is the tread
good enough for long-distance
driving? Are the tires all inflated to
the recommended pressure?
weather outlook along your route?
Should you delay your trip a short
time to avoid a major storm system?
Maps: Do you have up-to-date maps?
Wiper Blades: Are they in good
Fuel, Engine Oil, Other Fluids: Have
Lights: Are they all working? Are the
Tires: They are vitally important to a
Weather Forecasts: What’s the
Highway Hypnosis
Is tbere actually such a condition as
“highway hypnosis”? Or is it just plain
falling asleep at the wheel? Call it
highway hypnosis, lack of awareness, or
whatever.
ProCarManuals.com
Page 149 of 276
There is something about an easy
stretch
of road with the same scenery,
along with the hum
of the tires on the
road, the drone
of the engine, and the
rush
of the wind against the vehicle that
can make you sleepy. Don’t let it
happen to you!
If it does, your vehicle
can leave the road in
less than a
second, and you could crash and be
injured.
What can you do about highway
hypnosis? First, be aware that it can
happen.
Then here are some tips:
Make sure your vehicle is well
ventilated, with a comfortably cool
interior.
ahead and to the sides. Check your
mirrors and your instruments
frequently.
If you get sleepy, pull off the road into
a rest, service, or parking area and
take a nap, get some exercise, or both.
For safety, treat drowsiness on the
highway as an emergency.
Keep your eyes moving. Scan the road
I
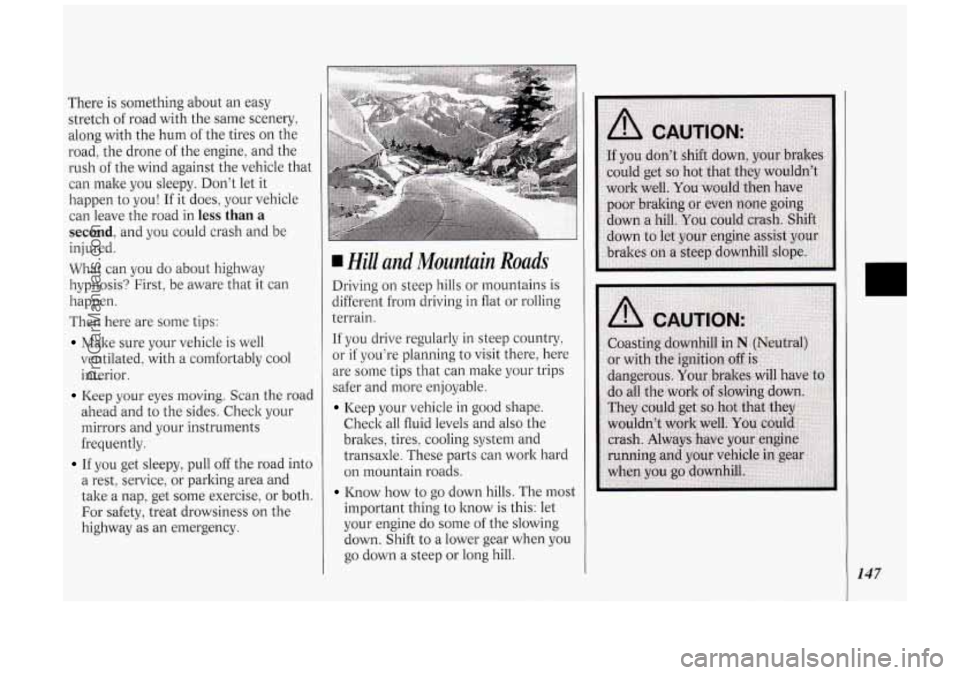
Hill and Mountain Roads
Driving on steep hills or mountains is
different from driving in flat or rolling
terrain.
If you drive regularly in steep countly,
or if you’re planning to visit there, here
are some tips that can make your trips
safer and more enjoyable.
Keep your vehicle in good shape.
Check all fluid levels and also the
brakes, tires, cooling system and
transaxle. These parts can work hard
on mountain roads.
Know how to go down hills. The most
important thing to know
is this: let
your engine do some
of the slowing
down. Shift to a lower gear when you
go down a steep
or long hill.
147
ProCarManuals.com
Page 155 of 276
I
I I
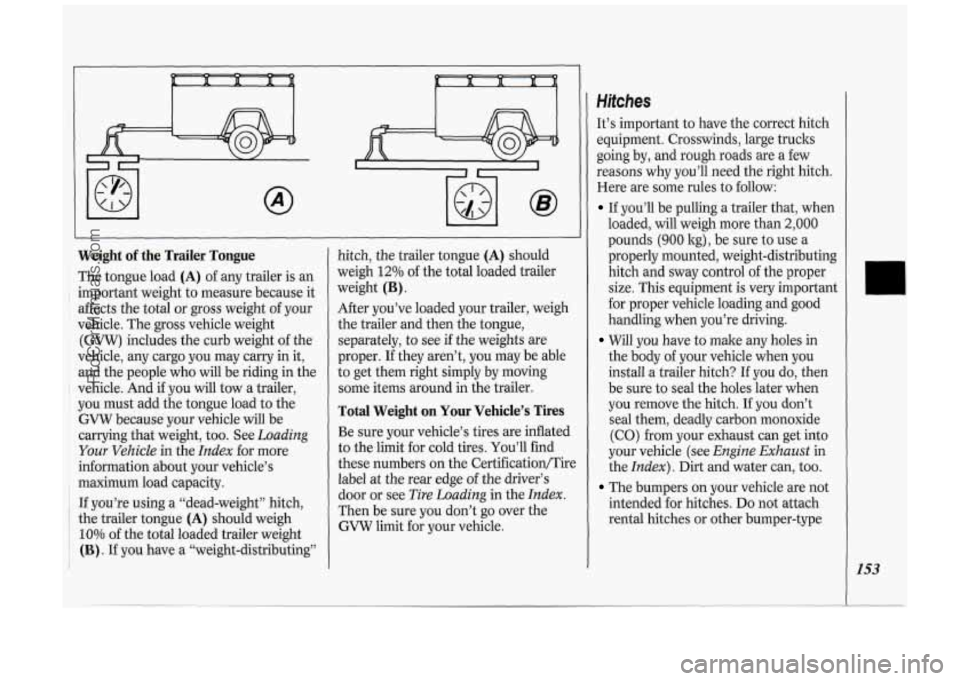
Weight of the Trailer Tongue
The tongue load (A) of any trailer is an
important weight to measure because it
affects the total
or gross weight of your
vehicle. The
gross vehicle weight
(GVW) includes the curb weight of the
vehicle, any cargo you may carry in it,
and the people who will be riding in the
vehicle. And if you will tow a trailer,
you must add the tongue load to the
GVW because your vehicle will be
carrying that weight, too. See
Loading
Your Vehicle in the Index for more
information about your vehicle’s
maximum load capacity.
I If you’re using a “dead-weight’’ hitch, 1 the trailer tongue (A) should weigh
i 10% of the total loaded trailer weight
’ (B). If you have a “weight-distributing”
I
hitch, the trailer tongue (A) should
weigh
12% of the total loaded trailer
weight
(B) .
After you’ve loaded your trailer, weigh
the trailer and then the tongue,
separately, to see
if the weights are
proper. If they aren’t, you may be able
to get them right simply by moving
some items around in the trailer.
Total Weight on Your Vehicle’s Tires
Be sure your vehicle’s tires are inflated
to the limit for cold tires. You’ll find
these numbers on the Certification/Tire
label at the rear edge
of the driver’s
door or see
Tire Loading in the Index.
Then be sure you don’t go over the
GVW limit for your vehicle.
Hifches
It’s important to have the correct hitch
equipment. Crosswinds, large trucks
going by, and rough roads are a few
reasons why you’ll need the right hitch.
Here are some rules to follow:
If you’ll be pulling a trailer that, when
loaded, will weigh more than
2,000
pounds (900 kg), be sure to use a
properly mounted, weight-distributing
hitch and sway control of the proper
size. This equipment is very important
for proper vehicle loading and good
handling when you’re driving.
Will you have to make any holes in
the body of your vehicle when you
install a trailer hitch? If you do, then
be sure to seal the holes later when
you remove the hitch. If you don’t
seal them, deadly carbon monoxide
(CO) from your exhaust can get into
your vehicle (see
Engine Exhaust in
the
Index). Dirt and water can, too.
The bumpers on your vehicle are not
intended for hitches.
Do not attach
rental hitches or other bumper-type
153
ProCarManuals.com
Page 159 of 276
Here you’ll find what to do about
some problems that can occur
on the
road
.
Part 5
Problems on the Road
Hazard Warning Flashers ..................... .. ................................................................ 158 .
Jump Starting ........................................................................\
.................................. 158
Towing Your Vehicle
........................................................................\
....................... 162
Engine Overheating
........................................................................\
......................... 165
If a Tire Goes Flat
........................................................................\
........................... 172
Changing a Flat Tire
........................................................................\
........................ 172
Compact Spare Tire ........................................................................\
........................ 178
If You’re Stuck: In Sand, Mud, Ice or Snow ......................................................... 179
157
ProCarManuals.com
Page 174 of 276
Problems on the Road
1 72
Ifa Tire Goes Flat
It’s unusual for a tire to “blow out”
while you’re driving, especially if
you
maintain your tires properly. If air goes
out of a tire, it’s much more likely to
leak out slowly. But
if you should ever
have a “blowout,” here are a few tips
about what to expect and what to do:
If a front tire fails, the flat tire will
create a drag that pulls the vehicle
toward that side. Take your foot
off the
accelerator pedal and grip the steering
wheel firmly. Steer
to maintain lane
position, then gently brake to a stop
well
out of the traffic lane.
A rear blowout, particularly on a curve,
acts much like a skid and may require
the same correction you’d use in a skid.
In any rear blowout, remove your foot
from the accelerator pedal. Get the
vehicle under control by steering the
way
you want the vehicle to go. It may
be very bumpy and noisy, but you can
still steer. Gently brake to a stop, well
off the road if possible.
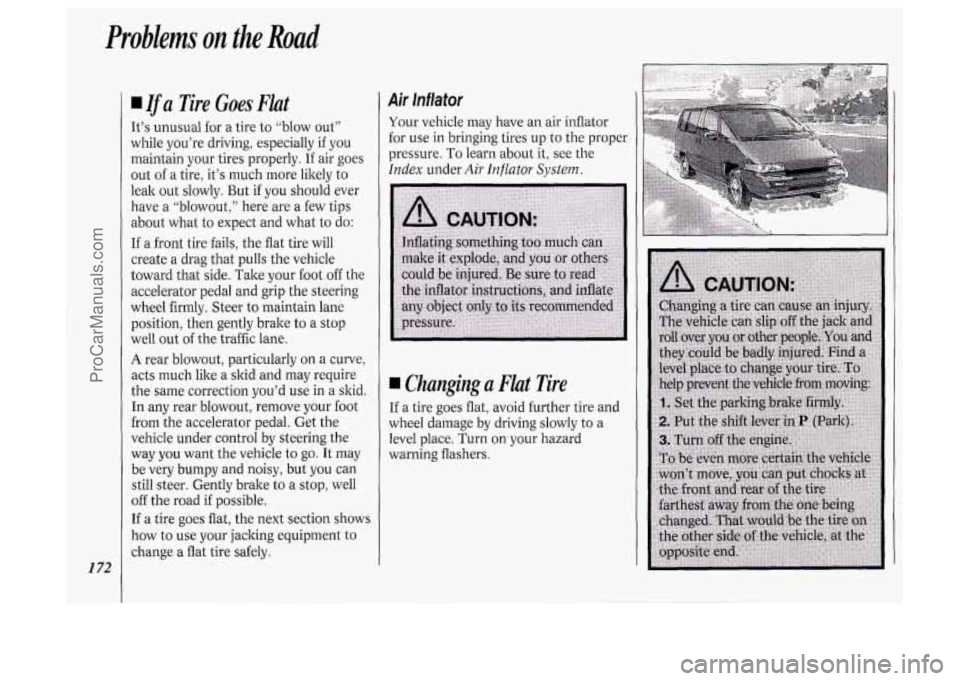
If a tire goes flat, the next section shows
how to
use your jacking equipment to
change a flat tire safely.
Air Inflator
Your vehicle may have an air inflator
for use in bringing tires up to the proper
pressure.
To learn about it, see the
Index under Air Inflator System.
Changing a Flat Tire
If a tire goes flat, avoid further tire and
wheel damage by driving slowly to a
level place. Turn on your hazard
warning flashers.
ProCarManuals.com
Page 176 of 276
Problems on the Road
I 74
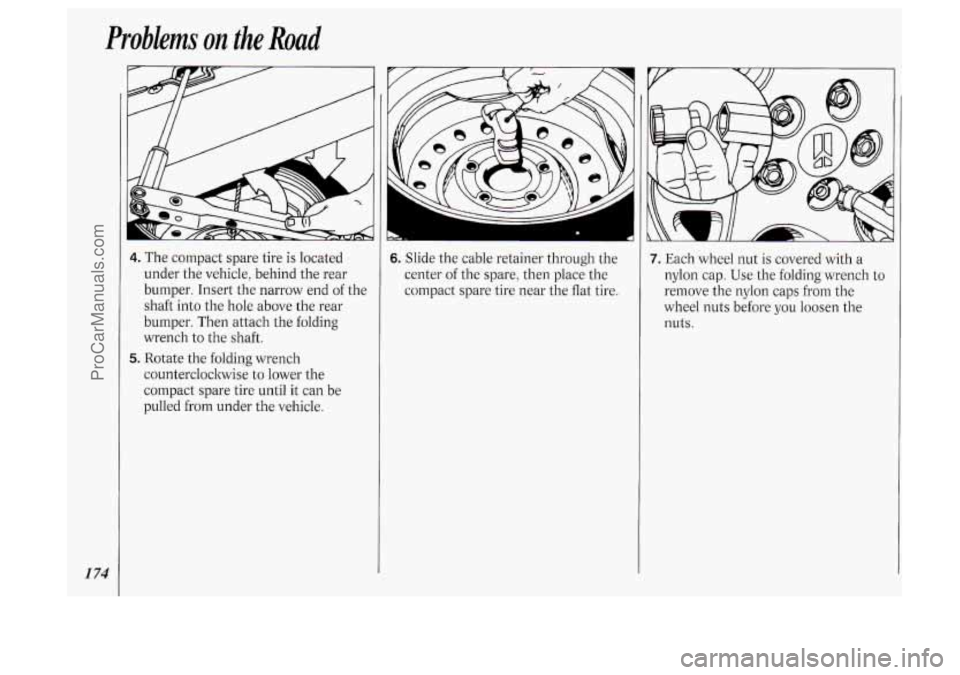
4. The compact spare tire is located
under the vehicle, behind the rear
bumper. Insert the narrow end of the
shaft into the hole above the rear
bumper. Then attach the folding
wrench to the shaft.
counterclockwise to lower the
compact spare tire until
it can be
pulled from under the vehicle.
5. Rotate the folding wrench
I
6. Slide the cable retainer through the
center of the spare, then place the
compact spare tire near the flat tire.
I
7. Each wheel nut is covered with a
nylon cap. Use the folding wrench to
remove the nylon caps from the
wheel nuts before
you loosen the
nuts.
ProCarManuals.com
Page 177 of 276
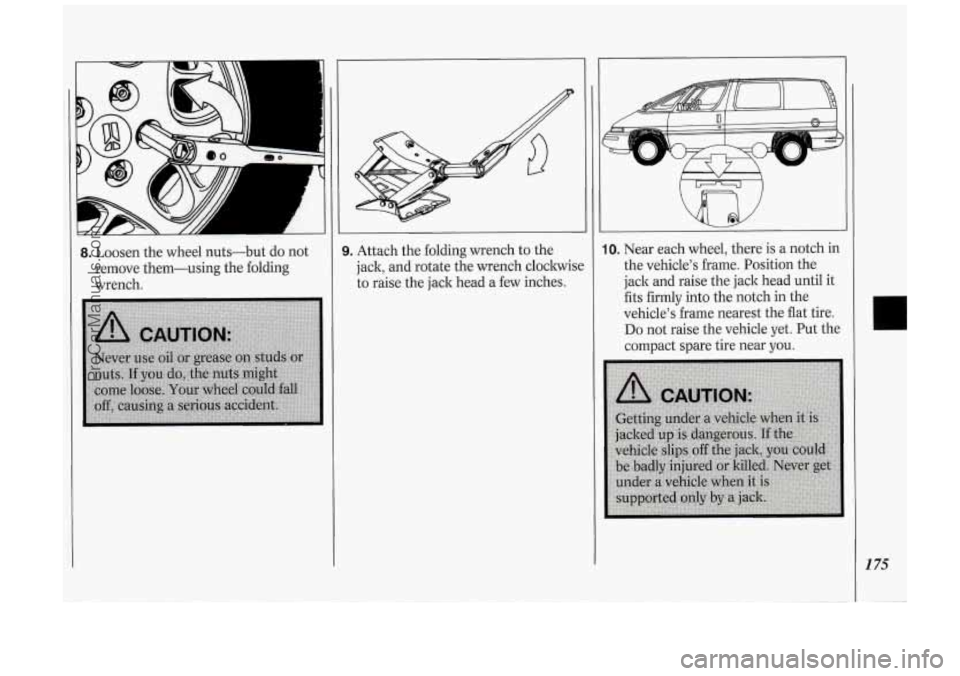
8. Loosen the wheel nuts-but do not
remove them-using the folding
wrench.
I
3. Attach the folding wrench to the
jack, and rotate the wrench cloclwisc
to raise the jack head a few inches. 10. Near each wheel, there is a notch in
the vehicle’s frame. Position the
jack and raise the jack head until it
fits firmly into the notch in the
vehicle’s frame nearest the flat tire.
Do not raise the vehicle yet. Put the
compact spare tire near you.
1 75
ProCarManuals.com
Page 178 of 276
Problems on the Road
1 76
NOTICE:
Raising your vehicle with the jack
improperly positioned will damage
the vehicle or may allow the vehicle
to fall off the jack. Be sure to fit the
jack lift head into the proper
location before raising your vehicle.
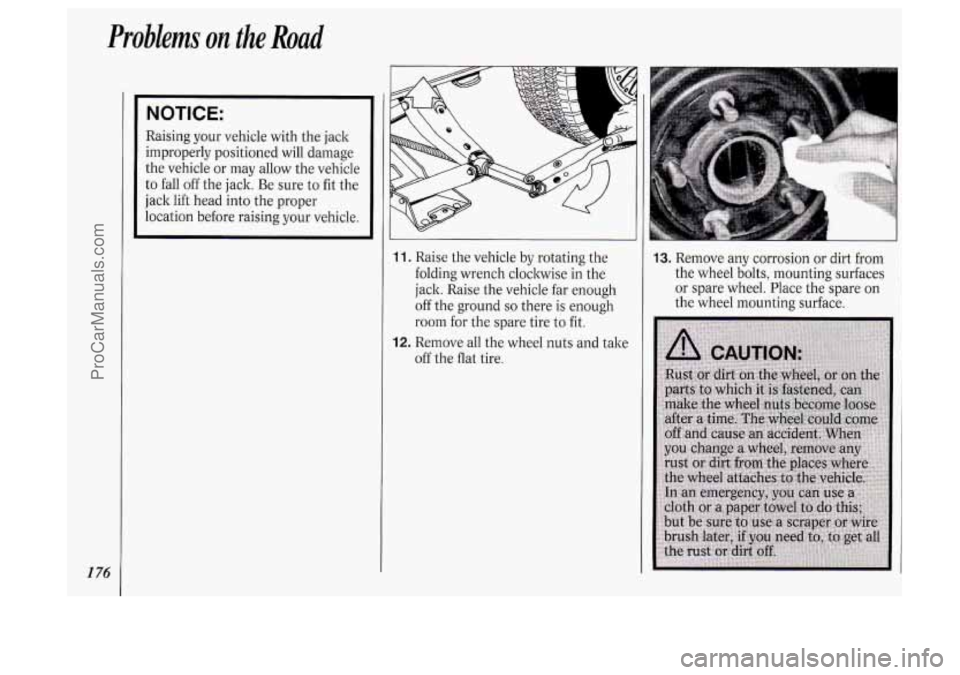
11. Raise the vehicle by rotating the
folding wrench clockwise in the
jack. Raise the vehicle far enough
off the ground
so there is enough
room for the spare tire to fit.
12. Remove all the wheel nuts and take
off the
flat tire.
3. Remove any corrosion or dirt from
the wheel bolts, mounting surfaces
or spare wheel. Place the spare on
the wheel mounting surface.
ProCarManuals.com