fuse OLDSMOBILE SILHOUETTE 1994 Owners Manual
[x] Cancel search | Manufacturer: OLDSMOBILE, Model Year: 1994, Model line: SILHOUETTE, Model: OLDSMOBILE SILHOUETTE 1994Pages: 276, PDF Size: 15.82 MB
Page 12 of 276
How to Use this Manual
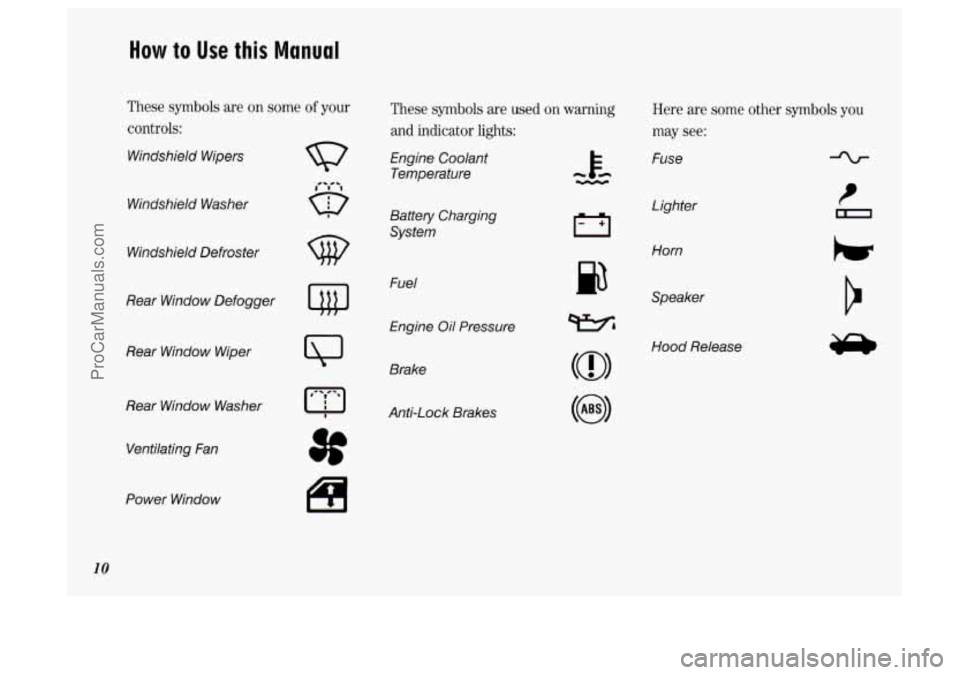
These symbols are on some of your
controls:
Windshield Wipers
Windshield Washer
w
Windshield Defroster
Rear Window Defogger
Rear Window Wiper
Rear Window Washer Ventilating Fan
Power Window
10
3f
These symbols are used on warning
and indicator lights:
Engine Coolant Temperature
Battery Charging
System
Fuel
Engine
Oil Pressure
Brake
AntXock Brakes
p3
Here are some other symbols you
may see:
Fuse
Lighter
Horn
Speaker
Hood Release
ProCarManuals.com
Page 73 of 276
0
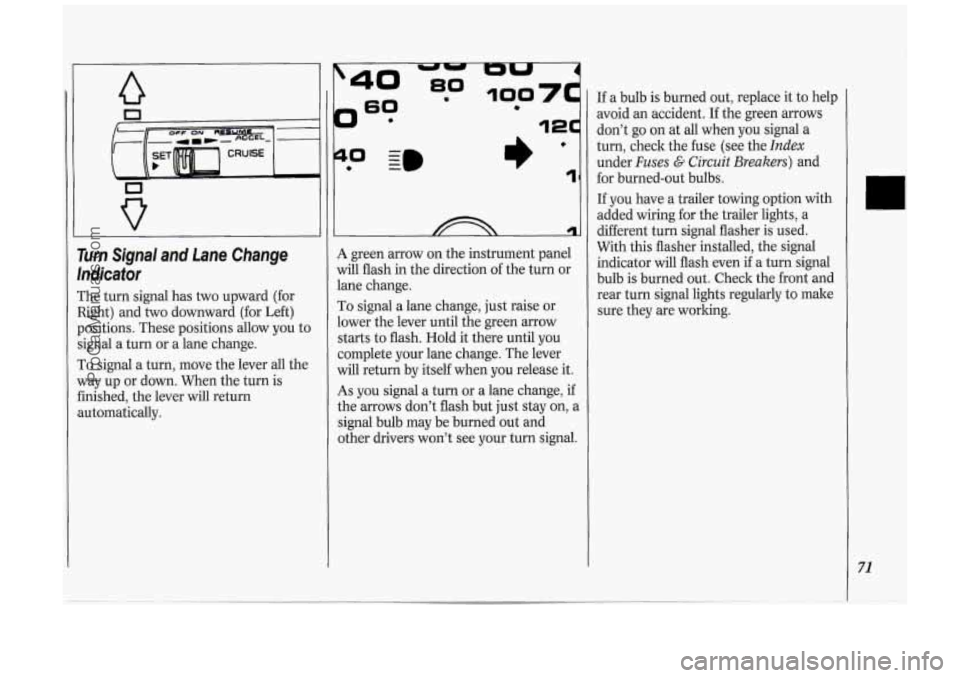
Turn Signal and Lane Change
lndicafor
The turn signal has two upward (for
Right) and two downward (for Left)
positions. These positions allow you to
signal a turn or a lane change.
To signal a turn, move the lever all the
way up or down. When the turn is
finished, the lever will return
automatically.
?
0 - I)’ 1
A green arrow on the instrument panel
will flash in the direction of the turn or
lane change.
To signal a lane change, just raise or
lower the lever until the green arrow
starts to flash. Hold it there until you
complete your lane change. The lever
will return by itself when you release it.
As you signal a turn or a lane change, if
the arrows don’t flash but just stay on, a
signal bulb may be burned out and
other drivers won’t see your turn signal. If
a bulb is burned out, replace it to help
avoid an accident. If the green arrows
don’t go on at all when you signal a
turn, check the fuse (see the
Index
under Fuses G Circuit Breakers) and
for burned-out bulbs.
If you have a trailer towing option with
added wiring for the trailer lights, a
different turn signal flasher is used.
With this flasher installed, the signal
indicator will flash even
if a turn signal
bulb is burned out. Check the front and
rear turn signal lights regularly to make
sure they are working.
71
ProCarManuals.com
Page 90 of 276
Features & Controls
88
I I I I
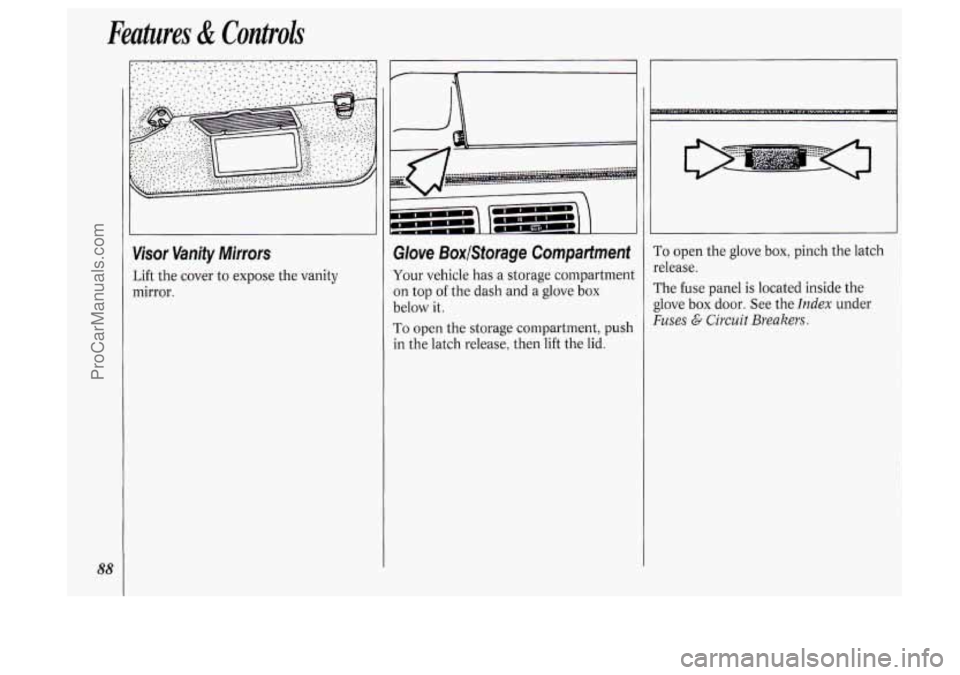
Visor Vanity Mirrors
Lift the cover to expose the vanity
mirror.
I
Glove BoxlStorage Compartment
Your vehicle has a storage compartment
on top of the dash and
a glove box
below it.
To open the storage compartment, push
in the latch release, then lift the lid.
To open the glove box, pinch the latch
release.
The fuse panel is located inside the
glove box door. See the
Index under
Fuses G Circuit Breakers.
ProCarManuals.com
Page 96 of 276
Features & Controls
94
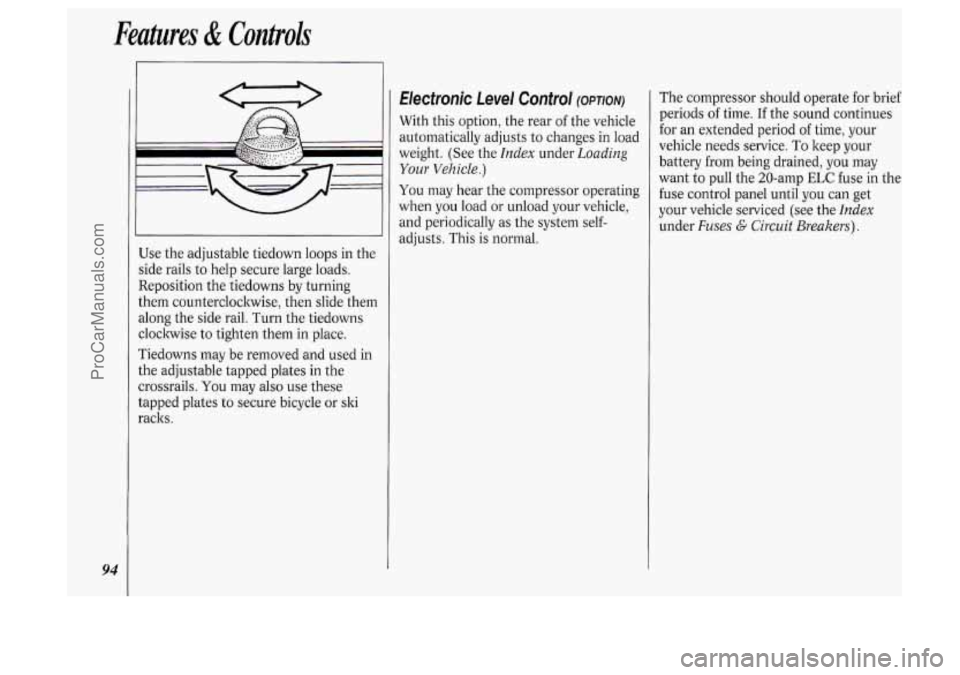
Use the adjustable tiedown loops in the
side rails
to help secure large loads.
Reposition the tiedowns by turning
them counterclockwise, then slide them
along the side rail. Turn the tiedowns
cloclnvise
to tighten them in place.
Tiedowns may be removed and used in
the adjustable tapped plates in the
crossrails.
You may also use these
tapped plates to secure bicycle or ski
racks.
Electronic Level Control (OPTION)
With this option, the rear of the vehicle
automatically adjusts to changes in load
weight. (See the
Index under Loading
Your Vehicle.)
You may hear the compressor operating
when you load or unload your vehicle,
and periodically
as the system self-
adjusts. This is normal. The compressor
should operate for brief
periods of time. If the sound continues
for an extended period
of time, your
vehicle needs service. To keep your
battery from being drained, you may
want to pull the 20-amp
ELC fuse in the
fuse control panel until you can get
your vehicle serviced (see the
Index
under Fuses G Circuit Breakers).
ProCarManuals.com
Page 99 of 276
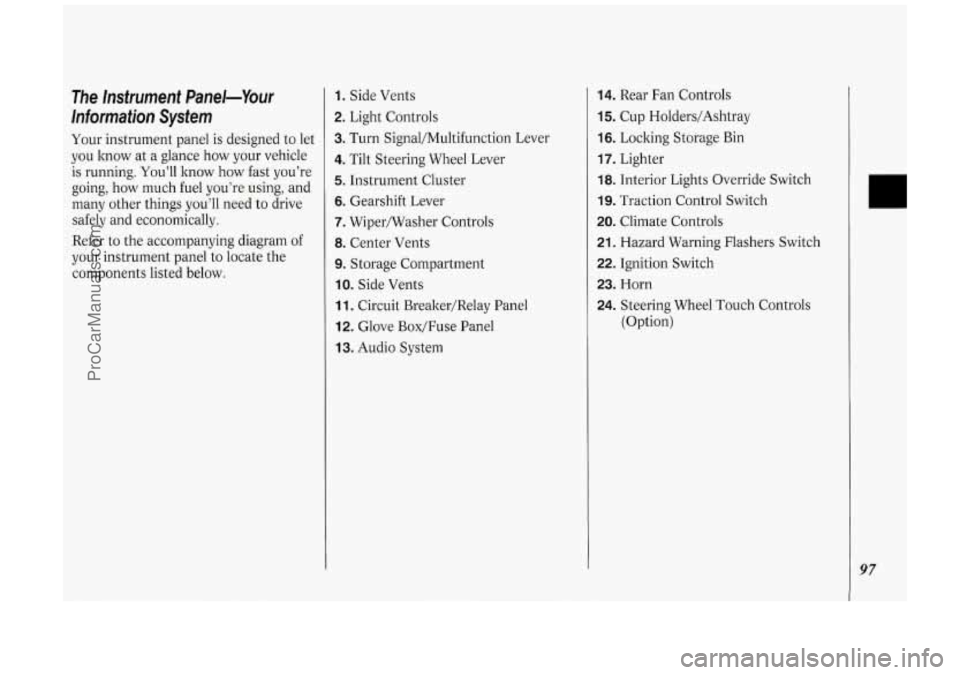
The Instrument Panel-Your
Information System
Your instrument panel is designed to let
you know at
a glance how your vehicle
is running. You’ll know how fast you’re
going, how much fuel you’re using, and
many other things you’ll need
to drive
safely
and economically.
Refer to the accompanying diagram
of
your instrument panel to locate the
components listed below.
1. Side Vents
2. Light Controls
3. Turn Signal/Multifunction Lever
4. Tilt Steering Wheel Lever
5. Instrument Cluster
6. Gearshift Lever
7. Wipermasher Controls
8. Center Vents
9. Storage Compartment
IO. Side Vents
11. Circuit Brealter/Relay Panel
12. Glove Box/Fuse Panel
13. Audio System
14. Rear Fan Controls
15. Cup Holders/Ashtray
16. Locking Storage Bin
17. Lighter
18. Interior Lights Override Switch
19. Traction Control Switch
20. Climate Controls
21. Hazard Warning Flashers Switch
22. Ignition Switch
23. Horn
24. Steering Wheel Touch Controls
(Option)
97
ProCarManuals.com
Page 183 of 276
Here you will find information about
the care of
your Oldsmobile . This
part begins with service and fuel
information. and then it shows how
to check important fluid and
lubricant levels
. There is also
technical information about
your
vehicle. and a section devoted to its
appearance care
.
Part 6
Service & Appearance Care
Service ........................................................................\
............................................. 182
Fuel
........................................................................\
.................................................. 183
Hood Release ........................................................................\
................................... 186
Engine Oil ........................................................................\
........................................ 190
Air Cleaner
........................................................................\
...................................... 194
Transaxle Fluid
........................................................................\
................................ 195
Engine Coolant
........................................................................\
................................ 197
Power Steering Fluid
........................................................................\
....................... 199
Windshield Washer Fluid
........................................................................\
................ 200
Brakes
........................................................................\
.............................................. 201
Battery
........................................................................\
............................................. 203
Bulb Replacement
........................................................................\
........................... 203
Windshield Wiper Blade Replacement
................................................................... 205
Loading Your Vehicle
........................................................................\
..................... 206
Tires
........................................................................\
................................................. 207
Appearance Care ........................................................................\
............................. 212
Vehicle Identification Number (VIN)
.................................................................... 218
Add-on Electrical Equipment
........................................................................\
........ 219
Fuses & Circuit Breakers ........................................................................\
................ 219
Capacities and Specifications
........................................................................\
......... 224
Normal Maintenance Replacement Parts
............................................................... 226
Fluids
& Lubricants ........................................................................\
........................ 227
Replacement
Bulbs ........................................................................\
.......................... 228
181
ProCarManuals.com
Page 221 of 276

Ad-On Electrical Equiprnent
NOTICE:
Don’t add anything electrical to
your Oldsmobile unless you check
with your dealer first. Some electrical
equipment can damage your vehicle
and the damage wouldn’t be
covered by your warranty. Some
add-on electrical equipment can
keep other components from
working as they should.
Your vehicle has an air bag system.
Before attempting to add anything
electrical to your Oldsmobile, see
Servicing Your Air Bag-Equipped
Oldsmobile
in the Index.
Fuses & Circuit Breakers
The wiring circuits in your vehicle are
protected from short circuits
by a
:ombination of fuses and circuit
breakers in the wiring itself. This greatly
reduces the chance of damage caused
by electrical problems.
To identify and check fuses, refer to the
Fuse panel, which is behind the
glove
box door, and the fuse usage chart later
in this section.
To remove a fuse, grasp it firmly and
pull.
U
Look at the silver-colored band inside
the fuse.
If the band is broken or
melted, replace the fuse. Be sure you
replace a bad fuse with a new one of the
correct size.
219
ProCarManuals.com
Page 224 of 276
Service &Appearance Care
222
I
1-
9 0
U
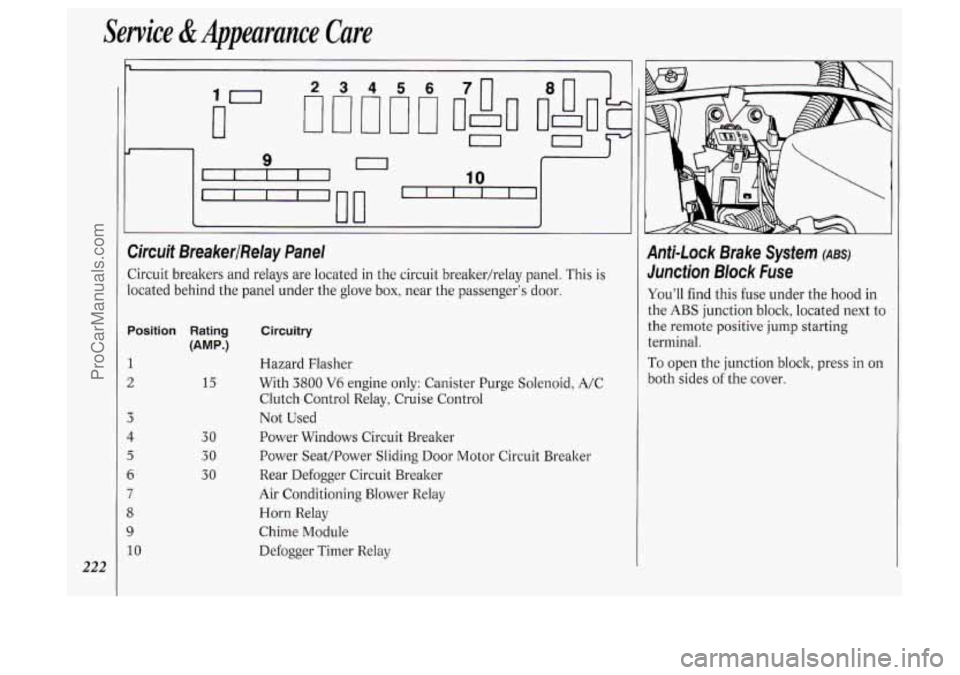
Circuit BreakerlRelay Panel
Circuit breakers and relays are located in the circuit breakerhelay panel. This is
located behind the panel under the glove box, near the passenger's door.
Position Rating
(AMP.)
1
2
3
I
5
6
7
3
3
10
15
30
30
30
Circuitry
Hazard Flasher
With
3800 V6 engine only: Canister Purge Solenoid, A/C
Clutch Control Relay, Cruise Control
Not Used
Power Windows Circuit Breaker
Power Seat/Power Sliding
Door Motor Circuit Breaker
Rear Defogger Circuit Breaker
Air Conditioning Blower Relay
Horn Relay
Chime Module
Defogger Timer Relay
Anti-Lock Brake System (ABS)
Junction Block Fuse
You'll find this fuse under the hood in
the
ABS junction block, located next to
the remote positive
jump starting
terminal.
To open the junction block, press in on
both sides of the cover.
ProCarManuals.com
Page 225 of 276
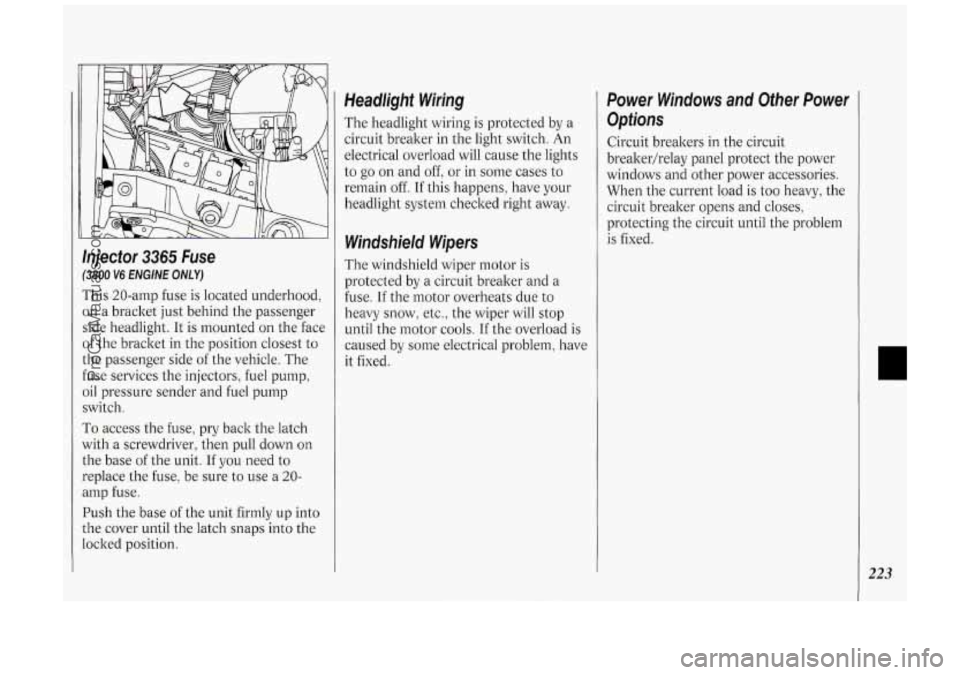
Injector 3365 Fuse
(3800 V6 ENGINE ONLY)
This 20-amp fuse is located underhood,
on a bracket just behind the passenger
side headlight. It is mounted on the face
of the bracket in the position closest to
the passenger side of the vehicle. The
fuse services the injectors, fuel pump,
oil pressure sender and fuel pump
switch.
To access the fuse, pry back the latch
with a screwdriver, then pull down on
the base
of the unit. If you need to
replace the fuse, be sure to use a 20-
amp fuse.
Push the base of the unit firmly up into
the cover until the latch snaps into the
locked position.
Headlight Wiring
The headlight wiring is protected by a
circuit breaker in the light switch. An
electrical overload will cause the lights
to go on and off: or
in some cases to
remain off. If this happens, have your
headlight system checked right away.
Windshield Wipers
The windshield wiper motor is
protected by a circuit breaker and a
fuse.
If the motor overheats due to
heavy snow, etc., the wiper will stop
until the motor cools.
If the overload is
caused by some electrical problem, have
it fixed.
Power Windows and Other Power
Options
Circuit breakers in the circuit
breakerhelay panel protect the power
windows and other power accessories.
When the current load is too heavy, the
circuit breaker opens and closes,
protecting the circuit until the problem
is fixed.
223
ProCarManuals.com
Page 265 of 276

lndex
Accessory Power Outlet ................... 84
Adding Brake Fluid
............................. 201. 227
Electrical Equipment
........ .60. 117 . 2 19
Engine Coolant
.......... 167.197.224. 227
Engine Oil
.............................. 190. 224
Power Steering Fluid
..... 199.225. 227
Sound Equipment
.......................... 11 7
Transaxle Fluid
.............. 195. 224. 227
Windshield Washer Fluid
...... 200. 227
Air Bag Readiness Light
..................... 27
Air Bags
............................................... 26
Air Cleaner
............................... 194. 226
Air Conditioner
................................ 11 1
Air Inflator System ............................. 85
Alcohol. Driving Under the
Influence
of ..................................... 132
Alcohol in Gasoline
.......................... 183
Aluminum Wheels .................... 21 1. 216
Antenna
............................................ 129
Anti-Lock
.......................................... 135
Anti-Lock Brake System
................... 135
Brake Master Cylinder ................... 201
Junction Block Fuse
...................... 222
Warning Light
................................ 104
Appearance Care
.............................. 212
Adjusting
Rear Seats
.......................... 17
Antifreeze
......................... 197. 224. 227
Ashtrays and Lighter
.................... 89. 90 Audio
Systems
.................................. 117
AM/FM Stereo Radio
.................... 1 19
AM/FM Stereo Radio with Compact
Disc Player
..................................... 124
Care
of Audio Systems .................. 128
Setting the Clock
........................... 117
Steering Wheel Touch Controls
.... 127
Adding Fluid
.................. 197. 225. 227
Checking Fluid
............................... 195
Shifting
............................................. 62
Battery
............................................ 203
Jump Starting
................................. 158
Battery Warning Gage ...................... 103
Blizzard
............................................. 149
Brake Cassette
Player
...................... 120. 122
Radio Reception. For the Best
...... 128
Automatic Transaxle
(( Blowout. .. Tire ................................ 172
Adjustment
.................................... 202
Anti-Lock Brakes
.......................... 135
Anti-Lock Brake System Warning
Light
............................................ 104
Fluid
....................................... 201. 227
Parking
............................................. 65
Pedal Travel
................................... 202
Rear
Drums .................................... 202
Junction
Block Fuse
...................... 222
Master Cylinder
............................. 201 Warning Light
................................ 103
Wear Indicators
............................. 202
Brake System Warning Light
........... 103
Braking
............................................. 134
Braking in Emergencies
................... 138
Braking Technique
........................... 134
“Break.1n.
.. New Vehicle ............. 57. 152
Bucket Seats. Removable Rear
.......... 15
Buckling Up (see
Safety Belts)
Bulb Replacement
Headlight
....................................... 203
Taillight
.......................................... 204
Bulbs, Replacement
.......................... 228
Capacities
81 Specifications ............ 224
Carbon Monoxide in
Exhaust
...................... 57, 68. 150. 154
Cassette Tape Player
(see
Audio Systems )
Center Passenger Position
(see
Safety Belts)
Chains. Safety ................................... 154
Chains. Tire
.............................. 179, 212
Changing a Flat Tire
......................... 172
Checking
Brake Fluid
.................................... 201
Engine Coolant
.............................. 197
Engine Oil ...................................... 190
Power Steering Fluid
..................... 199
Safety Belt Systems
......................... 41
.
263
ProCarManuals.com