ECO mode OLDSMOBILE SILHOUETTE 1995 Owners Manual
[x] Cancel search | Manufacturer: OLDSMOBILE, Model Year: 1995, Model line: SILHOUETTE, Model: OLDSMOBILE SILHOUETTE 1995Pages: 390, PDF Size: 20.27 MB
Page 76 of 390

If you have the Remote Lock Control system, there are
three additional ways
you can disable the lock delay
feature (see “Remote Lock Control” later in this
section):
Press the unlock symbol on your remote transmitter,
Return the shift lever to PARK (P), or
Turn the ignition off.
Customizing Your Automatic Door Locks Feature
With the Remote Lock Control system you can
customize your automatic door locks feature to suit your
individual needs. (See “Remote Lock Control” later in
this section.)
With
the doors closed and the ignition on, press and hold
the driver’s side power door lock switch in the lock
position for
10 seconds. The doors will lock, then
unlock, indicating that you have 10 seconds in which to
program one
of four custom modes:
Unlock the Driver’s Door Only: To program the
automatic door locks system
to unlock only the driver’s
door when the shift lever is returned to PARK
(P), press
the unlock symbol
on your remote transmitter once. The
driver’s door will unlock, indicating that this mode has
been successfully programmed.
Unlock All Doors: To program the automatic door locks
system
to unlock all doors when the shift lever is
returned to PARK (P), press the unlock symbol on your
remote transmitter once (the driver’s door will unlock),
then press the unlock symbol again. All doors will
unlock, indicating that this mode
has been successfully
programmed.
All Doors Remain Locked: To program the automatic
door locks system to leave
all doors locked when the
shift lever
is returned to PARK (P), press the lock
symbol on your remote transmitter once. All doors will
lock, indicating that this mode has been successfully
programmed.
ProCarManuals.com
Page 160 of 390
Air Conditioner
When the temperature outside is above freezing, the air
conditioner compressor will automatically condition the air when you press RECIRC (the A/C indicator light will glow),
DEFOG or DEF (the A/C indicator light will not glow).
Press A/C (the
A/C indicator light will glow) to condition
the air when you press UPPER, BI-LEV or
LOWER. To
turn off the air conditioner compressor
in these settings,
press A/C again (the indicator light will go off).
Each time
you turn on the ignition, the air conditioner
will default
to the setting you had selected before last
turning off the ignition.
When the air conditioner compressor is
on, you may
sometimes notice slight changes in your vehicle’s engine
performance and power. This
is normal. The system is
designed to help fuel economy while
it maintains the
desired cooling level.
The air conditioner removes moisture from the air,
so
you may sometimes notice water dripping from under
your vehicle when it is idling or after it has been turned
off. This is normal.
On very hot days,
your vehicle will cool down more
quickly and economically if you open the windows long
enough
to let hot, inside air escape. For all settings, adjust
the temperature control lever and fan speed as desired.
Directional Controls
RECIRC: Press to get maximum cooling or quick
cool-down
on very hot days. This setting recirculates
much of the air inside your vehicle. It should not be
used for long periods
of time because the air may
become too cold and dry.
Slide the temperature control lever down to the coolest
setting and adjust the fan speed as desired.
UPPER: For normal cooling on hot days, press A/C
along with UPPER. This setting cools outside air and
directs it through the instrument panel outlets. Adjust
the temperature of the air with the temperature control
lever.
BI-LEV: This setting is designed for use on sunny days
when the air is only moderately warm or cool. On days
like these, the sun may adequately warm your upper
body, but your lower body may
not be warm enough.
The BI-LEV setting directs outside air into your vehicle
in two ways. Cooler air is directed toward your upper
body through the front instrument panel outlets, while
warmed air is directed through the heater ducts at your
feet. At times this temperature difference may be more
apparent than others. For best results, slide the
temperature control lever to the middle position, and
then adjust for comfort.
3-2
ProCarManuals.com
Page 161 of 390
LOWER: This setting brings in most of the heated air through
the heater ducts, and some through the defroster vents.
DEFOG: This mode is particularly useful during cold or
inclement weather, because of your Silhouette’s larger
windshield area. Press this button to direct warmed
air to
the windshield and through the heater ducts.
DEF: Press this button to direct most of the warmed air
to the windshield and side window vents.
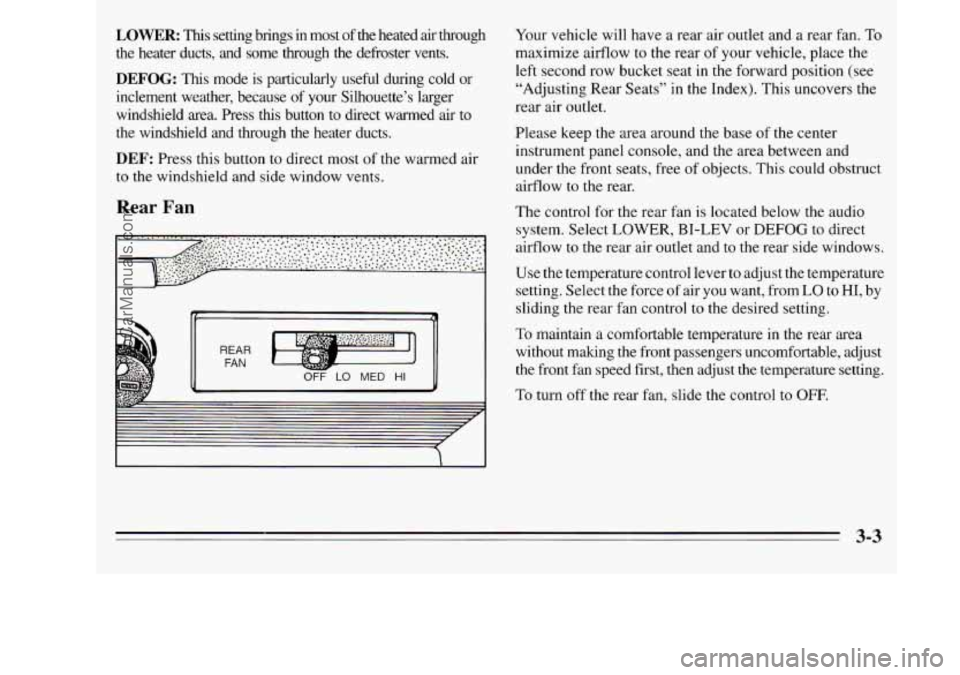
Rear Fan
OFF LO MED HI
Your vehicle will have a rear air outlet and a rear fan. To
maximize airflow to the rear of your vehicle, place the
left second row bucket seat in the forward position (see
“Adjusting Rear Seats” in the Index). This uncovers the
rear air outlet.
Please keep the area around the base of
the center
instrument panel console, and the area between and
under the front seats, free of objects. This could obstruct
airflow to the rear.
The control for the rear fan is located below the audio
system. Select LOWER, BI-LEV or DEFOG to direct
airflow
to the rear air outlet and to the rear side windows.
Use the temperature control lever to adjust the temperature
setting. Select the force
of air you want, from LO to HI, by
sliding the rear fan control to the desired setting.
To maintain a comfortable temperature in the rear area
without making the front passengers uncomfortable, adjust
the front fan speed first, then adjust the temperature setting.
To turn off the rear fan, slide the control to OFF.
3-3
ProCarManuals.com
Page 175 of 390
RCL: Press this button once to see which track is
playing. Press it again within five seconds to see how
long your selection has been playing. The track number
also will be displayed when the volume is changed or a
new track starts to play.
PREV: Press this button to play a track again. If you
hold or keep pressing the PREV button, the disc will
keep backing up to previous tracks.
NEXT Press this button when you want to hear the next
track before the track you are listening to has finished.
If
you hold or keep pressing the NEXT button, the disc
will keep advancing
to other tracks.
REV: Press and hold this button to rapidly back up to a
favorite passage. Release it to resume playing.
FF: Press and hold this button to rapidly advance the
disc. Release
it to resume playing.
COMP: Press this button to make soft and loud
passages more alike in volume. Press it again
to resume
normal play.
When Finished with the Compact Disc Player
If you press POWER or turn off the ignition, the disc
will stay
in the player and start again when you turn on
the ignition or power switch. The disc will begin playing
at the point where it had been stopped.
STEL: Press this button to stop the disc player (the
radio will then play). Press
it again to play the disc (the
player will start playing the disc where it was stopped
earlier).
EJCT Press this button to eject the disc (the radio will
then play).
CD Player Anti-Theft Feature
Delco LOC 11' is a security feature for the compact disc
player. It can be used or ignored. If ignored, the system
plays normally. If it is used, your player won't be usable
if it is ever stolen, because it will go to
LOC mode any
time battery power is removed. Until an unlock code is
entered, it will not turn
on.
The instructions that follow tell you how to enter a
secret code into the system. If your vehicle loses battery
power for any reason, you must unlock the system with
the secret code before the radio will turn on.
3-17
ProCarManuals.com
Page 177 of 390
To Unlock the System After a Power Loss
When battery power is reapplied to a secured radio, the
radio won’t turn on and LOC will appear on the display.
Enter your secret code as follows; pause no more than
15 seconds between steps.
1. Turn the ignition on (radio off).
2. Press the SET button. The display will show “OOO.”
3. Enter the six digits of the code following steps 6-9
under “To Set the Anti-Theft System.” The display
will show the numbers
as entered.
4. Press the AM FM button. If the time appears, the
disabling sequence was successful.
If the display
indicates SEC, the numbers did not match and the
unit is still secured.
Disabling the Anti-Theft System
1.
2.
3.
4.
5.
6.
7.
Press PREV and FF together for five seconds with
the ignition on and the radio power off. The display
will show SEC, indicating the unit is
in the
“secured” mode. (If
“---” appears on the display,
the anti-theft system has already been disabled.)
Press the SET button. The display will show
“000.”
Press and hold SEEK until the first digit of your
code appears.
Press and hold SCAN until the second and third
digits of your code appear.
Press the AM FM button. The radio will display
“000.”
Repeat steps 3 and 4 to enter the second three digits
of the code. The display will show the numbers as
entered.
Press the
AM FM button. If “---,” then the time
appears, the disabling sequence was successful (the
numbers matched the secret code) and the unit is in
the “unsecured” mode.
If the display shows SEC, the
disabling sequence was unsuccessful (the numbers
did not match) and the unit will remain in the
“secured” mode.
ProCarManuals.com
Page 290 of 390
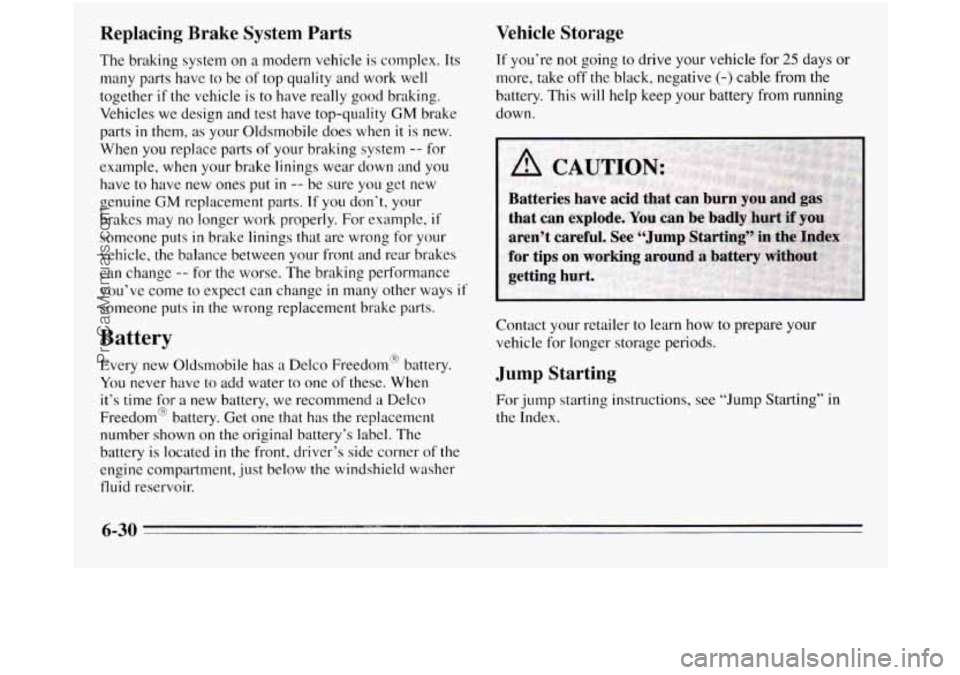
Replacing Brake System Parts
The braking system on a modern vehicle is complex. Its
many parts have to
be of top quality and work well
together
if the vehicle is to have really good braking.
Vehicles we design and test have top-quality
GM brake
parts
in them, as your Oldsmobile does when it is new.
When you replace parts of your braking system
-’- for
example, when your brake linings wear down and you
have to have new ones put
in -- be sure you get new
genuine
GM replacement parts. If you don‘t, your
brakes may no longer work properly. For example.
if
someone puts in brake linings that are wrong for your
vehicle, the balance between your front and rear brakes
can change
-- for the worse. The braking performance
you’ve
come to expect can change in many other ways if
someone puts in the wrong replacement brake parts.
Battery
Every new Oldsmobile has a Delco Freedom@ battery.
You never have to add water to one of these. When
it’s time
for a new battery, we recommend a Delco
Freedom@ battery. Get one that has
the replacement
number shown on the original battery’s label. The
battery is located in the front, driver’s side corner
of the
engine compartment, just below
the windshield washer
fluid reservoir.
Vehicle Storage
If you’re not going to drive your vehicle for 25 days or
more, take off the black, negative (-) cable from the
battery. This will help keep your battery from running
down.
Contact your retailer to learn how to prepare your
vehicle for longer storage periods.
Jump Starting
For jump starting instructions, see “Jump Starting” in
the Index.
6-30
ProCarManuals.com
Page 318 of 390
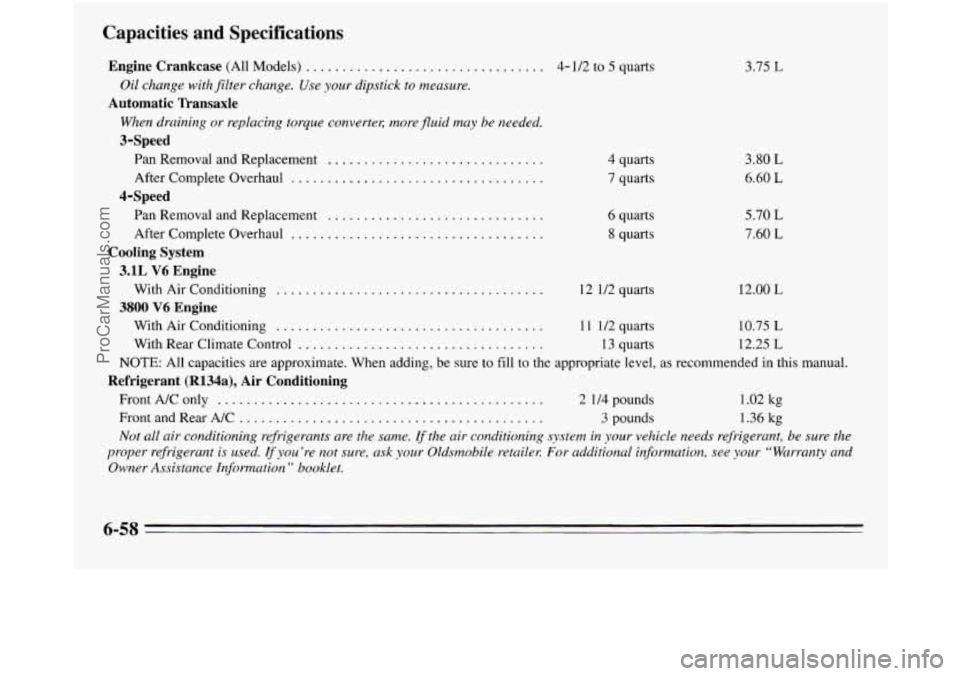
Capacities and Specifications
Engine Crankcase (All Models) ...........................
Oil change with filter change. Use your dipstick to measure.
Automatic Transaxle
When draining or replacing torque convertec more fluid may be needed.
3-Speed
Pan Removal and Replacement ..............................
After Complete Overhaul ...................................
Pan Removal and Replacement ..............................
4-Speed
. . 4-1/2 to 5 marts 3.75 L
4 quarts
7 quarts
6 quarts
8 quarts
12 11’2 quarts 3.80
L
6.60 L
5.70 L
7.60 L
12.00 L
After Complete Overhaul ...................................
Cooling System
3.1L
V6 Engine
3800
V6 Engine
With Air Conditioning .....................................
With Air Conditioning ..................................... 11 1/2 quarts 10.75 L
With Rear Climate Control .................................. 13 quarts 12.25 L
NOTE: All capacities are approximate. When adding, be sure to fill to the appropriate level, as recommended in this manual.
FrontA/Conly
............................................. 2 1/4 pounds 1.02 kg
Front and Rear A/C .......................................... 3 pounds 1.36 kg
Not all air conditioning refrigerants are the same. If the air conditioning s-ystem in your vehicle needs refrigerant, be sure the
proper
refrigerant is used. If you’re not sure, ask your Oldsmobile retailer: For additional information, see your “Warranty and
Owner Assistance Information
” booklet.
Refrigerant (R134a), Air Conditioning
6-58
ProCarManuals.com