air condition OLDSMOBILE SILHOUETTE 1995 Owners Manual
[x] Cancel search | Manufacturer: OLDSMOBILE, Model Year: 1995, Model line: SILHOUETTE, Model: OLDSMOBILE SILHOUETTE 1995Pages: 390, PDF Size: 20.27 MB
Page 123 of 390
L
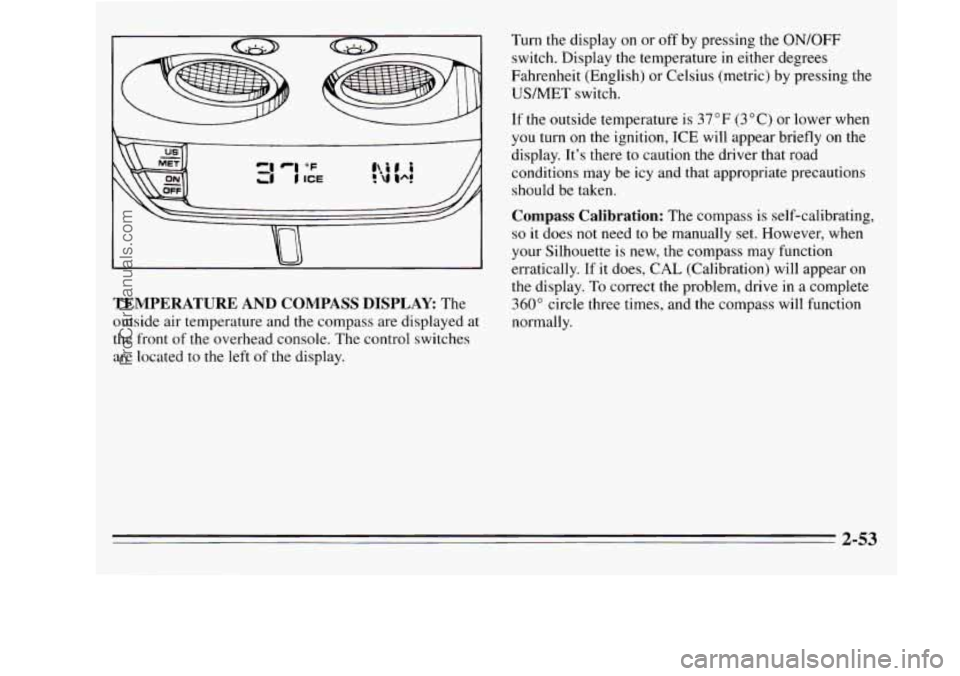
TEMPERATURE AND COMPASS DISPLAY The
outside air temperature and the compass are displayed at
the front of the overhead console. The control switches
are located to the left of the display. Turn the display
on or
off by pressing the ON/OFF
switch. Display the temperature in either degrees
Fahrenheit (English) or Celsius (metric) by pressing the
USMET switch.
If the outside temperature is 37°F (3°C) or lower when
you turn
on the ignition, ICE will appear briefly on the
display. It's there to caution the driver that road
conditions may be icy and that appropriate precautions
should be taken.
Compass Calibration: The compass is self-calibrating,
so it does not need to be manually set. However, when
your Silhouette is new, the compass may function
erratically.
If it does, CAL (Calibration) will appear on
the display.
To correct the problem, drive in a complete
360" circle three times, and the compass will function
normally.
ProCarManuals.com
Page 159 of 390
Section 3 Comfort Controls and Audio Systems
Q
~
In this section you’ll find out how to operate the comfort
control systems and audio systems offered with your
Oldsmobile. Be sure to read about the particular system
supplied with your vehicle.
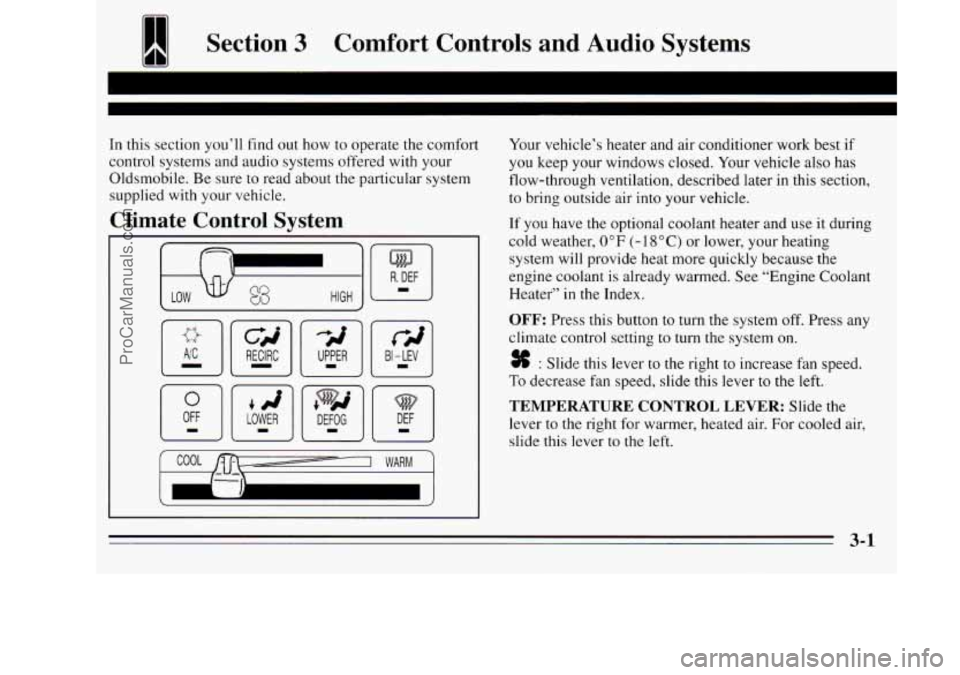
Zllimate Control System
COOL /st /--- I WARM --
Your vehicle’s heater and air conditioner work best if
you keep your windows closed. Your vehicle also has
flow-through ventilation, described later in this section,
to bring outside air into your vehicle.
If you have the optional coolant heater and use it during
cold weather,
0°F (- 1 8 “C) or lower, your heating
system will provide heat more quickly because the
engine coolant is already warmed. See “Engine Coolant
Heater”
in the Index.
OFF: Press this button to turn the system off. Press any
climate control setting to turn the system on.
* : Slide this lever to the right to increase fan speed.
To decrease fan speed, slide this lever to the left.
TEMPERATURE CONTROL LEVER: Slide the
lever to the right for warmer, heated air. For cooled air,
slide this lever
to the left.
ProCarManuals.com
Page 160 of 390
Air Conditioner
When the temperature outside is above freezing, the air
conditioner compressor will automatically condition the air when you press RECIRC (the A/C indicator light will glow),
DEFOG or DEF (the A/C indicator light will not glow).
Press A/C (the
A/C indicator light will glow) to condition
the air when you press UPPER, BI-LEV or
LOWER. To
turn off the air conditioner compressor
in these settings,
press A/C again (the indicator light will go off).
Each time
you turn on the ignition, the air conditioner
will default
to the setting you had selected before last
turning off the ignition.
When the air conditioner compressor is
on, you may
sometimes notice slight changes in your vehicle’s engine
performance and power. This
is normal. The system is
designed to help fuel economy while
it maintains the
desired cooling level.
The air conditioner removes moisture from the air,
so
you may sometimes notice water dripping from under
your vehicle when it is idling or after it has been turned
off. This is normal.
On very hot days,
your vehicle will cool down more
quickly and economically if you open the windows long
enough
to let hot, inside air escape. For all settings, adjust
the temperature control lever and fan speed as desired.
Directional Controls
RECIRC: Press to get maximum cooling or quick
cool-down
on very hot days. This setting recirculates
much of the air inside your vehicle. It should not be
used for long periods
of time because the air may
become too cold and dry.
Slide the temperature control lever down to the coolest
setting and adjust the fan speed as desired.
UPPER: For normal cooling on hot days, press A/C
along with UPPER. This setting cools outside air and
directs it through the instrument panel outlets. Adjust
the temperature of the air with the temperature control
lever.
BI-LEV: This setting is designed for use on sunny days
when the air is only moderately warm or cool. On days
like these, the sun may adequately warm your upper
body, but your lower body may
not be warm enough.
The BI-LEV setting directs outside air into your vehicle
in two ways. Cooler air is directed toward your upper
body through the front instrument panel outlets, while
warmed air is directed through the heater ducts at your
feet. At times this temperature difference may be more
apparent than others. For best results, slide the
temperature control lever to the middle position, and
then adjust for comfort.
3-2
ProCarManuals.com
Page 162 of 390
Rear Climate Control (Option)
If you have this option, you will have a master control
for the rear fan on the center instrument panel console,
and a rear control next to the rear seat, on the driver’s
side of the vehicle.
To maintain a comfortable temperature in the rear, use
either rear fan control to adjust the force
of air coming
through the rear outlets. See “Rear Fan
-- Master
Control” and “Rear Fan
-- Rear Control” later in
this section.
Select the desired climate control mode using the
directional controls on the instrument panel (see
“Directional Controls” earlier in the section). The mode
you choose will regulate both the front and rear climate
control systems. The temperature of heated or cooled air
directed to the rear
of the vehicle cannot be adjusted
with the temperature control
lever.
Select RECIRC, UPPER, BI-LEV or LOWER when
outside temperatures are warm or moderate. In
the RECIRC mode,
or if you press A/C when the
system is in the UPPER or BI-LEV modes, cooled air
will be directed to the rear
of the vehicle through the
overhead and third-row air conditioning outlets. If
you
select NC in the LOWER mode, cooled air will be
directed through the rear
floor vent (see “Rear Air
Vents“ later in this section) unless the temperature
control lever
is set approximately 30% from the full
cold setting. Heated air will result with the temperature
control
lever setting above 30% from the full cold
setting. Temperature adjustment of the heated air is
not possible. Cooled air will again return when the
temperature control lever setting is returned to
approximately
25% from the full cold setting.
If you do not select A/C in the UPPER or BI-LEV
modes, air directed to the rear of the vehicle will be
cabin temperature.
Select LOWER,
DEFOG or DEF when outside
temperatures are cool. In these modes, heated air will be
directed to the rear
of the vehicle through the rear side
window vents and the rear floor heater vent.
3-4
ProCarManuals.com
Page 164 of 390
LOW MED
REAR FAN
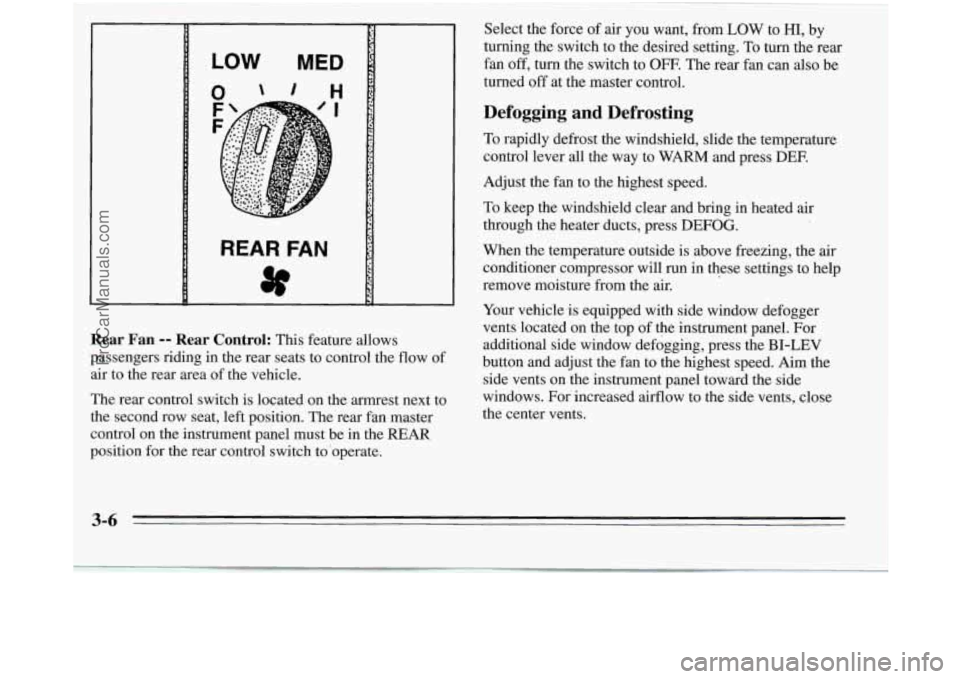
Rear Fan -- Rear Control: This feature allows
passengers riding in the rear seats to control the flow
of
air to the rear area of the vehicle.
The rear control switch is located on the armrest next to
the second row seat, left position. The rear fan master
control on the instrument panel must
be in the REAR
position for the rear control switch to'operate.
~~
Select the force of air you want, from LOW to HI, by
turning the switch
to the desired setting. To turn the rear
fan off, turn the switch to
OFF. The rear fan can also be
turned off at the master control.
Defogging and Defrosting
To rapidly defrost the windshield, slide the temperature
control lever all the way to WARM and press DEE
Adjust the fan to the highest speed.
To keep the windshield clear and bring
in heated air
through the heater ducts, press
DEFOG.
When the temperature outside is above freezing, the air
conditioner compressor will run in these settings to help
remove moisture from the air.
Your vehicle is equipped with side window defogger
vents located on the top of the instrument panel. For
additional side window defogging, press the
BI-LEV
button and adjust the fan to the highest speed. Aim the
side vents on the instrument panel toward the side
windows. For increased airflow to the side vents, close
the center vents.
3-6 -
ProCarManuals.com
Page 165 of 390
Rear Window Defogger
Press R.DEF (Rear Defog) to warm the defogger grid
on the rear window. The indicator light will glow while
the rear window defogger is operating. The rear
window defogger will turn off automatically after about
10 minutes of use. If you turn it on again, the defogger
will operate for about five minutes only.
You can also
turn the defogger off by turning off the ignition or
pressing the switch again.
Do not attach a temporary vehicle license across the
defogger grid on the rear window.
Flow-Through Ventilation System
Your vehicle’s flow-through ventilation system supplies
outside air into the vehicle when
it is moving. Outside
air will also enter the vehicle when the heater or the air
conditioning fan is running.
Ventilation Tips
0
1 NOTICE:
Don’t use a razor blade or something else sharp
on the inside
of the rear window. If you do, you
could cut or damage the warming grid, and the
repairs wouldn’t
be covered by your warranty. 0
Keep the hood and front air inlet free of ice, snow, or
any other obstruction (such as leaves). This will
allow
the heater and defroster to work much better,
reducing the chance of fogging the i.nside of your
windows.
When
you enter a vehicle in cold weather, turn the
blower fan to
HIGH for a few moments before
driving off. This helps clear the intake ducts of snow
and moisture, and reduces the chance
of fogging the
inside of your windows.
Keep the area around the base
of the center
instrument panel console and the air path under the
front seats clear of objects. This helps air to circulate
throughout your vehicle.
3-7
ProCarManuals.com
Page 197 of 390
is off, then an acceleration skid is also best handled by
easing your foot
off the accelerator pedal.
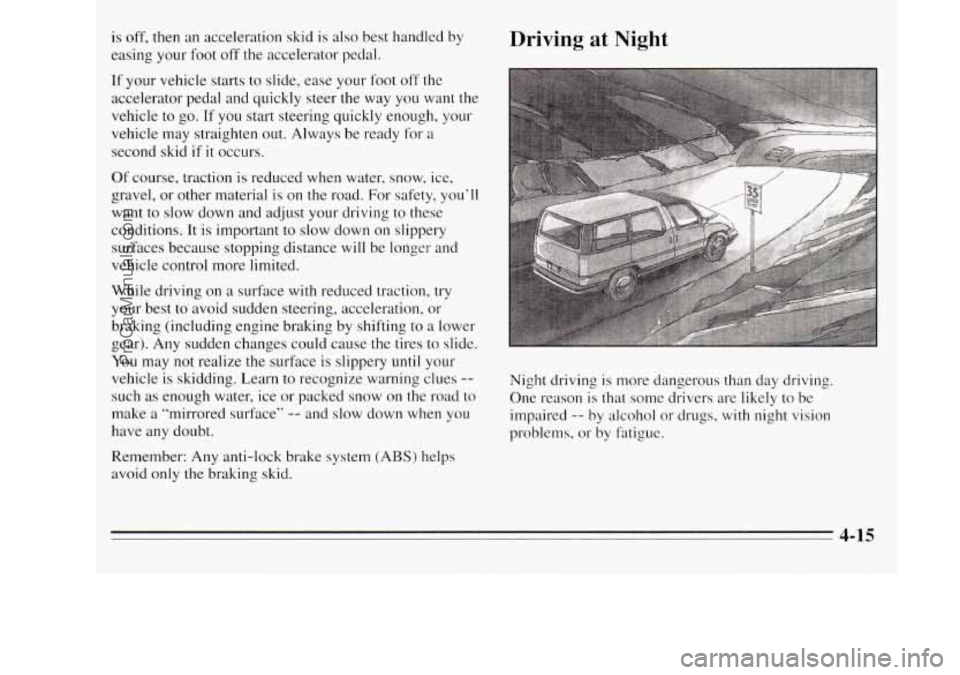
Driving at Night
If your vehicle starts to slide, ease your foot off the
accelerator pedal and quickly steer the way you want the
vehicle to go. If you start steering quickly enough, your
vehicle may straighten out. Always be ready for a
second
skid if it occurs.
Of course, traction is reduced when water, snow, ice,
gravel, or other material
is on the road. For safety, you’ll
want to slow down and adjust your driving
to these
conditions. It is important to slow down on slippery
surfaces because stopping distance
will be longer and
vehicle control more limited.
While driving on
a surface with reduced traction, try
your best
to avoid sudden steering, acceleration, or
braking (including engine braking by shifting
to a lower
gear). Any sudden changes could cause the tires to slide.
You may not realize the surface is slippery until your
vehicle is skidding. Learn to recognize warning clues
--
such as enough water, ice or packed snow on the road to
make
a “mirrored surface” -- and slow down when you
have any doubt.
Remember: Any anti-lock brake system
(ABS) helps
avoid
only the braking skid. Night
driving
is more dangerous than day driving.
One reason is that some drivers are likely to be
impaired
-- by alcohol or drugs, with night vision
problems, or by fatigue.
4-15
ProCarManuals.com
Page 238 of 390
If No Steam Is Coming From Your Engine
If you get the overheat warning but see or hear no
steam, the problem may not be too serious. Sometimes
the engine can get
a little too hot when you:
Climb a long hill on a hot day.
Stop after high speed driving.
Idle for long periods in traffic.
Tow a trailer.
If you get the overheat warning with no sign
of steam,
try this for a minute or
so:
1. Turn off your air conditioner.
2. Turn on your heater to full hot at the highest fan
speed and open the window as necessary.
3. If you’re in a traffic jam, shift to NEUTRAL (N);
otherwise, shift to the highest gear while driving --
AUTOMATIC OVERDRIVE (a) or THIRD (D) for
automatic transaxles.
If you no longer have the overheat warning, you can drive.
Just to be safe, drive slower for about
10 minutes. If the
warning doesn’t come back on, you can drive normally.
If the warning continues, pull over, stop, and park your
vehicle right away.
If there’s still no sign of steam, you can idle the engine
for two or three minutes while you’re parked, to see if
the warning stops. But then, if you still have the
warning,
turn off the engine and get everyone out of the
vehicle
until it cools down.
You may decide not to lift the hood but to get service
help right away.
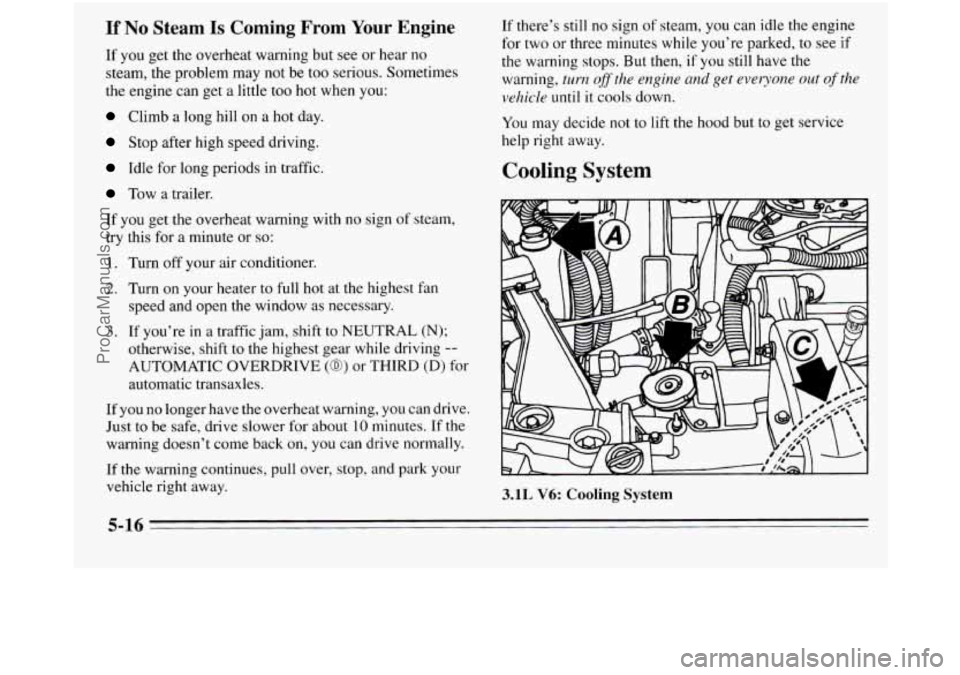
Cooling System
3.1L V6: Cooling System
5-16
ProCarManuals.com
Page 289 of 390
Brake Wear
Your Oldsmobile has front disc brakes and rear drum
brakes.
Disc brake pads have built-in wear indicators that make
a high-pitched warning sound when the brake pads are
worn and new pads are needed. The sound may come
and go or be heard
all the time your vehicle is moving
(except when you are pushing on the brake pedal
firmly).
NOTICE:
Continuing to drive with worn-out brake pads
could result in costly brake repair.
Some driving conditions or climates may cause a brake
squeal when the brakes are first applied or lightly
applied.
This does not mean something is wrong with
your brakes.
Your rear drum brakes don’t have wear indicators, but
if
you ever hear a rear brake rubbing noise, have the rear
brake linings inspected. Also, the rear brake drums
should be removed and inspected each time the tires are
removed for rotation or changing. When you have the
front brakes replaced, have the rear brakes inspected,
too.
Brake linings should always be replaced as complete
axle sets.
Brake Pedal Travel
See your retailer if the brake pedal does not return to
normal height, or if there is a rapid increase in pedal
travel.
This could be a sign of brake trouble.
Brake Adjustment
Every time you apply the brakes moderately, with or
without the vehicle moving, your brakes adjust for wear.
6-29
ProCarManuals.com
Page 300 of 390
While the tires available as standard or optional
equipment
on General Motors vehicles may vary with
respect to these grades, all such tires meet General
Motors performance standards and have been approved
for use on General Motors vehicles. All passenger type
(P Metric) tires must conform to Federal safety
requirements in addition to these grades.
Wheel Alignment and Tire Balance
The wheels on your vehicle were aligned and balanced
carefully at the factory to give you the longest tire life
and best overall performance.
In most cases, you will not need to have your wheels
aligned again. However, if you notice unusual tire wear
or your vehicle pulling one way or the other, the
alignment may need to be reset.
If you notice your
vehicle vibrating when driving on
a smooth road, your
wheels may need to be rebalanced.
Wheel Replacement
Replace any wheel that is bent, cracked, or badly rusted
or corroded.
If wheel nuts keep coming loose, the wheel,
wheel bolts, and wheel nuts should be replaced. If the
wheel leaks air, replace it (except some aluminum wheels,
which can sometimes be repaired). See your
Oldsmobile retailer
if any of these conditions exist.
Your retailer will know the kind of wheel you need.
Each new wheel should have the same load carrying
capacity, diameter, width, offset, and be mounted the
same way as the one it replaces.
If you need to replace any of your wheels, wheel bolts,
or wheel nuts, replace them only with new GM original
equipment parts. This way, you will be sure
to have the
right wheel, wheel bolts, and wheel nuts for your
Oldsmobile model.
6-40
ProCarManuals.com