glove box OLDSMOBILE SILHOUETTE 1996 Owners Manual
[x] Cancel search | Manufacturer: OLDSMOBILE, Model Year: 1996, Model line: SILHOUETTE, Model: OLDSMOBILE SILHOUETTE 1996Pages: 372, PDF Size: 19.39 MB
Page 86 of 372

Parking Lots
If you park in a lot where someone will be watching
your vehicle, it’s best to lock it up and take your keys.
But what if you have to leave your ignition key? What
if
you have to leave something valuable in your vehicle?
Put your valuables in a storage area, like your glove
box
or locking storage bin.
Lock the storage bin.
0 Lock all the doors except the driver’s.
0 Then take the door key with you.
New Vehicle “Break-In”
NOTICE:
Your modern Oldsmobile doesn’t need an
elaborate “break-in.” But it will perform better
in the long run if you follow these guidelines:
Don’t drive at any one speed -- fast or
slow
-- for the first 500 miles (804 km). Don’t
make full-throttle starts.
200 miles (322 km) or so. During this time
your new brake linings aren’t yet broken
in. Hard stops with new linings can mean
premature wear and earlier replacement.
Follow this breaking-in guideline every
time you get new brake linings.
0 Don’t tow a trailer during break-in. See
“Towing a Trailer” in the Index for more
.
information.
Avoid making hard stops for the first
2-22
ProCarManuals.com
Page 121 of 372

2.
3.
4.
5.
Press and hold both the ON/OFF and the US/MET
switches. The display will go off.
After five seconds, VAR CAL will appear on the
display. When it does, release both buttons.
Press
US/MET until your zone number appears on
the display.
Press
ON/OFF to enter your zone number. Your
variance is now set.
Storage Compartment
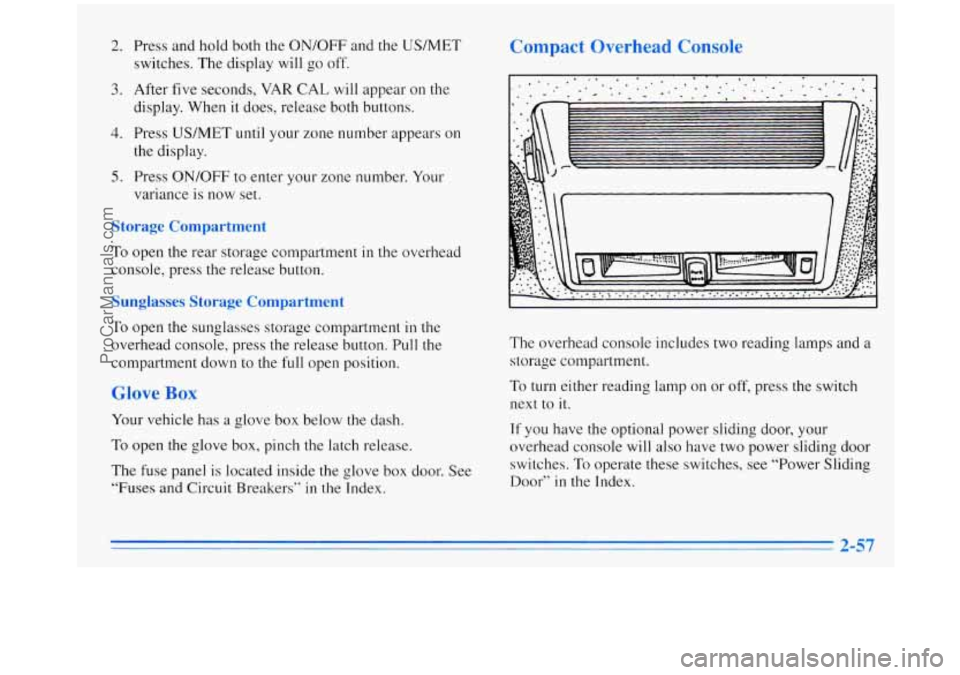
To open the rear storage compartment in the overhead
console, press the release button.
Sunglasses Storage Compartment
To open the sunglasses storage compartment in the
overhead console, press the release button. Pull the
compartment down to the
full open position.
Glove Box
Your vehicle has a glove box below the dash.
To open the glove box, pinch the latch release.
The fuse panel is located inside the glove box door. See
“Fuses and Circuit Breakers’’
in the Index.
Compact Overhead Console
The overhead console includes two reading lamps and a
storage compartment.
To turn either reading lamp on or off, press the switch
next to
it.
If you have the optional power sliding door, your
overhead console will also have two power sliding door
switches.
To operate these switches, see “Power Sliding
Door”
in the Index.
2-57
ProCarManuals.com
Page 131 of 372

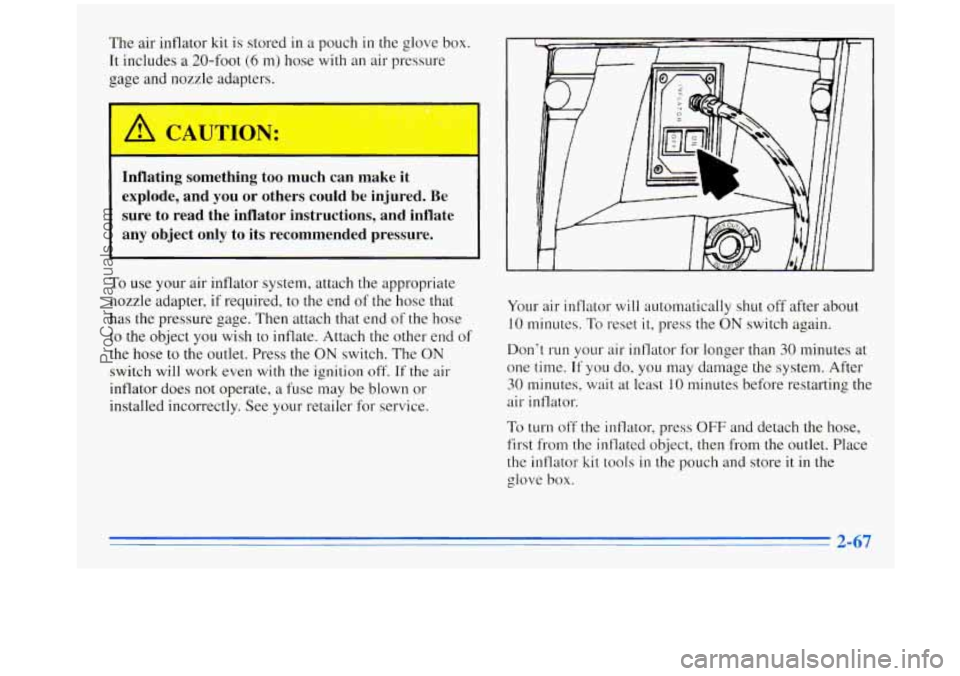
The air inflator kit is stored in a pouch in the glove box.
It includes
a 20-foot (6 m) hose with an air pressure
gage and nozzle adapters.
I
.. - ... . - -L .. .. ,. .- 0 - .. ..
I
Inflating something too much can make it
explode, and you or others could be injured. Be
sure to read the inflator instructions, and inflate
any object only to its recommended pressure.
To use your air inflator system, attach the appropriate
nozzle adapter,
if required, to the end of the hose that
has the pressure gage. Then attach that end of the hose
to the object you wish to inflate. Attach the other end of
the hose to the outlet. Press the
ON switch. The ON
switch will work even with the ignition off. If the air
inflator does not operate,
a fuse may be blown or
installed incorrectly. See your retailer for service. Your
air inflator
will automatically shut off after about
10 minutes. To reset it, press the ON switch again.
Don’t run your air inflator for longer than 30 minutes at
one time. If
you do, you may damage the system. After
30 minutes, wait at least 10 minutes before restarting the
air inflator.
To turn off the inflator, press OFF and detach the hose,
first from the inflated object, then from the outlet. Place
the inflator kit tools
in the pouch and store it in the
glove
box.
ProCarManuals.com
Page 133 of 372

Your instrument panel is designed to let you know at a
glance how your vehicle is running. You’ll know how fast
you’re going, how much fuel you’re using, and many
other things you’ll need to drive safely and economically.
Refer to the accompanying diagram
of your instrument
panel to locate
the components listed below.
1. Side Vents
2. Lamp Controls
3. Turn Signal/Multifunction Lever
4. Tilt Steering Wheel Lever
5. Instrument Cluster
6. Gearshift Lever
7. Wiper/Washer Controls
8. Center Vents
9. Storage Compartment
10. Side Vents
1 1. Circuit Breaker/Relay Panel
12. Glove Box/Fuse Panel
13. Audio System
14. Rear Fan Controls
15. CupholdedAshtray
16. Locking Storage Bin
1 7. Lighter
18. Interior Lights Override Switch
19. Climate Controls
20. Hazard Warning Flashers Switch
21. Ignition Switch
22. Horn
23. Steering Wheel Touch Controls (Option)
2-69
ProCarManuals.com
Page 297 of 372

Vehicle Identification Number (VIN)
0 I 11111111 1111 111 111111 111 11111111 IIIIIIIIIIII 1111
SAMPLE4UXTM072675 I
ENGlNE-6 f ASSEMBLY
CODE MODEL YEAR PLANT
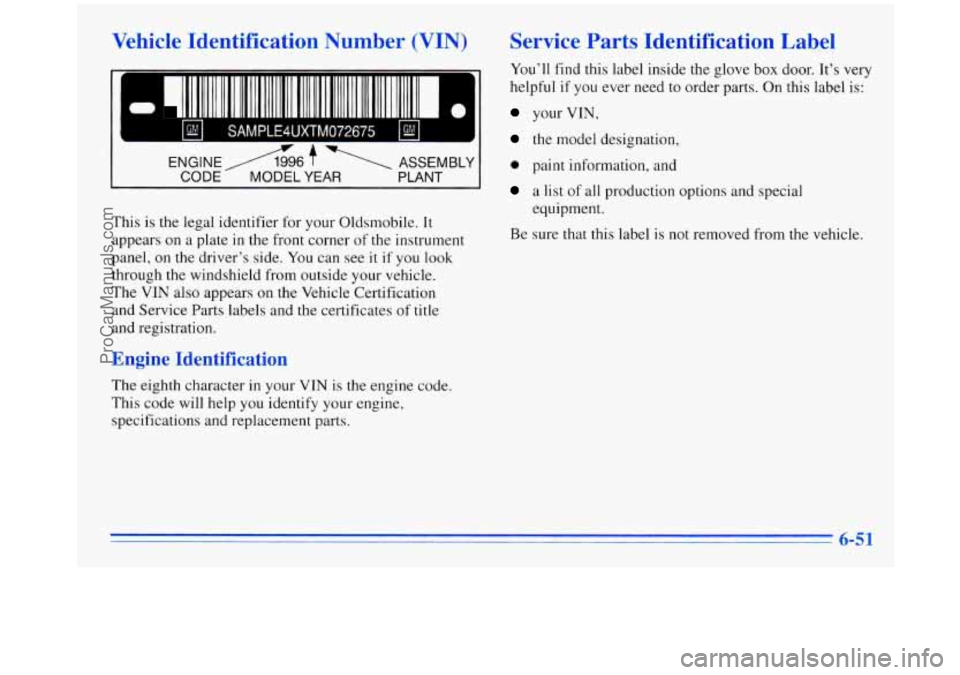
This is the legal identifier for your Oldsmobile. It
appears on a plate in the front corner
of the instrument
panel, on the driver’s side.
You can see it if you look
through the windshield from outside your vehicle.
The VIN also appears on the Vehicle Certification
and Service Parts labels and the certificates of title
and registration.
Engine Identification
The eighth character in your VIN is the engine code.
This code will help you identify your engine,
specifications and replacement parts.
Service Parts Identification Label
You’ll find this label inside the glove box door. It’s very
helpful
if you ever need to order parts. On this label is:
your VIN,
the model designation,
0 paint information, and
a list of all production options and special
equipment.
Be sure that this label is not removed from the vehicle.
6-51
ProCarManuals.com
Page 300 of 372

Fuse
CTSY
ELC
Usage
Automatic Door Lock Module,
Dome Lamps, Courtesy Lamps,
Power Door Lock Switches, Glove
Box Lamp, Power Mirrors, Remote
Lock Control Receiver
Electronic Level Control,
Air Inflator, Underhood Lamp
Fuse
HORN
STOP HAZ
F PUMP
RDO
1 /AUX
TAIL ECM
TURN B/U
Usage
Horns, Horn Relay, Safety Belt
Buzzer, Lamps On Reminder,
Key in the Ignition Warning
Hazards, Rear Stoplamps, Anti-Lock
Brake System (ABS), Center
High-Mounted Stoplamp
Fuel Pump, Rear Engine Fan Relay
Radio, Cigarette Lighter, Accessory
Power Outlet, Trailer Harness,
Heater-A/C Control
Headlamp and Instrument Panel
Dimmer Switch (to LPS
fuse),
Power Sliding Door Controller
Powertrain Control Module
Automatic Door Locks Module,
Back-up Lamps, Power Sliding
Door Alarm Module,
Fog Lamp
Relay, Power Sliding Door
Controller, Remote Lock Control
Receiver, Brake-Transaxle Shift
Interlock (BTSI), Front/Rear
Turn Lamps
6-54
ProCarManuals.com
Page 302 of 372

.
Circuit Breakermelay Panel
Circuit breakers and relays are located in the circuit
breakerhelay panel.
This is located belund the panel
under the glove box, near the passenger’s door.
Circuit
Breakers Usage
1 Hazard Flashers
2 Automatic Transaxle, Evaporative
(fuse) Emission (EVAP) Canister Purge
Solenoid Valve, Evaporative Emissions
Canister Purge Vacuum Diagnostic
Switch, Linear Exhaust Gas Recirculation
(EGR) Valve, Front Engine Fan Relay,
Heated Oxygen Sensors, Mass Air
Flow (MAF) Sensor, Powertrain Control
Module (PCM)
3
4
5
6
7
8
9
10
6-56
Not Used
Power Windows
Power Seat, Power Sliding
Door
Controller, Power Door Locks
Rear Defogger
Air Conditioning Blower,
Rear Blower Motor
Horns
Safety Belt Reminder Chime, Lamps on
Reminder, Key In the Ignition, Warning
(Chime Module)
Rear Defogger Timer
1
ProCarManuals.com
Page 341 of 372

At Least Nice a Year At Least Once a Year
Restraint System Check
Make sure the safety belt rem’ mder
light and all your
belts, buckles, latch plates, retractors and anchorages are
working properly.
If your vehicle has a built-in child
restraint, also periodically make sure the harness straps,
latch plates, buckle, clip, child head restraint and
anchorages are working properly.
Look for any other
loose or damaged safety belt and built-in child restraint
system parts.
If you see anything that might keep a
safety belt or built-in child restraint system from doing
its
job, have it repaired. Have any torn or frayed safety
belts or harness straps replaced.
Also look for any opened or broken air bag covers, and
have them repaired or replaced. (The air bag system
does
not need regular maintenance.)
Automatic Transaxle Check
Check the transaxle fluid level; add if needed. See
“Automatic Transaxle” in the Index.
A fluid loss
may indicate a problem. Check
the system and repair
if needed.
Key Lock Cylinders Service
Lubricate the key lock cylinders with the lubricant
specified
in Part D.
Body Lubrication Service
Lubricate all body door hinges, including the liftgate.
Also lubricate all hinges and latches, including those for
the hood, sliding door track, rear compartment, glove box
door, console door, and any folding seat hardware. Part
D
tells you what to use. More frequent lubrication may be
required when exposed to a corrosive environment.
7-
ProCarManuals.com
Page 363 of 372

FogLamps .................................... 2-49
Foreign Countries. Fuel
........................... 6-3
Four-Way Manual Seat
........................... 1 - I
FrontDoor ..................................... 2-3
Front Sidemarker Lamp Bulb Replacement
........... 6-30
FrontTowing
................................... 5-9
Front Turn Signal Lamp Bulb Replacement
.......... 6-30
Fuel
.......................................... 6-2
Filling Your Tank
.............................. 6-4
Gage
....................................... 2-83
In Foreign Countries
........................... 6-3
Fuses and Circuit Breakers
....................... 6-53
Gages Engine Coolant Temperature
.................... 2-76
Engine Oil Pressure
........................... 2-80
Fuel
....................................... 2-83
Speedometer
................................. 2-71
Tachometer
.................................. 2-71
Voltmeter
................................... 2-74
Garage Door Opener
............................ 2-54
Gear Positions. Automatic Transaxle
................ 2-27
GloveBox
.................................... 2-57
Gross Axle Weight Rating
........................ 4-27
Gross Vehicle Weight Rating
...................... 4-27
GAWR
....................................... 4-27
GVWR
....................................... 4-27 Halogen
Bulbs
................................ 6-29
Hazard Warning Flashers
.......................... 5-1
Head Restraints ................................. 1-4
Headlamps
.................................... 2-48
Bulb Replacement
............................ 6-29
HighLow Beam Changer
...................... 2-40
OnReminder
................................ 2-48
Wiring
..................................... 6-52
Hearing Impaired. Customer Assistance
.............. 8-3
Heating
........................................ 3-3
High-Beam Headlamps
.......................... 2-40
Highway Hypnosis
.............................. 4-21
Hill and Mountain Roads
......................... 4-21
Hitches. Trailer
................................. 4-33
Hood Checking Things Under
......................... 6-6
Prop
........................................ 6-7
Release
...................................... 6-6
Horn ......................................... 2-38
Hydroplaning
.................................. 4-17
Ignition Positions
.............................. 2-23
Illuminated Entry
.......................... 2- 1 1. 2-50
Inflation. Tire
.................................. 6-36
Inflator. Air
................................... 2-66
Injector Fuse
................................... 6-57
Inside Daymight Rearview Mirror
................. 2-52
ProCarManuals.com