power steering OLDSMOBILE SILHOUETTE 1996 Owners Manual
[x] Cancel search | Manufacturer: OLDSMOBILE, Model Year: 1996, Model line: SILHOUETTE, Model: OLDSMOBILE SILHOUETTE 1996Pages: 372, PDF Size: 19.39 MB
Page 85 of 372

Liftgate Lock Theft
J
To unlock the liftgate, insert the door key and turn the
lock clockwise. The liftgate will automatically lock
when you close
it.
If you have the optional power door locks or the Remote
Lock Control system, the liftgate will lock and unlock
differently. See “Power
Door Locks” in the Index. Vehicle theft is big business, especially
in some cities.
Although your Oldsmobile has a number
of theft-deterrent
features, we know that nothing we put
on it can make it
impossible to steal. However, there are ways you
can help.
Key in the Ignition
If you leave your vehicle with the keys inside, it’s an
easy target for joy riders
or professional thieves -- so
don’t do it.
When
you park your Oldsmobile and open the driver’s
door, you’ll hear a chime reminding
you to remove your
key from the ignition and take
it with you. Always do this.
Your steering wheel will be locked, and
so will your
ignition and transaxle. And remember to lock the doors.
Parking at Night
Park in a lighted spot, close all windows and lock your
vehicle. Remember
to keep your valuables out of sight.
Put them in a storage area, or take them with you.
.~ 2-21
ProCarManuals.com
Page 87 of 372

Ignition Positions
With the ignition key in the ignition switch, you can turn
the switch to five positions.
C
A E
ACCESSORY (A): An on position in which you can
operate your electrical power accessories. Press in the
ignition switch
as you turn the top of it toward you.
LOCK (B): This is the only position in which you can
remove
the key. This locks your steering wheel, ignition
and transaxle.
OFF (C): This position unlocks the steering wheel,
ignition and transaxle, but does not send electrical
power to any accessories. Use this position
if your
vehicle must be pushed
or towed, but never try to
push-start your vehicle. A warning chime will sound if
you open the driver’s door when the ignition is
OFF and
the key is
in the ignition.
RUN (D): An on position to which the switch returns
after
you start your engine and release the switch. The
switch stays
in the RUN position when the engine is
running. But
even when the engine is not running, you
can use the
RUN position to operate your electrical
power accessories, and to display some instrument panel
warning lights.
START (E): This position starts the engine. When the
engine starts, release the key. The ignition switch will
return
to the RUN position for normal driving.
ProCarManuals.com
Page 102 of 372

If you have power windows, the switches on the driver's
door armrest control the front windows (when the ignition
is on). The left switch controls the driver's window. The
right switch controls
the passenger's window.
The driver's power window switch has two down
positions. Hold the rear
of the switch in the first position
to lower the window normally.
To activate the auto-down feature, fully press the rear of
the switch, then release. The window will lower
completely.
To stop the window from lowering all the
way, press the front
of the switch.
To raise the window, press and hold the front of the switch.
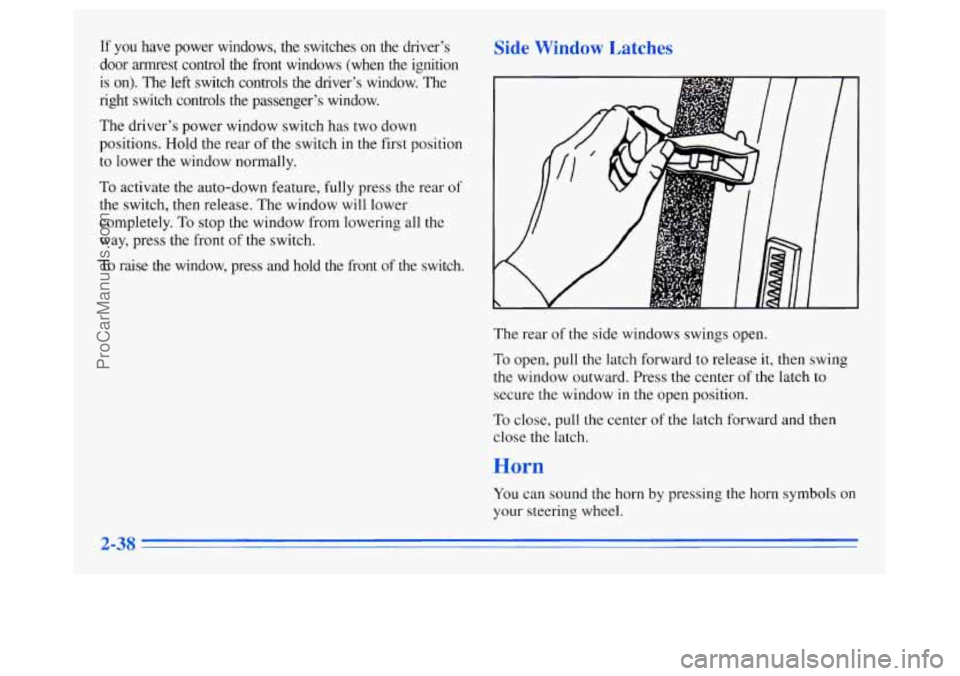
,atches
The rear of the side windows swings open.
To open, pull the latch forward to release
it, then swing
the window outward. Press the center
of the latch to
secure the window
in the open position.
To close, pull the center of the latch forward and then
close the latch.
You can sound the horn by pressing the horn symbols
on
your steering wheel.
ProCarManuals.com
Page 182 of 372

Remember: Anti-lock doesn’t change the time you need
to get your foot up to the brake pedal or always decrease
stopping distance. If
you get too close to the vehicle in
front of you, you won’t have time to apply your brakes
if that vehicle suddenly slows or stops. Always leave
enough room up ahead
to stop, even though you have
anti-lock brakes.
Using Anti-Lock
Don’t pump the brakes. Just hold the brake pedal
down and let anti-lock work for you. You may feel the
system working, or you may notice some noise, but this
is normal.
Braking in Emergencies
Use your anti-lock braking system when you need to.
With anti-lock, you can steer and brake at the same
time.
In many emergencies, steering can help you more
than even the very best braking.
Steering
Power Steering
If you lose power steering assist because the engine
stops or the system is not functioning, you can steer but
it will take much more effort.
Steering Tips
Driving on Curves
It’s important to take curves at a reasonable speed.
A lot of the “driver lost control” accidents mentioned on
the news happen on curves. Here’s why:
Experienced driver or beginner, each
of us is subject to
the same laws of physics when driving on curves. The
traction of
the tires against the road surface makes it
possible for the vehicle to change its path when
you turn
the front wheels. If there’s
no traction, inertia will keep
the vehicle going in the same direction. If you’ve ever
tried to steer a vehicle
on wet ice, you’ll understand this.
The traction you can get in
a curve depends on the
condition of your tires and the road surface,
the angle at
which the curve is banked,
and your speed. While you’re
in a curve, speed is the one factor you can control.
4-8
ProCarManuals.com
Page 254 of 372

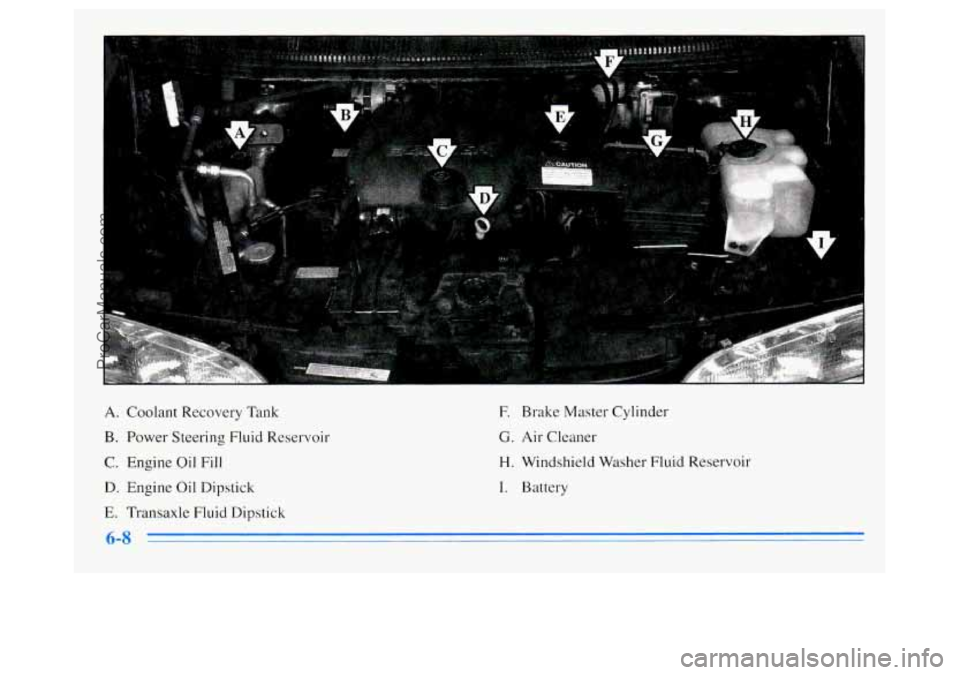
A. Coolant Recovery Tank
B. Power Steering Fluid Reservoir
C. Engine Oil Fill
D. Engine Oil Dipstick
E. Transaxle Fluid Dipstick
E Brake Master Cylinder
G. Air Cleaner
H. Windshield Washer Fluid Reservoir
I. Battery
ProCarManuals.com
Page 268 of 372

Radiator Pressure Cap
NOTICE:
Your radiator cap is a 15 psi (105 kPa)
pressure-type cap and must be tightly installed to prevent coolant loss and possible engine damage
from overheating. Be sure the arrows on the cap line up with the overflow tube on the radiator
filler neck.
When you replace your radiator pressure cap, an AC@
cap is recommended.
Thermostat
Engine coolant temperature is controlled by a thermostat
in the engine coolant system. The thermostat stops the
flow
of coolant through the radiator until the coolant
reaches
a preset temperature.
When
you replace your thermostat, an AC@ thermostat
is recommended.
Power Steering Fluid
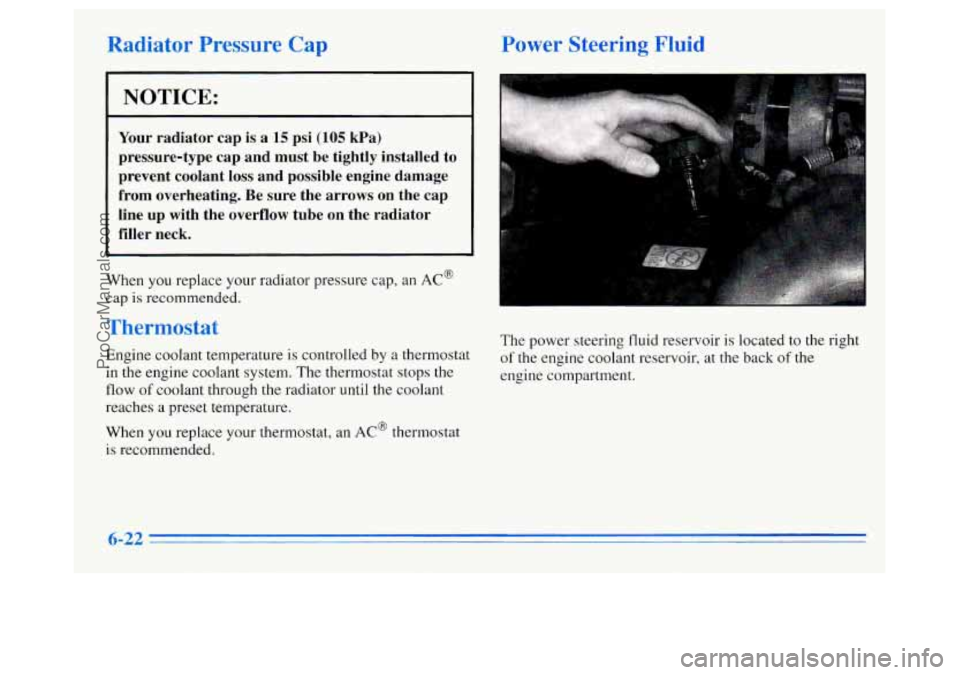
The power steering fluid reservoir is located to the right
of the engine coolant reservoir, at the back of the
engine compartment.
6-22
ProCarManuals.com
Page 269 of 372

When to Check Power Steering Fluid
It is not necessary to regularly check power steering
fluid unless you suspect there is a leak in the system or
you hear an unusual noise.
A fluid loss in this system
could indicate a problem. Have the system inspected
and repaired.
How To Check Power Steering Fluid
When the engine compartment is cool, unscrew the cap
and wipe the dipstick with
a clean rag. Replace the cap
and completely tighten
it. Then remove the cap again
and look at the fluid level on the dipstick.
When the engine compartment is hot, the level should be
at the
H mark. When it’s cold, the level should be at the
C mark. If the fluid is at the ADD mark, you should
add fluid.
What to Use
Refer to the Maintenance Schedule to determine what
kind of fluid
to use. See “Recommended Fluids and
Lubricants” in the Index. Always use the proper fluid.
Failure to use the proper fluid can cause leaks and
damage hoses and seals.
Windshield Washer Fluid
What to Use
When you need windshield washer fluid, be sure to read
the manufacturer’s instructions before use. If you will be
operating your vehicle in an area where the temperature
may fall below freezing, use a fluid that has sufficient
protection against freezing.
6-23
ProCarManuals.com
Page 301 of 372

Fuse Usage
GAUGES/AC A/C Compressor Relay, ABS,
Electronic Level Control Height
Sensor, Instrument Panel Cluster,
Power Sliding Door Controller
LPS
ABS Interior Lamps Dimming, Rear
Climate Control Blower, Door Lock
Switches, Temperature and Compass
Display, Headlamp and Instrument
Panel Dimmer Switch, Heater-A/C
Control, Instrument Panel Cluster,
Illumination for Power Sliding
Door Switches
ABS Enable Relay
Fuse
RD02
R WIPER
F WIPER
IGN
HTR-A/C
R BLW
Usage
Radio, Steering Wheel Controls
Temperature and Compass Display,
Rear Window Wipermasher
Windshield and Rear Window
Wipermasher
Cruise Control Switch, Heater-A/C
Control, Speedometer and
Tachometer, Rear Window Defogger
Relay, Safety Belt Reminder Chime,
Lamps on Reminder, Key in the
Ignition Warning
Low Speed A/C Blower Relay
Rear Climate Control Blower
6-55
ProCarManuals.com
Page 344 of 372

Part C: Periodic Maintenance
Inspections
Listed below are inspections and services which should
be performed at least twice a year (for instance, each
spring and fall).
You should let your GM retailer’s
service department or other qualified service center do
these jobs. Make sure any necessary repairs are
completed at once.
Proper procedures to perform these services may be
found
in an Oldsmobile Service Manual. See “Service
and Owner Publications’’ in the Index.
Steering, Suspension and Front-Wheel-Drive
Axle Boot and Seal Inspection
Inspect the front and rear suspension and steering system
for damaged, loose or missing parts, signs of wear or lack
of lubrication. Inspect the power steering lines and hoses
for proper hook-up, binding, leaks, cracks, chafing, etc.
Clean and then inspect the drive axle boot seals for
damage, tears or leakage. Replace seals if necessary.
Exhaust System Inspection
Inspect the complete exhaust system. Inspect the body
near the exhaust system. Look for broken, damaged,
missing or out-of-position parts as well as open seams, holes, loose connections
or other conditions which could
cause a heat build-up in the floor pan or could
let
exhaust fumes into the vehicle. See “Engine Exhaust’’ in
the Index.
Radiator anc d Heater Hose Inspection
Inspect the hoses and have them replaced if they are
cracked, swollen or deteriorated. Inspect all pipes,
fittings and clamps; replace as needed.
Throttle Linkage Inspect!. :
Inspect the throttle linkage for interrerence or binding,
and for damage or missing parts. Replace parts as
needed. Replace any cables that have high effort or
excessive wear.
Do not lubricate accelerator and cruise
control cables.
Brake System Inspection
Inspect the complete system. Inspect brake lines and
hoses for proper hook-up, binding, leaks, cracks, chafing, etc. Inspect disc brake pads for wear and rotors
for surface condition.
Also inspect drum brake linings
for wear and cracks. Inspect other brake parts, including
drums, wheel cylinders, calipers, parking brake, etc.
Check parking brake adjustment. You may need to have
your brakes inspected more often
if your driving habits
or conditions result
in frequent braking.
ProCarManuals.com
Page 345 of 372

Part D: Recommended Fluids and
Lubricants
NOTE: Fluids and lubricants identified below by name,
part number or specification may be obtained from your
GM retailer.
USAGE
Engine Oil
Engine Coolant
FLUIDLUBRICANT
Engine oil with the American
Petroleum Institute Certified For
Gasoline Engines “Starburst”
symbol of the proper viscosity.
To
determine the preferred viscosity
for your vehicle’s engine, see
“Engine Oil” in the Index.
50/50 mixture of clean wateL
(preferably distilled) and GM
Goodwrench@ DEX-COOL
TM or
Havoline@ DEX-COOL’”
(orange-colored, silicate-free)
antifreeze conforming
to GM
Specification 6277M. See “Engine
Coolant” in the Index.
USAGE
Coolant
Supplement
Sealer
Hydraulic Brake
System
Parking Brake
Cable Guides
Power Steering
System
Automatic
Transaxle
Key Lock
Cylinders GM
Part No. 3634621 or
equivalent with a complete flush
and refill.
(GM Part No.
1052535 or
Chassis lubricant (GM Part
No. 1052497 or equivalent) or
lubricant meeting requirements
of NLGI Grade 2, Category LB
or GC-LB.
GM Power Steering Fluid
(GM Part
No. 1052884 - 1 pt.,
1050017
- l qt., or equivalent).
DEXRON@-I11 Automatic
Transmission Fluid.
Multi-Purpose Lubricant, Superlube@ (GM Part No. 12346241
or equivalent).
7-39
ProCarManuals.com