reset OLDSMOBILE SILHOUETTE 1996 Owners Manual
[x] Cancel search | Manufacturer: OLDSMOBILE, Model Year: 1996, Model line: SILHOUETTE, Model: OLDSMOBILE SILHOUETTE 1996Pages: 372, PDF Size: 19.39 MB
Page 81 of 372

To manually close the power sliding door when the
sliding door
ON/OFF switch is in the ON position, pull
the inside or outside latch release or the edge
of the
door. Move the door about
4 inches (10 cm) toward the
closed position and release. The door will close
completely and latch for
you.
To manually close the power sliding door when the
ON/OFF switch is
in the OFF position, pull the inside or
outside latch release and slide the door
all the way
forward to the latch position.
Resetting the rower diding Door
The power sliding door may operate incorrectly or not
all because of the following conditions:
0 A low voltage or dead battery
0 Disconnecting the battery
0 If the GUAGES, TAIL or TURN B/U fuse is
removed or blown.
See “Fuse Panel”
in the Index for more information
about your fuse panel.
If any of these conditions occur, the power sliding door
will need to be reset. To do this, follow the directions
listed here. It will be easier
if you read through them
once before beginning this procedure.
1.
2.
3.
4.
5.
6.
Check to be sure the power sliding door is unlocked
and securely closed.
Turn the ignition switch to the
OFF position.
Turn
the power sliding door ON/OFF switch to OFF.
Remove the TAIL fuse from the fuse panel. Leave it
out for 30 seconds.
Reinstall the fuse and wait 10 seconds.
Move the
ON/OFF switch to the ON position.
2-
ProCarManuals.com
Page 110 of 372
I
I
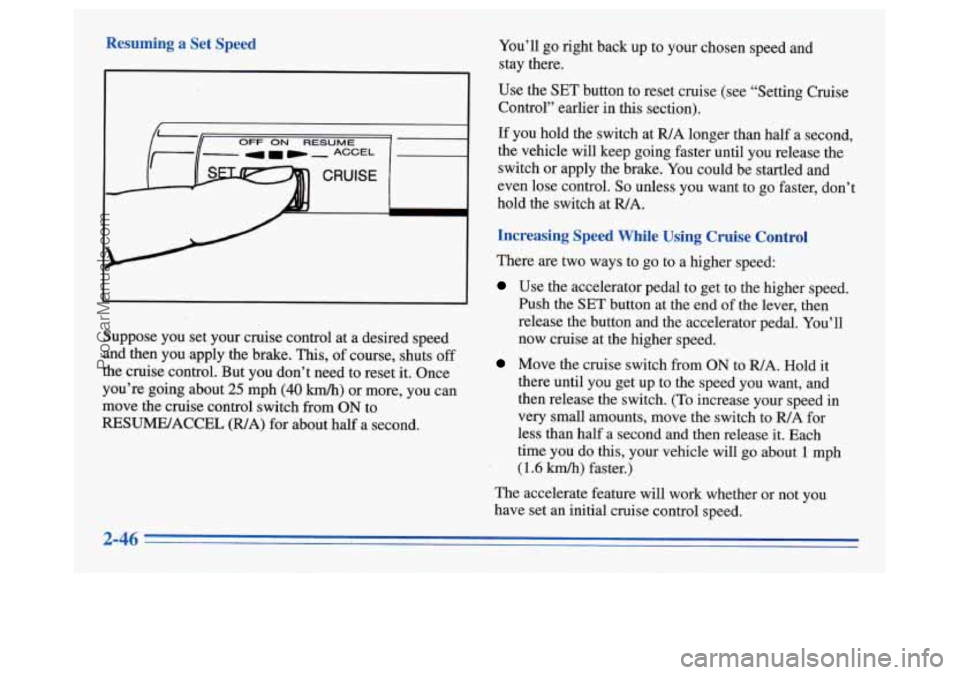
Resuming a Set Speed
CRUISE
You’ll go right back up to your chosen speed and
stay there.
Use the
SET button to reset cruise (see “Setting Cruise
Control” earlier in this section).
If you hold the switch at WA longer than half a second,
the vehicle will keep going faster until you release the
switch
or apply the brake. You could be startled and
even lose control.
So unless you want to go faster, don’t
hold the switch at
WA.
Increasing Speed While Using Cruise Control
There are two ways to go to a higher speed:
Use the accelerator pedal to get to the higher speed.
Push the SET button at the end of the lever, then
release the button and the accelerator pedal. You’ll
now cruise at the higher speed.
Move the cruise switch from ON to WA. Hold it
there until you get
up to the speed you want, and
then release the switch.
(To increase your speed in
very small amounts, move the switch to
WA for
less than half a second and then release it. Each
time you do
this, your vehicle will go about 1 mph
(1.6 kmh) faster.)
Suppose
you set your cruise control at a desired speed
and then you apply the brake. This, of course, shuts off
the cruise control. But you don’t need to reset
it. Once
you’re going about
25 mph (40 krn/h) or more, you can
move the cruise control switch from
ON to
RESUME/ACCEL (WA) for about half a second.
The accelerate feature will work whether or not you
have set an initial cruise control speed.
2-46 I
ProCarManuals.com
Page 131 of 372
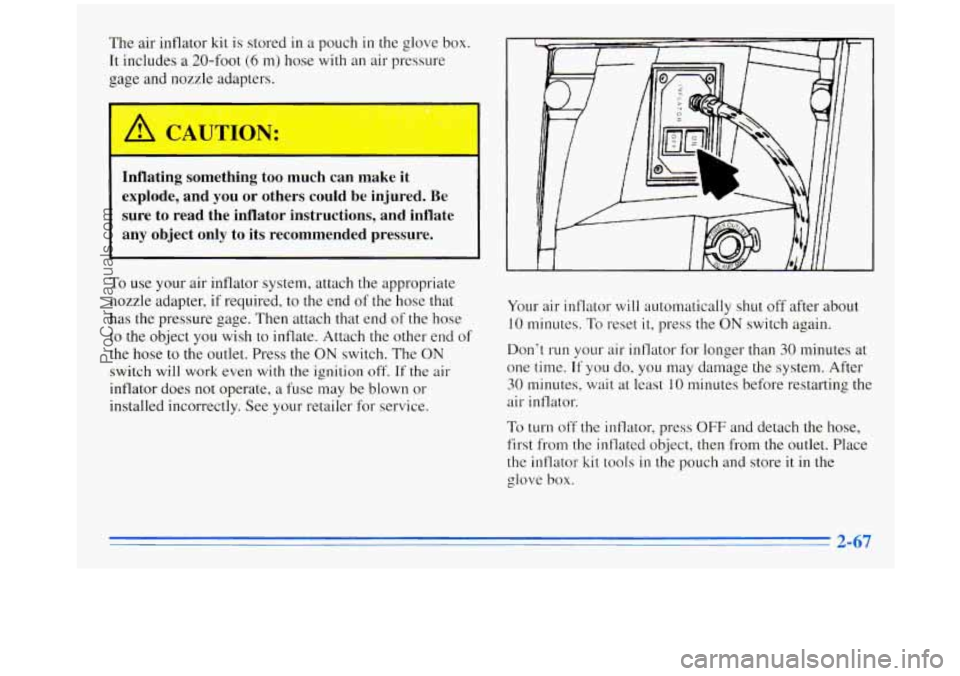
The air inflator kit is stored in a pouch in the glove box.
It includes
a 20-foot (6 m) hose with an air pressure
gage and nozzle adapters.
I
.. - ... . - -L .. .. ,. .- 0 - .. ..
I
Inflating something too much can make it
explode, and you or others could be injured. Be
sure to read the inflator instructions, and inflate
any object only to its recommended pressure.
To use your air inflator system, attach the appropriate
nozzle adapter,
if required, to the end of the hose that
has the pressure gage. Then attach that end of the hose
to the object you wish to inflate. Attach the other end of
the hose to the outlet. Press the
ON switch. The ON
switch will work even with the ignition off. If the air
inflator does not operate,
a fuse may be blown or
installed incorrectly. See your retailer for service. Your
air inflator
will automatically shut off after about
10 minutes. To reset it, press the ON switch again.
Don’t run your air inflator for longer than 30 minutes at
one time. If
you do, you may damage the system. After
30 minutes, wait at least 10 minutes before restarting the
air inflator.
To turn off the inflator, press OFF and detach the hose,
first from the inflated object, then from the outlet. Place
the inflator kit tools
in the pouch and store it in the
glove
box.
ProCarManuals.com
Page 136 of 372

Rip Odometer
UNLEADED FUEL ONLY
The trip odometer can tell you how far your vehicle has
been driven since
you last set it to zero. To set it to zero,
push the reset button located above the fuel gage.
Warning Lights, Gages and Indicators
This part describes the warning lights and gages that may
be on
your vehicle. The pictures will help you locate them.
Warning lights and gages can signal that something is
wrong before
it becomes serious enough to cause an
expensive repair or replacement. Paying attention to
your warning lights and gages could also save you or
others from injury.
Warning lights come on when there may be or
is a
problem with one of your vehicle’s functions.
As you
will see in the details on the next few pages, some
warning lights come on briefly when you start the
engine just to let you know they’re working.
If you are
familiar with this section, you should not be alarmed
when this happens.
Gages can indicate when there may be or
is a problem
with one
of your vehicle’s functions. Often gages and
warning lights work together to let you know when
there’s a problem with
your vehicle.
When one
of the warning lights comes on and stays on
when you are driving, or when one of the gages shows
there may be a problem, check the section that tells you
what to do about
it. Please follow this manual’s advice.
Waiting
to do repairs can be costly -- and even
dangerous.
So please get to know your warning lights
and gages. They’re a big help.
ProCarManuals.com
Page 140 of 372
A CAUTION:
Your regular brake system may not be working
properly if the anti-lock brake system warning light
is flashing. Driving with the anti-lock
brake system warning light flashing can lead to an accident. After you’ve pulled
off the road
and stopped carefully, have the vehicle towed
for service.
If the anti-lock brake system warning light stays on
longer than normal after you’ve started your engine, turn
the ignition off. Or, if the light comes on and stays on
when you’re driving, stop as soon as possible and turn
the ignition
off. Then start the engine again to reset the
system. If the light still stays on, or comes on again
while you’re driving, your Oldsmobile needs service. If
the light is on but not flashing and the regular brake
system warning light isn’t on, you still have brakes, but
you don’t have anti-lock brakes.
The anti-lock brake system warning light should come
on briefly when you turn the ignition key to
RUN. If the
light doesn’t come on then, have it fixed
so it will be
ready to warn you if there
is a problem.
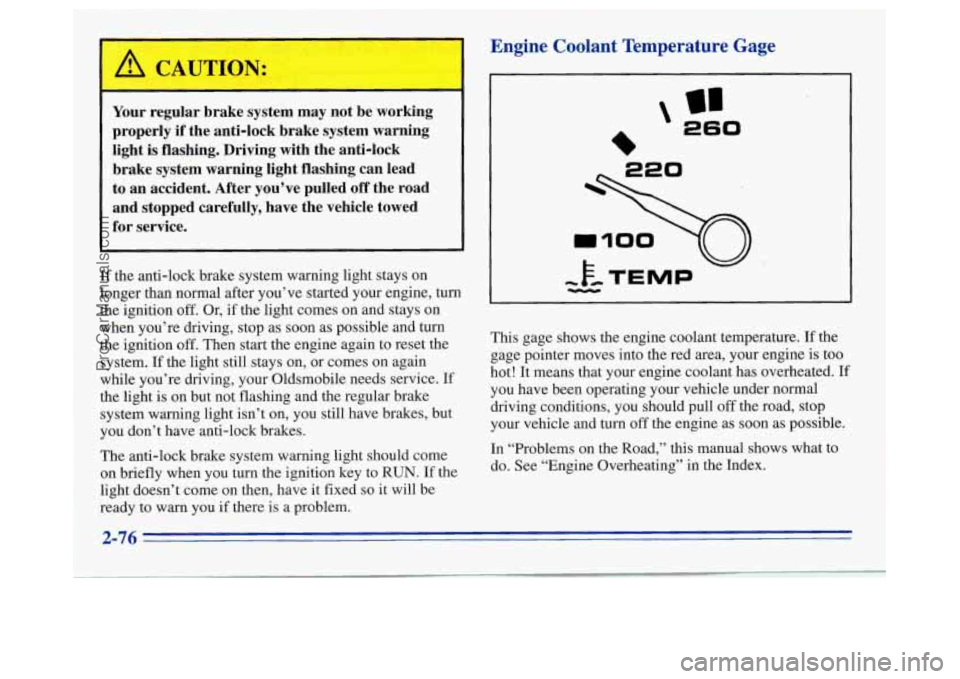
Engine Coolant Temperature Gage
’ 260
This gage shows the engine coolant temperature. If the
gage pointer moves into the red area, your engine
is too
hot! It means that your engine coolant has overheated. If
you have been operating your vehicle under normal
driving conditions, you should pull
off the road, stop
your vehicle and turn
off the engine as soon as possible.
In “Problems on the Road,” this manual shows what to
do. See “Engine Overheating” in the Index.
ProCarManuals.com
Page 159 of 372

In addition to the four stations set as above, up to
three additional stations may be preset
on each band by
pressing two adjoining buttons at
the same time. Just:
1. Tune in the desired station.
2. Press SET. (The SET indicator will appear on
the display.)
time (within five seconds).
3. Press any two adjoining pushbuttons at the same
4. Whenever you press the same buttons, the station
you set will return.
Setting the Tone
BASS:
Slide this lever up to increase bass and down to
decrease it.
TREB: Slide this lever up to increase treble and down
to decrease it. If a station is weak or noisy, slide the
lever down
to reduce the noise.
Adjusting the Speakers
BAL:
This control behind the upper knob adjusts the
sound between the right and left speakers.
FADE: This control behind the lower knob adjusts the
sound between your front and rear speakers.
AM-FM Stereo with Cassette Tape Player
(Option)
Playing the Radio
VOL-BAL-PROG-RCL:
This knob turns the system
on and
off and controls the volume. Turn the upper knob
clockwise to increase volume. Turn
it counterclockwise
to decrease volume. Press the upper knob briefly to
recall the station being played or to display the clock. If
you press the button when the ignition is off, the clock
will show for
a few seconds.
3-11
ProCarManuals.com
Page 160 of 372
Finding a Station
AM-FM:
Press the lower knob to get AM, FM 1 or
FM2. The display shows your selection.
TUNE: Turn the lower knob to choose radio stations.
SEEK: Press the up or down arrow to go to the next
higher
or lower station.
PUSHBUTTONS: The four pushbuttons let you return
to your favorite stations. You can set up to
21 stations
(seven
AM, seven FMl and seven FM2).
1.
2.
3.
4.
5.
6.
Press AM-FM to select the band.
Find the station you want by using TUNE or
SEEK.
Press SET until the word SET appears on the display.
Press and hold one of the four buttons, within
five seconds.
The sound will mute. When it returns, release the
button. Whenever you press that button, the station
you set will return.
Repeat the steps for each pushbutton.
In addition
to the four stations set as above, up to
three additional stations
may be preset on each band by
pressing two adjoining buttons at the same time. Just:
1. Tune in the desired station.
2. Press SET. (The SET indicator will appear on
3. Press any two adjoining pushbuttons at the same
the display.)
time (within
five seconds).
4. The sound will mute. When it returns, release the
buttons. Whenever you press the same buttons, the
station you set will return.
PSCAN: Press both SEEK arrows and PSCAN will
appear on
the display. Use PSCAN to listen to each of
your preset stations for
a few seconds. The radio will go
to the first preset station, stop
for a few seconds, then go
on to the next preset station. (If a preset station has weak
reception,
it will not stop.) Press either SEEK arrow or
the upper knob to stop scanning.
Setting the Tone
BASS:
Slide the lever up or down to increase or
decrease bass. The middle position is a detent.
TREB: Slide the lever up or down to increase or
decrease treble. The middle position
is a detent. If a
station is weak or noisy, slide the lever down to reduce
the noise.
3-12
ProCarManuals.com
Page 161 of 372
Adjusting the Speakers
BAL: Turn the control behind the upper knob to move
the sound
to the left or right speakers. The middle
position is a detent and balances the speakers.
FADE: Turn the control behind the lower knob to move
the sound to the front or rear speakers. The middle
position is a detent and balances
the speakers.
Playing a Cassette Tape
Your tape player is built to work best with tapes that are
30 to 45 minutes long on each side. Tapes longer than
that are
so thin they may not work well in this player.
The longer side with the tape visible goes in first. If
you
hear nothing or hear just a garbled sound, it may not be
in squarely. Press STOP-EJECT to remove the tape and
start over.
While the tape is playing, use the
VOL, FADE, BAL,
TREB and
BASS controls just as you do for the radio.
Other controls may have different functions when
a tape
is inserted. The display will show an
arrow to show
which side
of the tape is playing. Note
that cassette tape adapter kits for portable compact
disc players will not work in your cassette player. These
adapters will cause an error message to show on
the
display, and the adapter cassette will be ejected.
FORWARD: Press the right arrow to rapidly advance
the tape. It will continue forwarding until you press the
right arrow again lightly.
REVERSE: Press the left arrow to rapidly reverse the
tape. It will continue reversing
until you press the left
arrow again lightly.
PROG-RCL: Press this knob to hear the other side of a
tape that is playing.
STOP-EJECT Press this button to remove the tape or
stop playing the tape and switch
to the radio.
CLN: This message may appear on the display. If it
does, your cassette tape player needs to be cleaned. It
will still play tapes, but you should clean it as soon as
possible to prevent damage to your tapes and player.
See “Care of Your Cassette Tape Player” in the Index.
After you clean the player, press and hold STOP-EJECT
for five seconds to reset the CLN indicator. The radio
will display
--- to show the indicator was reset.
3-13
ProCarManuals.com
Page 163 of 372
Setting the Tone
BASS:
Press this button up to increase bass and down
to decrease
it. Press the center of the control to get the
factory preset midpoint.
TREB: Press this button up to increase treble and down
to decrease it. If a station is weak or noisy, press the
button down to reduce the noise. Press the center of the
control to get the factory preset midpoint.
Adjusting the Speakers
BALANCE:
Turn the control behind the upper knob to
adjust the sound between the right and left speakers.
FADE: Turn the control behind the lower knob to move
the sound between the front and rear speakers.
Playing a Cassette Tape
Your tape player is built to work best with tapes that are
30 to 45 minutes long on each side. Tapes longer than
that are
so thin they may not work well in this player.
While the tape is playing, use the
VOL, FADE, TREB
and BASS controls just
as you do for the radio. The
display will show an arrow to show which side of the
tape is playing. When the down indicator arrow is lit,
selections listed
on the bottom side of the cassette are
playing. When the
up arrow is lit, selections listed on the top
side
of the cassette are playing. The tape player
automatically begins playing the other side when it
reaches the end of
the tape.
This system has automatic Dolby Noise Reduction to
reduce background noise on tapes encoded with Dolby
NR. Dolby Noise Reduction is manufactured under a
license from Dolby Laboratories Licensing Corporation.
Dolby and the double-D symbol are trademarks
of
Dolby Laboratories Licensing Corporation.
PROG (1): Press this button to play the other side of
the tape.
CrO2 (2): This button sets the tape bias. When playing
high-bias chrome or metal tapes, press the Cr02 button
to turn
the Cr02 display on. When playing standard bias
tapes, press again to turn the light
off.
REV (5): Press this button to reverse the tape rapidly.
Press
REV or PROG to return to playing speed.
The radio will play the last-selected station while
the tape reverses.
FWD: Press the SCAN button to advance quickly to
another part
of the tape. Press FWD or PROG to return
to playing speed. The radio
will play the last-selected
station while
the tape advances.
ProCarManuals.com
Page 164 of 372

PREV: Press the SEEK left arrow to search for the
previous selection on the tape.
A four-second quiet
interval must be present for the tape to stop. The tape
will also stop when
PROG or the SEEK right arrow
is pressed.
NEXT Press the SEEK right arrow to search for the
next selection
on the tape. Your tape must have at least
four seconds of silence between each selection for
NEXT or
SEEK to work. Press PREV or the SEEK
right arrow to stop searching.
ST-PL: To switch from tape to radio immediately, press
the ST-PL button and the radio will resume playing the
station that was tuned in when you inserted a tape.
Pressing the button again will allow the tape to
resume playing.
EJECT: Press this button to remove the tape. The radio
will play. EJECT may be activated with either the
ignition or the radio off.
AM-FM Stereo with Compact Disc Player
(Option)
Playing the Radio
POWER: Press this button to turn the system on or off
when the ignition is on.
VOL: Press the up arrow to increase volume and the
down arrow to decrease volume. The bottom of the
digital screen displays the setting. For a normal listening
level preset at the factory, press the center of
the button.
RCL: Press this button to recall the station being played
or to display
the clock. RCL may be pressed with the
ignition off to display the time.
3-16
ProCarManuals.com