fuses OLDSMOBILE SILHOUETTE 1997 Owners Manual
[x] Cancel search | Manufacturer: OLDSMOBILE, Model Year: 1997, Model line: SILHOUETTE, Model: OLDSMOBILE SILHOUETTE 1997Pages: 436, PDF Size: 21.87 MB
Page 141 of 436
Turn Signal and Lane Change Indicator
The turn signal has two upward (for right) and two
downward (for left) positions. These positions allow you
to signal a turn or
a lane change.
To signal a turn, move the lever all the way up or down.
When the turn is finished, the lever will return automatically.
An arrow on the instrument panel will flash in the
direction of the turn or lane change.
To signal a lane change, just raise or lower the lever
until the arrow starts to flash. Hold it there until you
complete your lane change. The lever will return by
itself when
you release it.
As you signal a turn or a lane change, if the arrow
flashes faster than normal, a signal bulb may be burned
out and other drivers won’t see your turn signal.
If a bulb is burned out, replace it to help avoid an
accident. If the arrows don’t go on at all when you
signal
a turn, check for burned-out bulbs and check the
fuse (see “Fuses and Circuit Breakers”
in the Index).
If you have a trailer towing option with added wiring for
the trailer lamps, the signal indicator will flash at a
normal rate even
if a turn signal bulb is burned out.
Check the front and rear turn signal lamps regularly to
make sure
they are working.
Turn Signal Reminder Chime
If either turn signal is left on for more than 3/4 of a mile,
a chime will sound to let the driver know to turn it off.
If you need to leave the signal on for more than 3/4 of a
mile, turn off the signal and then turn it back on.
Headlamp HigWLow Beam Changer
To change the headlamps from high to low beam, or low
to high, simply pull
the turn signal lever all the way
toward you. Then release it.
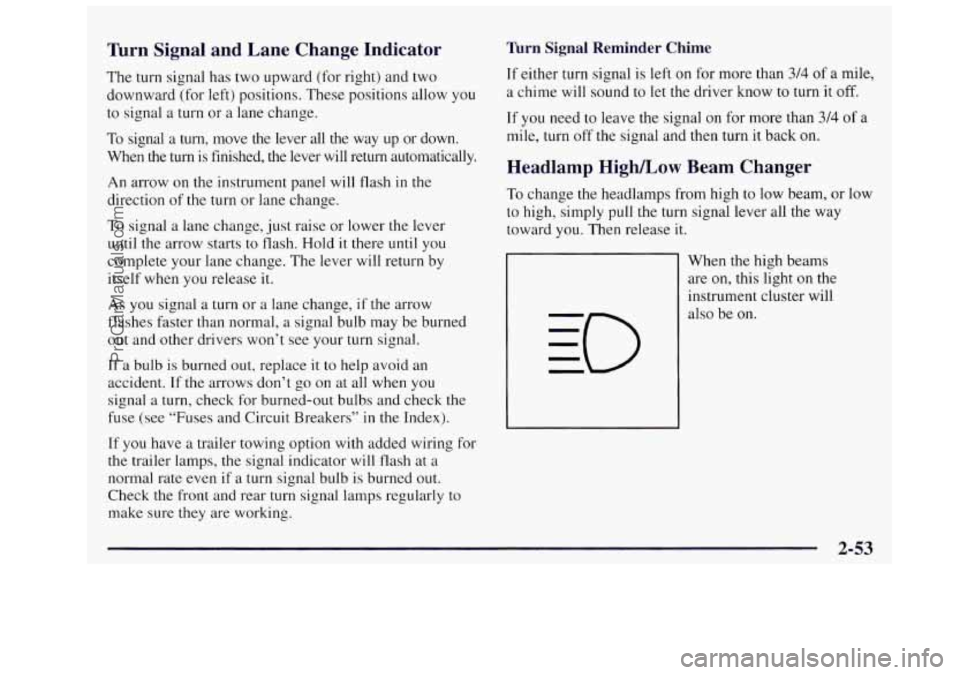
When the high beams
are on, this light on the
instrument cluster will
also be on.
2-53
ProCarManuals.com
Page 175 of 436
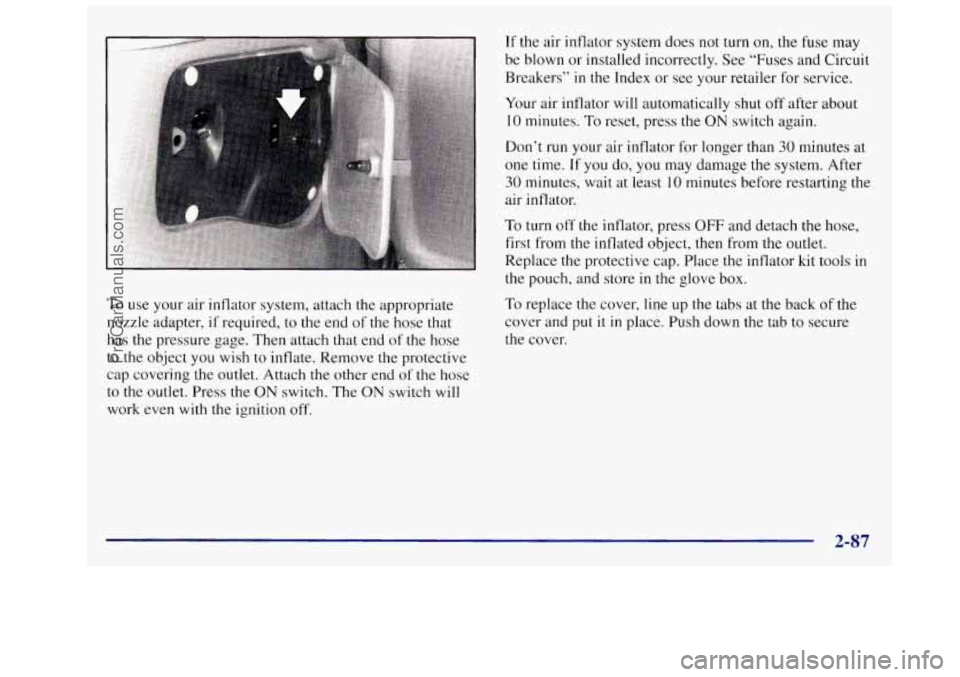
To use your air inflator system, attach the appropriate
nozzle adapter,
if required, to the end of the hose that
has the pressure gage. Then attach that end of the hose
to
the object you wish to inflate. Remove the protective
cap covering the outlet. Attach
the other end of the hose
to
the outlet. Press the ON switch. The ON switch will
work even with the ignition off.
If the air inflator system does not turn on, the fuse may
be blown or installed incorrectly. See “Fuses and Circuit
Breakers’’
in the Index or see your retailer for service.
Your air inflator will automatically shut off after about
10 minutes. To reset, press the ON switch again.
Don’t run your air inflator for longer than
30 minutes at
one time. If
you do, you may damage the system. After
30 minutes, wait at least 10 minutes before restarting the
air inflator.
To turn off the inflator, press OFF and detach the hose,
first from the inflated object, then from the outlet.
Replace the protective cap. Place the inflator kit tools
in
the pouch, and store in the glove box.
To replace the cover, line up the tabs at the back of the
cover and
put it in place. Push down the tab to secure
the cover.
2-87
ProCarManuals.com
Page 255 of 436
Loading Your Vehicle
XXXXXXXX PRINTEO IN U.S.A. I
‘0 GVWR MFD BVGENERALMOTORSCORP
I mi-
GAWR FRT GAWR RR
I 0 m
THIS VEHICLE CONFORMS TO ALL APPLICABLE U.S. FEDERAL
MOTOR VEHICLE SAFETY STANDARDS IN EFFECT ON THE DATE
OF MANUFACTURE SHOWN ABOVE.
I m mn
I
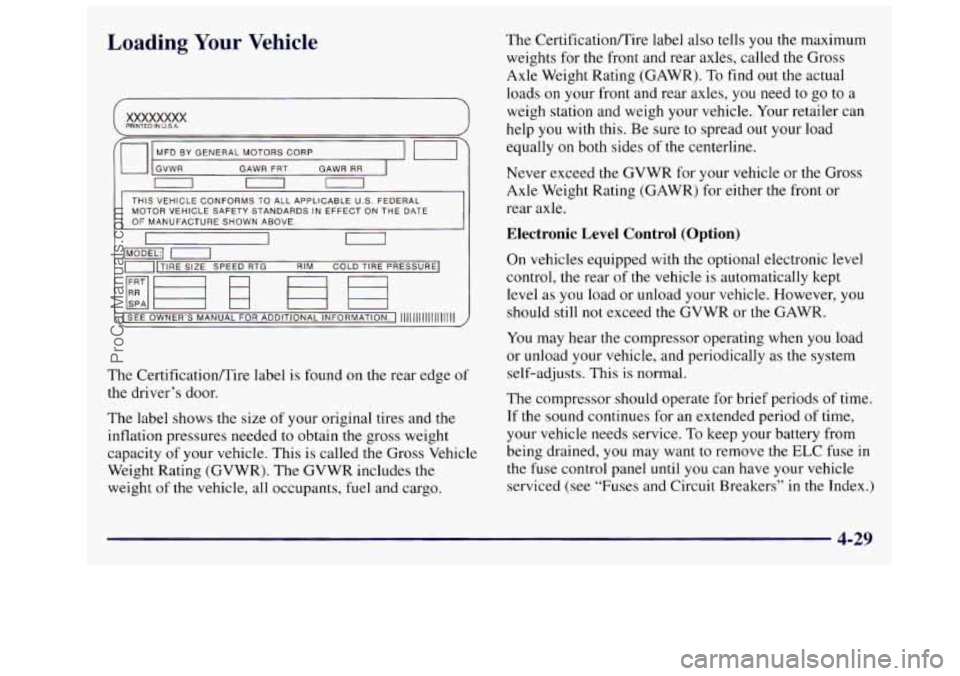
The Certificationnire label also tells you the maximum
weights for the front and rear axles, called the Gross
Axle Weight Rating (GAWR). To find out the actual
loads on your front and rear axles, you need to go to a
weigh station and weigh your vehicle. Your retailer can
help you with this. Be sure to spread out your load
equally
on both sides of the centerline.
. . . - - - - .
-]TIRE SIZE SPEED RTG
1- RIM COLD TIRE PRESSURE]
The CertificationRire label is found on the rear edge of
the driver’s door.
The label shows the size of your original tires and the
inflation pressures needed to obtain the gross weight
capacity of your vehicle. This is called the Gross Vehicle
Weight Rating (GVWR). The GVWR includes the
weight of the vehicle, all occupants, fuel and cargo. Never exceed the
GVWR for your vehicle or the Gross
Axle Weight Rating (GAWR) for either the front or
rear axle.
Electronic Level Control (Option)
On vehicles equipped with the optional electronic level
control, the rear
of the vehicle is automatically kept
level as you load or unload your vehicle. However, you
should still
not exceed the GVWR or the GAWR.
You may hear the compressor operating when you load
or unload your vehicle, and periodically as the system
self-adjusts. This is normal.
The compressor should operate for brief periods of time.
If the sound continues for an extended period of time,
your vehicle needs service.
To keep your battery from
being drained, you may want to remove the ELC fuse in
the fuse control panel
until you can have your vehicle
serviced (see “Fuses and Circuit Breakers” in the Index.)
4-29
ProCarManuals.com
Page 299 of 436
Section 6 Service and Appearance Care
Here you will find information about the care of your Oldsmobile. This section begins with service information, and
then it shows how to check important fluid and lubricant levels. There is also technical information about your
vehicle, and a part devoted
to its appearance care.
6-2
6- 3
6-4
6-5
6-7
6-10 6-15
6-16 6-17
6-20 6- 24
6-25
6-26
6-30 6-30
6-3
1
6-38 Doing
Your Own Service Work
What Kind
of Fuel to Use
Using Fuel in Foreign Countries
Where to Put the Fuel and Filling the Tank
Checking Things Under the Hood
Checking Your Engine
Oil
Air Cleaner
Pollen Filter
Automatic Transaxle Fluid
Engine Coolant
Power Steering Fluid
Where to Fill
the Windshielc 9 Washer Fluic
Important Brake Information
Information on Your Vehicle’s Battery
Tips on Vehicle Storage
Bulb Replacement Procedures
Windshield Wiper Blade Replacement 6-40
6-42
6-44
6-47 6-49
6-50
6-52
6-53 6-54
6-55 6-56
6-57
6-62
6-62
6-62 6-63
6-63 How and
When to Check Tire Inflation
When
it is Time to Buy New Tires
Wheel Alignment
Cleaning the Inside of Your Vehicle
Care of the Safety Belts
Cleaning
the Outside of Your Vehicle
How to Clean Aluminum Wheels
Underbody Maintenance
Recommended Appearance Care Materials
Your Vehicle Identification Number
(VIN)
The Electrical System
Fuses and Circuit Breakers
Replacement Bulb Types for Your Vehicle
Capacities and Specifications
Air Conditioning Specifications
Vehicle Dimensions
Normal Replacement Parts
6-1
ProCarManuals.com
Page 355 of 436
Fuses and Circuit Breakers
The wiring circuits in your vehicle are protected from
short circuits by a combination of fuses, circuit breakers
and fusible thermal links.
Look at the silver-colored band inside the fuse. If the
band
is broken or melted, replace the fuse. Be sure you
replace a bad fuse with a new one of the identical size
and rating.
If you ever have a problem on the road and don’t have a
spare fuse,
you can borrow one that has the same
amperage
or use one of the spare fuses in the underhood
fuse and relay center. Just pick some feature of your
vehicle that you can get along without
-- like the radio
or cigarette lighter -- and use its fuse, if it is the right
amperage. Replace it as soon as you can.
There are two fuse blocks in your vehicle: the
instrument panel fuse block and the underhood fuse and
relay center.
Instrument Panel Fuse Block
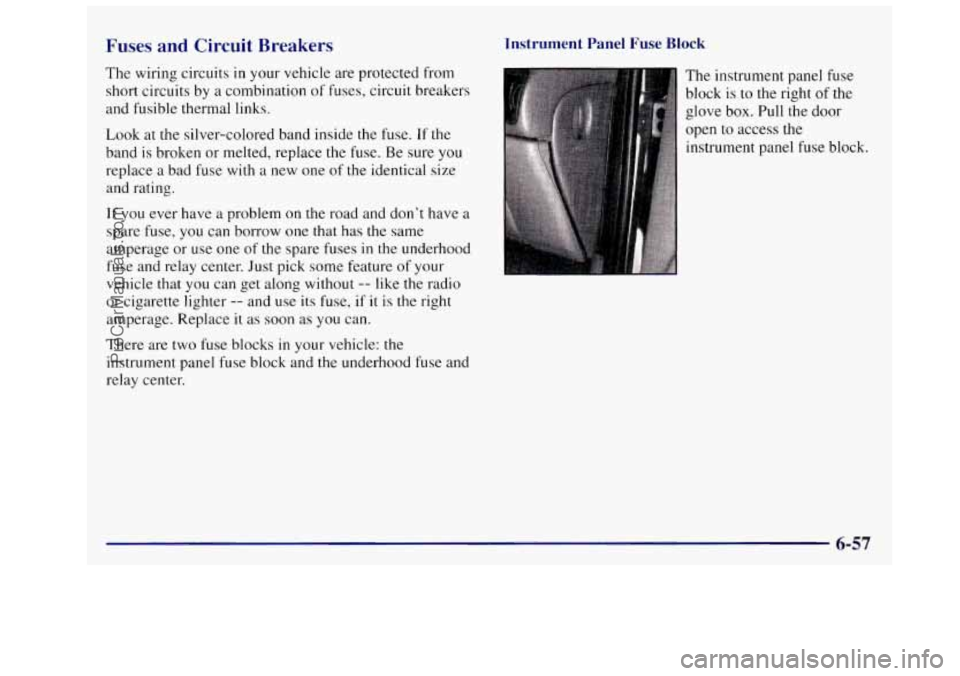
The instrument panel fuse
block
is to the right of the
glove box. Pull the door
open to access the
instrument panel fuse block.
ProCarManuals.com
Page 356 of 436
/ -.
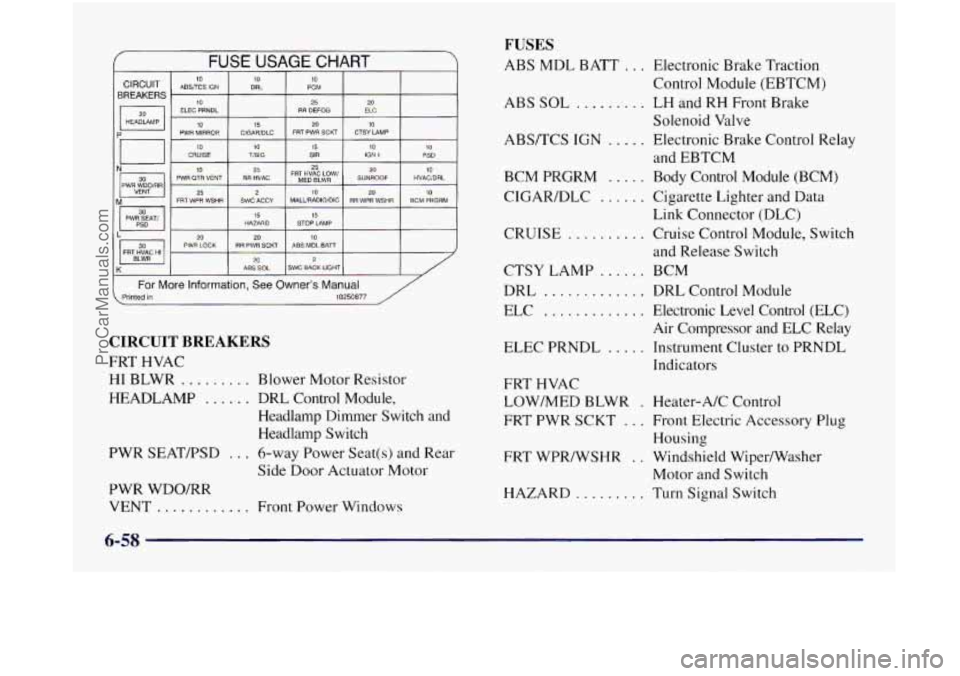
FUSE USAGE CHART
BREAKERS
ELEC PRNDL RR DEFOG ELC
HEADlAMP
20
10 CRUISE 10 TlSlG 15 SIR 10 IGN 1 10 PSD
10 25
‘a 25
25 PWR OTR VENT RR HVAC FR$~~~~~~w’ SUNROOF HVAC/DRL
10
20 10
PIM WDQ/RR 2 10 M 20 FRT WPR WSHR SWC ACCY MALURADIO/DC RR WPR WSHR BCM PRGRM -- I PWGiAT, I HAZARD 15 STOP LAMP 15
L 20 PWR LOCK RR PWR SCKT ABS MOL BATT 20 10
FRT HVAC HI 20 2 K ABS SOL SWC BACK LIGHT
For More Information, See Owner’s Manual . Printed in 10250877 /
CIRCUIT BREAKERS
FRT HVAC
HI BLWR ......... Blower Motor Resistor
HEADLAMP
...... DRL Control Module,
Headlamp Dimmer Switch and
Headlamp Switch
PWR SEATFSD
... 6-way Power Seat(s) and Rear
Side Door Actuator Motor
PWR WDO/RR VENT
............ Front Power Windows
FUSES
ABS MDL BATT ... Electronic Brake Traction
ABS
SOL ......... LH and RH Front Brake
ABS/TCS
IGN ..... Electronic Brake Control Relay
BCM
PRGRM ..... Body Control Module (BCM)
CIGARDLC
...... Cigarette Lighter and Data
CRUISE
.......... Cruise Control Module, Switch
CTSY LAMP
...... BCM
DRL
............. DRL Control Module
ELC
............. Electronic Level Control (ELC)
Air Compressor and ELC Relay
ELEC PRNDL
..... Instrument Cluster to PRNDL
Indicators Control Module
(EBTCM)
Solenoid Valve
and EBTCM
Link Connector (DLC)
and Release Switch
FRT HVAC
LOW/MED BLWR
. Heater-A/C Control
FRT PWR SCKT
... Front Electric Accessory Plug
Housing
Motor and Switch
FRT
WPR/WSHR
. . Windshield Wiper/Washer
HAZARD
......... Turn Signal Switch
6-58
ProCarManuals.com
Page 357 of 436
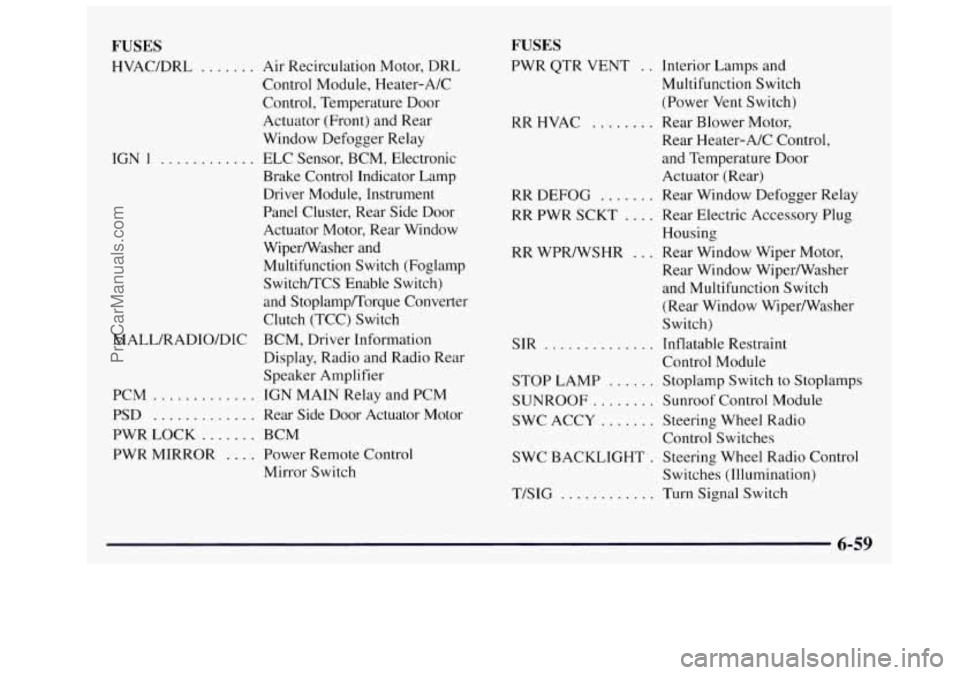
FUSES
HVAC/DRL ....... Air Recirculation Motor, DRL
IGN
1 ...........
MALL/RADIO/DIC Control Module, Heater-A/C
Control,
Temperature Door
Actuator (Front) and Rear
Window Defogger Relay
ELC Sensor, BCM, Electronic
Brake Control Indicator Lamp
Driver Module, Instrument
Panel Cluster, Rear Side Door
Actuator Motor, Rear Window
Wiperwasher and
Multifunction Switch (Foglamp
Switch/TCS Enable Switch)
and Stoplamp/Torque Converter
Clutch (TCC) Switch
BCM, Driver Information
Display, Radio and Radio Rear
Speaker Amplifier
PCM
............. IGN MAIN Relay and PCM
PSD
............. Rear Side Door Actuator Motor
PWR LOCK
....... BCM
PWR MIRROR
.... Power Remote Control
Mirror Switch
FUSES
PWR QTR VENT . . Interior Lamps and
Multifunction Switch
(Power
Vent Switch)
RR HVAC ........ Rear Blower Motor,
Rear Heater-A/C Control,
and Temperature Door
Actuator (Rear)
RR
DEFOG ....... Rear Window Defogger Relay
RR PWR SCKT .... Rear Electric Accessory Plug
Housing
Rear Window Wiper/Washer
and Multifunction Switch
(Rear Window Wiper/Washer
Switch)
Control Module
RR WPR/WSHR
... Rear Window Wiper Motor,
SIR
.............. Inflatable Restraint
STOP LAMP ...... Stoplamp Switch to Stoplamps
SUNROOF
........ Sunroof Control Module
SWC ACCY
....... Steering Wheel Radio
SWC BACKLIGHT
. Steering Wheel Radio Control
T/SIG ............ Turn Signal Switch
Control
Switches
Switches (Illumination)
6-59
ProCarManuals.com
Page 358 of 436
Underhood Fuse and Relay Center
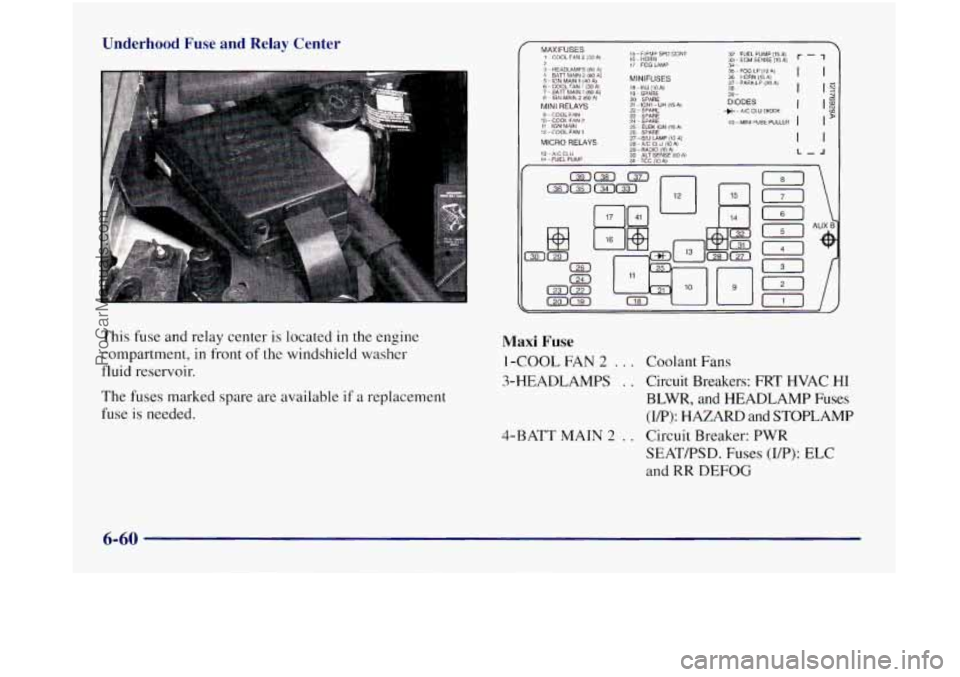
This fuse and relay center is located in the engine
compartment, in front
of the windshield washer
fluid reservoir.
The fuses marked spare are available
if a replacement
fuse is needed.
OR 14
181
17j
EL AUX B
Maxi Fuse
I -COOL FAN 2 . . . Coolant Fans
3-HEADLAMPS
. . Circuit Breakers: FRT HVAC HI
BLWR, and HEADLAMP Fuses
(VP): HAZARD and STOPLAMP
SEAT/PSD. Fuses (UP): ELC
and RR DEFOG
4-BATT MAIN
2 . . Circuit Breaker: PWR
6-60
ProCarManuals.com
Page 359 of 436
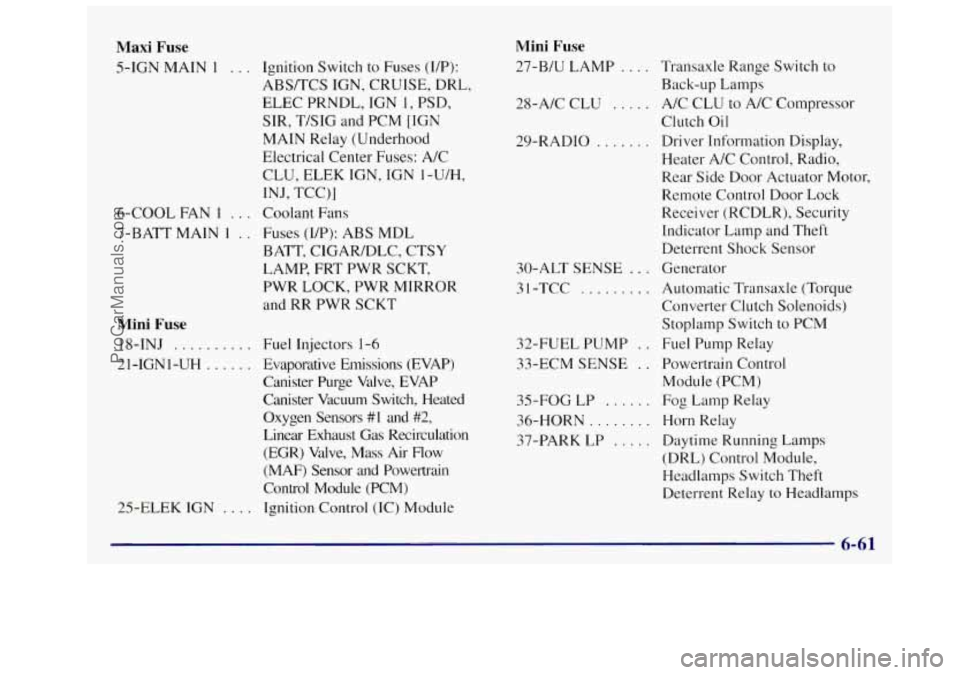
Maxi Fuse
5-IGN MAIN 1 . . . Ignition Switch to Fuses (UP):
ABS/TCS IGN, CRUISE, DRL,
ELEC PRNDL, IGN
1, PSD,
SIR, T/SIG and PCM [IGN
MAIN Relay (Underhood
Electrical Center Fuses: A/C
INJ, TCC)]
CLU,
ELEK
IGN, IGN 1-U/H,
6-COOL FAN
I . . . Coolant Fans
7-BATT MAIN
1 . . Fuses (IP): ABS MDL
BATT, CIGARIDLC, CTSY
LAMP, FRT PWR SCKT,
PWR LOCK, PWR MIRROR
and RR PWR SCKT
Mini Fuse
18-INJ . . . . . . . . . .
21-IGNI-UH . . . . . .
25-ELEK IGN . . .
Fuel Injectors 1-6
Evaporative Emissions (EVAP)
Canister Purge Valve, EVAP
Canister Vacuum Switch, Heated
Oxygen Sensors
#1 and #2,
Linear Exhaust Gas Recirculation
(EGR) Valve, Mass Air Flow
(MAF) Sensor and Powertrain
Control Module (PCM)
Ignition Control (IC) Module
Mini Fuse
27-B/U LAMP . . . . Transaxle Range Switch to
Back-up Lamps
28-A/C CLU
, . . . . A/C CLU to A/C Compressor
Clutch
Oil
29-RADIO . . . . . , , Driver Information Display,
Heater A/C Control, Radio,
Rear Side Door Actuator Motor,
Remote Control Door Lock
Receiver (RCDLR), Security
Indicator Lamp and Theft
Deterrent Shock Sensor
30-ALT SENSE
. . . Generator
3
1 -TCC . . . . . . . . . Automatic Transaxle (Torque
Converter Clutch Solenoids)
Stoplamp Switch to PCM
32-FUEL PUMP
. . Fuel Pump Relay
33-ECM SENSE
. . Powertrain Control
35-FOG
LP . . . . . . Fog Lamp Relay
36-HORN
. . . . . . . . Horn Relay
37-PARK LP
. . . . . Daytime Running Lamps
(DRL) Control Module,
Headlamps Switch Theft
Deterrent Relay to Headlamps
Module
(PCM)
6-61
ProCarManuals.com
Page 425 of 436
Finish Damage ................................. 6-52
FirstGear
..................................... 2-34
Flashers. Hazard Warning
......................... 5-2
Flat Tire. Changing
............................. 5-22
Fluid Capacities
................................ 6-62
Fluids and Lubricants
............................ 7-43
FogLamps
.................................... 2-60
Folding Driver's Seatback
......................... 1-3
Foreign Countries. Fuel ........................... 6-4
FrontDoor
..................................... 2-4
Front Parking/Turn Signal Lamp Bulb Replacement
.... 6-34
Front Seat Storage Bin
........................... 2-75
Front Seat Storage Net
........................... 2-76
Front Sidemarker Lamp Bulb Replacement
........... 6-36
FrontTowing
.................................. 5-10
Fuel .......................................... 6-3
Filling Your Tank
.............................. 6-5
Gage ...................................... 2-105
In Foreign Countries ........................... 6-4
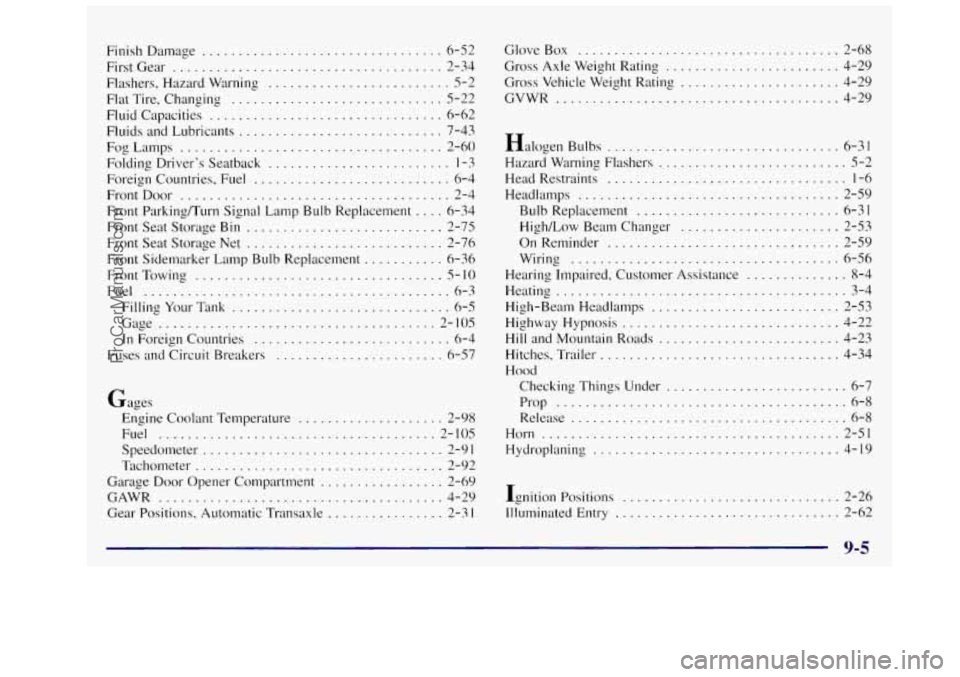
Fuses and Circuit Breakers ....................... 6-57
Gages Engine Coolant Temperature
.................... 2-98
Fuel
...................................... 2-105
Speedometer ................................. 2-9 1
Tachometer .................................. 2-92
Garage Door Opener Compartment
................. 2-69
Gear Positions. Automatic Transaxle
................ 2-3 I
GAWR ....................................... 4-29 GloveBox
.................................... 2-68
Gross Axle Weight Rating
........................ 4-29
Gross Vehicle Weight Rating
...................... 4-29
GVWR
....................................... 4-29
Halogen Bulbs
................................ 6-31
Hazard Warning Flashers
.......................... 5-2
Head Restraints ................................. 1-6
Headlamps
.................................... 2-59
Bulb Replacement ............................ 6-31
High/Low Beam Changer
...................... 2-53
OnReminder
................................ 2-59
Wiring
..................................... 6-56
Hearing Impaired, Customer Assistance
.............. 8-4
Heating
........................................ 3-4
High-Beam Headlamps
.......................... 2-53
Highway Hypnosis
.............................. 4-22
Hill and Mountain Roads ......................... 4-23
Hitches, Trailer
................................. 4-34
Hood
Checking Things Under ......................... 6-7
Prop
........................................ 6-8
Release ...................................... 6-8
Horn ......................................... 2-51
Hydroplaning
.................................. 4-19
Ignition Positions
.............................. 2-26
Illuminated Entry
............................... 2-62
9-5
__ . .- ~
ProCarManuals.com