reset OLDSMOBILE SILHOUETTE 1998 User Guide
[x] Cancel search | Manufacturer: OLDSMOBILE, Model Year: 1998, Model line: SILHOUETTE, Model: OLDSMOBILE SILHOUETTE 1998Pages: 444, PDF Size: 23.2 MB
Page 220 of 444

P.SCAN: Press this button to listen to each of your
favorite stations stored on your pushbuttons for a few
seconds. The radio will scan through each of the stations
stored
on your pushbuttons, except those stations with
weak reception. The AUTO TONE setting stored for
that pushbutton will be automatically chosen. Press
P.SCAN or one of the pushbuttons again to stop
scanning. P.SCAN will be displayed whenever the tuner
is in the P.SCAN mode. The channel number (PI-P6)
will appear momentarily just before the frequency is
displayed. In FM mode, this function will scan through
both
FM1 and FM2 preset stations and FM 1 or FM2 will
appear on the display.
Setting the Tone
BASS: Press this knob lightly so it extends. Turn the
knob
to the right to increase bass and to the left to
decrease bass. When you use this control, the radio’s
AUTO TONE setting will switch to manual and the
AUTO TONE display will
go blank.
TREB: Press this knob lightly so it extends. Turn the
knob to the right to increase treble and to the left
to
decrease treble. When you use this control, the radio’s
AUTO TONE setting will switch
to manual and the
AUTO TONE display will
go blank. If a station is weak
or noisy, you may want
to decrease the treble. Push these knobs back into their stored positions when
you’re not using them.
AUTO TONE: This feature allows you to choose preset
bass and treble equalization settings designed for
country/western, classical, news, rock, pop and jazz
stations.
CnV will appear on the display when you first
press AUTO TONE. Each time you press it, another
setting will appear on the display. Press it again after
JAZZ appears and the AUTO TONE display will go
blank. Tone control will return to the BASS and TREB
knobs. Also, if you use the BASS and TREB knobs,
control will return to them and the AUTO
TONE
display will go blank. Use PUSHBUTTONS to program
AUTO TONE.
Adjusting the Speakers
BAL: Press this knob lightly so it extends. Turn the
knob to the right for the right speakers and to the left for
the left speakers. The middle position balances the
sound between the speakers.
FADE: Press this knob lightly so it extends. Turn the
knob
to the right to adjust the sound to the front
speakers and to the left for the rear speakers. The middle
position balances the sound between the speakers.
Push these knobs back into
their stored positions when
you’re not using them.
3-16
ProCarManuals.com
Page 221 of 444

Playing a Compact Disc
Insert a disc partway into the slot, label side up. The
player will pull it
in. The disc should begin playing. The
display will
show CD and the CD symbol. If you want
to insert a compact disc with the ignition
off, first press
RECALL
or EJECT.
If you’re driving on a very rough road or if it’s very hot,
the disc may not play and ERR (error) may appear on
the display. Press RECALL to take ERR off the display.
When things get back to normal, the disc should play. If
the disc comes out, it could be that:
0 The disc is upside down.
0 It is dirty, scratched or wet.
0 It is very humid. (If so, wait about an hour and
PREV (1): Press this button or the left SEEK arrow to
go to the previous track if the current selection has been
playing for less than eight seconds. If the PREV button
is pressed and the current selection has been playing for
more than eight seconds, it will
go to the beginning of
the current selection. If you hold
the button or press it
more than once, the player will continue moving back
through the disc. The sound will mute while seeking.
try
again.)
RDM (2): Press this button to hear the tracks in random,
rather than sequential, order. RANDOM will show on
the display. Press RDM again to turn off random play.
RDM is reset to off when the disc is ejected.
NEXT (3): Press this button or the right SEEK arrow to
go to the next track. If you hold the button
or press it
more than once, the player will continue moving
forward through the disc. The sound will mute
while seeking.
REV (4): Press and hold this button to quickly reverse
within a track. Release it to play the passage. You can
use the counter reading on the display to locate
a
passage more easily.
FWD (6): Press and hold this button to advance
quickly within a track. Release it to resume playing. You
can use the counter reading on the display to locate
a
passage easily.
RECALL: Press this button to see which track is
playing. Press it again within five seconds to see how
long it has been playing (elapsed time). The track
number also appears when you change the volume or
when a new track starts to play.
ProCarManuals.com
Page 223 of 444

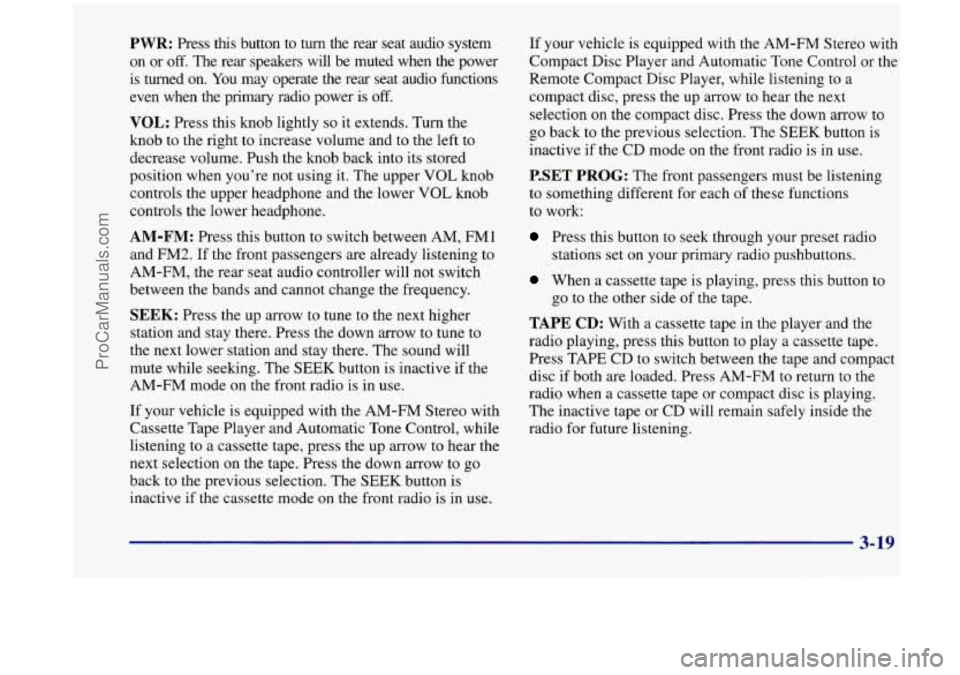
PWR: Press this button to turn the rear seat audio system
on or off. The rear speakers will be muted when the power
is turned on. You may operate the rear seat audio functions
even when the primary radio power is
off.
VOL: Press this knob lightly so it extends. Turn the
knob to the right to increase volume and to the left to
decrease volume. Push the knob back into its stored
position when you’re not using
it. The upper VOL knob
controls the upper headphone and the lower
VOL knob
controls the lower headphone.
AM-FM: Press this button to switch between AM, FMl
and FM2. If the front passengers are already listening
to
AM-FM, the rear seat audio controller will not switch
between the bands and cannot change the frequency.
SEEK: Press the up arrow to tune to the next higher
station and stay there. Press the down arrow to tune to
the next lower station and stay there. The sound will
mute while seeking. The SEEK button is inactive
if the
AM-FM mode on the front radio is in use.
If your vehicle is equipped with the AM-FM Stereo with
Cassette Tape Player and Automatic Tone Control, while
listening to a cassette tape, press the up arrow to hear the
next selection on the tape. Press the down arrow to
go
back to the previous selection. The SEEK button is
inactive if the cassette mode on the front radio is in use.
If your vehicle is equipped with the AM-FM Stereo with
Compact Disc Player and Automatic Tone Control or the
Remote Compact Disc Player, while listening
to a
compact disc, press the up arrow
to hear the next
selection
on the compact disc. Press the down arrow to
go back to the previous selection. The SEEK button is
inactive if the CD mode on the front radio is in use.
P.SET PROG: The front passengers must be listening
to something different for each
of these functions
to work:
Press this button to seek through your preset radio
stations set on your primary radio pushbuttons.
When a cassette tape is playing, press this button to
go to the other side of the tape.
TAPE CD: With a cassette tape in the player and the
radio playing, press this button to play a cassette tape.
Press TAPE CD to switch between the tape and compact
disc
if both are loaded. Press AM-FM to return to the
radio when a cassette tape or compact disc is playing.
The inactive tape or CD will remain safely inside the
radio for future listening.
ProCarManuals.com
Page 228 of 444

Audio Steering Wheel Controls
(If Equipped)
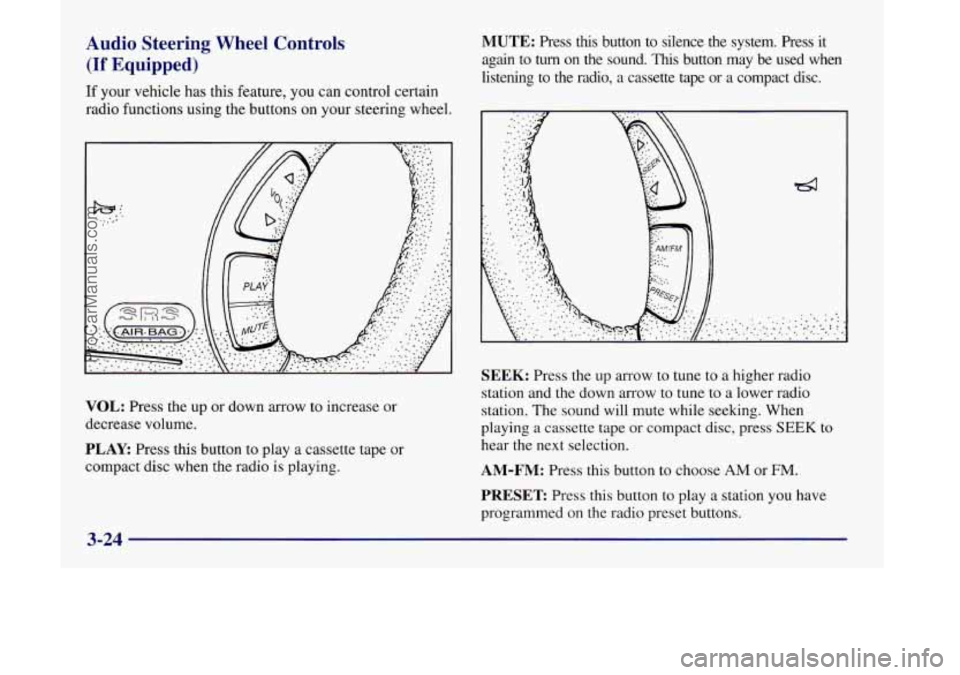
If your vehicle has this feature, you can control certain
radio functions using the buttons on your steering wheel.
VOL: Press the up or down arrow to increase or
decrease volume.
PLAY: Press this button to play a cassette tape or
compact disc when the radio
is playing.
MUTE: Press this button to silence the system. Press it
again to
turn on the sound. This button may be used when
listening to the radio,
a cassette tape or a compact disc.
SEEK: Press the up arrow to tune to a higher radio
station and the down arrow to tune to a lower radio
station. The sound will mute while seeking. When
playing
a cassette tape or compact disc, press SEEK to
hear the next selection.
AM-FM: Press this button to choose AM or FM.
PRESET Press this button to play a station you have
programmed on the radio preset buttons.
3-24
ProCarManuals.com
Page 230 of 444

Care of Your Cassette Tape Player
A tape player that is not cleaned regularly can cause
reduced sound quality, ruined cassettes or a damaged
mechanism. Cassette tapes should be stored in their
cases away from contaminants, direct sunlight and
extreme heat. If they aren’t, they may not operate
properly or may cause failure of the tape player.
Your tape player should be cleaned regularly after every
50 hours of use. Your radio may display CLN to indicate
that you have used your tape player for
50 hours without
resetting the tape clean timer. If this message appears
on
the display, your cassette tape player needs to be
cleaned. It will still play tapes, but you should clean it as
soon as possible to prevent damage to your tapes and
player.
If you notice a reduction in sound quality, try a
known good cassette to see if it
is the tape or the tape
player at fault. If this other cassette has no improvement
in sound quality, clean the tape player.
The recommended cleaning method for your cassette
tape player
is the use of a scrubbing action,
non-abrasive cleaning cassette with pads which scrub
the tape head as the hubs of the cleaner cassette turn.
The recommended cleaning cassette
is available through
your retail facility
(GM Part No. 12344789). When using a
scrubbing action, non-abrasive cleaning
cassette, it is normal for the cassette to eject because
your unit is equipped with a cut tape detection feature
and a cleaning cassette may appear as a broken tape.
To
prevent the cleaning cassette from being ejected, use the
following steps.
1. Turn the ignition to RUN or ACCESSORY.
2. Turn the radio off.
3. Press and hold the TAPE AUX button for five
seconds. The tape symbol on the display will flash
for two seconds.
4. Insert the scrubbing action cleaning cassette.
5. Eject the cleaning cassette after the manufacturer’s
recommended cleaning time.
When the cleaning cassette has been ejected, the cut tape
detection feature is active again.
You may also choose a non-scrubbing action, wet-type
cleaner which uses a cassette with a fabric belt to clean
the tape head. This type of cleaning cassette will not
eject on its own.
A non-scrubbing action cleaner may
not clean as thoroughly as the scrubbing type cleaner.
The use of a non-scrubbing action, dry-type cleaning
cassette is not recommended.
3-26
ProCarManuals.com
Page 231 of 444

After you clean the player, press and hold EJECT for
five seconds to reset the
CLN indicator. The radio will
display
--- to show the indicator was reset.
Cassettes are subject to wear and the sound quality
may degrade over time. Always make sure the cassette
tape is in good condition before you have your tape
player serviced.
Care of Your Compact Discs
Handle discs carefully. Store them in their original cases
or other protective cases and away from direct sunlight
and dust. If the surface of a disc is soiled, dampen a
clean, soft cloth in a mild, neutral detergent solution and clean it, wiping from the center to the edge.
Be sure never to touch the signal surface when handling
discs. Pick up discs by grasping the outer edges or the
edge
of the hole and the outer edge.
Care of Your Compact Disc Player
The use of CD lens cleaner discs is not advised, due to
the risk of contaminating the lens of the CD optics with
lubricants internal to the
CD mechanism.
Integrated Windshield Antenna
The antenna in your vehicle is a very thin, metal layer in
the windshield. If you look near the edges
of the
windshield,
you can see the outline of the antenna. The
connector is at
the top of the windshield, where the
headliner ends.
If you experience difficulty with remote transmitters,
such as a garage door opener, try pointing the device
through the very top of the windshield.
3-27
ProCarManuals.com
Page 334 of 444

1 Add coolant mixture at the recovery tank, but be careful
~ not to spill it.
~
You can be burned if you spill coolant on hot
engine parts. Coolant contains ethylene glycol,
and
it will burn if the engine parts are hot
enough. Don’t spill coolant on
a hot engine.
_- -
When you replace your radiator pressure cap, a GM cap
is recommended.
Radiator Pressure Cap
NOTICE:
Your radiator cap is a 15 psi (105 kPa)
pressure-type cap and must be tightly installed to
prevent coolant loss and possible engine damage
from overheating. Be
sure the arrows on the cap
line up with the overflow tube on the radiator
filler neck.
Thermostat
Engine coolant temperature is controlled by a thermostat
in the engine coolant system. The thermostat
stops the
flow of coolant through the radiator until the coolant
reaches a preset temperature.
When you replace your thermostat, a
GM thermostat
is recommended.
1 6-24
I I
ProCarManuals.com
Page 355 of 444

Wheel Alignment and Tire Balance
The wheels on your vehicle were aligned and balanced
carefully at
the factory to give you the longest tire life
and best overall performance.
Scheduled wheel alignment and wheel balancing are
not needed. However, if you notice unusual tire wear or
your vehicle pulling one way or the other, the alignment
may need
to be reset. If you notice your vehicle
vibrating when driving on a smooth road, your wheels
may need to be rebalanced.
Wheel Replacement
Replace any wheel that is bent, cracked, or badly rusted
or corroded. If wheel nuts keep coming loose, the wheel,
wheel bolts and wheel nuts should be replaced.
If the
wheel leaks air, replace it (except some aluminum
wheels, which can sometimes be repaired). See your
retailer if any
of these conditions exist.
Your retailer will know the kind of wheel you need.
Each new wheel should have
the same load-carrying
capacity, diameter, width, offset and be mounted the
same way
as the one it replaces.
If you need to replace any of your wheels, wheel bolts
or wheel nuts, replace them only with new
GM original
equipment parts. This way,
you will be sure to have the right wheel, wheel bolts
and wheel nuts
for your
Oldsmobile model.
Using the wrong replacement wheels, wheel bolts
or wheel nuts on your vehicle can be dangerous.
It could affect the braking and handling of your
vehicle, make your tires lose air and make you
lose control. You could have
a collision in which
you or others could be injured. Always use the
correct wheel, wheel bolts and wheel nuts for
replacement.
NOTICE:
The wrong wheel can also cause problems with
bearing life, brake cooling, speedometer or
odometer calibration, headlamp aim, bumper
height, vehicle ground clearance and tire
or tire
chain clearance to the body and chassis.
See “Changing
a Flat Tire” in the Index for more
information.
6-45
ProCarManuals.com
Page 435 of 444

Replacing Bucketseats
................................. 1-19
Captain’s Chairs
.............................. 1-23
SafetyBelts
................................. 1-90
Split Bench Seat
............................... 1-12
Reporting Safety Defects
...................... 8-8. 8-9
Resetting the Power Sliding Door
.................. 2-19
Restraints Checking
................................... 1-89
Child
....................................... 1-70
Head
........................................ 1-6
Replacing Parts After a Crash
................... 1-90
Second Row Safety Belt Stowage
................. 1-7
Systemcheck
................................ 7-30
Restraint Systems. Supplemental (SRS)
............. 1-38
Reverse
....................................... 2-31
Right Front Passenger Position
.................... 1-38
Roadside Assistance
.............................. 8-5
Rocking
Your Vehicle ........................... 5-36
Rotation. Tires
................................. 6-41
Seat and Restraint System Parts After
a Crash
...... 1-90
safety Belt Extender
............................ 1-89
SafetyBelts
................................... 1-24
Adults
...................................... 1-29
Care
....................................... 6-49
Center Passenger Position (Bench Seat)
........... 1-53
Center Passenger Position (Bucket Seat)
........... 1-54
Children
.................................... 1-56
Driver Position
............................... 1-29
Extender
.................................... 1-89
How to Wear Properly
......................... 1-29
Incorrect Usage
.................... 1-32,l-87, 1-88 Lap
Belt
............................... 1.52. 1.54
Lap-Shoulder
........................... 1.29. 1.47
Larger Children
.............................. 1-86
Passenger Position
............................ 1-38
Questions and Answers
........................ 1-28
Rear
Comfort Guides .......................... 1-50
Rear Seat Outside Passenger Positions
............ 1-46
Rear Seat Passengers
.......................... 1-46
Reminder Light
......................... 1.25. 2.87
Right Front Passenger Position
.................. 1-38
Shoulder Belt Height Adjuster
................... 1-31
Smaller Children and Babies
.................... 1-56
WhyTheyWork
.............................. 1-25
SafetyChains
.................................. 4-37
Safety Defects. Reporting
..................... 8-8. 8-9
Safety Warnings and Symbols
....................... 1u
Scheduled Maintenance Services .................... 7-4
Seat Controls
............................... 1-2. 1-6
Seatback
Folding Driver’s
............................... 1-3
RecliningFront
............................... 1-4
Controls
................................. 1-2. 1-6
Driver’s Four-Way Manual
...................... 1-2
Dumpandstow
............................... 1-7
Lumbar Control
............................... 1-6
Manual Front Passenger
......................... 1-4
Power
....................................... 1-3
Rear
........................................ 1-6
Restraint Systems
.............................. 1-1
Seat Controls ................................. 1-2
Replacing After
a Crash
........................ 1-90
Use During Pregnancy
......................... 1-37
...
Seats
9-9
ProCarManuals.com