seat OLDSMOBILE SILHOUETTE 1998 Manual PDF
[x] Cancel search | Manufacturer: OLDSMOBILE, Model Year: 1998, Model line: SILHOUETTE, Model: OLDSMOBILE SILHOUETTE 1998Pages: 444, PDF Size: 23.2 MB
Page 173 of 444
Front Seat Storage Bin
The storage bin is located under the manual front
passenger’s seat.
To open the bin, lift the handle and
slide the drawer out.
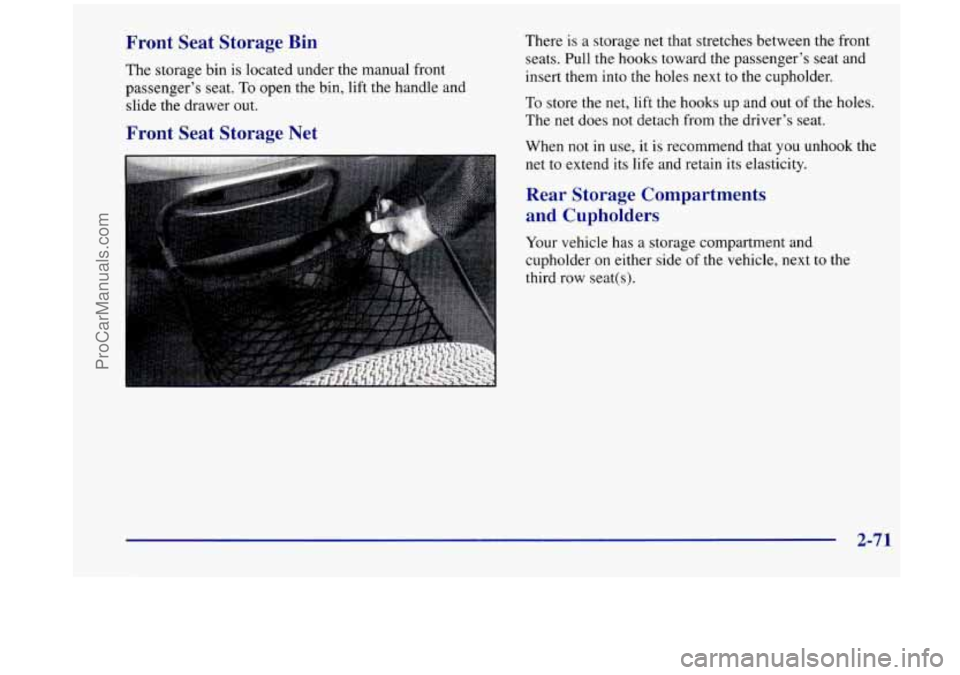
Front Seat Storage Net
There is a storage net that stretches between the front
seats. Pull the
hooks toward the passenger’s seat and
insert them into the holes next
to the cupholder.
To store the net, lift the hooks up and out of the holes.
The net does not detach from the driver’s seat.
When not in use, it is recommend that
you unhook the
net to extend its
life and retain its elasticity.
Rear Storage Compartments
and Cupholders
Your vehicle has a storage compartment and
cupholder on either side of the vehicle, next
to the
third row seat(s).
2-71
ProCarManuals.com
Page 175 of 444
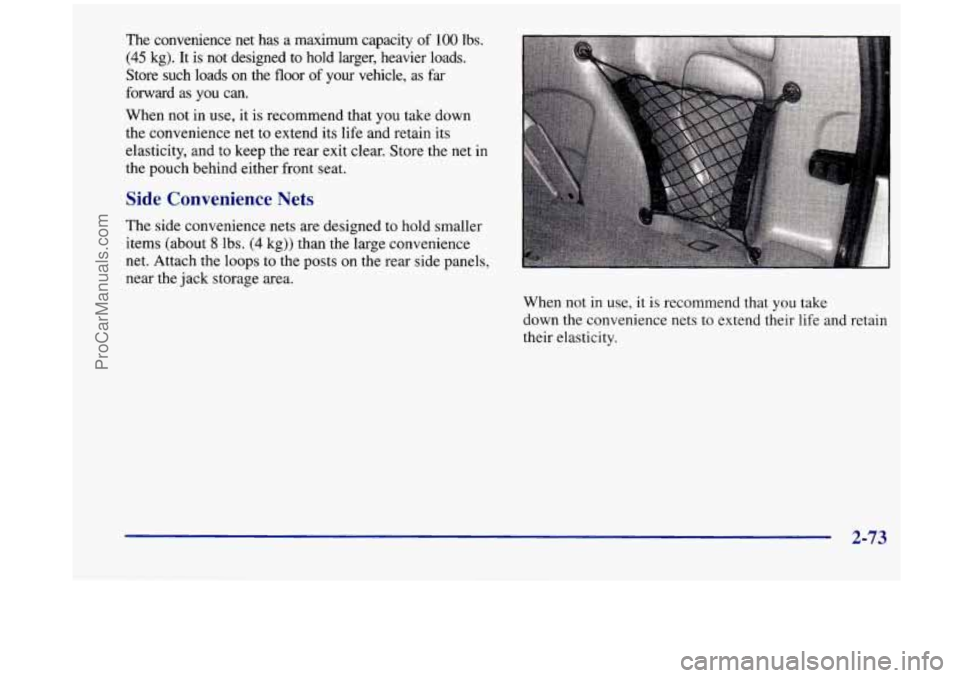
The convenience net has a maximum capacity of 100 lbs.
(45 kg). It is not designed to hold larger, heavier loads.
Store such loads on the floor
of your vehicle, as far
forward as you can.
When not in use, it is recommend that
you take down
the convenience net to extend its life and retain its
elasticity, and
to keep the rear exit clear. Store the net in
the pouch behind either front seat.
Side Convenience Nets
The side convenience nets are designed to hold smaller
items (about
8 lbs. (4 kg)) than the large convenience
net. Attach the loops to the
posts on the rear side panels,
near the jack storage area.
When not in
use, it is recommend that you take
down the convenience nets to extend their life and retain
their elasticity.
2-73
ProCarManuals.com
Page 205 of 444
Section 3 Comfort Controls and Audio Systc-;
In this section, you’ll find out how to operate the comfort control and audio systems offered with your vehicle. Be
sure to read about the particular systems supplied with your vehicle.
3-2
3-3
3-4
3-4
3-5
3-6
3-8
3-9 3-10
3- 14 Comfort Controls
Air Conditioning
Heating
Defogging and Defrosting
Rear Window Defogger
Rear Climate Control (If Equipped)
Ventilation System
Setting the Clock for All Systems
AM-FM Stereo with Cassette Tape Player and
Automatic Tone Control
AM-FM Stereo with Compact Disc Player and
Automatic Tone Control
(If Equipped) 3-18
3 -20
3-21
3 -24
3 -25
3 -25
3-26
3-27
3 -27
3-27 Rear Seat
Audio
(If Equipped)
Remote Compact Disc Player (If Equipped)
Theft-Deterrent Feature Audio Steering Wheel Controls
(If Equipped)
Understanding Radio Reception
Tips About Your Audio System
Care of Your Cassette Tape Player
Care of Your Compact Discs
Care of Your Compact Disc Player
Integrated Windshield Antenna
3-1
ProCarManuals.com
Page 206 of 444
Comfort Controls
This section tells you how to make your air system work
for you. Your comfort control system uses
ozone-friendly
R- 134a refrigerant.
With these systems,
you can control the heating, cooling
and ventilation
in your vehicle. Your vehicle also has a
flow-through ventilation system described later
in
this section.
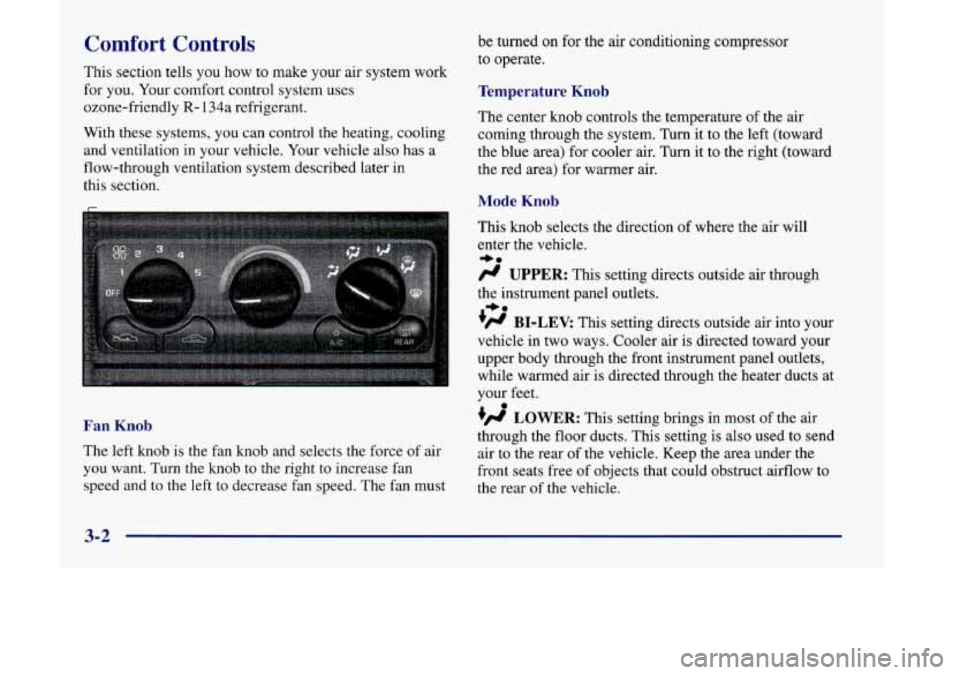
Fan Knob
The left knob is the fan knob and selects the force of air
you want. Turn the knob to the right to increase fan
speed and to the left to decrease fan speed. The fan must be turned on
for the air conditioning compressor
to operate.
Temperature Knob
The center knob controls the temperature of the air
coming through the system. Turn it to the left (toward
the blue area) for cooler air. Turn it to the right (toward
the red area) for warmer air.
Mode Knob
This knob selects the direction of where the air will
enter the vehicle.
/J UPPER: This setting directs outside air through
the instrument panel outlets.
+fl BI-LEV: This setting directs outside air into your
vehicle in two ways. Cooler air is directed toward your
upper body through the front instrument panel outlets,
while warmed air is directed through the heater ducts at
your feet.
+d LOWER: This setting brings in most of the air
through the floor ducts. This setting is also used to send
air to the rear of the vehicle. Keep the area under the
front seats free
of objects that could obstruct airflow to
the rear
of the vehicle.
+0
+e
0
3-2
ProCarManuals.com
Page 210 of 444

Rear Climate Control (If Equipped)
If you have the optional rear climate control, the rear
seat passengers can control the temperature and
the
amount of air directed to the rear of the vehicle. The
amount of air directed to the rear of the vehicle can also
be adjusted using the front control for the rear fan.
Set the main climate control mode knob to
LOWER,
DEFOG or DEFROST, when outside temperatures are
cold or moderate, to send air to the rear of the vehicle
through the lower vents.
Set the main climate control mode knob to UPPER or
BI-LEV to send air to the rear
of the vehicle through the
headliner outlets.
To send conditioned air to the rear of the vehicle, press
the
A/C button (the light will glow) on the main climate
controls.
If you do not select NC, air directed to the rear
of the vehicle will be cabin temperature.
Rear Fan Control
This option comes with the rear climate controls.
Keep the area around the base
of the center instrument
panel console and
the area between and under the front
seats free
of objects that would obstruct airflow to the
rear
of the vehicle.
O’@ ’
/C
R (
REAR) c
The rear fan control is
located below the
climate control system,
in the switchbank.
Turn the fan to the desired setting for the amount of air
to be directed to
the rear of the vehicle. The temperature
of the air will be
the same as the air in the front of the
vehicle. The rear fan control in the instrument panel
switchbank has an
R setting which allows the rear
passengers to use the rear climate control knobs to
adjust the air through the rear air outlets.
3-6
ProCarManuals.com
Page 211 of 444
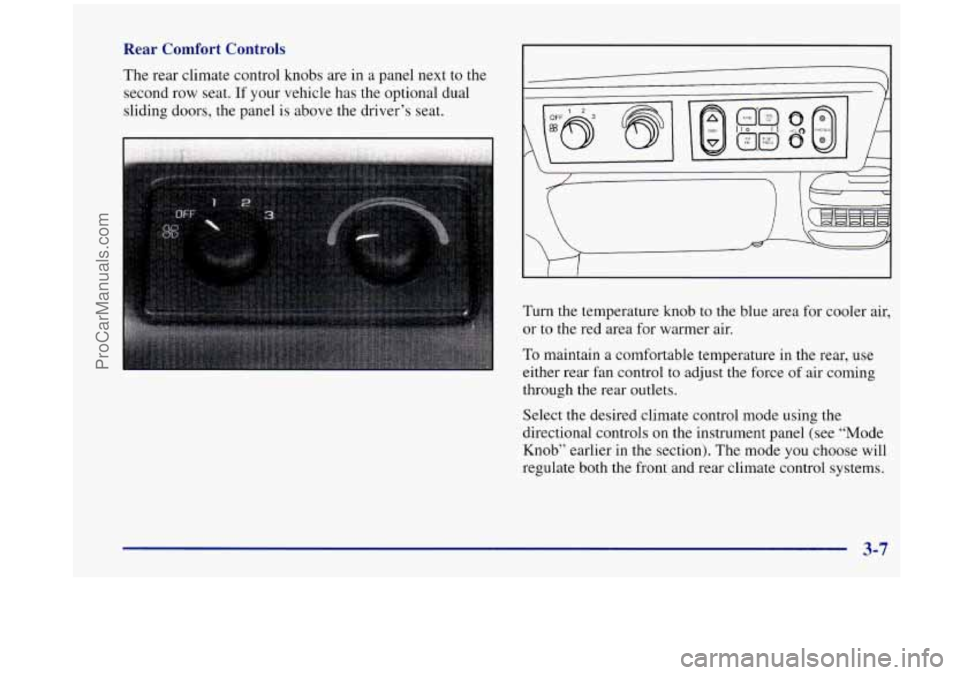
Rear Comfort Controls
The rear climate control knobs are in a panel next to the
second row seat.
If your vehicle has the optional dual
sliding doors, the panel is above the driver’s seat. Cl
A
Turn the temperature knob to the blue area for cooler air,
or to the red area for warmer air.
To maintain a comfortable temperature in the rear, use
either rear fan control to adjust the force of air coming
through the rear outlets.
Select the desired climate control mode using the
directional controls on the instrument panel (see “Mode
Knob” earlier in the section). The mode you choose will
regulate both the front and rear climate control systems.
3-7
ProCarManuals.com
Page 212 of 444
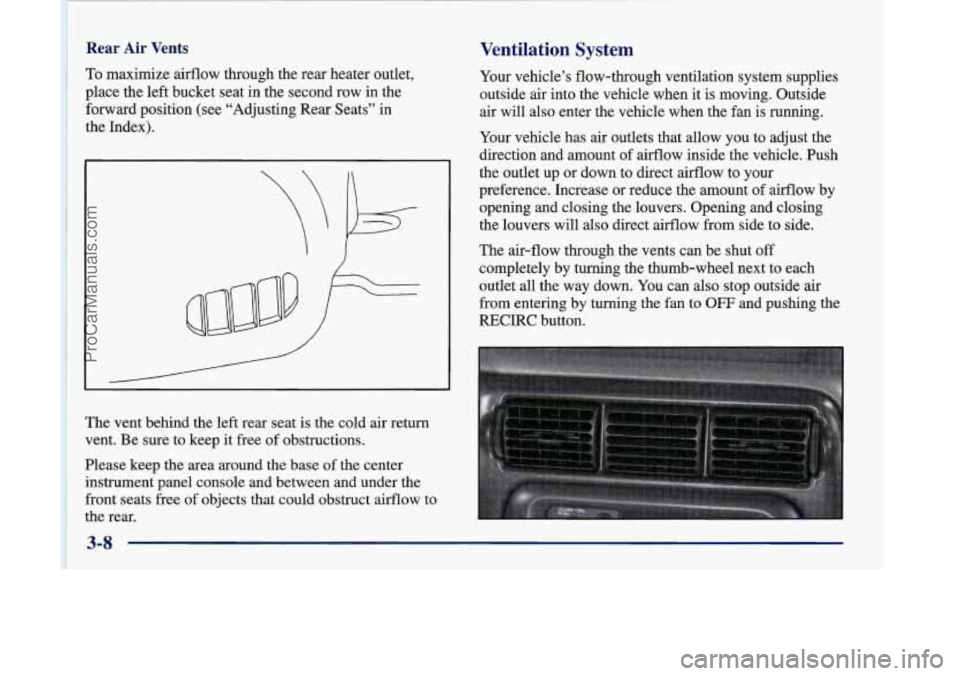
~ 1 To maximize airflow through the rear heater outlet,
i place the
left bucket seat in the second row in the
~ forward position (see “Adjusting Rear Seats” in
1 the Index).
Rear Air Vents
I
~
1 ~ vent. Be sure to keep it free of obstructions.
~ Please keep the area around the base of the center ’ instrument panel console and between and under the
~ front seats free of objects that could obstruct airflow to
~ the rear.
The
vent behind
the left rear seat is the cold air return
~
Ventilation System
Your vehicle’s flow-through ventilation system supplies
outside air into the vehicle when it is moving. Outside
air will also enter the vehicle when the fan
is running.
Your vehicle has
air outlets that allow you to adjust the
direction and amount
of airflow inside the vehicle. Push
the outlet up or down to direct airflow to your
preference. Increase or reduce the amount of airflow by
opening and closing the louvers. Opening and closing
the louvers will
also direct airflow from side to side.
The air-flow through the vents can be shut
off
completely by turning the thumb-wheel next to each
outlet all the way down. You can also stop outside air
from entering by turning the fan
to OFF and pushing the
RECIRC button.
ProCarManuals.com
Page 213 of 444

Ventilation Tips
Keep the hood and front air inlet free of ice, snow or
any other obstruction (such as leaves). This will
allow the heater and defroster to work much better,
reducing the chance of fogging the inside of
your windows.
When you enter a vehicle in cold weather, turn the
blower fan to
5 for a few moments before driving
off. This helps clear the intake ducts of snow and
moisture, and reduces the chance of fogging the
inside of your windows.
instrument panel console and the air path under the
front seats clear of objects. This helps air to circulate
throughout your vehicle.
Keep the area around the base of the center
In cold weather, operating the system in the
OUTSIDE AIR mode will improve the time it takes
to warm the vehicle.
Audio Systems
Your Delco Electronics audio system has been designed
to operate easily and give years
of listening pleasure.
You will get the most enjoyment out of it if you acquaint
yourself with it first. Find out what your Delco
Electronics system can do and how to operate all its
controls, to be sure you’re getting the most out of the
advanced engineering that went into it.
Setting the Clock for All Systems
Press and hold HR until the correct hour appears. Press
and hold
MN until the correct minute appears.
ProCarManuals.com
Page 222 of 444

If you turn off the ignition or radio with a disc in the
player, it will stay in the player. When you turn on the
ignition or system, the disc will start playing where it
was stopped.
If you press EJECT but don’t remove the
disc, the player will pull the disc back in to protect it
after about one minute. If you leave a compact disc
in the player while listening to the radio, it may
become warm. This feature
allows rear seat passengers to listen to a
different music source than the front seat passengers
including AM-FM automatic tone control, cassette tapes
or
CDs. For example, rear seat passengers may listen to
a cassette tape or CD through headphones while the
driver listens to the radio through the front speakers.
The rear seat passengers have control of the volume for
each headphone. Be aware that the front seat audio
controls always override the rear seat audio controls.
Note that
this feature is intended for rear seat passengers.
3-18
ProCarManuals.com
Page 223 of 444
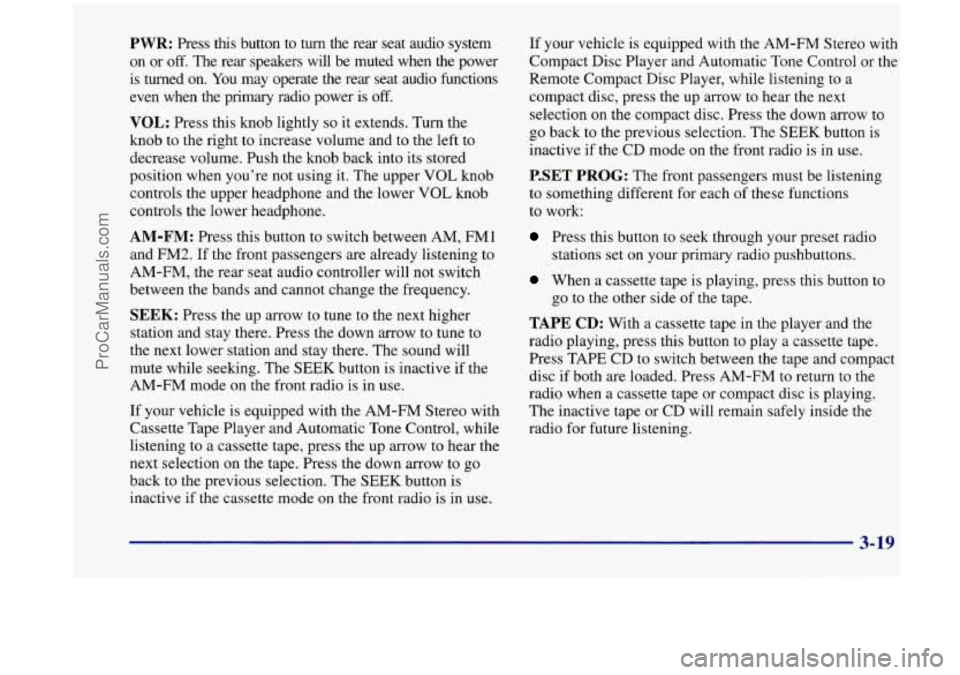
PWR: Press this button to turn the rear seat audio system
on or off. The rear speakers will be muted when the power
is turned on. You may operate the rear seat audio functions
even when the primary radio power is
off.
VOL: Press this knob lightly so it extends. Turn the
knob to the right to increase volume and to the left to
decrease volume. Push the knob back into its stored
position when you’re not using
it. The upper VOL knob
controls the upper headphone and the lower
VOL knob
controls the lower headphone.
AM-FM: Press this button to switch between AM, FMl
and FM2. If the front passengers are already listening
to
AM-FM, the rear seat audio controller will not switch
between the bands and cannot change the frequency.
SEEK: Press the up arrow to tune to the next higher
station and stay there. Press the down arrow to tune to
the next lower station and stay there. The sound will
mute while seeking. The SEEK button is inactive
if the
AM-FM mode on the front radio is in use.
If your vehicle is equipped with the AM-FM Stereo with
Cassette Tape Player and Automatic Tone Control, while
listening to a cassette tape, press the up arrow to hear the
next selection on the tape. Press the down arrow to
go
back to the previous selection. The SEEK button is
inactive if the cassette mode on the front radio is in use.
If your vehicle is equipped with the AM-FM Stereo with
Compact Disc Player and Automatic Tone Control or the
Remote Compact Disc Player, while listening
to a
compact disc, press the up arrow
to hear the next
selection
on the compact disc. Press the down arrow to
go back to the previous selection. The SEEK button is
inactive if the CD mode on the front radio is in use.
P.SET PROG: The front passengers must be listening
to something different for each
of these functions
to work:
Press this button to seek through your preset radio
stations set on your primary radio pushbuttons.
When a cassette tape is playing, press this button to
go to the other side of the tape.
TAPE CD: With a cassette tape in the player and the
radio playing, press this button to play a cassette tape.
Press TAPE CD to switch between the tape and compact
disc
if both are loaded. Press AM-FM to return to the
radio when a cassette tape or compact disc is playing.
The inactive tape or CD will remain safely inside the
radio for future listening.
ProCarManuals.com