seat OLDSMOBILE SILHOUETTE 1998 Manual Online
[x] Cancel search | Manufacturer: OLDSMOBILE, Model Year: 1998, Model line: SILHOUETTE, Model: OLDSMOBILE SILHOUETTE 1998Pages: 444, PDF Size: 23.2 MB
Page 264 of 444

/I CAL TION:
Things you put inside your vehicle can strike
and injure people in a sudden stop or turn, or in
a crash.
0 Put things in the cargo area of your vehicle.
Try to spread the weight evenly.
0 Never stack heavier things, like suitcases,
inside the vehicle
so that some of them are
above the tops
of the seats.
0 Don’t leave an unsecured child restraint in
your vehicle.
0 When you carry something inside the
vehicle, secure it whenever you can.
0 Don’t leave a seat folded down unless you
need to.
Electronic Level Control (Option)
On vehicles equipped with the optional electronic level
control, the rear of the vehicle is automatically kept
level as you load or unload your vehicle. However, you
should still not exceed the
GVWR or the GAWR.
You may hear the compressor operating when you load
or unload your vehicle, and periodically as the system
self-adjusts. This is normal.
The compressor should operate for brief periods
of time.
If the sound continues for an extended period of time,
your vehicle needs service.
To keep your battery from
being drained, you may want to remove the
ELC fuse in
the fuse control panel until you can have your vehicle
serviced (see “Fuses and Circuit Breakers” in the Index.)
Using heavier suspension components to get added
durability might not change your weight ratings. Ask
your retailer to help you load your vehicle the right way.
4-32
ProCarManuals.com
Page 326 of 444

Checking or Replacing the Air Cleaner
1. Unlatch the two hooks on top of the air
cleaner housing.
2. Turn back the air inlet panel and rest it on top of the
housing. The air intake tube is designed to flex back;
you do not need to disconnect it.
3. After replacing the air cleaner filter, seat the tabs on
the bottom of the panel into the slots at the bottom.
4. Latch the hooks to secure the panel in place. If the
panel moves easily, check that the tabs
are seated
correctly in the slots.
NOTICE:
If the air cleaner is off, a backfire can cause a
damaging engine fire. And, dirt can easily get
into your engine, which will damage it. Always
have the air cleaner in place when you’re driving.
Passenger Cornparti .t Air
Filter Replacemem
Passenger compartment air, both outside and
I recirculated air, is routed through a passenger
compartment filter, which is part of
a two-piece filter
system. The filter removes certain contaminants from
the air, including pollen and dust particles. Reductions
Operating the engine with the air cleaner off can in airflow, which may occur more quickly in dusty
cause you or others to be burned. The air cleaner areas, indicate that the filter needs to be replaced early.
not only cleans the air, it stops flame if the engine For how often to change the passenger compartment air
backfires. If it isn’t there, and the engine
backfires, you could be burned. Don’t drive with
The access panel for the passenger compartment air
it off, and be careful working on the engine with filter is in the back of the glove box.
the air cleaner off.
filter, see “Maintenance Schedule” in the Index.
6-16
ProCarManuals.com
Page 348 of 444

5. Replace the bulb(s) by pulling the old one(s) out
and gently pushing the
new one(s) into the bulb
holder socket.
7. Reinstall the taillamp assembly by inserting the
outboard locatingketaining pins until the lamp is
seated. Secure with the inboard screws.
For any bulb changing procedure not listed in this
section, contact your retailer service department.
Windshield Wiper
Blade Replacement
For the proper windshield wiper blade length and type,
see “Replacement Parts” in the Index.
Replacement blades come in different types
and are
removed
in different ways. Here’s how to remove the
type with a release clip:
1. Turn the wipers on to the lowest intermittent setting.
2. Turn off the ignition while the wipers are at the
outer positions of the wipe pattern. The blades are
more accessible for removalheplacement while in
A. Tail Bulb C. Turn Signal Bulb
B. Back-up Bulb D. Stop/Tail Bulb this position.
6. Snap the bulb holder back into place making sure all
retaining tabs
are properly over the bulb holder tabs.
3. Pull the windshield wiper arm away from the
windshield
or backglass.
6-38
ProCarManuals.com
Page 359 of 444
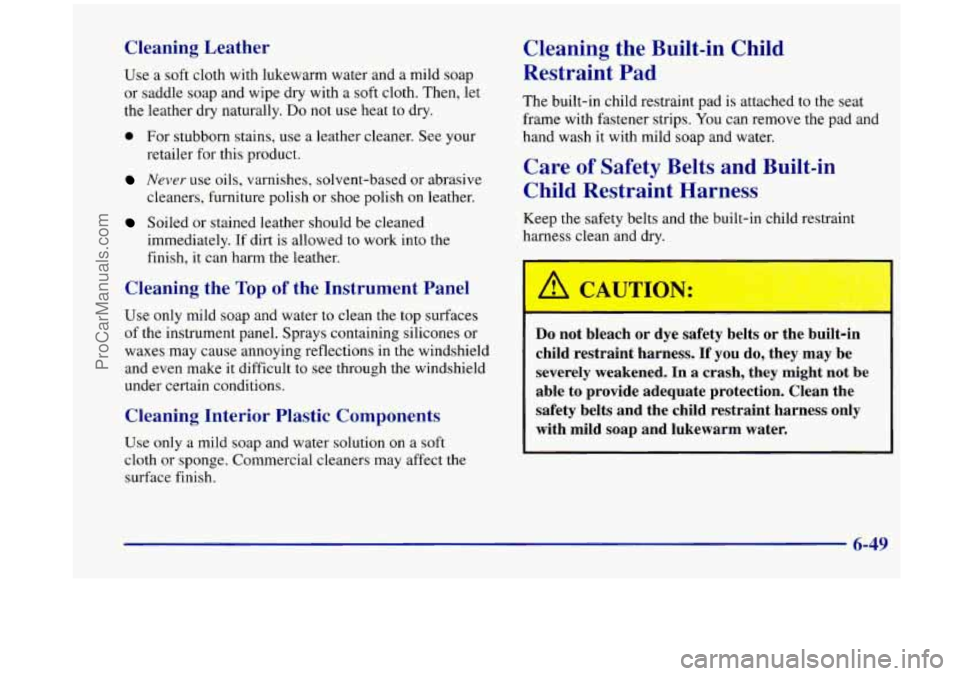
Cleaning Leather
Use a soft cloth with lukewarm water and a mild soap
or saddle soap and wipe dry with a soft cloth. Then, let
the leather dry naturally.
Do not use heat to dry.
0 For stubborn stains, use a leather cleaner. See your
Never use oils, varnishes, solvent-based or abrasive
retailer
for this product.
cleaners, furniture polish or shoe polish on leather.
immediately.
If dirt is allowed to work into the
finish, it can harm the leather.
Soiled or stained leather should be cleaned
Cleaning the Top of the Instrument Panel
Use only mild soap and water to clean the top surfaces
of the instrument panel. Sprays containing silicones or
waxes may cause annoying reflections in the windshield
and even make it difficult
to see through the windshield
under certain conditions.
Cleaning Interior Plastic Components
Use only a mild soap and water solution on a soft
cloth
or sponge. Commercial cleaners may affect the
surface finish.
Cleaning the Built-in Child
Restraint Pad
The built-in child restraint pad is attached to the seat
frame with fastener strips. You can remove the pad and
hand wash
it with mild soap and water.
Care of Safety Belts and Built-in
Child Restraint Harness
Keep the safety belts and the built-in child restraint
harness clean and dry.
Do not bleach or dye safety belts or the built-in
child restraint harness. If you
do, they may be
severely weakened. In
a crash, they might not be
able to provide adequate protection. Clean the
safety belts and the child restraint harness only
with mild soap and lukewarm water.
6-49
ProCarManuals.com
Page 368 of 444

r
FUSE USAGE CHART
CIRCUIT LH T/LP RH T/LP
SWC
BACKLIGHT
3REAKERS
I HEADLAMP ELEC PRNDL
ABS SOL ELC RR DEFOG RR FOG LP
PWR MIRROR CTSY
LAMP FRT PWR
SCKT
CIGARDLC
Fl FRT HVAC/HI
1 CRUISE I TiSlG I SIR
I PWROTRVENT I RRHVAC I FR&~~$~~~w' I SUNROOF I HVAC/DRL I
FRT WPRMSHR BCM
PRGRM
RR WPA WSHR
MALURADIO/DIC
SWC ACCY
LH HEADLP RH
HEADLP
HAZARD LOW LOW
I PWR LOCK I RR PWR SCKT 1 ABS MOD BATr I LH:ktDLP I RH%DLp
I I DRL I CANVENTSOL I ABSFCS IGN I PCM /
For More information, See Owner's Manual Printed in /
Circuit Breakers
HEADLAMP
PWR WDOIRR
VENT
PWR SEATIPSD
FRT HVAC/HI
BLWR DRL
Control Module,
Headlamp and
I/P
Dimmer Switch
Front Power Windows
6-Way Power Seat(s) and Rear
Side Door Actuator Motor
Blower Motor Hi Speed Relay
in Module
Fuses
swc
BACKLIGHT
ELEC PRNDL
PWR MIRROR Steering Wheel
Radio Control
Switches (Illumination)
Instrument Cluster to
PRNDL Indicators
Power Remote Control
Mirror Switch
CRUISE Cruise Control Module, Switch
and Release Switch
PWR QTR VENT Interior Lamps and
Multifunction Switch
(Power Vent Switch)
FRT WPWSHR Windshield Wipermasher
Motor and Switch
BCM
PWR LOCK
RH TLP
RR FOG LP
CIGARIDLC
TISIG Not
Used
Not Used Cigarette Lighter and Data Link
Connector (DLC)
Turn Signal Switch
6-58
ProCarManuals.com
Page 371 of 444

Underhood Fuse and Relay Center
This fuse and relay center is located in the engine
compartment, in front
of the windshield washer
fluid reservoir.
The fuses marked spare are available
if a replacement
fuse is needed.
‘ MAXIFUSES 1 ~ COOL FAN 2 :30 A)
3 - HEACLAlvlPS (60 A1 4 8All MAIN 2 (60 A) 5 - lLiN MAIN 1 (40 AI fi - COOL FAN 1 (30 A) 7 - BAlT MAIN 1 !63 A) I3 - IGN MAIN 2 160 AI MINI RELAYS
10 -COOL FAN 2 9 -COOL FAN
12-COOL FAN
1 li IGNMAIN
MICRO RELAYS
IS-FPMPSPDCON~ lG ~- HORN I7 FOGLAMP
MINIFUSES .a- Iru (IO A) ’9 -$=ARE 20 SPARE 21 - lGNi - UH :’5 A) =-SPARE 23 SPARE 21 -SPARE
25-ELEKIGN (l5Aj 26 SPARE 27- BiU LAMP (10 A) 28 - AIC CLU I10 A!
32 FUEL PUMP ;15 AI
33-ECMSENSEilOA) - ’ 34 - 35-FOG LP IlOA) I I 36 HORN (15 A] 37 -PARK LP (20 A) 39 - 38 - II
II
II
DIODES *- AC CLU DIODE
40-MINI FUSEPULLER 1 I
13-AiCCLU 1L - FUEL PUMP 29 - RACCO :la A] 30 ALT SENSE (10 A) L-J 31 --CC (10 A)
Maxi Fuse
1 -COOL FAN 2
3-HEADLAMPS
4-BATT MAIN
2
Coolant Fans
Circuit Breakers: FRT HVAC
HI BLWR, and HEADLAMP
Fuses (UP): HAZARD and
STOPLAMP
Circuit Breaker: PWR
SEATPSD. Fuses
(UP): ELC
and
RR DEFOG
6-61
ProCarManuals.com
Page 406 of 444

At Least Twice a Year Automatic Transaxle Check
Restraint System Check
Make sure the safety belt reminder light and all your
belts, buckles, latch plates, retractors and anchorages are
working properly. If your vehicle has a built-in child
restraint, also periodically make sure the harness straps,
latch plates, buckle, clip, child head restraint and
anchorages are working properly. Look for any other
loose or damaged safety belt and built-in child restraint
system parts. If you see anything that might keep a
safety belt or built-in child restraint system from doing
its
job, have it repaired. Have any torn or frayed safety
belts or harness straps replaced.
Also look for any opened
or broken air bag coverings,
and have them repaired
or replaced. (The air bag system
does not need regular maintenance.)
Wiper Blade Check
Inspect wiper blades for wear or cracking. Replace blade
inserts that appear worn or damaged or that streak or
miss areas
of the windshield. Also see “Wiper Blades,
Cleaning”
in the Index. Check the transaxle fluid level; add
if needed. See
“Automatic Transaxle”
in the Index. A fluid loss may
indicate a problem. Check the system and repair if needed.
At Least Once a Year
Key Lock Cylinders Service
Lubricate the key lock cylinders with the lubricant
specified in Part
D.
Body Lubrication Service
Lubricate all body door hinges, including the liftgate.
Also lubricate all hinges and latches, including those for
the hood, power sliding
door cable, rear compartment,
glove box door, console door, and any folding seat
hardware. Part
D tells you what to use. More frequent
lubrication may be required when exposed to a
corrosive environment.
7-30
ProCarManuals.com
Page 411 of 444
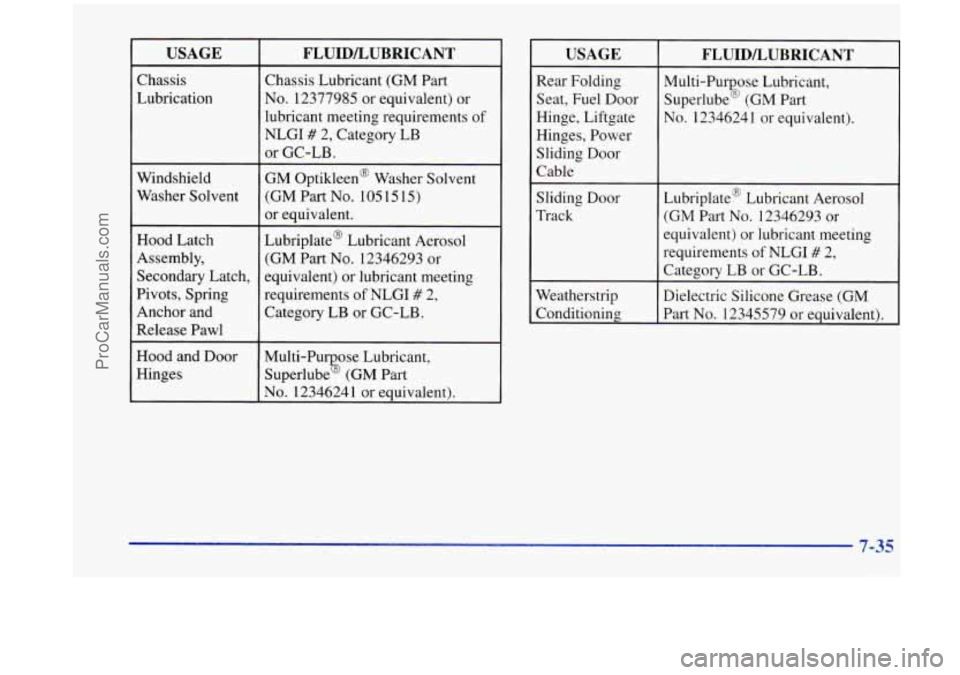
USAGE
Chassis
Lubrication
Windshield Washer Solvent
Hood Latch
Assembly, Secondary Latch,
Pivots, Spring
Anchor and
Release Pawl
Hood and Door
Hinges
FLUIDLUBRICANT
Chassis Lubricant (GM Part
No. 12377985 or equivalent) or
lubricant meeting requirements of
NLGI
# 2, Category LB
or GC-LB.
GM Optikleen@ Washer Solvent
(GM Part No. 105 15
15)
or equivalent.
Lubriplate@ Lubricant Aerosol
(GM Part No. 12346293 or
equivalent) or lubricant meeting
requirements
of NLGI # 2,
Category LB or GC-LB.
Multi-Pu ose Lubricant,
Superlube
% (GM Part
No. 12346241 or equivalent).
USAGE
Rear Folding
Seat, Fuel Door
Hinge, Liftgate
Hinges, Power
Sliding Door
Cable
Sliding Door
Track
Weatherstrip Conditioning
FLUID/LUBRICANT
Multi-Pur ose Lubricant,
Superlube
& (GM Part
No. 12346241 or equivalent).
Lubriplate@ Lubricant Aerosol
(GM Part No. 12346293 or
equivalent) or lubricant meeting
requirements
of NLGI # 2,
Category LB or GC-LB.
Dielectric Silicone Grease (GM
Part No. 12345579 or equivalent).
7-35
ProCarManuals.com
Page 427 of 444
Section 9 Index
Accessory Idator System ....................... 2-78
Accessory Power Outlets
......................... 2-81
Adding Equipment to the Outside Of Your Vehicle
...... 6-3
Adjusting the Bucket Seats
....................... 1-16
Adjusting the Split Bench Seat
..................... 1-9
AirBag
....................................... 1-38
How Does it Restrain
.......................... 1-44
Howitworks
................................ 1-41
Location
.................................... 1-41
Readiness Light
......................... 1.40. 2.87
Servicing
................................... 1-46
What Makes it Inflate
.......................... 1-43
What Will You See After
it Inflates ............... 1-44
When Should it Inflate
......................... 1-42
Aircleaner
.................................... 6-15
Air Conditioning Refrigerants ..................... 6-65
Air Filter Replacement, Passenger Compartment ...... 6-16
Airhflator
.................................... 2-78
Alignment and Balance, Tire
...................... 6-45
Aluminum Wheels, Cleaning
...................... 6-52
Antenna, Integrated Windshield
.................... 3-27
Antifreeze
..................................... 6-21
Brakes
...................................... 4-7
Brake System Warning Light
................ 2-89, 4-7
Appearancecare
............................... 6-47
Appearance Care Materials
....................... 6-54
AirConditioning
................................ 3-3
hti-LOck Ashtray
....... ........... a.......i.. .. .i-...<.:..i.. 2-77
Audio Systems
.................................. 3-9
Automatic
Door Locks ............................ 2-6
Automatic Overdrive
............................ 2-32
Automatic Transaxle Check
....................... 7-30
Automatic Transaxle Fluid
........................ 6-18
HowtoAdd
................................. 6-20
How to Check
............................... 6-18
When to Check and Change
..................... 6-18
Automatic Transaxle Operation
.................... 2-30
Shifting
..................................... 2-30
Automatic Transaxle
Park Mechanism Check ......... 7-32
Battery
...................................... 6-30
Jump Starting
................................. 5-3
BatterySaver .................................. 2-64
BBB Auto Line
................................. 8-7
Before Leaving on a Long
Trip .................... 4-23
Better Business Bureau Mediation
................... 8-7
Blizzard
...................................... 4-28
Brake Warnings
................................ 5.3. 5.5
Adjustment
.................................. 6-30
Fluid
....................................... 6-27
Master Cylinder
.............................. 6-27
Parking
..................................... 2-34
ProCarManuals.com
Page 428 of 444
Brake (Continued) PedalTravel
................................. 6-29
Replacing System Parts
........................ 6-30
System Warning Light
.................... 2.88. 6.28
Trailer
...................................... 4-37
Transaxle Shift Interlock
....................... 2-37
Transaxle Shift Interlock Check
.................. 7-3 1
Wear ....................................... 6-29
Brakes. Anti-Lock
............................... 4-7
Braking
........................................ 4-6
Braking in Emergencies
.......................... 4- 10
Break-In. New Vehicle
.......................... 2-25
BTSI
......................................... 2-37
BTSICheck
................................... 7-31
Bucketseats
................................... 1-15
Adjusting
................................... 1-16
Folding or Reclining the Seatback
................ 1 - 15
Removing
................................... 1-16
Replacing
................................... 1-19
Bulb Replacement .............................. 6-3 1
Canada. Ordering Service and Owner Publications .... 8-9
Canadian Roadside Assistance ...................... 8-6
Capacities and Specifications
...................... 6-64
Captain’s Chairs
................................ 1-21
Reclining
the Seatback ......................... 1-2 1
Removing ................................... 1-22
Replacing
................................... 1-23
Carbon Monoxide
.................... 2-38.4-29. 4-36
Cassette Deck Service
........................... 7-29
Cassette Tape Player
............................ 3- 10
Cassette Tape Player Care ........................ 3-26 CD Adapter Kits
............................... 3-14
CD Player Theft-Deterrent Feature
................. 3-21
Center Dome Lamp
............................. 2-63
Center Passenger Position (Bench Seat)
............. 1-53
Center Passenger Position (Bucket Seat)
............. 1-54
Certificationflire Label
.......................... 4-30
Chains. Safety
................................. 4-37
Chains. Tire
................................... 6-46
Changing
a Flat Tire ............................. 5-24
Charging System Indicator Light
................... 2-88
Checking Your Restraint Systems
.................. 1-89
Chemical Paint Spotting.
......................... 6-53
Child Restraints
................................ 1-70
Built-in
..................................... 1-59
Cleaning Built-in
............................. 6-49
Securing in
a Rear Outside Seat Position ........... 1-77
Securing in the Center Rear Seat Position
(Bucketseat)
............................... 1-81
Securing
in the Center Rear Seat Position
(Third Row Bench)
.......................... 1-79
Securing
in the Right Front Seat Position .......... 1-83
TopStrap
................................... 1-76
WheretoPut
................................ 1-75
Children
...................................... 1-56
Cigarette Lighter
............................... 2-77
Circuit Breakers and Fuses
....................... 6-57
Cleaner. Air
................................... 6-15
Cleaning Alum~num Wheels
............................ 6-52
Built-in Child Restraint
........................ 6-49
Fabric
...................................... 6-48
Glass
....................................... 6-50
Inside of Your Vehicle
......................... 6-47
Instrument Panel
............................. 6-49
9-2
ProCarManuals.com