inflation pressure OLDSMOBILE SILHOUETTE 1998 Owners Manual
[x] Cancel search | Manufacturer: OLDSMOBILE, Model Year: 1998, Model line: SILHOUETTE, Model: OLDSMOBILE SILHOUETTE 1998Pages: 444, PDF Size: 23.2 MB
Page 262 of 444

Run your engine only as long as you must. This saves
fuel. When you run the engine, make it go a little faster
than just idle. That is, push the accelerator slightly. This
uses less fuel for the heat that you get and it keeps the
battery charged. You will need a well-charged battery to
restart the vehicle, and possibly for signaling later on
with your headlamps. Let the heater run for a while.
Then, shut the engine
off and close the window almost
all the way to preserve the heat. Start the engine again
and repeat this only when you feel really uncomfortable
from the cold. But do it as little as possible. Preserve the
fuel as long as you can. To help keep warm, you can get
out of the vehicle and do some fairly vigorous exercises
every half hour or so until help comes.
Loading Your Vehicle
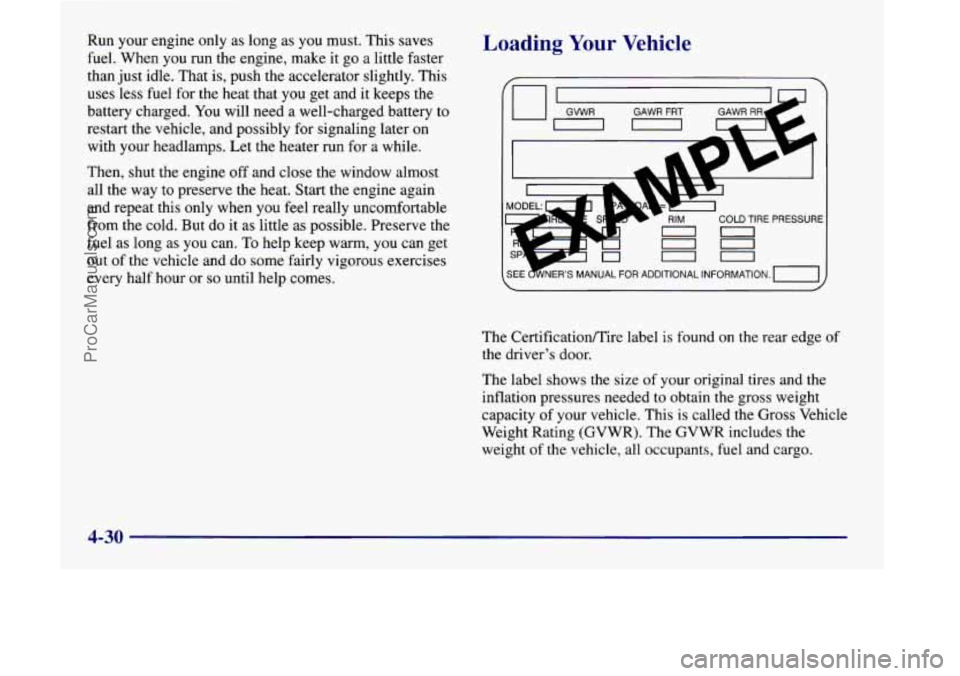
GAWR FRT
COLD TIRE PRESSURE
00 n-
SEE %ER’S MANUAL FOR ADDITIONAL INFORMATION. -1
The Certificatioflire label is found on the rear edge of
the driver’s door.
The label shows the size of your original tires and the
inflation pressures needed to obtain the gross weight
capacity of your vehicle. This is called the Gross Vehicle
Weight Rating (GVWR). The GVWR includes the
weight of the vehicle, all occupants, fuel and cargo.
4-30
ProCarManuals.com
Page 308 of 444

NOTE: INSTALL BOlTOM OF BAG FIRST
TOOL STORAGE
’ BAG & TOOLS
Replace all jacking tools as they were stored in the jack
storage compartment and replace the compartment
cover.
To replace the cover, line up the tabs on the right
of the cover with the slots in the cover opening. Push the
cover
in place and push down the tab so that it rests in
the groove. This secures the cover in place. Unless
you have the plastic “bolt-on” wheel covers, be
sure to also store the center cap. When you replace the
compact spare with a full-size tire, replace the bolt-on
wheel covers and the center cap. Tighten them “hand
tight’’ over the wheel nuts, using the folding wrench.
Compact Spare Tire
Although the compact spare tire was fully inflated when
your vehicle was new, it can lose air after a time. Check
the inflation pressure regularly. It should be
60 psi
(420 kPa).
After installing the compact spare on your vehicle, you
should stop as soon as possible and make sure your
spare tire is correctly inflated. The compact spare
is
made to perform well at speeds up to 65 mph
(105 km/h) for distances up to 3,000 miles (5 000 km),
so you can finish your trip and have your full-size tire
repaired or replaced where you want. Of course, it’s best
to replace your spare with a full-size tire as soon as
you
can. Your spare will last longer and be in good shape in
case
you need it again.
5-34
ProCarManuals.com
Page 350 of 444

Inflation -- Tire Pressure
The CertificatiodTire label, which is on the rear edge of
the driver’s door, shows the correct inflation pressures
for your tires when they’re cold. “Cold” means your
vehicle has been sitting for at least three hours or driven
no more than
1 mile ( 1.6 km).
NOTICE:
Don’t let anyone tell you that underinflation or
overinflation is all right. It’s not.
If your tires
don’t have enough air (underinflation), you can
get the following:
0 Too much flexing
Too much heat
0 Tire overloading
Bad wear
0 Bad handling
0 Bad fuel economy.
NOTICE: (Continued) NOTICE: (Continued)
If your tires have too much air (overinflation),
you can get the following:
0 Unusual wear
0 Bad handling
Rough ride
0 Needless damage from road hazards.
When to Check
Check your tires once a month or more.
Don’t forget your compact spare tire.
It should be at
60 psi
(420 kPa).
How to Check
Use a good quality pocket-type gage to check tire
pressure.
You can’t tell if your tires are properly inflated
simply by looking at them. Radial tires may look
properly inflated even when they’re underinflated.
Be sure to put the valve caps back on the valve
stems. They help prevent leaks by keeping out dirt
and moisture.
6-40
ProCarManuals.com
Page 351 of 444

Tire Inspection and Rotation
Tires should be rotated every 6,000 to 8,000 miles
(10 000 to 13 000 km). Any time you notice unusual
wear, rotate your tires as soon
as possible and check
wheel alignment. Also crheck for damaged tires or
wheels.
See “When It’s ‘Time for New Tires”
and “Wheel Replacement” later in this section for
more information.
The purpose of regular rotation is to achieve more
uniform wear for all tires on the vehicle. The first
rotation
is the most important. See “Scheduled
Maintenance Services” in the Index for scheduled
rotation intervals.
1
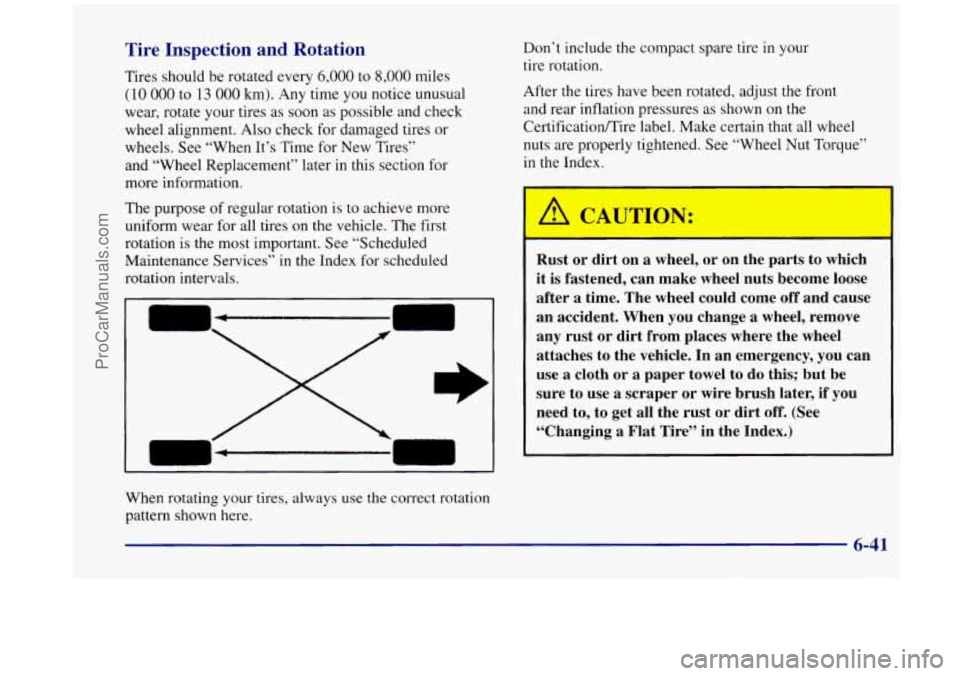
When rotating your tires, always use the correct rotation
pattern shown here. Don’t
include the compact spare tire
in your
tire rotation.
After the tires have been rotated, adjust the front
and rear inflation pressures as shown on the
CertificatiodTire label. Make certain that all wheel
nuts are properly tightened. See “Wheel Nut Torque”
in the Index.
Rust or dirt on
a wheel, or on the parts to which
it is fastened, can make wheel nuts become loose
after
a time. The wheel could come off and cause
an accident. When you change
a wheel, remove
any rust or dirt from places where the wheel
attaches to the vehicle. In an emergency, you can
use
a cloth or a paper towel to do this; but be
sure
to use a scraper or wire brush later, if you
need to,
to get all the rust or dirt off. (See
“Changing
a Flat Tire” in the Index.)
6-41
ProCarManuals.com
Page 405 of 444

Part B: Owner Checks and Services
Listed below are owner checks and services which
should be performed at the intervals specified to help
ensure the safety, dependability and emission control
performance
of your vehicle.
Be sure any necessary repairs are completed at once.
Whenever any fluids or lubricants are added
to your
vehicle, make sure they are the proper ones, as shown in
Part
D.
At Each Fuel Fill
It is important for you or a service station attendant to
pe~orm these underhood checks
at each fueljill.
Engine Oil Level Check
Check the engine oil level and add the proper oil if
necessary. See “Engine Oil” in
the Index for
further details.
Engine Coolant Level Check
Check the engine coolant level and add DEX-COOL@
coolant mixture if necessary. See “Engine Coolant”
in
the Index for further details.
Windshield Washer Fluid Level Check
Check the windshield washer fluid level in the
windshield washer tank and add the proper fluid if
necessary. See “Windshield Washer Fluid” in the Index
for further details.
At Least Once a Month
Tire Inflation Check
Make sure tires are inflated to the correct pressures. See
“Tires” in the Index for further details.
Cassette Deck Service
Clean cassette deck. Cleaning should be done every
50 hours of tape play. See “Audio Systems” in the Index
for further details.
7-29
ProCarManuals.com
Page 437 of 444

Theft ......................................... 2-22
Theft-Deterrent Feature, CD Player
................ 3-21
THEFI'LOCK
.................................. 3-21
Thermostat
.................................... 6-24
ThirdGear
.................................... 2-32
Tilt Steering Wheel
............................. 2-52
Time, Setting the
................................ 3-9
Tire Chains
.................................... 6-46
TireLoading
................................... 4-30
Tire-Loading Information Label
................... 4-30
Tires
......................................... 6-39
Alignment and Balance
........................ 6-45
BuyingNew
................................. 6-42
Chains
..................................... 6-46
Changing a Flat
.............................. 5-24
Compact Spare
............................... 5-34
Inflation
.................................... 6-40
Inflation Check
............................... 7-29
Inspection and Rotation
........................ 6-41
Cleaning
.................................... 6-52
Loading
.................................... 4-30
Pressure
.................................... 6-40
Storing a Flat or Spare
......................... 5-33
Temperature
................................. 6-44
Traction
.................................... 6-44
Treadwe
ar ................................... 6-44
Uniform Quality Grading
....................... 6-43
Used Wheel Replacement
...................... 6-46
Wear Indicators
.............................. 6-42
Wheel Replacement
........................... 6-45
When It's Time for New
....................... 6-42
TopStrap
..................................... 1-76
TorqueLock
................................... 2-37 Torque.
Wheel Nut
......................... 5.32. 6.64
Towing a Trailer
................................ 4-33
Towing
Your Vehicle ............................. 5-7
Traction Control System
.......................... 4-9
Traction Control System Warning Light
........ 2.90. 4.10
Trailer
Brakes
..................................... 4-37
Hitches
..................................... 4-36
Driving on Grades
............................ 4-39
Drivingwith
................................. 4-37
Maintenance When Towing
..................... 4-40
ParkingonHills
.............................. 4-40
Safety Chains
................................ 4-37
Tongueweight
............................... 4-35
Total Weight on Tires
.......................... 4-36
Towing
..................................... 4-33
Turnsignals
................................. 4-39
Weight
..................................... 4-34
Transaxle Fluid, Automatic
....................... 6-18
Transmitters, Remote Lock Control
.................. 2-8
Transportation, Courtesy
.......................... 8-6
Trip Computer
................................ 2-101
Trip Odometer
................................. 2-85
TTY Users
...................................... 8-4
Turn Signal and Lane Change Signals ............... 2-53
Turn Signal Reminder Chime
..................... 2-53
Turn Signal/Multifunction Lever
................... 2-52
Turn Signals When Towing a Trailer
................ 4-39
Underbody Flushing Service
..................... 7-32
Underhood Fuse and Relay Center
................. 6-61
UnderhoodLamp
............................... 6-11
Underbody Maintenance
......................... 6-53
ProCarManuals.com