fuel OLDSMOBILE SILHOUETTE 2003 Owners Manual
[x] Cancel search | Manufacturer: OLDSMOBILE, Model Year: 2003, Model line: SILHOUETTE, Model: OLDSMOBILE SILHOUETTE 2003Pages: 466, PDF Size: 21.55 MB
Page 2 of 466
.
The 2003 Oldsmobile Silhouette Owner Manual
Seats and Restraint Systems ........................... 1-1
Front Seats
............................................... 1-2
Rear Seats
............................................... 1-7
Safety Belts
............................................. 1-22
Child Restraints
....................................... 1-45
Air Bag Systems
...................................... 1-69
Restraint System Check
............................ 1-77
Features and Controls
..................................... 2-1
Keys
........................................................ 2-3
Doors and Locks
....................................... 2-9
Windows
................................................. 2-24
Theft-Deterrent Systems
............................ 2-27
Starting and Operating Your Vehicle
........... 2-32
Mirrors
.................................................... 2-45
Onstar@ System
...................................... 2-47
HomeLink@ Transmitter
......................... 2-49
Storage Areas
......................................... 2-54
Vehicle Personalization
............................. 2-62
Instrument Panel Overview
.......................... 3-4
Climate Controls
...................................... 3-25
Warning Lights, Gages and Indicators
......... 3-39
Driver Information Center (DIC)
.................. 3-60
Instrument Panel
............................................. 3-1
Messaye Center 5-3L n r~ .......................................
Audio
System(s) ....................................... 3-63
Your Driving, the Road, and Your Vehicle
..... 4-2
Towing
................................................... 4-32
Service
..................................................... 5-3
Fuel
......................................................... 5-5
Checking Things Under the Hood
............... 5-10
All-Wheel Drive
........................................ 5-50
Bulb Replacement
.................................... 5-52
Windshield Wiper Blade Replacement
......... 5-58
Tires
...................................................... 5-60
Appearance Care
..................................... 5-87
Vehicle Identification
................................. 5-95
Electrical System
...................................... 5-96
Capacities and Specifications
................... 5-1 03
Normal Maintenance Replacement Parts
...... 5-1 05
Maintenance Schedule
................................ 6-2
Customer Assistance Information
.................... 7-1
Customer Assistance Information
.................. 7-2
Reporting Safety Defects
............................ 7-9
Driving Your Vehicle
....................................... 4-1
Service and Appearance Care
.......................... 5-1
Maintenance Schedule
..................................... 6-1
Index
................................................................ 1
Page 92 of 466
Remote Alarm
When you press the button with the horn symbol on the
remote keyless entry transmitter, the parking lamps
will flash and the horn
will sound. This will allow you to
attract attention,
if needed.
Press the panic button again to stop the alarm from
sounding.
Remote Power Sliding Door Operation
If your vehicle has the power sliding door, your remote
keyless entry transmitter will have a button that has a van
symbol on it. Press it to open or close the sliding door.
See
Power Sliding Door (PSD) on page 2- 16.
If your vehicle has the dual power sliding doors, your
remote keyless entry transmitter will have two buttons
that have a van symbol on them. The van symbol on the
left is for the driver’s side sliding door and the van
symbol on the right is for the passenger’s side sliding
door. See
Power Sliding Door (PSD) on page 2-16.
If the power sliding door(s) is locked, first unlock all
doors, then press the van symbol to open the power
sliding door(s). The parking lamps will flash when
the right button with the van symbol is pressed and they
will not flash when the left button with the van symbol
is pressed. Press the van symbol again to close the
sliding door(s). See
Power Sliding Door (PSD) on
page 2- 16 for more information. You
can operate the power sliding door(s) with the
remote keyless entry transmitter only when the power
sliding door override switch(es) on the overhead
console is turned
off. See Power Sliding Door (PSD)
on page
2- 16.
If your vehicle’s fuel filler door is opened, the driver’s side
power sliding door will not open completely.
Do not try to
force the door. Once the fuel filler door is closed, the
driver’s side sliding door can be opened normally.
Matching Transmitter(s) to Your Vehicle
Each remote keyless entry transmitter is coded to
prevent another transmitter from unlocking your vehicle.
If a transmitter is lost or stolen, a replacement can
be purchased through your dealer. Remember to bring
any remaining transmitters with you when you go to
your dealer. When the dealer matches the replacement
transmitter to your vehicle, any remaining transmitters
must also be matched. Once your dealer has coded the
new transmitter, the lost transmitter will not unlock
your vehicle. Each vehicle can have a maximum of
+^..I .L .----- :.LL--- --L-L^--I I- :A IUUI LI a1 131 I IILLGI 3 I I I~LCII IGU LV 11.
See your dealer to match transmitters to another vehicle.
2-7
Page 98 of 466
Lockout Protection
The lockout protection feature makes it difficult for you
to lock your keys in your vehicle.
If the driver’s door
is open while the keys are in the ignition, a chime will
sound and you will not be able to use your power
door lock switch to lock the vehicle.
If you don’t leave the keys in the ignition or if you use the
manual door lock, you could still lock your keys in your
vehicle. Always remember to take your keys with you.
To turn this feature off or on, see
Vehicle
Personalization
on page 2-62.
Leaving Your Vehicle
If you are leaving the vehicle, take your keys, open your
door and set the locks from the inside. Then get out
and close the door.
Dual Sliding Doors
To open either sliding door from outside the vehicle, pull
the handle out and then pull the door toward the rear.
If you slide the door all the way back, the door will rest in
a detent position.
To move the door forward, you must first pull the door
past the open detent position.
The driver’s side sliding door
is designed to open only a
little
if the fuel door is open. If this ever happens, don’t try
to force the sliding door. Just close the driver’s side sliding door. Then when the fuel filler door is closed,
the driver’s side sliding door can be opened normally.
2-1 3
Page 104 of 466
The driver’s side sliding door is designed to open
only a little
if the fuel door is open. If this ever happens,
don’t try to force the sliding door. When the fuel filler
door is closed, the driver’s side sliding door can
be opened normally.
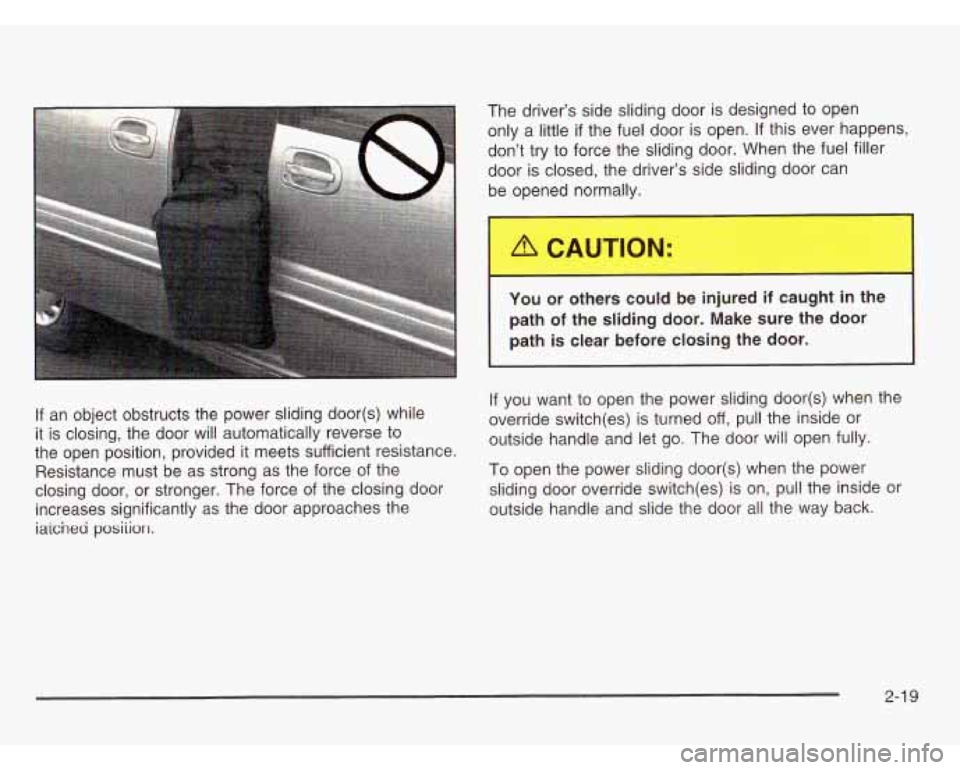
You or others could be injured
if caught in the
path
of the sliding door. Make sure the door
path is clear before closing the door.
If you want to open the power sliding door(s) when the
If an object obstructs the power sliding door(s) while override switch(es) is turned off, pull the inside or
it is closing, the door will automatically reverse to
the open position, provided it meets sufficient resistance. outside handle and
let go. The door will open fully.
Resistance must be as strong as the force of the
To open the power sliding door(s) when the power
closing door, or stronger. The force
of the closing door sliding door override switch(es) is on, pull the inside or
increases significantly as the door approaches the outside handle and slide the door all the way back.
iaichea posiiion.
2-1 9
Page 115 of 466

PASS-Key@ 111 Operation
Your vehicle is equipped
with the PASS-Key@
Ill
(Personalized Automotive
Security System)
theft-deterrent system.
PASS-Key@
Ill is a passive
theft deterrent system.
This means you don’t have
to do anything different
to arm or disarm the
system.
It works when you
insert
or remove the key
from the ignition.
When the PASS-Key@
Ill system senses that someone
is using the wrong key, it shuts down the vehicle’s
starter and fuel systems. The starter will not work and
fuel will stop being delivered to the engine. Anyone
using a trial-and-error method
to start the vehicle will be
discouraged because of the high number of electrical
key codes.
If the engine does not start and the security message
comes on, the key may have a damaged transponder.
Turn the ignition
off and try again.
If the engine still does not start, and the key appears to
be undamaged, try another ignition key. At this time,
you may also want
to check the instrument panel PASS
KEY fuse.
If the engine still does not start with the
other key, your vehicle needs service.
If your vehicle
does start, the first key may be faulty. See your dealer or
a locksmith who can service the PASS-Key@ Ill to
have a new key made. See Fuses and Circuit Breakers
on page 5-96.
It is possible for the PASS-Key@ Ill decoder to learn
the transponder value of a new or replacement key.
Up
to 10 additional keys may be programmed for
the vehicle. This procedure is for learning additional
keys only.
If all the currently programmed keys are lost
or do not operate, you must see your dealer or a
locksmith who can service PASS-Key@
Ill to have keys
made and programmed to the system.
See your dealer or a locksmith who can service
PASS-Key@
Ill to get a new key blank that is cut
exactly as the ignition key that operates the system.
2-30
Page 120 of 466
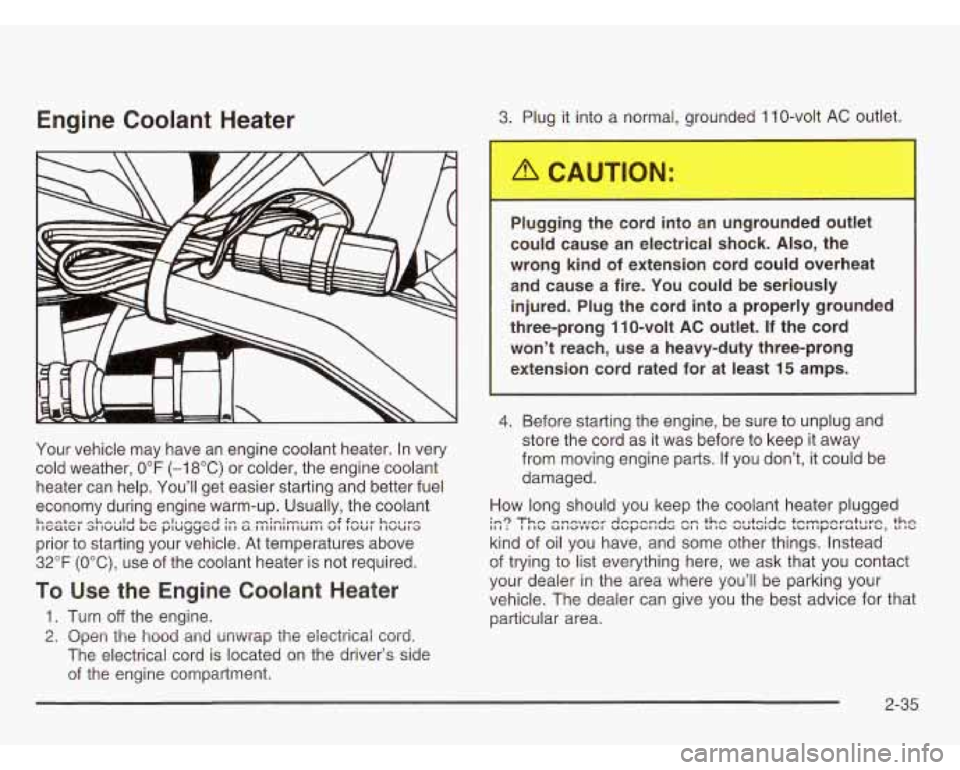
Engine Coolant Heater
Your vehicle may have an engine coolant heater. In very
cold weather,
0°F (-1 8°C) or colder, the engine coolant
heater can help. You’ll get easier starting and better fuel
economy during engine warm-up. Usually, the coolant
prior to starting your vehicle. At temperatures above
32°F (OOC), use of the coolant heater is not required.
h--+-r -hhm .I& h- -1, me.n-~I ;c. - -rc.n-~ I- n.F 4-v vv hew 8“- .. lltialtt ~IIVUIU uti pluyycu III a IIIIIIIIIIUII~ wl lwut IIUUID
To Use the Engine Coolant Heater
1. Turn off the engine.
2. Open the hood and unwrap the eieciricai cord.
The electrical cord is located on the driver’s side
of the engine compartment.
3. Plug it into a normal, grounded 1 10-volt AC outlet.
Plugging the cord into an ungrounded outlet
could cause an electrical shock.
Also, the
wrong kind
of extension cord could overheat
and cause a fire. You could be seriously
injured. Plug the cord into a properly grounded
three-prong 110-volt
AC outlet. If the cord
won’t reach, use a heavy-duty three-prong
extension cord rated
for at least 15 amps.
4. Before starting the engine, be sure to unplug and
store the cord as it was before to keep it away
from moving engine parts.
If you don’t, it could be
damaged.
How long should you keep the coolant heater plugged
kind of oil you have, and some other things. Instead
of trying to list everything here, we ask that you contact
your dealer in the area where you’ll be parking your
vehicle. The dealer can give you the best advice for that
particular area.
in3 Thn mncxL,nr AnnnnAc nn thn nl ItciAn tnmnnvqtl lvn thn I, 1 ; 1 I Ib UI 1dVVbI UbfJbI IUU VI I LI ,b VUl~lUb ,bI I IybluLUI u, LI I”
2-35
Page 123 of 466
Warm-up Shift
Your vehicle has a computer controlled transaxle
designed to warm up the engine faster when the outside
temperature is
35°F (2°C) or colder. You may notice
that the transaxle will shift at a higher vehicle speed until
the engine is warmed up. This is a normal condition
designed to provide heat to the passenger compartment
and defrost the windows more quickly. See
Climate
Control System on
page 3-25 for more information.
THIRD
(3): This position is also used for normal driving,
but it offers more power and lower fuel economy than
AUTOMATIC OVERDRIVE (D).
Here are some times you might choose THIRD
(3)
instead of AUTOMATIC OVERDRIVE (D):
When driving on hilly, winding roads.
When towing a trailer (so there is less shifting
When going down a steep hill. between gears).
SECOND
(2): This position gives you more power,
but lower fuel economy. You can use SECOND
(2) on
hills. It can help control your speed as you go down
steep mountain roads, but then you would also want to
use your brakes
off and on.
Notice: Don’t drive in SECOND (2) for more than
25 miles (40 km), or at speeds over 55 mph (90 km/h),
or you can damage your transaxle. Use THIRD
(3) or
AUTOMATIC OVERDRIVE (D) as much as possible.
Don’t
shift into SECOND (2) unless you are going
slower than
65 mph (105 km/h) or you can damage
your engine.
Notice: If your vehicle seems to start up rather
slowly, or if
it seems not to shift gears as you go
faster, something may be wrong with a transaxle
system sensor. If you drive very far that way, your
vehicle can be damaged.
So, if this happens, have
your vehicle serviced
right away. Until then, you can
use SECOND
(2) when you are driving less than
35 mph (55 km/h) and THIRD (3) for higher speeds.
FIRST
(1): This position gives you even more power
(but lower fuel economy) than
SECOND (2). You can use
it on very steep hills, or in deep snow or mud.
If the shift
lever is put in FIRST
(I), the transaxle won’t downshift
into first gear until the vehicle is going slow enough.
Notice: If your front wheels won’t turn, don’t try to
drive. This might happen if you were stuck in very
deep sand or mud or were up against a solid object.
You could damage your transaxle. Also, if you stop
when going
uphill, don’t hold your vehicle there with
only the accelerator pedal. This could overheat and
damage the transaxle. Use your brakes to hold your
vehicle in position on a
hill.
2-38
Page 158 of 466
Section 3 Instrument Panel
Instrument Panel Overview ........................... 3.4
Hazard Warning Flashers
............................ 3.6
Other Warning Devices
............................... 3.6
Horn
............................................................. 3.7
Tilt Wheel
..................................................... 3-7
Turn SignaVMultifunction Lever
......................... 3.7
Exterior Lamps
............................................. 3.14
Interior Lamps
.............................................. 3.17
Switchbanks
................................................. 3.21
Instrument Panel Switchbank
.......................... 3-21
Overhead Console Switchbank
....................... 3.21
Ultrasonic Rear Parking Assist (URPA)
............ 3.22
Accessory Power Outlets
............................... 3.24
Climate Controls
............................................ 3.25
Climate Control System
................................. 3.25
Dual Climate Control System
.......................... 3.28
Rear Climate Control System
Rear Climate Control System (With Entertainment System)
...................... -3-34
Passenger Compartment Air Filter
................... 3.37
Warning Lights, Gages and Indicators
............. 3.39
Instrument Panel Cluster
................................ 3.40
Outlet Adjustment
......................................... 3.31
ilAlM-.nr I+ lZmtnwtq;n-mnt Ctrctnm \VUiLllWUL LIIL~ILUIIiIII~.. . Vy~L~..., .... ....... " "L 4-49
Speedometer and Odometer ........................... 3.41 Safety
Belt Reminder Light
............................. 3.42
Air Bag Readiness Light
................................ 3-43
Brake System Warning Light
.......................... 3-44
Anti-Lock Brake System Warning Light
............. 3-45
Traction Control System (TCS) Warning Light
...... 3-46
Engine Coolant Temperature Gage
.................. 3-47
Malfunction Indicator Lamp
............................. 3-47
Fuel Gage
................................................... 3-51
Message Center
............................................. 3-52
Service Traction System Warning Message
...... 3-52
Traction Active Message
................................ 3-53
Engine Coolant Temperature Warning
Message
.................................................. 3-53
Charging System Indicator Message
................ 3-54
Low Oil Pressure Message
............................ 3-54
Low Engine Oil Level Message
....................... 3-55
Change Engine Oil Message
.......................... 3-56
Power Sliding Door Warning Message
............. 3-56
Rear Hatch Ajar Warning Message
.................. 3-58
PASS-Key@
I II Security Message ................... -3-58
All-Wheel Drive Disable Warning Message
....... 3-59
Low Fuel Warning Message
........................... 3-59
Driver Information Center (DIC)
....................... 3-60
Eee: P, jar '!!s:n?!g !!esss;e .......................... ... Iz-c;7 v .
3- 1
Page 183 of 466
a (Outside Air): Press this button to turn the
outside air mode on or
off. When this mode is on,
outside air will circulate throughout your vehicle.
When this mode is on, an indicator light in the button
will come on to let you know that
it is activated.
The outside air mode can be used with all modes, but
it
cannot be used with the recirculation mode.
a (Recirculation): This mode keeps outside air
from coming in the vehicle. It can be used to prevent
outside air and odors from entering your vehicle or help
heat or cool the air inside your vehicle more quickly.
Press this button to turn the recirculation mode on or
off.
When the button is pressed, an indicator light will
come on. The air-conditioning compressor also comes
on. The recirculation mode can be used with vent
and bi-level modes, but it cannot be used with floor,
defog, defrost or outside air modes.
Temperature Control: Turn the center knob clockwise
or counterclockwise to increase or decrease the air
temperature inside your vehicle.
e A/C (Air Conditioning): Press this button to turn
the air-conditioning system on or
off. When A/C is
pressed, an indicator light in the button will come on
to let you know that air conditioning
is activated. You may
notice a slight change in engine performance
when the air-conditioning compressor shuts
off and
turns on again. This is normal. The system is designed
to make adjustments to help with fuel economy while
still maintaining the selected temperature.
On hot days, open the windows to let hot inside air
escape; then close them. This helps to reduce the time
it takes for your vehicle to cool down. It also helps
the system to operate more efficiently.
For quick cool down on hot days,
do the following:
1. Select the vent mode.
2. Select the recirculation mode.
3. Select A/C.
4. Select the coolest temperature.
5. Select the highest fan speed.
Using these settings together for long periods of time
may cause the air inside of your vehicle to become
too dry. To prevent this from happening, after the
air inside of your vehicle has cooled, turn the
recirculation mode
off.
The air-conditioning system removes moisture from the
air,
so you may sometimes notice a small amount of
water dripping underneath your vehicle while idling
or after turning off the engine. This is normal.
3-26
Page 186 of 466
a (Outside Air): Press this button to turn the
outside air mode on or
off. When this mode is on,
outside air will circulate throughout your vehicle.
When this mode is on, an indicator light in the button
will come on to let you know that it is activated.
The outside air mode can be used with all modes,
but it cannot be used with the recirculation mode.
(Recirculation): This mode keeps outside air
from coming in the vehicle. It can be used to prevent
outside air and odors from entering your vehicle or help
heat or cool the air inside your vehicle more quickly.
Press this button to turn the recirculation mode on or
off.
When the button is pressed, an indicator light will
come on. The air-conditioning compressor also comes
on. The recirculation mode can be used with vent
and bi-level modes, but it cannot be used with floor,
defog, defrost or outside air modes.
Temperature Control: Use the driver’s and
passenger’s temperature levers to increase or decrease
the air temperature inside your vehicle.
a A/C (Air Conditioning): Press this button to turn
the air-conditioning system on or off. When
A/C is
pressed, an indicator light in the button will come on
to let you know that air conditioning is activated. You may
notice a slight change in engine performance
when the air-conditioning compressor shuts
off and
turns
on again. This is normal. The system is designed
to make adjustments to help with fuel economy while
still maintaining the selected temperature.
On hot days, open the windows to let hot inside air
escape; then close them. This helps to reduce the time
it takes for your vehicle to cool down. It also helps
the system to operate more efficiently.
For quick cool down on hot days, do the following:
1. Select the vent mode.
2. Select the recirculation mode.
3. Select
A/C.
4. Select the coolest temperature.
5. Select the highest fan speed.
Using these settings together for long periods of time
may cause the air inside of your vehicle to become
too dry. To prevent this from happening, after the
recirculation mode
off.
The air-conditioning system removes moisture from the
air,
so you may sometimes notice a small amount of
water dripping underneath your vehicle while idling
or after turning
off the engine. This is normal.
gr inside cf )mIr \/ehic!e hzs ccs!ed, tllrn the
3-29