OPEL 1900 1973 Service Manual
Manufacturer: OPEL, Model Year: 1973, Model line: 1900, Model: OPEL 1900 1973Pages: 625, PDF Size: 17.22 MB
Page 151 of 625
2F-281973 OPEL SERVICE MANUAL
guides to height adjustment rings, loosen second
screw (see Figure 2F-6), and swing guides away from
guide rail.
NOTE: When swinging front guides inboard, be
careful not to change position of height adjustment
rings. It is suggested that the position of the height
adjustment rings be marked with a pencil prior to
loosening of front guide attaching screws.
5. Retighten remaining screw holding front guide in
position to prevent height adjustment rings from
turning.
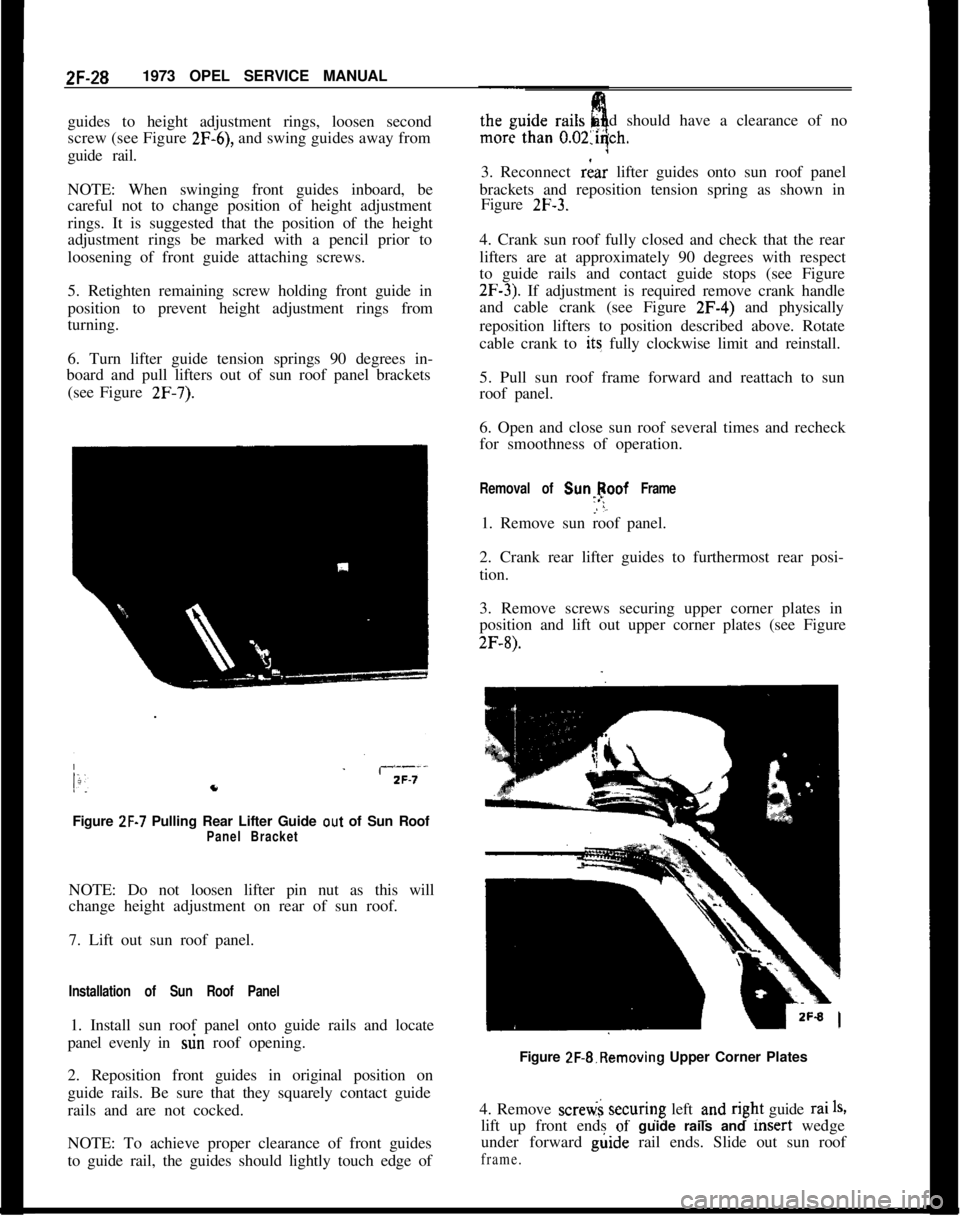
6. Turn lifter guide tension springs 90 degrees in-
board and pull lifters out of sun roof panel brackets
(see Figure
2F-7).Figure
ZF-7 Pulling Rear Lifter Guide out of Sun RoofPanel BracketNOTE: Do not loosen lifter pin nut as this will
change height adjustment on rear of sun roof.
7. Lift out sun roof panel.
Installation of Sun Roof Panel1. Install sun roof panel onto guide rails and locate
panel evenly in stin roof opening.
2. Reposition front guides in original position on
guide rails. Be sure that they squarely contact guide
rails and are not cocked.
NOTE: To achieve proper clearance of front guides
to guide rail, the guides should lightly touch edge ofdshould have a clearance of no
3. Reconnect
riar lifter guides onto sun roof panel
brackets and reposition tension spring as shown in
Figure
2F-3.4. Crank sun roof fully closed and check that the rear
lifters are at approximately 90 degrees with respect
to guide rails and contact guide stops (see Figure
2F-3). If adjustment is required remove crank handle
and cable crank (see Figure 2F-4) and physically
reposition lifters to position described above. Rotate
cable crank to its fully clockwise limit and reinstall.
5. Pull sun roof frame forward and reattach to sun
roof panel.
6. Open and close sun roof several times and recheck
for smoothness of operation.
Removal of Sunlpoof Frame1. Remove sun roof panel.
2. Crank rear lifter guides to furthermost rear posi-
tion.
3. Remove screws securing upper corner plates in
position and lift out upper corner plates (see Figure
2F-8).Figure 2F-&Removing Upper Corner Plates
4. Remove scretii securing left und
r@t guide rai1%lift up front ends
of- guide rails and msert wedge
under forward g&de rail ends. Slide out sun roof
frame.
Page 152 of 625

ROOF AND SUN ROOF2F-29Installation of Sun Roof Frame1. Slide sun roof frame into lower slot of guide rails,
position fully rearward and reattach guide rails to
roof.NOTE: Be sure guide rail retainers at rear of guide
rails are positioned with their dowels in bores of roof
frame.2. Install upper corner plates and secure in place..
3. Install sun roof panel.
REMOVAL AND INSTALLATION OF VELVET STRIP
ON SUN ROOF OPENING, AND VELVET STRIP AND
WEATHERSTRIP ON REAR OF SUN ROOF PANEL
Removal of Velvet Strip on Sun Roof Opening1. Fully open sun roof.
;2. Carefully pull off velvet strip using solvent to dis-
solve cement. Clean area thoroughly before installing
new velvet strip.
Installation of Velvet Strip On Sun Roof Opening1. Cut away for a distance of 1.5 inch the velvet
material on velvet strip that will be on the outside
when strip is cemented in positioAlso cut off to
this dimension the plastic cord i
not cut away velvet material on
1strip which is to be cemented
2. Using
nitrile vinyl trim adhesive (3M Vinyl Trim
Adhesive, Permalastic Viny1 Trim Adhesive or
equivalent) apply sparingly to both sun roof opening
and side of velvet strip to be cemented.
3. Immediately install new velvet strip and position
so that upper edge of velvet strip is flush with car
roof.4. Clean off excess cement being careful not to con-
tact velvet strip.
Removal of Velvet Strip and Wea’therstrip on Rear
of Sun Roof Panel1. Remove sun roof panel.
2. Carefully detach weatherstrip and velvet strip
from sun roof panel using solvent as required todisdolve cement. Thoroughly clean area before in-
stalling new velvet strip and weatherstrip.
Installing Velvet Strip and Weatherstrip On Rear
of Sun Roof Panel1. Using
nitrile vinyl trim adhesive (3M Vinyl Trim
Adhesive Permalastic Viny1 Trim Adhesive or
equivalent) apply sparingly to vertical and horizontal
contact areas at rear of sun roof panel (see Figure
2F-9) and also to side of velvet strip which will touch sun
roof panel.
REAR OF SUN ROOF PANEL
ICAR ROOF
VELVET STRIP
II
,/ WETRSTRIP 1APPLY CEMENT TO HORIZONTAL AND
VERTICAL SURFACES,TO BOTH SIDES
OF VELVET STRIP AND TO SIDE AND
BOTTOM OF WEATHERSTRIP2F-9
Figure
ZF-9 Installing Velvet Strip and Weatherstrip
on Rear of Sun Roof Panel
2. Immediately install new velvet strip and position
so that top edge of velvet strip is flush with sun roof
panel.
3. Apply cement to outboard edge of velvet strip and
to top and bottom contact surfaces of weatherstrip,
and install weatherstrip in position.
4. Clean off excess cement being careful not to con-
tact velvet strip.
5. Install sun roof panel.
REMOVAL AND INSTALLATION OF REAR GUIDES
AND CABLE
Removal of Rear Guides and Cable
1. Remove sun roof panel.
2. Crank rear lifter guides fully rearward and then
remove crank handle and cable crank.
Page 153 of 625
2F-301973 OPEL SERVICE MANUAL
3. Unscrew and remove upper and lower corner
plates (see Figure 2F-8).4. Unscrew and remove left and right upper cable
shields ans pull cable ends out of cable box.
5. Pull cable and rear lifter guides out of leftand
right guide rails.
Installation of Rear Guides and Cable1. Check both cables for wear or damage. If eigher
cable is defective, replace both cables.
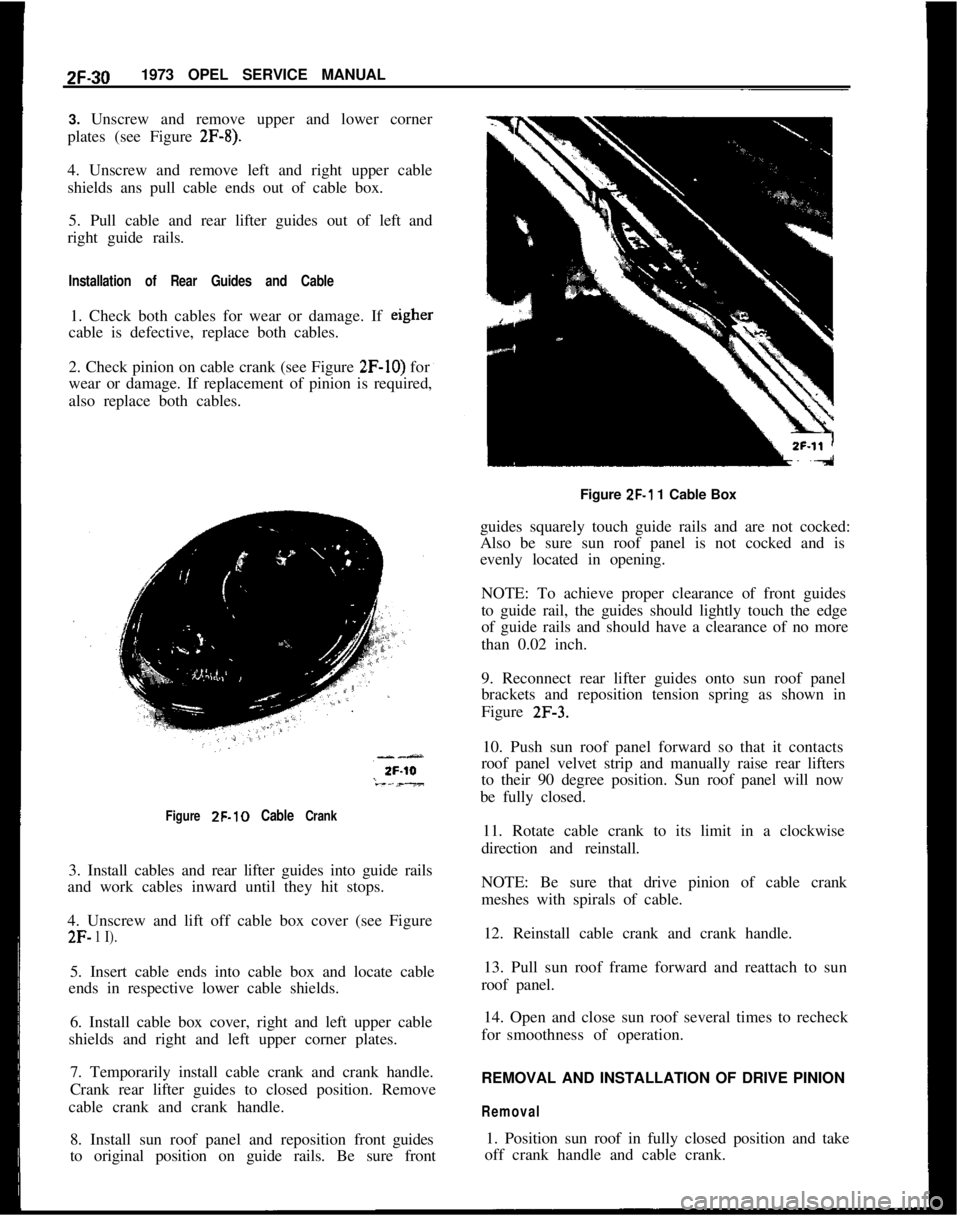
2. Check pinion on cable crank (see Figure
2F-IO) for
wear or damage. If replacement of pinion is required,
also replace both cables.
Figure ZF-10 Cable Crank3. Install cables and rear lifter guides into guide rails
and work cables inward until they hit stops.
4. Unscrew and lift off cable box cover (see Figure
2F- 1 I).5. Insert cable ends into cable box and locate cable
ends in respective lower cable shields.
6. Install cable box cover, right and left upper cable
shields and right and left upper corner plates.
7. Temporarily install cable crank and crank handle.
Crank rear lifter guides to closed position. Remove
cable crank and crank handle.
8. Install sun roof panel and reposition frontguides
to original position on guide rails. Be sure frontFigure
ZF-1 1 Cable Box
guides squarely touch guide rails and are not cocked:
Also be sure sun roof panel is not cocked and is
evenly located in opening.
NOTE: To achieve proper clearance of front guides
to guide rail, the guides should lightly touch the edge
of guide rails and should have a clearance of no more
than 0.02 inch.
9. Reconnect rear lifter guides onto sun roof panel
brackets and reposition tension spring as shown in
Figure
2F-3.10. Push sun roof panel forward so that it contacts
roof panel velvet strip and manually raise rear lifters
to their 90 degree position. Sun roof panel will now
be fully closed.
11. Rotate cable crank to its limit in a clockwise
direction and reinstall.
NOTE: Be sure that drive pinion of cable crank
meshes with spirals of cable.
12. Reinstall cable crank and crank handle.
13. Pull sun roof frame forward and reattach to sun
roof panel.
14. Open and close sun roof several times to recheck
forsmoothness of operation.
REMOVAL AND INSTALLATION OF DRIVE PINION
Removal1. Position sun roof in fully closed position and take
off crank handle and cable crank.
Page 154 of 625

2. Press off snap ring holding drive pinion in place
and remove drive pinion (see Figure 2F-10).
Installation1. Install drive pinion reverse of removal.
NOTE: If drive pinion is to be replaced, also replace
both cables to insure smooth operation of sun roof.
2. Rotate cable crank to its limit in a clockwise direc-
tion and install reverse of removal procedure.ROOF AND SUN ROOF2F-31
REMOVAL AND INSTALLATION OF FRONT AND
REAR WATER DRAINAGE HOSES
Removal of Front Water Drainage Hose
1, Remove sun visor from side of car which will have
drainage pipe taken out.
2. Partially detach pinchweld finishing strip from
door opening involved.
II2F-12L
Figure 2F-12 Sun Roof (Exploded View)
Page 155 of 625

2F-321973 OPEL SERVICE MANUAL
3. Carefully detach a portion of headlining around
window corner post involved.
4. Detach water drain hose from sun roof hose iit-
ting.
5. Remove cowl side kickpads.
6. Pull out from upper end front water drain hose.
Installation of Front Water Drain Hose
1. Insert from above water drain hose (wider end
upward) into door hinge pillar.
NOTE: Do not mistake front and rear water hoses.
The front hose is thinner than the rear hose and is
wider at the end which connects to hose fitting on
sun roof. The rear hose is uniform over its entire
length.
2. Work water drain hose downward through lower
half of door hinge pillar and be sure hose terminates
behind door sill flange at bottom of frbnt fender.
3. Cement upper portion of water drain hose to sun
roof hose fitting.
4. Cement detached portions of headlining into place
by use of rubber cement or nitrile vinyl trim adhesive
(3M Vinyl Trim Adhesive, Permalastic Vinyl Trim
Adhesive or equivalent).
5. Complete installation reverse of removal proce-
dures.
Removal of Rear Water Drain Hose1. Remove rear seat and rear seat back.2. Pry out plastic fasteners securing cardboard parcel
shelf in position and remove shelf.
3. Remove rear quarter trim pad.
4. Detach headlining only as required from area
around rear window pillar.
5. Pull out rear water drain hose.
Installation of Rear Water Drain Hose1. Install rear water drain hose in original position.
Insert hose from above and work downward. Ce-
ment both ends of hose in place.
2. Secure water drain hose in place along wheel-
house.3. Complete installation reverse of removal proce-
dures.
REMOVAL AND INSTALLATION
OF LUGGAGE
RACKAll 1973 luggage racks will be dealer installed, and
are held to the roof at the 4 corners. Removal and
installation is accomplished by removing the attach-
ing screw at each corner. See Figure
2F-14.Figure ZF-14 Luggage Rack
Page 156 of 625
SEATS, INTERIOR TRIM AND HEADLINING26-33SEATS, INTERIOR TRIM AND HEADLINING
CONTENTS
SubjectPage No.
DESCRIPTION AND OPERATION: (Not Applicable)
DIAGNOSIS: (Not Applicable)
MAINTENANCE AND ADJUSTMENTS: (Not
Applicable)
MAJOR REPAIR:
Removal and Installation
FrontSeat
. . . . . . . . . . . . . . . . . . . . . . . . . . . . . . . . . . . . . . . . . . . . . . . . . . . . . . . . . . . . . . . . . . . . . . . .RearSeat
. . . . . . . . . . . . . . . . . . . . . . . . . . . . . . . . . . . . . . . . . . . . . . . . . . . . . . . . . . . . . . . . . . . . . . . . . .Glove Compartment Lock ..,.........................................
Front
SidePanelTrimPad. . . . . . . . . . . . . . . . . . . . . . . . . . . . . . . . . . . . . . . . . .Headlining
. . . . . . . . . . . . . . . . . . . . . . . . . . . . . . . . . . . . . . . . . . . . . . . . . . . . . . . . . . . . . . . . . . . . . . . .
RearSidePanelTrimPad. . . . . . . . . . . . . . . . . . . . . . . . . . . . . . . . . . . . . . . . . .SPECIFICATIONS: (Not Applicable)26-33
26-33
26-3426-34
26-3526-37
MAJOR REPAIRREMOVAL AND INSTALLATION OF FRONT SEAT
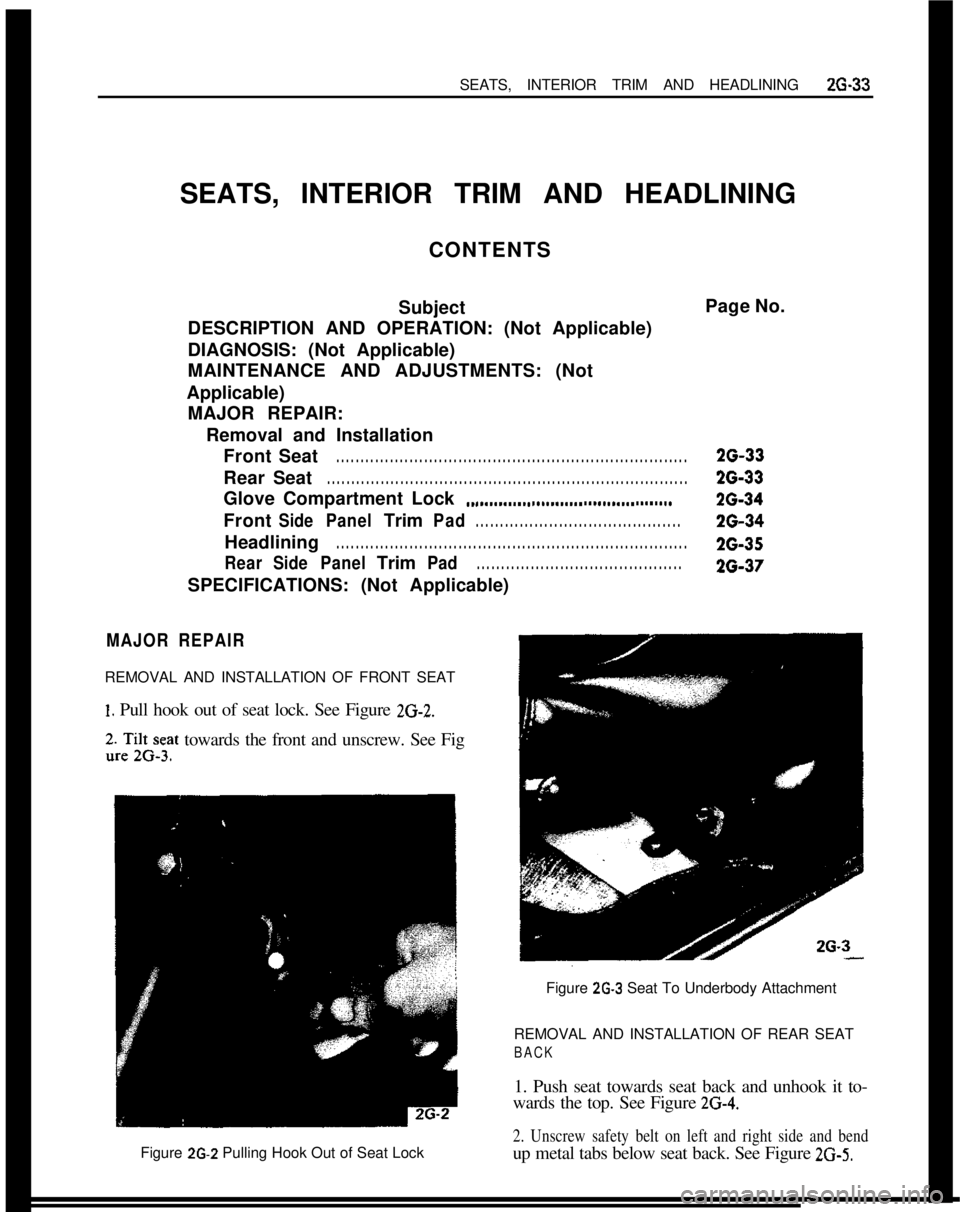
1. Pull hook out of seat lock. See Figure 2G-2.
2.TZ.Gy3at towards the front and unscrew. See Fig
Figure
2G-2 Pulling Hook Out of Seat LockFigure
2G-3 Seat To Underbody Attachment
REMOVAL AND INSTALLATION OF REAR SEAT
BACK1. Push seat towards seat back and unhook it to-
wards the top. See Figure
2G-4.
2. Unscrew safety belt on left and right side and bendup metal tabs below seat back. See Figure
2~3-5.
Page 157 of 625

26-341973 OPEL SERVICE MANUAL
a 13/16 inch deep socket, and remove. See Figure2G-6.Figure
ZG-4 Seat to Underbody Hook
Figure
ZG-5 Seat Back Metal Tabs
3. Remove seat back towards the top.
REMOVAL AND INSTALLATION
OF GLOVE
COMPARTMENT DOOR LOCK
1. Unscrew nut of glove compartment lid lock, usingFigure ZG-6 Removing Glove Compartment Lock
2. Install new glove compartment lid lock.
REMOVAL AND INSTALLATION OF FRONT SIDE
PANEL TRIM PAD
1, Lift up door sill shield and pull off sealing strip up
to the instrument panel cover. See Figure 2G- 7.
Figure
ZG-7 Pulling Off Sealing Strip
Page 158 of 625
SEATS, INTERIOR TRIM AND HEADLININGZG-35
2. Push off side panel trim pad. Trim pad is held in
position by a retaining button.
REMOVAL AND INSTALLATIONOF HEADLINING
Removal
1. Disconnect battery.
2. Lift out rear seat cushion (sedans only).
3. From trunk area, loosen tabs holding cardboard
against rear seat cross brace and lift out cardboard
(sedans only).
4. Pry up two tabs holding lower portion of rear seat
back in position, swing back of seat forward and lift
out (sedans only).
5. From trunk area pry out parcel shelf plastic retain-
ers and lift out parcel shelf (sedans only).
6. Remove rear-view mirror, sun visors, interior
lamp, assist straps and coat hooks. Remove front and
rear windows on all but Wagon Models. On Wagons,
remove the front window and the quarter windows.
7. Work door opening pinchweld finishing strip
away from pinchweld as far as necessary to expose
edge of headlining.
8. Start at: left or right windshield pillar and pry
headlining loose.
9. Roll back headlining to expose metal tabs securing
headlining listing wire to roof and unhook headhn-
ing front listing wire from metal tabs using a blunt
edge tool.
10. Pull loose the edges of headlining cemented to
door openings, rear quarter window openings, rear
quarter pillar and from under rear window rubber
channel. On rear quarter pillars, slightly bend down
cardboard of rear quarter trim pad to facilitate re-
moval. During removal, special care should be taken
not to tear headlining at seams.
11. After edges of headlining have been pulled loose,
tilt remaining listing wires with headlining forward
or rearward and pull listing wires free from side roof
rails. Lift out headlining and listing wires.
Installation1. Check secureness of noise insulation pad on inside
of roof panel and recement as necessary using asphalt
cement. If headlining is to be replaced, insert listing
wires into headlining according to their markings.
Progressing from the front listing wire to the rear
wire, the left ends of the wires are color coded as
follows:1st listing wire
- No marking, wire is thinner than
other wires
2nd listing wire
- Red
3rd listing wire
- Blue
4th listing wire
_ Green
5th listing wire
- Brown
6th listing wire
- White
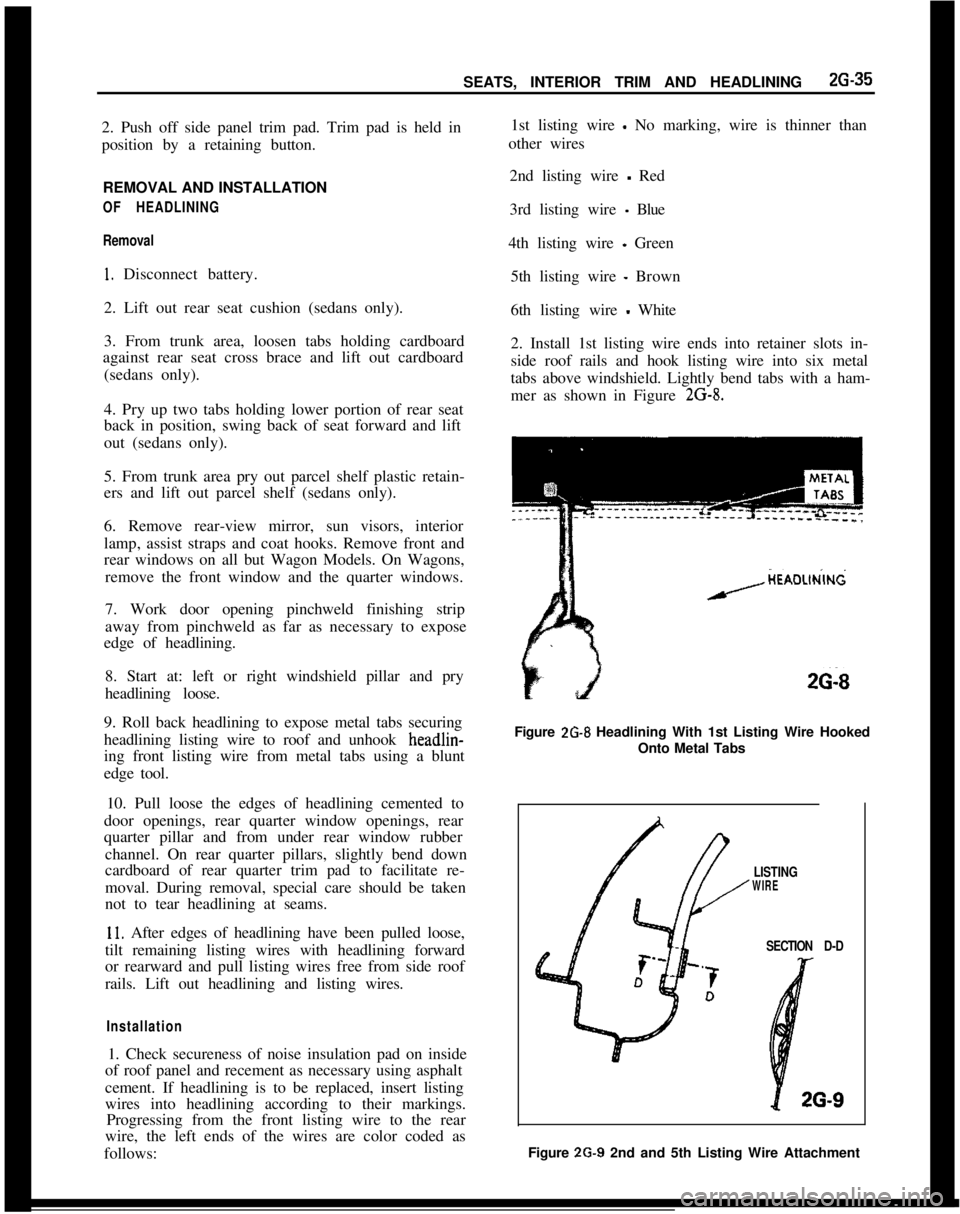
2. Install 1st listing wire ends into retainer slots in-
side roof rails and hook listing wire into six metal
tabs above windshield. Lightly bend tabs with a ham-
mer as shown in Figure
2G-8.
HEAOLlN’lNdA-----
26-8Figure
2G-8 Headlining With 1st Listing Wire Hooked
Onto Metal Tabs
LISTINGWIRE
SECTIOND-D
4 26-9Figure 2G-9 2nd and 5th Listing Wire Attachment
Page 159 of 625

2G-361973 OPEL SERVICE MANUAL
3. Install and align the remaining five listing wires.
If required, caulk retainers of 2nd and 5th listing
wires so that wires run in a straight line transversally
under the roof. See Figure
2G-9.Figure ZG-10 3rd. 4th and 6th Listing Wire
Attachment4. Lightly pull headlining towards the rear and ce-
ment to the rear roof frame cross member and then
to the rear quarter pillars using rubber cement.
When pulling headlining toward rear be sure that the
listing wires are not pulled out of line. A folded clothshould be used to smooth down cemented portions
of headlining.
5. Cut off surplus headlining along rear window, rear
quarter windows, and windshield, leaving enough to
tit under rubber channels.
6. Cement surplus material to pinchweld flanges.
7. Cut off excess headliner around door openings and
cement trimmed edge to pinchweld flange using rub-
ber cement.
Figure 2G-12 Quarter Window and Lock Pillar Sealing
StripFigure
2G-1 1 Lock Pillar Shield Attaching ScrewsFigure 2G-13 Trim Pad and Retaining Button
Page 160 of 625
SEATS, INTERIOR TRIM AND HEADLINING20.378. If wagon, install front window and quarter win-
dows. It other than wagon, install front and rear
windows.9. Install coat hooks, assist straps, interior lamp, sun
visors, and rear view mirror.
10. Install parcel shelf and plastic retainers (sedans
only).
11. Install rear seat back into position and bend over
tabs holding lower portion of seat back (sedans only).
12. In trunk area instail cardboard against rear seat,
cross brace, and bend over tabs (sedans only).
13. Install rear seat cushion (sedans only).
14. Connect battery.REMOVAL AND INSTALLATION OF REAR SIDE
PANEL TRIM PAD
1, Unscrew shield on lock pillar. See Figure 2G- 11.
2. Pull off sealing strip on lock pillar and rear quarter
window. See Figure 2G- 12.
3. Remove ash tray.
4. Remove rear seat and push retaining button out of
trim pad. See Figure
2G-13.5. Pull out trim pad towards the front.
6. Prior to installation, press together sealing strip
ends to obtain a tight seat.