air condition OPEL 1900 1973 User Guide
[x] Cancel search | Manufacturer: OPEL, Model Year: 1973, Model line: 1900, Model: OPEL 1900 1973Pages: 625, PDF Size: 17.22 MB
Page 86 of 625
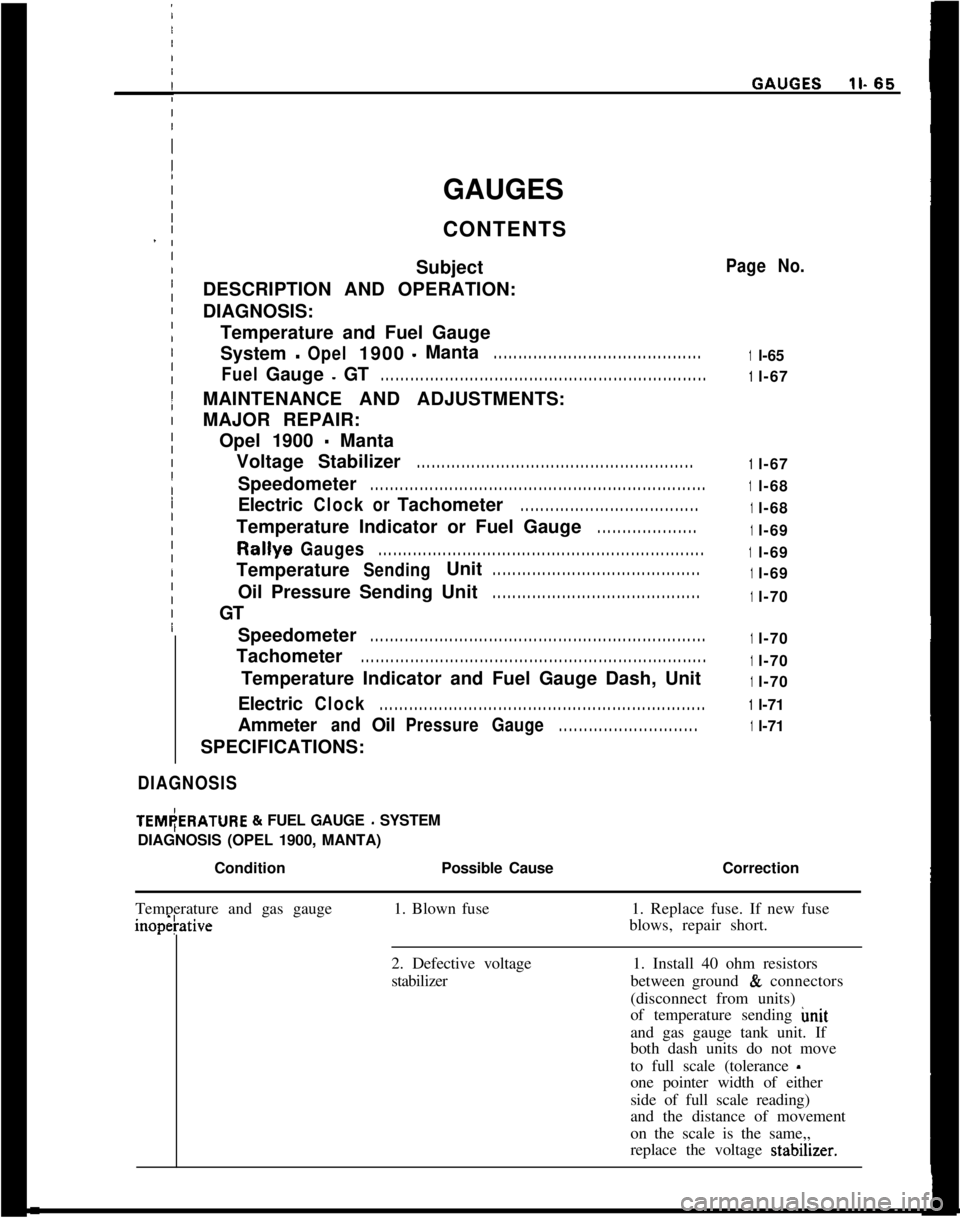
GAUGES
CONTENTS
Subject
DESCRIPTION AND OPERATION:
DIAGNOSIS:
Temperature and Fuel Gauge
System-Opel1900-Manta. . . . . . . . . . . . . . . . . . . . . . . . . . . . . . . . . . . . . . . . . .
FuelGauge-GT. . . . . . . . . . . . . . . . . . . . . . . . . . . . . . . . . . . . . . . . . . . . . . . . . . . . . . . . . . . . . . . . . .MAINTENANCE AND ADJUSTMENTS:
MAJOR REPAIR:
Opel 1900
- Manta
Voltage Stabilizer
. . . . . . . . . . . . . . . . . . . . . . . . . . . . . . . . . . . . . . . . . . . . . . . . . . . . . . . .Speedometer
. . . . . . . . . . . . . . . . . . . . . . . . . . . . . . . . . . . . . . . . . . . . . . . . . . . . . . . . . . . . . . . . . . . .Electric
ClockorTachometer. . . . . . . . . . . . . . . . . . . . . . . . . . . . . . . . . . . .Temperature Indicator or Fuel Gauge
. . . . . . . . . . . . . . . . . . . .Rallye
Gauges. . . . . . . . . . . . . . . . . . . . . . . . . . . . . . . . . . . . . . . . . . . . . . . . . . . . . . . . . . . . . . . . . .Temperature
SendingUnit. . . . . . . . . . . . . . . . . . . . . . . . . . . . . . . . . . . . . . . . . .Oil Pressure Sending Unit
. . . . . . . . . . . . . . . . . . . . . . . . . . . . . . . . . . . . . . . . . .GT
Speedometer
. . . . . . . . . . . . . . . . . . . . . . . . . . . . . . . . . . . . . . . . . . . . . . . . . . . . . . . . . . . . . . . . . . . .Tachometer
. . . . . . . . . . . . . . . . . . . . . . . . . . . . . . . . . . . . . . . . . . . . . . . . . . . . . . . . . . . . . . . . . . . . . .Temperature Indicator and Fuel Gauge Dash, Unit
Electric
Clock. . . . . . . . . . . . . . . . . . . . . . . . . . . . . . . . . . . . . . . . . . . . . . . . . . . . . . . . . . . . . . . . . .Ammeter
andOilPressureGauge. . . . . . . . . . . . . . . . . . . . . . . . . . . .SPECIFICATIONS:
DIAGNOSISITEM(ERATURE
& FUEL GAUGE - SYSTEM
DIAGNOSIS (OPEL 1900, MANTA)
/
ConditionPossible Cause
I
Page No.
1l-65
1l-67
1l-67
1l-68
1l-68
1l-69
1l-69
1l-69
1l-70
1l-70
1l-70
1l-70
1l-71
1l-71
Correction
Temperature and gas gaugeinopetative1. Blown fuse1. Replace fuse. If new fuse
blows, repair short.
2. Defective voltage
stabilizer1. Install 40 ohm resistors
between ground
& connectors
(disconnect from units)
of temperature sending imit
and gas gauge tank unit. If
both dash units do not move
to full scale (tolerance
-one pointer width of either
side of full scale reading)
and the distance of movement
on the scale is the same,,
replace the voltage stabdner.
Page 87 of 625

ll- 66 1973 OPEL SERVICE MANUALi
ConditionPossible CauseCorrection
Gas gauge does not read
full when tank tilled1. Tank unit misadjusted1. Install 40 ohm resistor
between connector and ground
I
(disconnect from unit). If
dash unit reads full within
one pointer width. Remove
/
Igas tank unit from tank, install
connector, ground unit and
adjust tab to obtairi full reading on
dash. Reinstall tank unit.
2. Defective’ voltage
stabilizer1. See corrective action above.
Gas gauge not operating1. Corroded tank unit
terminal I1. Check tank unit terminal, if
corroded clean, pack connector
with grease and reinstall
connector..
2. Loose dash gauge
!
1. Install 40 ohm resistor between
sending unit connector. and
ground (disconnect from tank
terminal). If dashgauge does
not read rull, check dash gauge
attaching nuts for secureness
and tighten if required.
(Requires removal of dash panel)
Momentarily touch dash gauge
attaching studs to 12 volt
source. If indicator moves,
reinstall panel; if not, replace
gauge. (Caution do not keep
studs connected to 12 volt
source for more than a few
seconds
- damage to gauge can
result)
3. Open
w&g1. Remove connector from sending
unit and ground (40 ohm
resistor may be used if
ohmmeter available. Remove
multiple connector from rear
of dash. Connect test light
to ground and touch other end
to connector socket with blue
and black wire, if it does not
light (40 ohm reading of ohm
meter used) repair open circuit.
4. Defective gas tank
sending unit1. Install 40 ohm resistor between
temperature sending unit and
ground (disconnect from unit)
if dash unit reads full scale.
Replace tank unit (check for
terminal corrosion before
replacing).
Page 88 of 625

I
GAUGES1 I- 67I
I Condition
Car
&s out of gas with
gauge indicating fuel in
tank. 1
I
I
I
I
IPossible Cause
1. Tank unit misadjusted
2. Defective voltage
stabilizer.Correction
1. Follow corrective action as
stated above (obtain empty
reading on dash)
1. See corrective action above.
Temperature gauge not1. Loose dash gauge1. See corrective action above.
Iattaching nut.
I
I
I2. Defective temperature1. Install 40 ohm resistor
Isending unitbetween temperature sneding
Iunit and ground (disconnect
I
from unit). If dash unit reads
I
full scale, replace temperature
Isending unit.
I
I
I3. Open wiring.1. Follow corrective action as
Istated above (connector socket
Iwith blue wire).Tempkrature gauge indicates
hot when engine temperature1. Incorrect temperature1. Check for correct sending unit
sending unit
normal.(white porcelain) replace if
incorrect.
2. i>efective temperaturesending unit.1. See corrective action above.
3. Dkfective voltage
stabilizer.
1. See Corrective action above.
GAS
GdUGE TROUBLE DIAGNOSIS - GT4. Disconnect the tank unit lead wire (light blue with
black tracer) from the tank unit.
An inoperative gas gauge reading can normally be
found to result from a poor grounding condition
within the circuit. Using the procedure as outlined
below may lead to the correction of the inoperative
reading without replacement of either the tank unit
or the
dph unit.5. Connect ihe stock tank unit; ground unit, and
operate manually.
6. If the dash unit shows a correct reading, then
replacement of the tank unit is required as the cor-
rection.
1. Makelcertain the gas tank (ground) strap is prop-
erly secured.A correct reading will be one which resembles the
movement of the manually-operated tank unit.
2. Make’certain the ground wire (brown in color) for
gasoline/ and temperature gauges is properly con-
nected tb the windshield wiper motor and is secured.
(This
gl?ound wire is also common for the heater
blower
etor.)7. If the dash unit does not show a correct reading,
then its replacement is necessary.
If the adove procedure does not produce a satisfac-
tory gaube reading, an attempt to isolate the defec-
tive
par<, i.e. tank or dash unit should be made.
3. Rem&e a tank unit from parts stock.MAJOR
AEPAIR
OPEL 1900. MANTA
Removing Voltage Stabilizer1. Remove instrument cluster housing assembly.
Page 148 of 625
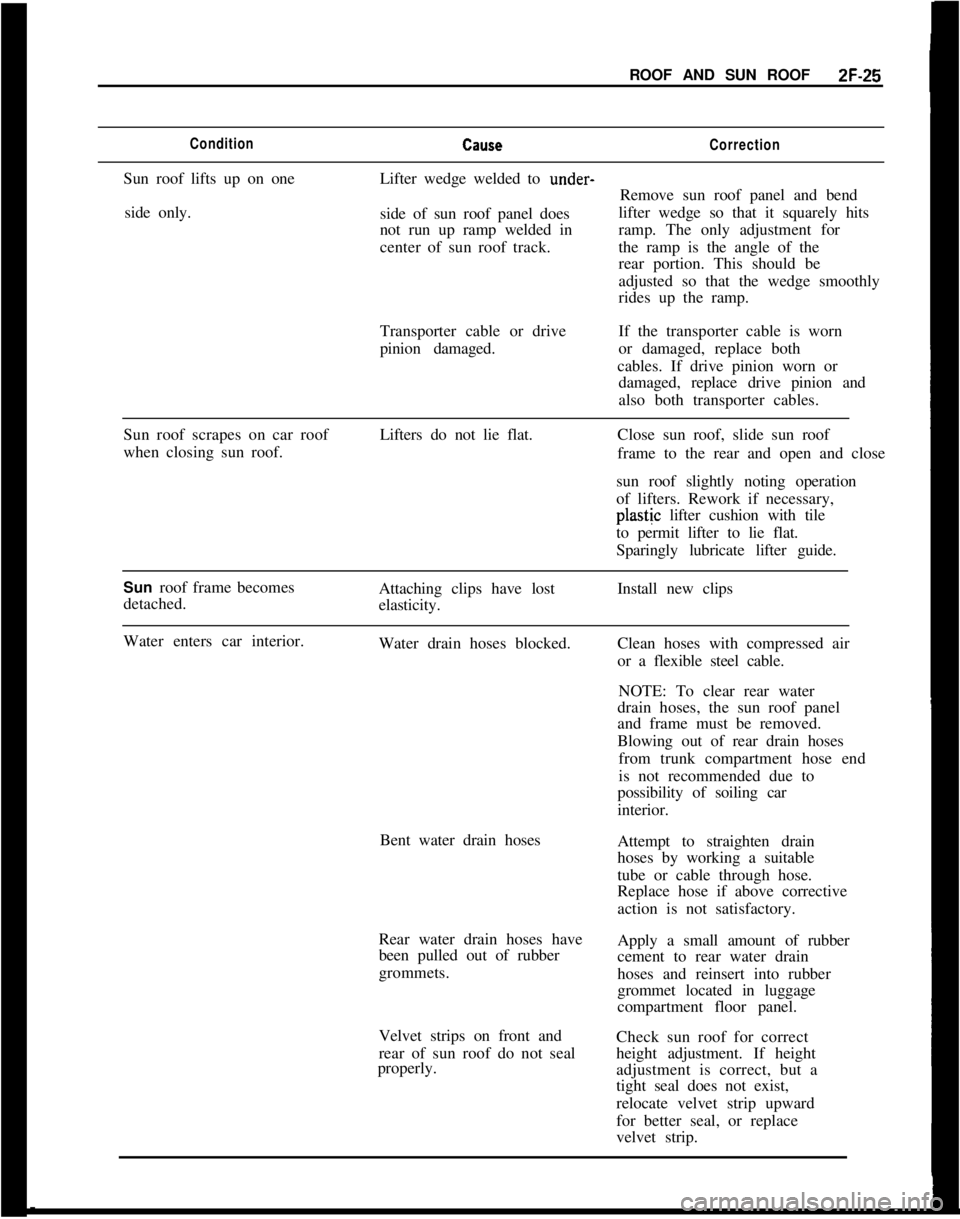
ROOF AND SUN ROOFZF-25ConditionCallseCorrectionSun roof lifts up on one
side only.Lifter wedge welded to under-
Remove sun roof panel and bend
side of sun roof panel doeslifter wedge so that it squarely hits
not run up ramp welded inramp. The only adjustment for
center of sun roof track.the ramp is the angle of the
rear portion. This should be
adjusted so that the wedge smoothly
rides up the ramp.
Transporter cable or drive
pinion damaged.If the transporter cable is worn
or damaged, replace both
cables. If drive pinion worn or
damaged, replace drive pinion and
also both transporter cables.
Sun roof scrapes on car roof
when closing sun roof.Lifters do not lie flat.Close sun roof, slide sun roof
frame to the rear and open and close
sun roof slightly noting operation
of lifters. Rework if necessary,plastjc lifter cushion with tile
to permit lifter to lie flat.
Sparingly lubricate lifter guide.
Sun roof frame becomes
detached.Attaching clips have lost
elasticity.Install new clips
Water enters car interior.
Water drain hoses blocked.
Bent water drain hoses
Rear water drain hoses have
been pulled out of rubber
grommets.
Velvet strips on front and
rear of sun roof do not seal
properly.Clean hoses with compressed air
or a flexible steel cable.
NOTE: To clear rear water
drain hoses, the sun roof panel
and frame must be removed.
Blowing out of rear drain hoses
from trunk compartment hose end
is not recommended due to
possibility of soiling car
interior.
Attempt to straighten drain
hoses by working a suitable
tube or cable through hose.
Replace hose if above corrective
action is not satisfactory.
Apply a small amount of rubber
cement to rear water drain
hoses and reinsert into rubber
grommet located in luggage
compartment floor panel.
Check sun roof for correct
height adjustment. If height
adjustment is correct, but a
tight seal does not exist,
relocate velvet strip upward
for better seal, or replace
velvet strip.
Page 189 of 625
3C-22 1973 OPEL SERVICE MANUAL.
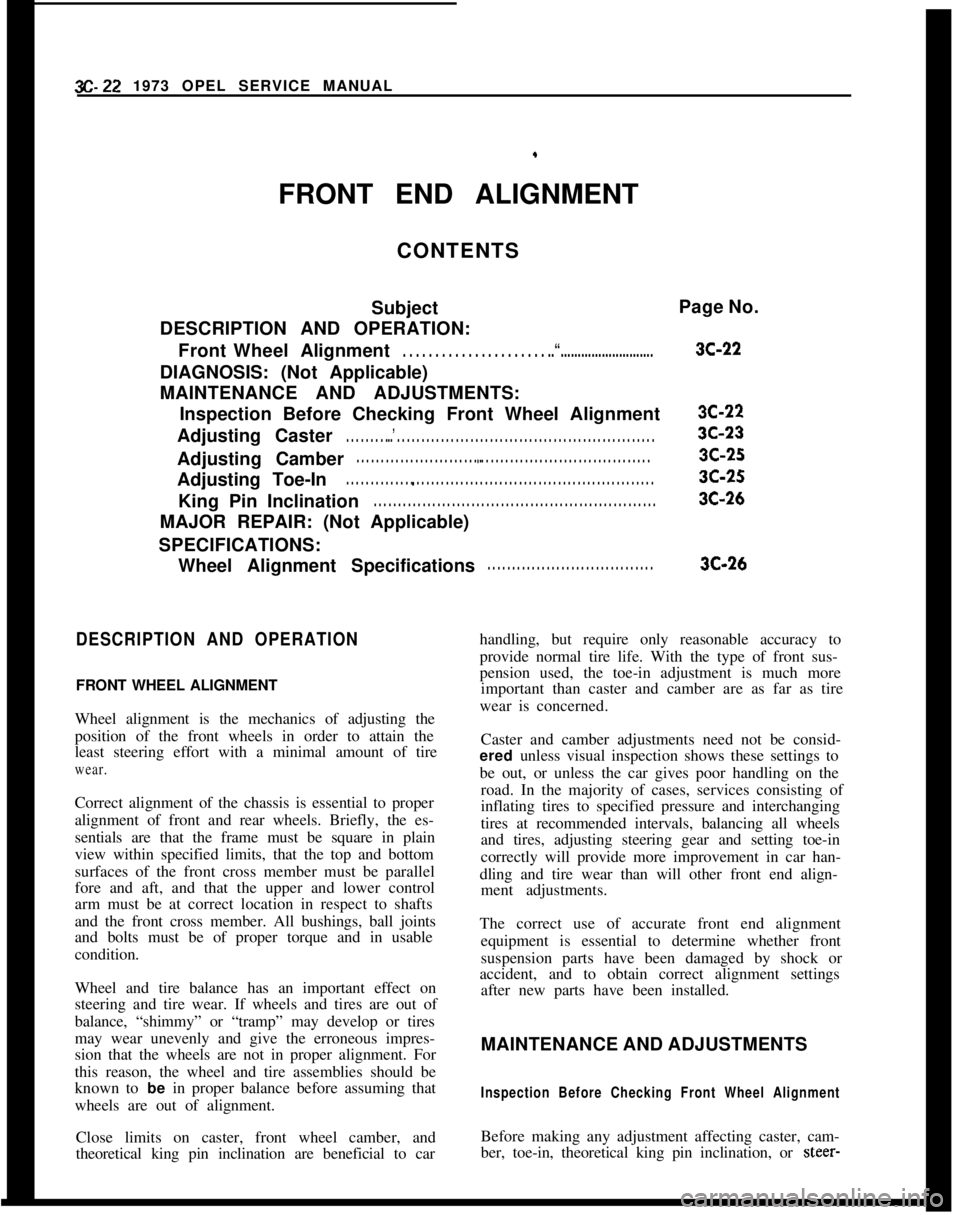
FRONT END ALIGNMENT
CONTENTS
SubjectPage No.
DESCRIPTION AND OPERATION:
FrontWheelAlignment
. . . . . . . . . . . . . . . . . . . . . . ..“...........................DIAGNOSIS: (Not Applicable)
MAINTENANCE AND ADJUSTMENTS:
Inspection Before Checking Front Wheel Alignment
AdjustingCaster
. . . . . . . . ...’ . . . . . . . . . . . . . . . . . . . . . . . . . . . . . . . . . . . . . . . . . . . . . . . . . . . . .Adjusting Camber
. . . . . . . . . . . . . . . . . . . . . . . . . . * . . . . . . . . . . . . . . . . . . . . . . . . . . . . . . . . . . .Adjusting Toe-In
. . . . . . . . . . . . . . * . . . . . . . . . . . . . . . . . . . . . . . . . . . . . . . . . . . . . . . . . . . . . . . . .King Pin Inclination
. . . . . . . . . . . . . . . . . . . . . . . . . . . . . . . . . . . . . . . . . . . . . . . . . . . . . . . . . .MAJOR REPAIR: (Not Applicable)
SPECIFICATIONS:3C-223C-223C-233C-253C-253C-26
Wheel Alignment Specifications
. . . . . . . . . . . . . . . . . . . . . . . . . . . . . . . . . .3C-26
DESCRIPTION AND OPERATIONFRONT WHEEL ALIGNMENT
Wheel alignment is the mechanics of adjusting the
position of the front wheels in order to attain the
least steering effort with a minimal amount of tire
wear.handling, but require only reasonable accuracy to
provide normal tire life. With the type of front sus-
pension used, the toe-in adjustment is much more
important than caster and camber are as far as tire
wear is concerned.
Correct alignment of the chassis is essential to proper
alignment of front and rear wheels. Briefly, the es-
sentials are that the frame must be square in plain
view within specified limits, that the top and bottom
surfaces of the front cross member must be parallel
fore and aft, and that the upper and lower control
arm must be at correct location in respect to shafts
and the front cross member. All bushings, ball joints
and bolts must be of proper torque and in usable
condition.Caster and camber adjustments need not be consid-
ered unless visual inspection shows these settings to
be out, or unless the car gives poor handling on the
road. In the majority of cases, services consisting of
inflating tires to specified pressure and interchanging
tires at recommended intervals, balancing all wheels
and tires, adjusting steering gear and setting toe-in
correctly will provide more improvement in car han-
dling and tire wear than will other front end align-
ment adjustments.
Wheel and tire balance has an important effect on
steering and tire wear. If wheels and tires are out of
balance, “shimmy” or “tramp” may develop or tires
may wear unevenly and give the erroneous impres-
sion that the wheels are not in proper alignment. For
this reason, the wheel and tire assemblies should be
known to be in proper balance before assuming that
wheels are out of alignment.The correct use of accurate front end alignment
equipment is essential to determine whether front
suspension parts have been damaged by shock or
accident, and to obtain correct alignment settings
after new parts have been installed.
MAINTENANCE AND ADJUSTMENTS
Inspection Before Checking Front Wheel AlignmentClose limits on caster, front wheel camber, andBefore making any adjustment affecting caster, cam-
theoretical king pin inclination are beneficial to carber, toe-in, theoretical king pin inclination, or
steer-
Page 190 of 625
FRONT END ALIGNMENT 3C-23
ing geometry, the following checks and inspections
must be made to insure correctness of alignment
equipment readings and alignment adjustments.
1. The front tires should have approximately the
same wear and all tires must be inflated to specified
pressures (see Wheel and Tire Specifications
- Sec-
tion 3G).
2. Check front wheel bearings for looseness and ad-
just if necessary (see Front Suspension Adjustments
- Section 3A).
3. Check for run-out of wheels and tires, (see Section
3G).
4. Check wheels and tires for balance and correct if
out-of-balance (See Section 3G).
5. Check for looseness at ball joints and tie
rdd ends;
if found excessive, it must be
corxcted before align-
ment readings will have any value.
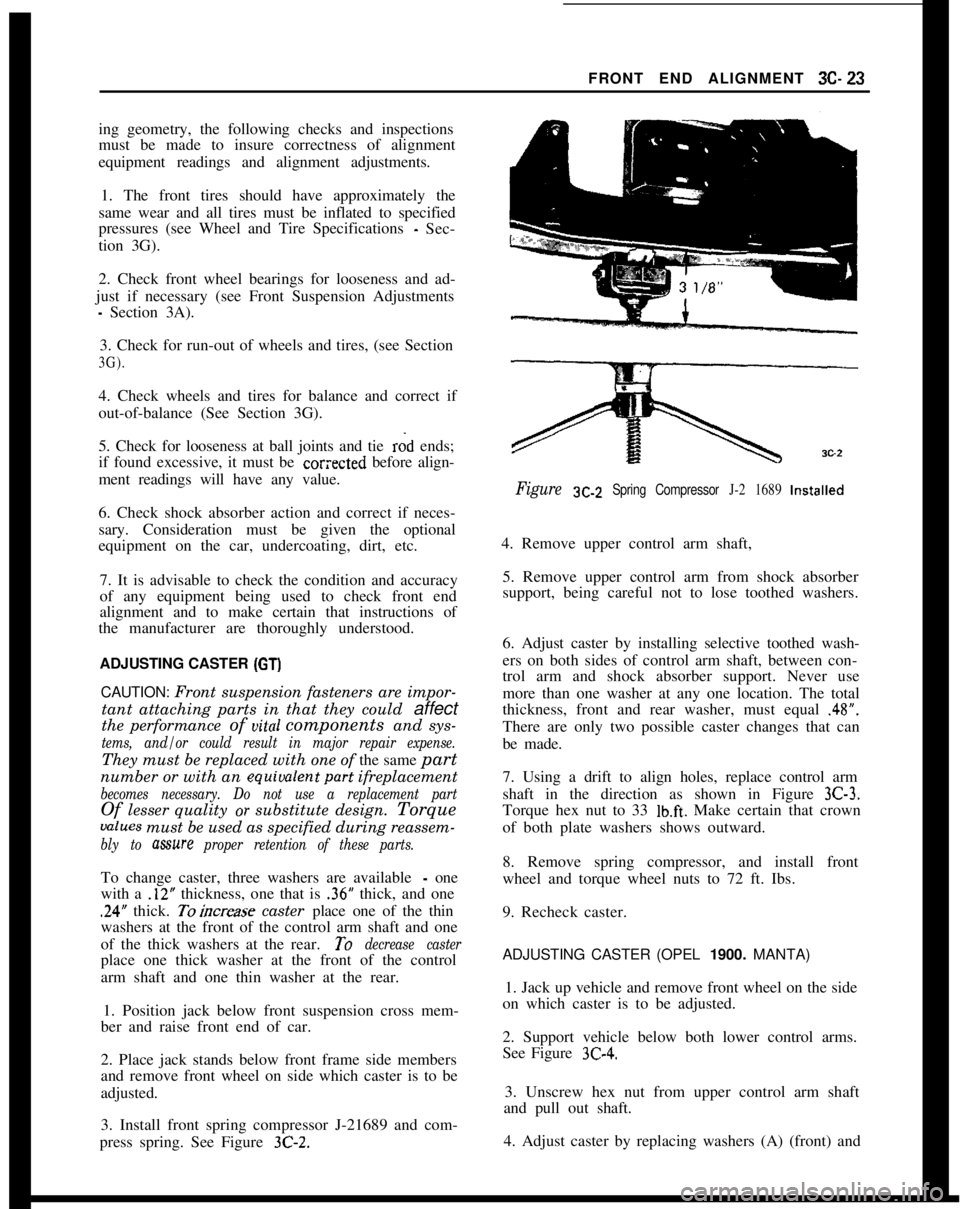
Figure SC-Z Spring Compressor J-2 1689 Installed
6. Check shock absorber action and correct if neces-
sary. Consideration must be given the optional
equipment on the car, undercoating, dirt, etc.
7. It is advisable to check the condition and accuracy
of any equipment being used to check front end
alignment and to make certain that instructions of
the manufacturer are thoroughly understood.
ADJUSTING CASTER (GT)
4. Remove upper control arm shaft,
5. Remove upper control arm from shock absorber
support, being careful not to lose toothed washers.
6. Adjust caster by installing selective toothed wash-
ers on both sides of control arm shaft, between con-
trol arm and shock absorber support. Never use
CAUTION: Front suspension fasteners are impor- more than one washer at any one location. The total
tant attaching parts in that they could
affectthickness, front and rear washer, must equal .48”.
the performance of uital components and sys-
tems, and/or could result in major repair expense.
There are only two possible caster changes that can
be made.
They must be replaced with one of the same
part
number or with an equiualentpart ifreplacement
becomes necessary. Do not use a replacement part
Of lesser quality or substitute design. Torque
values must be used as specified during reassem-
bly to mure proper retention of these parts.
7. Using a drift to align holes, replace control arm
shaft in the direction as shown in Figure
3C-3.
Torque hex nut to 33 lb.ft. Make certain that crown
of both plate washers shows outward.
To change caster, three washers are available
- one
with a
.12” thickness, one that is .36” thick, and one
.24” thick. Toincrease caster place one of the thin
washers at the front of the control arm shaft and one
of the thick washers at the rear.
To decrease caster
place one thick washer at the front of the control
arm shaft and one thin washer at the rear.
1. Position jack below front suspension cross mem-
ber and raise front end of car. 8. Remove spring compressor, and install front
wheel and torque wheel nuts to 72 ft. Ibs.
9. Recheck caster.ADJUSTING CASTER (OPEL
1900. MANTA)
2. Place jack stands below front frame side members
and remove front wheel on side which caster is to be
adjusted. 1. Jack up vehicle and remove front wheel on the side
on which caster is to be adjusted.
3. Install front spring compressor J-21689 and com-
press spring. See Figure
3C-2.
2. Support vehicle below both lower control arms.
See Figure
3C-4.
3. Unscrew hex nut from upper control arm shaft
and pull out shaft.
4. Adjust caster by replacing washers (A) (front) and
Page 199 of 625
3D- 321973 OPEL SERVICE MANUAL
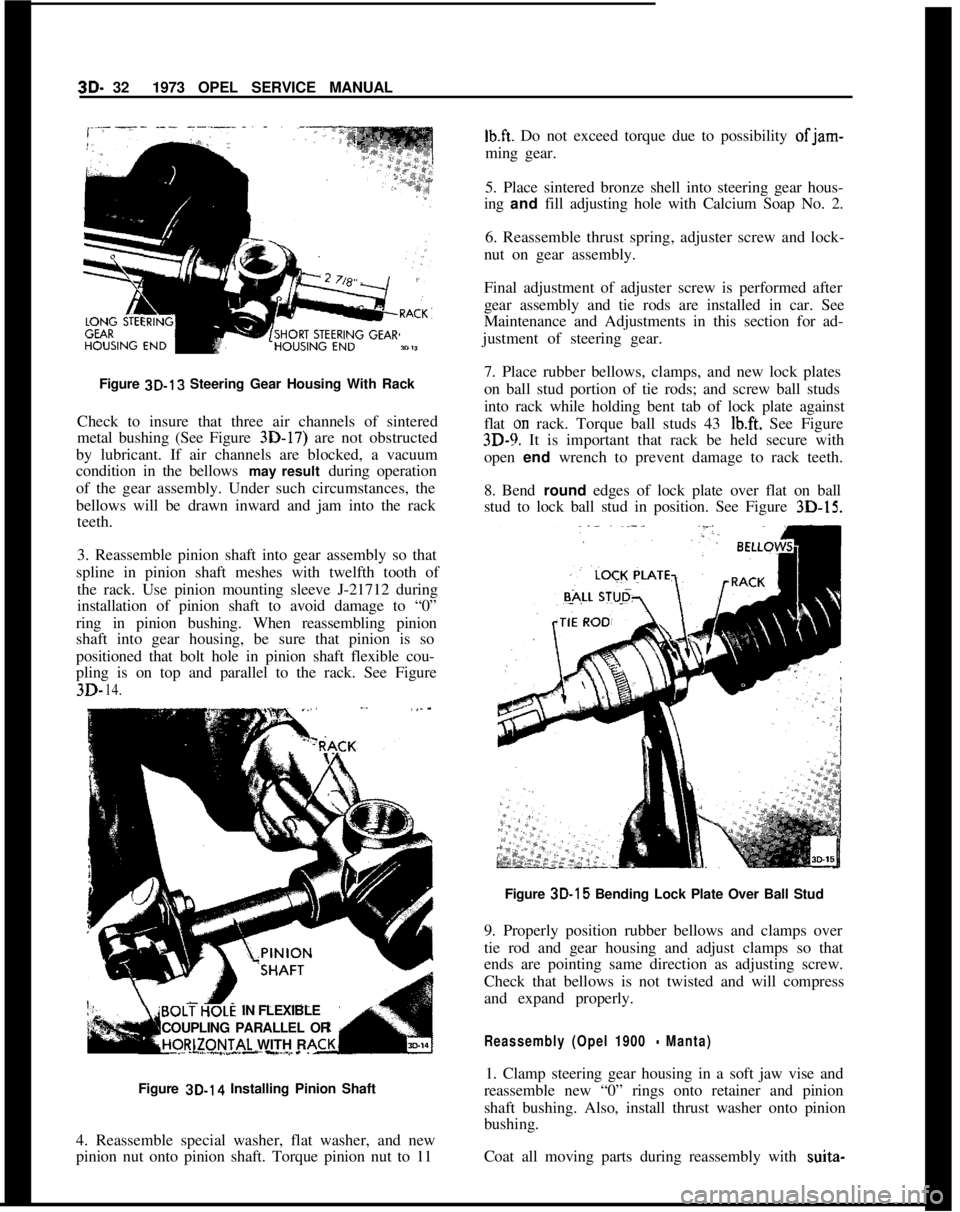
Figure 3D-13 Steering Gear Housing With Rack
Check to insure that three air channels of sintered
metal bushing (See Figure 3D-17) are not obstructed
by lubricant. If air channels are blocked, a vacuum
condition in the bellows may result during operation
of the gear assembly. Under such circumstances, the
bellows will be drawn inward and jam into the rack
teeth.
3. Reassemble pinion shaft into gear assembly so that
spline in pinion shaft meshes with twelfth tooth of
the rack. Use pinion mounting sleeve J-21712 during
installation of pinion shaft to avoid damage to “0”
ring in pinion bushing. When reassembling pinion
shaft into gear housing, be sure that pinion is so
positioned that bolt hole in pinion shaft flexible cou-
pling is on top and parallel to the rack. See Figure3D- 14..~.. ~. ..~.IN FLEXIBLE
COUPLING PARALLEL ORRIZONTAL WITH R
._..-_ - -._..-
Figure 3D-14 Installing Pinion Shaft
4. Reassemble special washer, flat washer, and new
pinion nut onto pinion shaft. Torque pinion nut to 11
Ib.ft. Do not exceed torque due to possibility ofjam-
ming gear.
5. Place sintered bronze shell into steering gear hous-
ing and fill adjusting hole with Calcium Soap No. 2.
6. Reassemble thrust spring, adjuster screw and lock-
nut on gear assembly.
Final adjustment of adjuster screw is performed after
gear assembly and tie rods are installed in car. See
Maintenance and Adjustments in this section for ad-
justment of steering gear.
7. Place rubber bellows, clamps, and new lock plates
on ball stud portion of tie rods; and screw ball studs
into rack while holding bent tab of lock plate against
flat
ton rack. Torque ball studs 43 lb.ft. See Figure
3D-9. It is important that rack be held secure with
open end wrench to prevent damage to rack teeth.
8. Bend round edges of lock plate over flat on ball
stud to lock ball stud in position. See Figure
3D-15.Figure 3D-15 Bending Lock Plate Over Ball Stud
9. Properly position rubber bellows and clamps over
tie rod and gear housing and adjust clamps so that
ends are pointing same direction as adjusting screw.
Check that bellows is not twisted and will compress
and expand properly.
Reassembly (Opel 1900 - Manta)1. Clamp steering gear housing in a soft jaw vise and
reassemble new “0” rings onto retainer and pinion
shaft bushing. Also, install thrust washer onto pinion
bushing.
Coat all moving parts during reassembly with suita-
Page 200 of 625

STEERING GEAR ASSEMBLY30.33ble steering gear lubricant. Fill long end of housingbly. Under such circumstances, the bellows will be
with approximately 1 3/4 oz. steering gear lubricant.
drawn inward and jam into the rack teeth.
3. Reassemble pinion shaft into gear assembly so that
spline in pinion shaft meshes with twelfth tooth of
the rack. Use pinion mounting sleeve J-21712 during
installation of pinion shaft to avoid damage to “0”
ring in pinion bushing. When reassembling pinion
shaft into gear housing, be sure that pinion is so
positioned that bolt hole in pinion shaft flexible cou-
pling is on top and parallel to the rack. See Figure
3D-16.2. Insert long toothless end of rack into short end of
housing until rack ends (A) protrude equally out of
both ends of housing. See Figure
3D-16.Figure 3D-16
- Steering Gear Housing With Rack
Check to insure that three air channels of sintered
metal bushing are not obstructed by lubricant. If air
channels are blocked, a vacuum condition in the bel-
lows may result during operation of the gear assem-
SPECIFICATIONS
Tightening Specifications
PartLocation
BoltBolt
Nut
NutNut
Bolt
Bolt
NutNut
Nut4. Reassemble special washer, flat washer, and new
pinion nut onto pinion shaft. Torque pinion nut to 11
lb.ft. Do not exceed torque due to possibility of jam-
ming gear.
5. Place sintered bronze shell into steering gear hous-
ing and till adjusting hole with suitable steering gear
lubricant.
6. Reassemble thrust spring, adjuster screw and lock-
nut on gear assembly. Torque locknut to 43
Ib.ft.7. Screw ball stud of the axial joint together with stop
plate onto both ends of the rack. Torque to 47
lb.ft.Counterhold rack with open-end wrench.
8. Slide rubber bellows onto axial joint and steering
gear housing. Attach rubber bellows with loose
clamp and clamping wire. Check that rubber bellows
is not twisted.
FlexibleCouplingClamp(GT)
Flexible Coupling Clamp (1 900
- Manta) _....,,,,,,....._...,,,,Tie
RodBall-Connects toRack (GT). . . . . .
BallStud - Axial Joint toRack (1900 - Manta)
Tie
RodLockNut(1900-Manta). . . . . .
Steering Gear Housing to Front Suspension
Crossmember (GT)
,,....._.._.................................................Steering Gear Housing to Front Suspension
Crossmember (1 900
- Manta) _...........................,...........Adjusting Screw Lock Nut.
.._.._....................................Pinion
. . . .._............_.......,,,,,.........................................,,,,..........,,Tie Rod to Steering Arm. .
.._.....................................
Torque
Lb.Ft..-
;“2
43
4749
18
29
43
:i
Page 222 of 625
WHEELS AND TIRES3G- 55
WHEELS AND TIRES
CONTENTS
Subject
DESCRIPTION AND OPERATION: (Not Applicable)
DIAGNOSIS:
Car
RoughnessandVibration. . . . . . . . . . . . . . . . . . . . . . . . . . . . . . . . . . . . . . . .AbnormalTireWear
. . . . . . . . . . . . . . . . . . . . . . . . . . . . . . . . . . . . . . . . . . . . . . . . . . . . . . . . . .MAINTENANCE AND ADJUSTMENTS:
Demounting and Mounting Tubeless Tires
. . . . . . . . . . . . . .Wheel
andTireBalance. . . . . . . . . . . . . . . . . . . . . . . . . . . . . . . . . . . . . . . . . . . . . . . . . .MAJOR REPAIR: (Not Applicable)
SPECIFICATIONS:
Specifications
. . . . . . . . . . . . . . . . . . . . . . . . . . . . . . . . . . . . . . . . . . . . . . . . . . . . . . . . . . . . . . . . . . . . . .Page No.
3G-55
3G-58
3G-6136-6236-62
DIAGNOSIS
CAR ROUGHNESS AND VIBRATIONinflation pressures and perform tire inspection, in-
cluding removal of any foreign material on tire tread
or wheel large enough to upset balance.
Possible Causes
To assist in the diagnosis and correction of some of
the more stubborn cases of tire vibration and rough-
ness conditions that may be encountered, the follow-
ing information is offered:Tire inflation pressure recommendations are very
important at all times and particularly so on all ride
complaints. Raising or lowering tire pressures to
“improve” mileage or traction should not be at-
tempted.
VIBRATION, or a quivering motion condition, no-
ticeable by feel through the steering column, steering
wheel, floor
p&n, or by hood and fender shake, usu-
ally originates from the front wheels and tires. Front
end vibration, when caused by unbalanced front
wheels, can be generally felt as steering wheel “nib-ble”.Next, road-test the car with the owner, if possible,
and have the owner explain the specific ride disturb-
ance.After road-testing, raise car on hoist and proceed to
isolate the offending tire/wheel assembly.
Reproducing the Disturbance
A vibration felt through the seats as a side-to-side
disturbance can usually be attributed to the rearIn an attempt to reproduce the disturbance ex-
wheels and tires.perienced in the ride, a wheel spinner can be used on
the front wheels of the car.
Both front and rear vibration can be noticed mainly
at highway speeds, usually over 60 mph.The rear wheels may be spun by placing car in
“Drive” with engine running.
ROUGHNESS, noticeable primarily at speeds be-
tween 40 and 65 mph, can be felt (and occasionally
heard), and is due to certain irregularities in the tire.
Roughness usually sets up a “trembling” feel or a
shuddering effect.When spinning rear wheels, never exceed a speedom-
eter speed of 35 mph with a standard rear axle assem-
bly, or 75 mph on one with a positive traction rear
axle. Excessive speeds may cause damage to the rear
axle assembly.
Road-Test With Owner
When a ride complaint is encountered, first checkJack up both rear wheels by placing the jack under
the differential housing. Spin one wheel and tire with
the opposite wheel held from rotating by holding the
Page 227 of 625
36. 601973 OPEL SERVICE MANUAL
severe or careless driver. Rapid acceleration and de-celeration, severe application of brakes, taking turns
at excessive speed, high-speed driving, and striking
curbs or other obstructions which lead to misalign-
ment are driving habits which will shorten the life of
any tire.hiaintenance of proper inflation pressure and peri-
odic interchanging of tires to equalize wear are
within the control of the driver. Underinflation
raises the internal temperature of a tire greatly due
to the continual friction caused by the flexing of the
side walls. Tire squealing on turns is an indication of
underinflation or excessive speed on the turns. A
combination of underinflation, high road tempera-
tures, and high-speed driving will quickly ruin the
best tire made.
High speed on straight highways or expressways nor-
mally causes more rapid wear on the rear than on thefront tires, although cupping of front tires can result
if the tires are not periodically switched from wheel
to wheel. Driving turns and curves at too high a rate
of speed causes the front tires to wear much faster
than the rear tires.
An inspection of the tires, together with information
as to locality in which the car has been operated willusually indicate whether abnormal wear is due to the
operating conditions described above or to mechani-cal faults which should be corrected.
The various types of
abnormal tire wear and their
causes are described in the following paragraphs.
Shoulder or Underinflation Tread WearWhen a tire is underinflated, the side walls and
shoulders of the tread carry the load, while the centerof tread folds in or compresses due to the low inter-
nal air pressure. This action causes the shoulders to
take all of the driving and braking load, resulting in
much faster wear of shoulders than of the center of
tread. See Figure 3G-7. For maximum results in han-dling, riding and tire life, tire inflation pressures
should never be allowed to go below the specified
minimum pressure.
Continuous high-speed driving on curves, right and
left, may produce tread wear very similar to underin-flation wear and might very easily be mistaken for
such. Side thrust when rounding turns causes wear
on the sides of tire tread. In making a turn to the left,especially at high speeds, the outside shoulder of the
right tire and the inside shoulder of the left tire take
the side thrust and naturally receive the most wear.
The only possible correction is to advise slower
speeds on curves. Do not increase tire inflation pres-
sures beyond specified limits, as this will cause centeror over-inflation wear. See paragraph below.
Canter or Overinflation Tread Wear
Excessive wheel camber, either positive or negative,causes the tire to run at such an angle to the road
surface that one side of the tread wears much more
than the other. See Figure
3G-7.When tire inflation pressures are maintained within
the specified limits, the tire will make a full contact
across the entire width of tread, thereby distributing
the wear evenly over the total surface of the tread
area.
Cross or Toe Tread WearWhen the front wheels have an excessive amount of
either toe-in or toe-out, the tires are actually draggedsideways when they travel straight down the road
and cross wear or scraping action takes place rapidly
wearing away the tread of tires. This cross wear con-dition will usually produce a tapered or feathered
edge on the ribs of the tire tread. See Figure
3G-7.In most cases, this can be detected by rubbing the
hand across the tire tread.
If the tapered or feathered edges are on the inner
sides of the ribs on one of both sides, it indicates thatone or both tires have excessive toe-in, while the
same condition in the outer sides of ribs indicates
excessive toe-out. Usually, excessive toe-in causes
excessive tire wear on the outer edge of the right
front tire and toe-out causes tire wear on the inner
edge of the left front tire. See Section 3C for toe-in
correction.Cornering wear caused by high-speed driving on
curves (see following paragraph) sometimes has the
appearance of toe wear. Care must be used to distin-guish between these two types of wear so that the
proper corrective measures will be used.
Side or Camber WearExcessive wheel camber, either positive or negative,
causes the tire to run at such an angle to the road
surface that one side of the tread wears much more
than the other. See Figure
3G-7.The amount or angle of the camber wear will be
governed by the amount of positive or negative cam-ber. Tire tread wear very similar in appearance to
camber wear may be caused by driving on turns at
excessive speeds. This “cornering” tread wear (see
paragraph below) cannot be corrected by change of
camber angle.
Adjustments for specified camber are covered in Sec-
tion 3C.