mirror OPEL AMPERA E 2017.5 Manual user
[x] Cancel search | Manufacturer: OPEL, Model Year: 2017.5, Model line: AMPERA E, Model: OPEL AMPERA E 2017.5Pages: 265, PDF Size: 6.24 MB
Page 38 of 265

36Keys, doors and windowsChild safety system for rear
windows
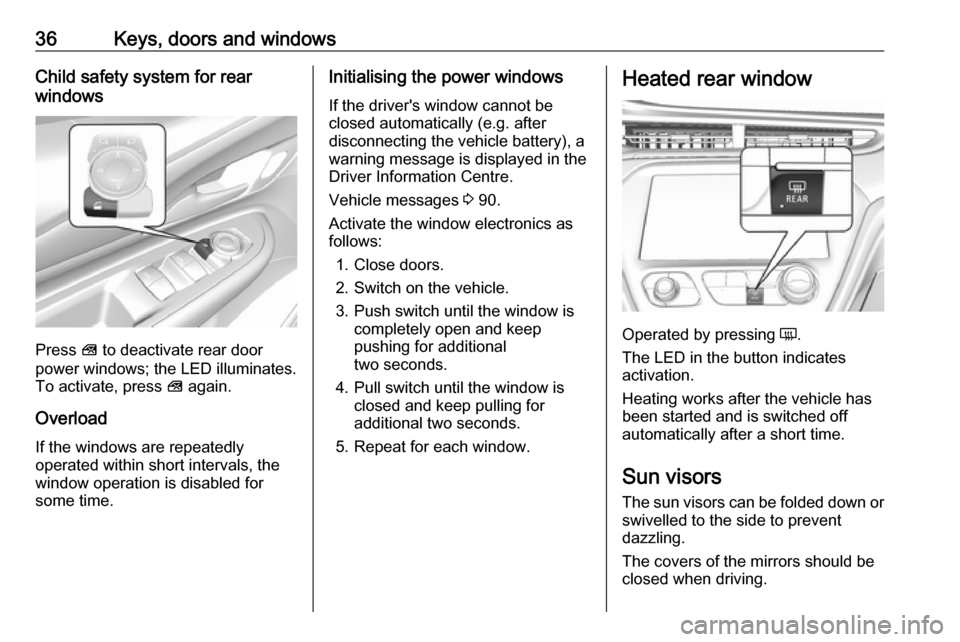
Press V to deactivate rear door
power windows; the LED illuminates.
To activate, press V again.
Overload
If the windows are repeatedly
operated within short intervals, the
window operation is disabled for
some time.
Initialising the power windows
If the driver's window cannot be
closed automatically (e.g. after
disconnecting the vehicle battery), a
warning message is displayed in the
Driver Information Centre.
Vehicle messages 3 90.
Activate the window electronics as
follows:
1. Close doors.
2. Switch on the vehicle.
3. Push switch until the window is completely open and keep
pushing for additional
two seconds.
4. Pull switch until the window is closed and keep pulling for
additional two seconds.
5. Repeat for each window.Heated rear window
Operated by pressing Ü.
The LED in the button indicates
activation.
Heating works after the vehicle has
been started and is switched off
automatically after a short time.
Sun visors The sun visors can be folded down or
swivelled to the side to prevent
dazzling.
The covers of the mirrors should be
closed when driving.
Page 71 of 265

Instruments and controls69Activation or deactivation of this
function can be changed in the menu Settings in the Info display.
Vehicle personalisation 3 92.
Rear window washer
Push lever.
Washer fluid is sprayed onto the rear
window and the wiper wipes a few
times.
If the rear camera mirror is equipped,
the washer fluid is sprayed on the rear camera at the same time.
Washer fluid 3 216.
Outside temperature
A drop in temperature is indicated
immediately and a rise in temperature
after a time delay.
If outside temperature drops to
0.5 °C, a warning message is
displayed in the Driver Information
Centre.
9 Warning
The road surface may already be
icy even though the display
indicates a few degrees above
0 °C.
Clock
Date and time are shown in the
Info display.
Info display 3 86.
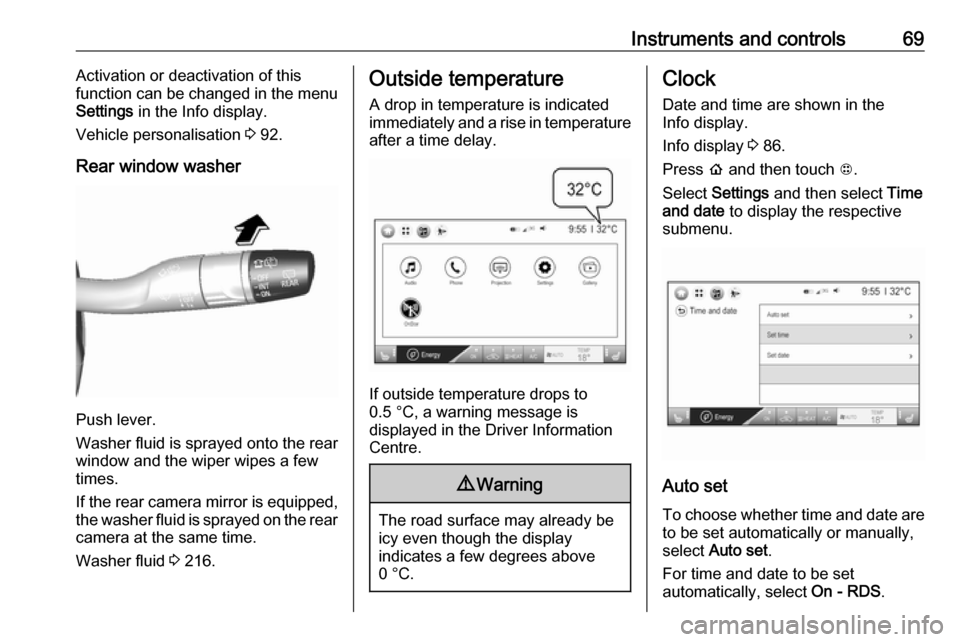
Press p and then touch 1.
Select Settings and then select Time
and date to display the respective
submenu.
Auto set
To choose whether time and date are to be set automatically or manually,
select Auto set .
For time and date to be set
automatically, select On - RDS.
Page 144 of 265

142Climate controlClimate controlClimate control systems.............142
Electronic climate control system .................................... 142
Air vents ..................................... 145
Adjustable air vents .................145
Fixed air vents ......................... 146
Maintenance .............................. 146
Air intake ................................. 146
Pollen filter ............................... 146
Air conditioning regular operation ................................ 147
Service .................................... 147Climate control systems
Electronic climate control system
Note
Do not cover the sensor located on top of the instrument panel,
otherwise the automatic climate
control system may not work
properly.
In automatic mode, temperature, fan
speed and air distribution are
regulated automatically.Controls for:
● temperature
● air distribution M K
● fan speed Z
● automatic mode AUTO
● demisting and defrosting V/
V MAX
Heated rear window Ü 3 36.
Heated exterior mirrors Ü 3 32.
Climate touch screen controls
● system on or off ON/OFF
● cooling HEAT & A/C
Page 184 of 265

182Driving and operatingmirror, when detecting objects that
may not be visible in the interior and
exterior mirrors.
The radar distance sensors are
located in the rear bumper.9 Warning
Side blind spot alert does not
replace driver vision.
The system does not detect:
● vehicles outside the side blind zones which may be rapidly
approaching
● pedestrians, cyclists or animals
Before changing a lane, always
check all mirrors, look over the
shoulder and use the turn signal.
When the system detects a vehicle in the side blind zone while driving
forwards, either while passing a
vehicle or being passed, a yellow
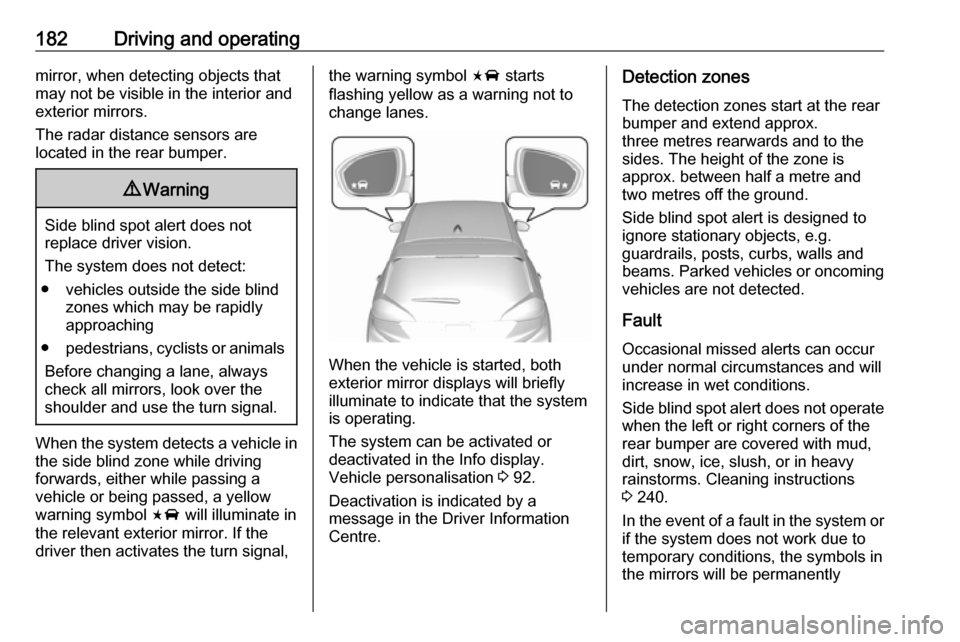
warning symbol F will illuminate in
the relevant exterior mirror. If the
driver then activates the turn signal,
the warning symbol F starts
flashing yellow as a warning not to
change lanes.
When the vehicle is started, both
exterior mirror displays will briefly illuminate to indicate that the system
is operating.
The system can be activated or
deactivated in the Info display.
Vehicle personalisation 3 92.
Deactivation is indicated by a
message in the Driver Information
Centre.
Detection zones
The detection zones start at the rear
bumper and extend approx.
three metres rearwards and to the
sides. The height of the zone is
approx. between half a metre and
two metres off the ground.
Side blind spot alert is designed to ignore stationary objects, e.g.
guardrails, posts, curbs, walls and
beams. Parked vehicles or oncoming
vehicles are not detected.
Fault
Occasional missed alerts can occur
under normal circumstances and will
increase in wet conditions.
Side blind spot alert does not operate when the left or right corners of the
rear bumper are covered with mud,
dirt, snow, ice, slush, or in heavy
rainstorms. Cleaning instructions
3 240.
In the event of a fault in the system or if the system does not work due to
temporary conditions, the symbols in
the mirrors will be permanently
Page 185 of 265

Driving and operating183illuminated and a message is
displayed in the Driver Information
Centre. Seek the assistance of a
workshop.
Lane change alert Additional to the side blind spot alert
3 181, lane change alert recognises
rapidly approaching vehicles from
behind on parallel lanes next to your
vehicle.
If the vehicle is equipped with lane
change alert, side blind spot alert is
always included.
The system alerts visually in each
exterior mirror when detecting rapidly
approaching vehicles from behind.
The radar distance sensors are
located in the rear bumper.9 Warning
Lane change alert does not
replace driver vision.
Before changing a lane, always
check all mirrors, look over the
shoulder and use the turn signal.
When the system detects an
approaching vehicle from behind
which drives considerably faster, the
yellow warning symbol F will
illuminate in the relevant exterior mirror. If the driver then activates the
turn signal, the warning symbol F
starts flashing yellow as a warning not to change lanes.
Lane change alert is active at all
speeds.
When the vehicle is started, both
exterior mirror displays will briefly come on to indicate that the system is operating.
Detection zones
The system sensors cover a zone of
approx. 3.5 metres parallel on both
vehicle sides and approx.
three metres rearwards on side blind
zone alert (A) and approx. 70 metres
rearwards on lane change alert (B) on
parallel lanes. The zones start at each exterior mirror. The height of the zone
is approx. between 0.5 metres and
two metres off the ground.
Deactivation Activation or deactivation of the lanechange alert can be set in the vehicle personalisation menu in the Info
display.
Page 186 of 265

184Driving and operatingVehicle personalisation 3 92.
Info display 3 86.
Deactivation is indicated by a message in the Driver Information
Centre.
Note
After production, the system
requires a calibration. For optimal
performance, drive as soon as
possible on a straight highway road
with roadside objects, e.g. guardrails
and barriers for some distance.
System limitations
Occasional missed alerts can occur
under normal circumstances or in
sharp curves. The system can
temporarily alert of objects in the blind spot at specific weather conditions
(rain, hail etc). Driving on a wet road
or in the transitions from a dry area to a wet area can cause the system to
light up, as water splash can be
interpreted as an object. Otherwise
F may illuminate due to guardrails,
signs, trees, shrubs or other immobile objects. This is normal operation and
the system does not need a service.The system may not operate properly
when:
● ice, snow, mud, or anything else covers the sensors
● driving in heavy rainstorms
● the vehicle had an accident
● there are extreme temperature changes
In the event of a fault in the system or if the system does not work due to
temporary conditions, a message is
displayed in the Driver Information
Centre. Seek the assistance of a
workshop.
Panoramic view system
The panoramic view system vision
displays an image of the area
surrounding the vehicle, along with
the front or rear camera views in the
centre console.The system uses four cameras:
● rear camera, installed above the license plate
● front camera, installed in the grille or near the front emblem
● side cameras, located at the bottom of both exterior mirrors.9Warning
The surround vision cameras have
blind spots and will not display all
objects near the corners of the
vehicle. Folding side mirrors that
are out of position will not display
the surrounding view correctly.
Always check around the vehicle
when parking or reversing.
Page 228 of 265

226Vehicle careNumberUsage1–2Power window rear3–4Rechargeable energy
storage system 15–6–7Left high‐beam headlight8Right high‐beam headlight9Left low‐beam headlight10Right low‐beam headlight11Horn12–13Front wiper motor driver14Tailgate15Front wiper motor co-driver16Electronic brake control
module supply electronicsNumberUsage17Rear wiper18Tailgate19Seat module front20Washer21HID light22Linear power module23Electronic brake control
module supply motor24Seat module rear25Powertrain26Transmission range control
module27Aero shutter28Auxiliary oil pump29E-booster motor source30Front power windows31In-panel bussed electrical
centreNumberUsage32Rear window defogger33Heated exterior rear view
mirror34Pedestrian friendly alert
function35–36–37Current sensor38Rain sensor39–40E-booster (ECU)41Power line communication
module42Infant occupant sensing43Window switch44Rechargeable energy
storage system45Vehicle integration control
module
Page 229 of 265

Vehicle care227NumberUsage46Integrated chassis control
module47Headlight levelling device48Integrated chassis control
module49Interior rear view mirror50–51E-booster52Rear camera53Run/Crank54A/C control module55Rechargeable energy
storage system pump56–57Power electronics coolant
pump58Engine control module59Electric steering column
lockNumberUsage60HVAC electric heater61On-board charging module62Transmission range control
module 163Electric cooling fan64Engine control module65Auxiliary heater pump66Powertrain relay67Drive unit controller68Rear window defogger69Second run/Crank relay70A/C control module71–72Transmission range control
module73Single power inverter
module74–After having changed defective fuses,
close the fuse box cover and press
until it engages.
If the fuse box cover is not closed
correctly, malfunctions may occur.
Instrument panel fuse boxInstrument panel fuse box on the
left side end
The fuse box is located on the driver's
side behind a cover in the instrument
panel.
To open the compartment, compress
the locking tabs, fold cover down and
remove.
Page 251 of 265
![OPEL AMPERA E 2017.5 Manual user Technical data249Vehicle dimensionsLength [mm]4164Width without exterior mirrors [mm]1765Width with two exterior mirrors [mm]2039Height (without antenna) [mm]1594Length of load compartment floor [mm]6 OPEL AMPERA E 2017.5 Manual user Technical data249Vehicle dimensionsLength [mm]4164Width without exterior mirrors [mm]1765Width with two exterior mirrors [mm]2039Height (without antenna) [mm]1594Length of load compartment floor [mm]6](/img/37/18754/w960_18754-250.png)
Technical data249Vehicle dimensionsLength [mm]4164Width without exterior mirrors [mm]1765Width with two exterior mirrors [mm]2039Height (without antenna) [mm]1594Length of load compartment floor [mm]681Length of load compartment with folded rear seats [mm]1459Load compartment width [mm]1154Load compartment height [mm]921Wheelbase [mm]2600Turning circle diameter [m]10.8
Page 259 of 265

257Initiating a phone call..............137
Ring tone ................................. 137
Call history .................................. 137
Car wash mode .......................... 155
Central locking system ................20
Centre console storage ...............59
Changing tyre and wheel size ...235
Charge cord ................................ 205
Charge limit selection .................197
Charge mode selection ..............197
Charge rate selection .................197
Charging ..................................... 193
Charging override .......................197
Charging status .......................... 204
Charging system .......................... 79
Child locks ................................... 26
Child restraint installation locations ................................... 54
Child restraints.............................. 52
Child restraint systems ................52
Climate control ............................. 13
Clock............................................. 69
Collision damage repair ..............251
Control elements Infotainment system ................108
Steering wheel ........................ 108
Control elements overview .........108
Control indicators.......................... 78
Control of the vehicle .................149
Controls ........................................ 66Convex shape .............................. 31
Coolant ....................................... 214
Coolant and antifreeze ...............244
Cooling system ........................... 214
Cruise control ...................... 82, 164
Cupholders .................................. 58
Curtain airbag system .................. 50
D DAB ............................................ 124
Danger, Warnings and Cautions ...2
Daytime running lights ...............102
Declaration of conformity ............251
Delayed locking ............................ 25
Digital audio broadcasting ..........124
Directional tyres .......................... 230
Displaying pictures .....................130
Display settings ..................130, 131
Door open .................................... 83
Doors ............................................ 28
Drive modes ............................... 154
Driver assistance systems ..........164
Driver Information Centre .............83
Driving economically................... 148
Driving efficiency gauge ...............75
Driving hints ........................ 148, 149
E Electric adjustment ......................31
Electrical requirements ...............208
Electrical system......................... 222Electrical system overload .........222
Electric drive unit ..................14, 155
Electric parking brake ...........80, 159
Electric parking brake fault ...........80
Electric rate schedule .................197
Electric vehicle operation modes 154
Electronic climate control system 142
Electronic key system ...................19
Electronic Stability Control.......... 163
Electronic Stability Control and Traction Control system ............81
Electronic Stability Control off....... 81
Emergency call ........................... 136
Engine compartment fuse box ...224
Entry lighting .............................. 104
Event data recorders ..................254
Exit lighting ................................ 104
Exterior care .............................. 240
Exterior light ................................. 82
Exterior lighting ......................10, 99
Exterior mirrors ............................. 31
F
File formats Audio files................................ 126
Movie files ............................... 126
Picture files.............................. 126
First aid kit ................................... 62
Fixed air vents ........................... 146
Folding mirrors ............................. 32