mirror OPEL AMPERA E 2017.5 Manual user
[x] Cancel search | Manufacturer: OPEL, Model Year: 2017.5, Model line: AMPERA E, Model: OPEL AMPERA E 2017.5Pages: 265, PDF Size: 6.24 MB
Page 8 of 265

6In briefHead restraint adjustment
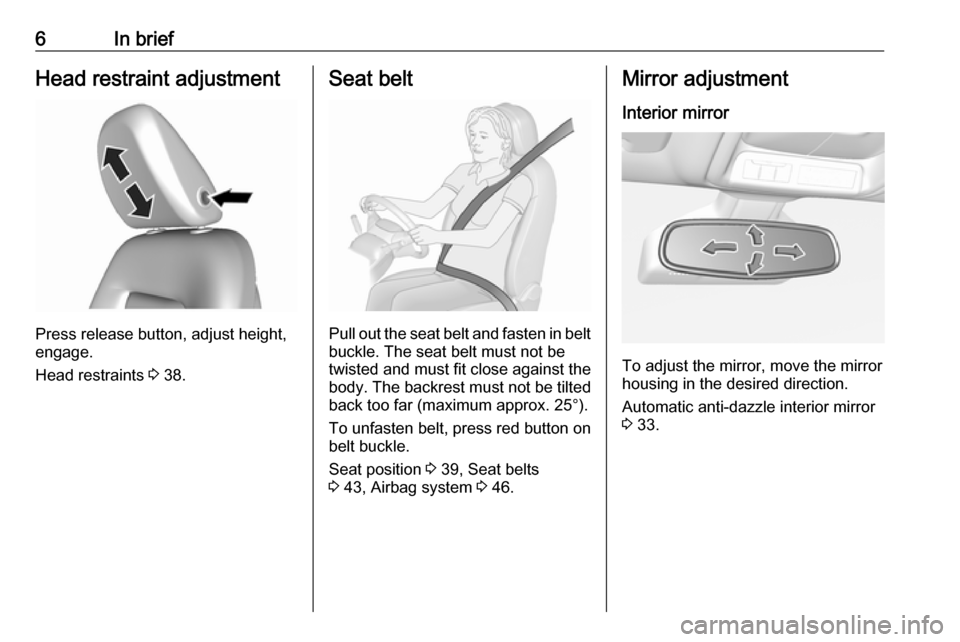
Press release button, adjust height,
engage.
Head restraints 3 38.
Seat belt
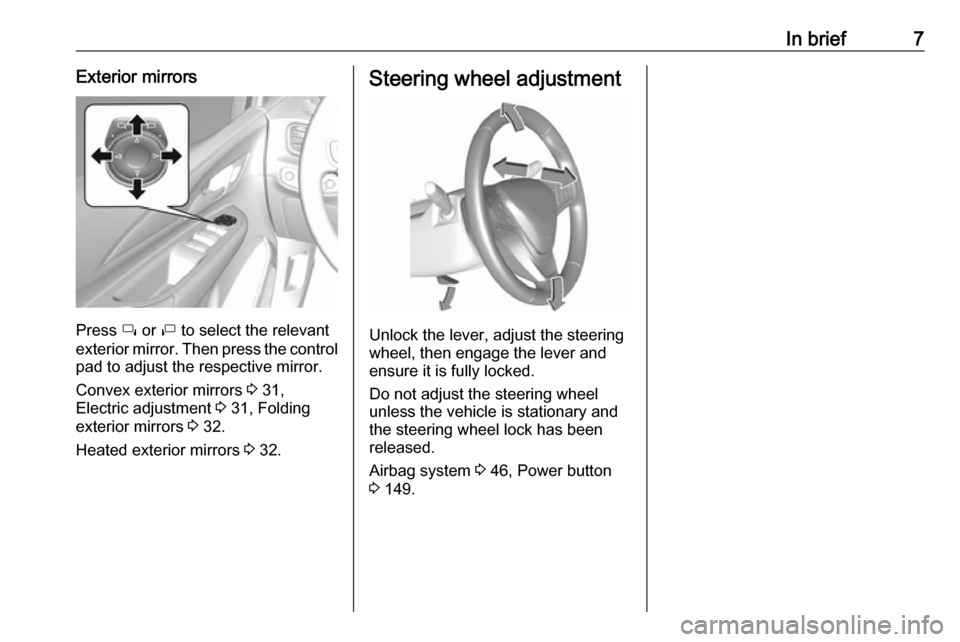
Pull out the seat belt and fasten in belt
buckle. The seat belt must not be
twisted and must fit close against the
body. The backrest must not be tilted back too far (maximum approx. 25°).
To unfasten belt, press red button on belt buckle.
Seat position 3 39, Seat belts
3 43, Airbag system 3 46.
Mirror adjustment
Interior mirror
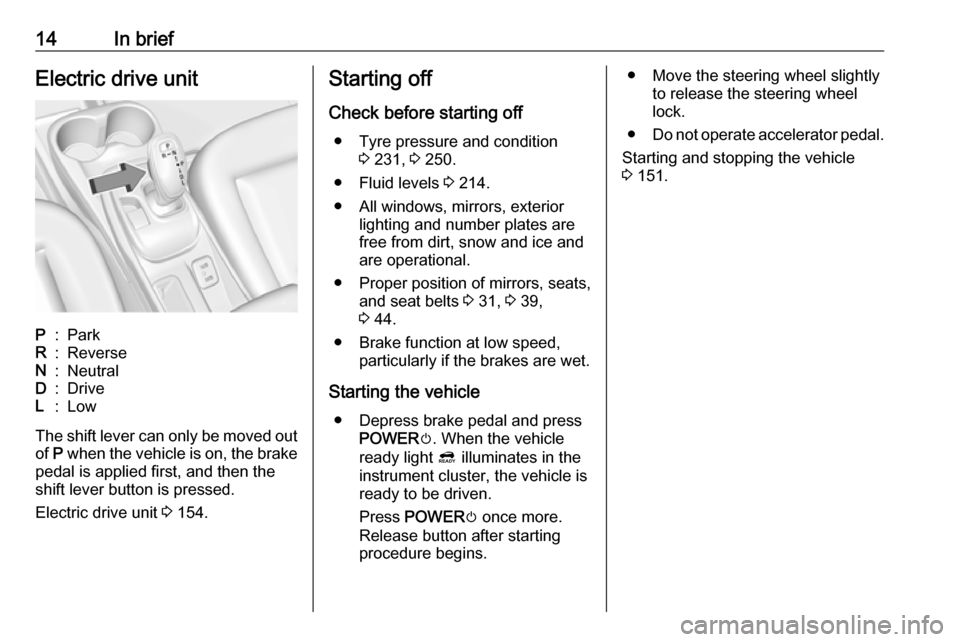
To adjust the mirror, move the mirror
housing in the desired direction.
Automatic anti-dazzle interior mirror
3 33.
Page 9 of 265

In brief7Exterior mirrors
Press í or ì to select the relevant
exterior mirror. Then press the control
pad to adjust the respective mirror.
Convex exterior mirrors 3 31,
Electric adjustment 3 31, Folding
exterior mirrors 3 32.
Heated exterior mirrors 3 32.
Steering wheel adjustment
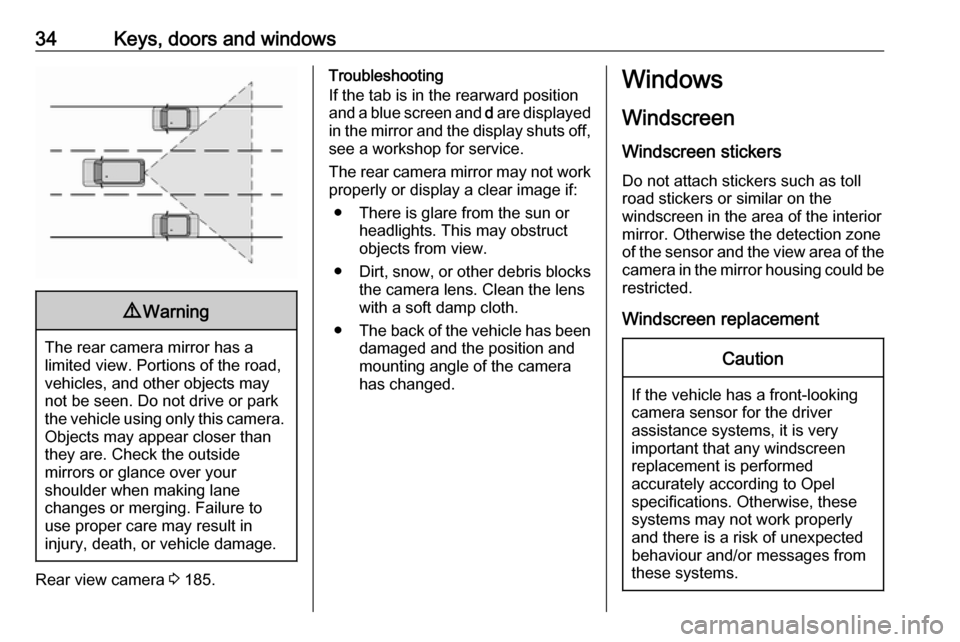
Unlock the lever, adjust the steering
wheel, then engage the lever and
ensure it is fully locked.
Do not adjust the steering wheel
unless the vehicle is stationary and the steering wheel lock has been
released.
Airbag system 3 46, Power button
3 149.
Page 11 of 265

In brief91Power windows .....................35
2 Exterior mirrors .....................31
3 Central locking system ..........20
4 Side air vents ...................... 145
5 Turn and lane-change
signals, headlight flash,
low/high beam, high beam
assist ................................... 102
Exit lighting ......................... 104
Parking lights ...................... 103
6 Regen on Demand .............160
7 Cruise control .....................164
Speed limiter ....................... 165
Forward collision alert .........167
Heated steering wheel ..........66
8 Instruments .......................... 75
Driver Information Centre ...... 83
9 Forward collision alert
indicator ............................. 167
Front pedestrian alert ..........172
10 Buttons for Driver
Information Centre ................8311Windscreen wiper and
washer, rear wiper and
washer ................................. 67
12 Centre air vents .................. 145
13 Info display ........................... 86
14 Anti-theft alarm system
status LED ........................... 29
Light sensor ........................ 100
Charging status indicator ....204
15 Glovebox .............................. 58
16 Climate control system ........ 142
17 Hazard warning flashers ....102
Sport mode ........................ 154
Traction Control system .....162
Electronic Stability Control . 163
Parking assist/Advanced
parking assist .....................174
Lane keep assist ................191
18 Power outlet .......................... 70
19 Shift lever ........................... 155
20 USB port
21 Controls for Info display
operation .............................. 86
22 Parking brake ......................15923Power button ....................... 149
24 Steering wheel adjustment ..66
25 Horn ..................................... 67
26 Bonnet release lever ..........213
27 Fuse box ............................ 227
28 Light switch .......................... 99
Headlight range
adjustment ......................... 101
Rear fog lights ....................102
Instrument illumination .......103
Page 15 of 265

In brief13Rear window washer
Push lever.
Washer fluid is sprayed on the rear
window and the wiper wipes a few
times.
Rear window wiper/washer 3 68.
Climate control
Heated rear window
The heating is operated by pressing
Ü .
Heated rear window 3 36.
Heated exterior mirrors
Pressing Ü also activates the heated
exterior mirrors.
Heated exterior mirrors 3 32.
Demisting and defrosting the
windows
Press V.
Temperature and air distribution are
set automatically and the fan runs at
high speed.
Switch on heated rear window Ü.
Electronic climate control system 3 142.
Page 16 of 265

14In briefElectric drive unitP:ParkR:ReverseN:NeutralD:DriveL:Low
The shift lever can only be moved out
of P when the vehicle is on, the brake
pedal is applied first, and then the
shift lever button is pressed.
Electric drive unit 3 154.
Starting off
Check before starting off ● Tyre pressure and condition 3 231, 3 250.
● Fluid levels 3 214.
● All windows, mirrors, exterior lighting and number plates are
free from dirt, snow and ice and
are operational.
● Proper position of mirrors, seats, and seat belts 3 31, 3 39,
3 44.
● Brake function at low speed, particularly if the brakes are wet.
Starting the vehicle ● Depress brake pedal and press POWER m. When the vehicle
ready light 4 illuminates in the
instrument cluster, the vehicle is
ready to be driven.
Press POWER m once more.
Release button after starting
procedure begins.● Move the steering wheel slightly to release the steering wheel
lock.
● Do not operate accelerator pedal.
Starting and stopping the vehicle
3 151.
Page 18 of 265

16Keys, doors and windowsKeys, doors and
windowsKeys, locks ................................... 16
Keys .......................................... 16
Radio remote control .................17
Electronic key system ................19
Memorised settings ...................20
Central locking system ..............20
Delayed locking ......................... 25
Automatic locking ......................25
Child locks ................................. 26
Smartphone remote function .....26
Doors ........................................... 28
Load compartment ....................28
Vehicle security ............................ 29
Anti-theft locking system ...........29
Anti-theft alarm system ..............29
Immobiliser ................................ 31
Exterior mirrors ............................ 31
Convex shape ........................... 31
Electric adjustment ....................31
Folding mirrors .......................... 32
Heated mirrors ........................... 32
Interior mirrors ............................. 33
Automatic anti-dazzle ................33Windows...................................... 34
Windscreen ............................... 34
Power windows ......................... 35
Heated rear window ..................36
Sun visors .................................. 36Keys, locks
Keys
Replacement keys
The key number is specified on a
detachable tag.
The key number must be quoted
when ordering replacement keys as it
is a component of the immobiliser
system.
Locks 3 240, Central locking 3 20,
Starting and stopping the vehicle
3 151.
Radio remote control 3 17.
Electronic key 3 19.
The code number of the adapter for
the locking wheel nuts is specified on
a card. It must be quoted when
ordering a replacement adapter.
Page 33 of 265

Keys, doors and windows31message is displayed in the Driver
Information Centre after switching on
the vehicle.
Vehicle messages 3 90.
Immobiliser The system whether the vehicle is
allowed to be started with the key
being used.
The immobiliser is activated
automatically after the electronic key
has been removed from the vehicle.
If control indicator d flashes when the
vehicle is on, there is a fault in the
system; the propulsion system cannot
be started. Switch off the vehicle and
repeat the start attempt.
If control indicator d continues
flashing, attempt to start the
propulsion system using the spare
key and seek the assistance of a
workshop.
Note
Radio Frequency Identification
(RFID) tags may cause interference with the key. Do not have it placednear the key when starting the
vehicle.Note
The immobiliser does not lock the doors. You should always lock the
vehicle after leaving it and switch on the anti-theft alarm system 3 20,
3 29.
Control indicator d 3 81.Exterior mirrors
Convex shape
The shape of the mirror makes
objects appear smaller, which will affect the ability to estimate
distances.
Side blind zone alert 3 181.
Electric adjustment
Press í or ì to select the relevant
exterior mirror. Then press the control
pad to adjust the respective mirror.
Press í or ì again to deselect the
mirror.
Page 34 of 265

32Keys, doors and windowsFolding mirrors
For pedestrian safety, the exterior
mirrors will swing out of their normal
mounting position if they are struck
with sufficient force. Reposition the mirror by applying slight pressure tothe mirror housing.
Electric folding
Press n to fold both exterior mirrors.
Press n again - both exterior mirrors
to return to their original position.
If an electrically folded mirror is
manually extended, pressing n will
only electrically extend the other
mirror.
Heated mirrors
Operated by pressing Ü.
The LED in the button indicates
activation.
Heating works after the vehicle has
been started and is switched off
automatically after a short time.
Page 35 of 265

Keys, doors and windows33Interior mirrors
Automatic anti-dazzle
Dazzle from following vehicles at
night is automatically reduced.
Rear camera mirror
This automatic dimming mirror
provides a wide angle camera view of
the area behind the vehicle.
Pull the tab rearward to turn on the
display. Push the tab forward to turn
it off. When off, the mirror is automatic dimming. Adjust the mirror for a clear
view of the area behind the vehicle
while the display is off.To adjust the brightness, press the
button (1) on the back of the rear view mirror without covering the light
sensor (2).
Each button press cycles the
brightness between five settings.
Page 36 of 265

34Keys, doors and windows9Warning
The rear camera mirror has a
limited view. Portions of the road,
vehicles, and other objects may
not be seen. Do not drive or park
the vehicle using only this camera. Objects may appear closer thanthey are. Check the outside
mirrors or glance over your
shoulder when making lane
changes or merging. Failure to
use proper care may result in
injury, death, or vehicle damage.
Rear view camera 3 185.
Troubleshooting
If the tab is in the rearward position and a blue screen and d are displayed
in the mirror and the display shuts off, see a workshop for service.
The rear camera mirror may not work properly or display a clear image if:
● There is glare from the sun or headlights. This may obstruct
objects from view.
● Dirt, snow, or other debris blocks
the camera lens. Clean the lens
with a soft damp cloth.
● The back of the vehicle has been
damaged and the position and
mounting angle of the camera
has changed.Windows
Windscreen Windscreen stickers
Do not attach stickers such as toll
road stickers or similar on the
windscreen in the area of the interior
mirror. Otherwise the detection zone
of the sensor and the view area of the camera in the mirror housing could be
restricted.
Windscreen replacementCaution
If the vehicle has a front-looking
camera sensor for the driver
assistance systems, it is very
important that any windscreen
replacement is performed
accurately according to Opel
specifications. Otherwise, these
systems may not work properly
and there is a risk of unexpected
behaviour and/or messages from
these systems.