warning light OPEL AMPERA E 2019 Manual user
[x] Cancel search | Manufacturer: OPEL, Model Year: 2019, Model line: AMPERA E, Model: OPEL AMPERA E 2019Pages: 271, PDF Size: 6.7 MB
Page 86 of 271

84Instruments and controlsBlank page
Shows a blank page without any
information.
Audio menu
In the main view of the Audio
application, press { or } to scroll
through radio stations or move to the next / previous track of a USB /
Bluetooth ®
device that is connected to
the vehicle.
Press 9 to select the Audio app, then
press [ to enter the Audio menu. In
the Audio menu browse for music,
select from the favourites, or change
the audio source.
Exit the Audio menu by pressing 9
or ].
Phone menu Press 9 to select the Phone
application, then press [ to enter the
Phone menu. In the Phone menu, if
there is no active phone call, view
recent calls, scroll through contacts,
or select from the favourites. If thereis an active call, mute or unmute the
phone or switch to handset or hands
free operation.
Exit the Phone menu by pressing 9
or ].
Layout menu Press 9 while display themes is
displayed. Select Basic, Standard or
Enhanced mode by pressing 9.
Options menu
The following list contains all possible Options menu pages:
● Unit
● Speed warning
● Tyre load
Units
Press [ while units page is displayed.
Select imperial or metric units by
pressing 9.
Speed warning
The speed warning function alerts the
driver when a set speed is exceeded.To set the speed warning, press 9
while the page is displayed. Press
[ and { or } to adjust the value.
Press 9 to set the speed. Once the
speed is set, this feature can be
turned off by pressing 9 while
viewing this page. If the selected
speed limit is exceeded, a pop-up
warning is displayed with a chime.
Tyre load
The tyre pressure category according to the actual tyre inflation pressure
can be selected 3 232.
Press { or } to select a category
Light , Eco or Max .
Press 9 to confirm category.
Help
Provides information about the
gauges which are available in the
different layouts ( Basic, Standard or
Enhanced ).
Open source software
System settings 3 116.
Page 92 of 271

90Instruments and controlsWarning chimesIf several warnings appear at the
same time, only one warning chime
will sound.
When starting the propulsion
system or whilst driving
The warning chime regarding not
fastened seat belts has priority over any other warning chime.
● If seat belt is not fastened.
● If a door or the tailgate is not fully
closed when starting off.
● If a certain speed is exceeded with parking brake applied.
● If approaching a vehicle ahead too rapidly.
● If a programmed speed or speed
limit is exceeded.
● If a warning message appears in the Driver Information Centre.
● If the electronic key is not in the passenger compartment.
● If the parking assist detects an object.● If an unintended lane changeoccurs.
● If safety function of the power tailgate detects obstacles in the
moving area.
When the vehicle is parked and / or the driver's door is opened
● With exterior lights on.
Battery voltage When the voltage of the 12 V vehicle
battery is running low, a warning
message will appear in the Driver
Information Centre.
1. Switch off any electrical consumers which are not requiredfor a safe drive, e.g. seat heating, heated rear window or other main
consumers.
2. Charge the 12 V vehicle battery by
driving continuously for a while or
by using a charging device.
If the 12 V vehicle battery cannot be
recharged, have the cause of the fault
remedied by a workshop.Vehicle personalisation
The vehicle's behaviour can be
personalised by changing the settings in the Info Display.
Depending on vehicle equipment and
country-specific regulations some of
the functions described below may
not be available.
Some functions are only displayed or
active when the vehicle is on.
Personal settings
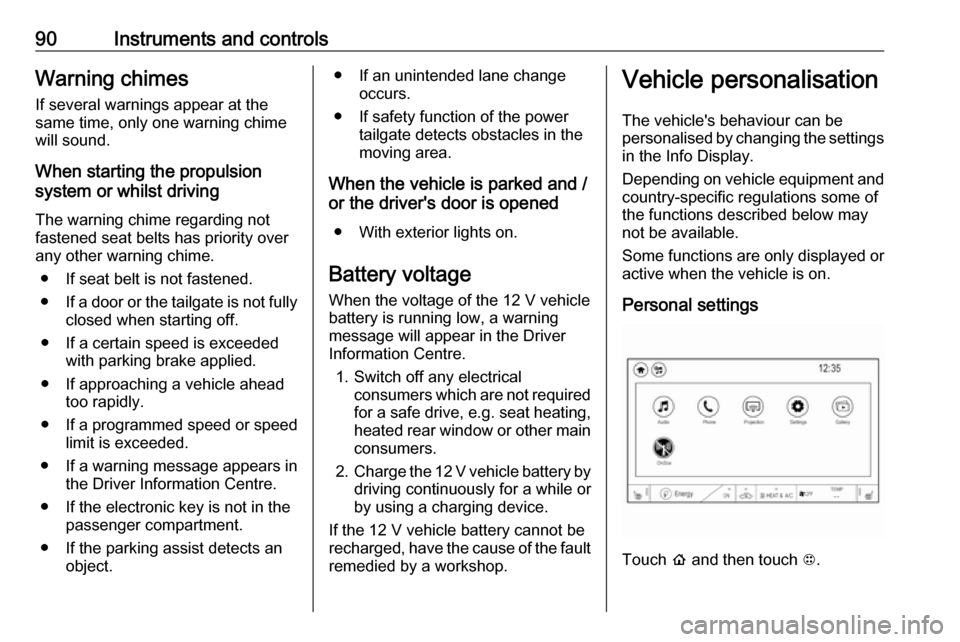
Touch p and then touch 1.
Page 94 of 271

92Instruments and controlsdisables Active Emergency
Braking. Select Off, Alert , or Alert
and Brake .
Front pedestrian detection : This
allows the feature’s notification to
be customised. This feature may
help avoid or reduce the harm
caused by front-end crashes with nearby pedestrians. Select Off,
Alert , or Alert and Brake .
Rear Cross Traffic Alert :
Activates or deactivates rear
cross traffic alert.
Lane Change Alert : Activates or
deactivates lane change alert.
● Lighting
Vehicle locator lights : Activates
or deactivates the entry lighting.
Exit lighting : Activates or
deactivates and changes the duration of exit lighting.
● Power door locks
Auto door lock : Activates or
deactivates the automatic door
locking function after switching on the vehicle.Unlocked door anti lockout :
Activates or deactivates the door
locking function while a door is open.
Delayed door lock : Activates or
deactivates the delayed door
locking function. This feature
delays the actual locking of the
doors until all doors are closed. It
just can be toggled when Auto
door lock is deactivated.
● Remote lock / unlock / start
Remote unlock light feedback :
Activates or deactivates the
hazard warning flasher feedback
whilst unlocking.
Remote lock feedback : Changes
what kind of feedback is given when locking the vehicle.
Remote door unlock : Changes
the configuration to unlock only
the driver's door or the whole
vehicle whilst unlocking.
Relock remotely unlocked doors :
Activates or deactivates the
automatic relock function after
unlocking without opening the
vehicle.Remote start auto heat seats :
Activates or deactivates
automatically the heated seats
when using remote start.
Passive door unlock : Changes
the configuration to unlock only
the driver's door or the whole
vehicle whilst unlocking.
Relock remotely unlocked doors :
Activates or deactivates the
passive locking function. This
feature locks the vehicle
automatically after several
seconds if all doors have been
closed and an electronic key has
been removed from the vehicle.
Remote start auto heat seats :
Activates or deactivates automatically the heated seats
when using remote start.
Passive door unlock : Changes
the configuration to unlock only
the driver's door or the whole
vehicle whilst unlocking.
Passive door lock : Activates or
deactivates the passive locking
function. This feature locks the
vehicle automatically after
several seconds if all doors have
Page 100 of 271

98LightingLightingExterior lighting............................ 98
Light switch ................................ 98
Automatic light control ...............99
High beam ................................. 99
High beam assist .....................100
Headlight flash ......................... 101
Headlight range adjustment ....101
Headlights when driving abroad .................................... 101
Daytime running lights .............101
Hazard warning flashers ..........101
Turn lights ................................ 102
Rear fog light ........................... 102
Parking lights ........................... 102
Reversing lights .......................103
Misted light covers ...................103
Interior lighting ........................... 103
Instrument panel illumination control ..................................... 103
Interior lights ............................ 103
Reading lights .......................... 104
Sunvisor lights ......................... 104
Lighting features ........................104
Entry lighting ............................ 104Exit lighting.............................. 104
Battery discharge protection ....104Exterior lighting
Light switch
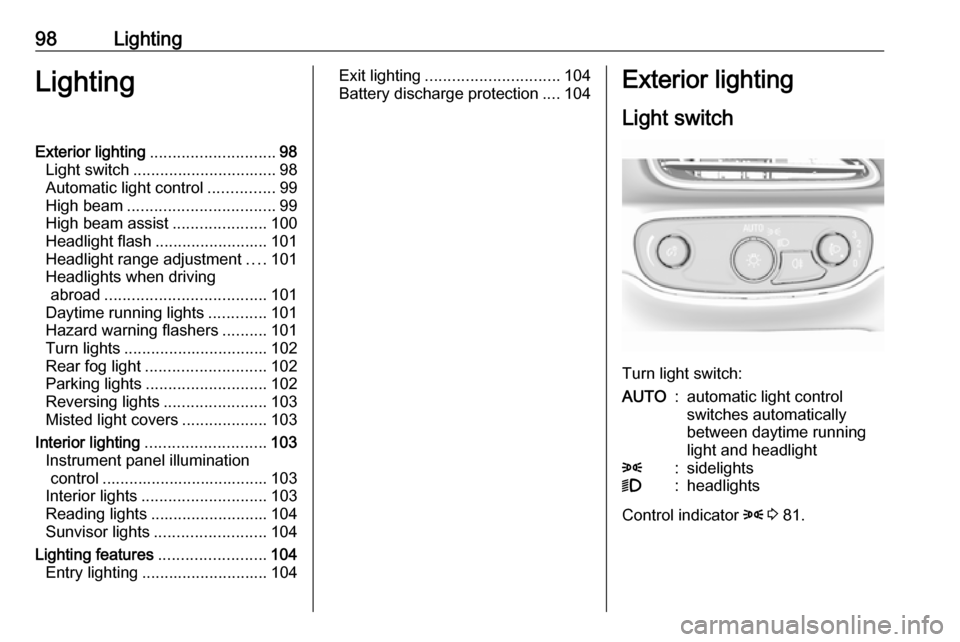
Turn light switch:
AUTO:automatic light control
switches automatically
between daytime running
light and headlight8:sidelights9:headlights
Control indicator 8 3 81.
Page 102 of 271

100LightingPush stalk to switch from low to high
beam.
Pull stalk to deactivate high beam.
High beam assist This feature automatically activates
the high beam at night.
The camera in the windscreen
detects the lights of oncoming or
preceding vehicles. High beam can
be triggered or faded out particularly
according to the traffic situation. This
gives the best light distribution
without dazzling other road users.
Once activated, high beam assist
remains active and switches high
beam on and off depending on
surrounding conditions. The latest
setting of the high beam assist will remain after the vehicle is switched
on again.
Activation Activate high beam assist by pressing
f once. High beam is switched on
automatically at a speed above50 km/h. High beam is switched off at a speed below 35 km/h, but high
beam assist remains active.
The green control indicator f
illuminates continuously when the
high beam assist is activated, the blue one 7 illuminates when high beam is
on.
Control indicator f 3 81, 7 3 81.
Pushing the stalk once switches on
manual high beam without high beam assist.
High beam assist switches
automatically back to low beam
when:
● Driving in urban areas.
● Reverse parking function is active.
● Rear fog light is switched on.
If there are no restrictions detected, the system switches back to high
beam.Deactivation
If high beam assist is active and high
beam is on, press f once or pull the
stalk once to deactivate high beam
assist.
If high beam assist is active and high
beam is off, press f once to
deactivate high beam assist.
Pushing the stalk to activate manual
high beam will also deactivate high beam assist.
Headlight flash in conjunction with high beam assist
Headlight flash by pulling the stalk
once will not deactivate high beam
assist when high beam is off.
Headlight flash by pulling the stalk
once deactivates high beam assist
when high beam is on.
Fault in headlight system
When the system detects a failure in
the headlight system, it selects a
preset position to avoid dazzling of
oncoming traffic. A warning is
displayed in the Driver Information
Centre.
Page 103 of 271

Lighting101Headlight flash
To activate the headlight flash, pull
stalk.
Pulling stalk deactivates high beam.
Headlight range adjustment Manual headlight range
adjustment
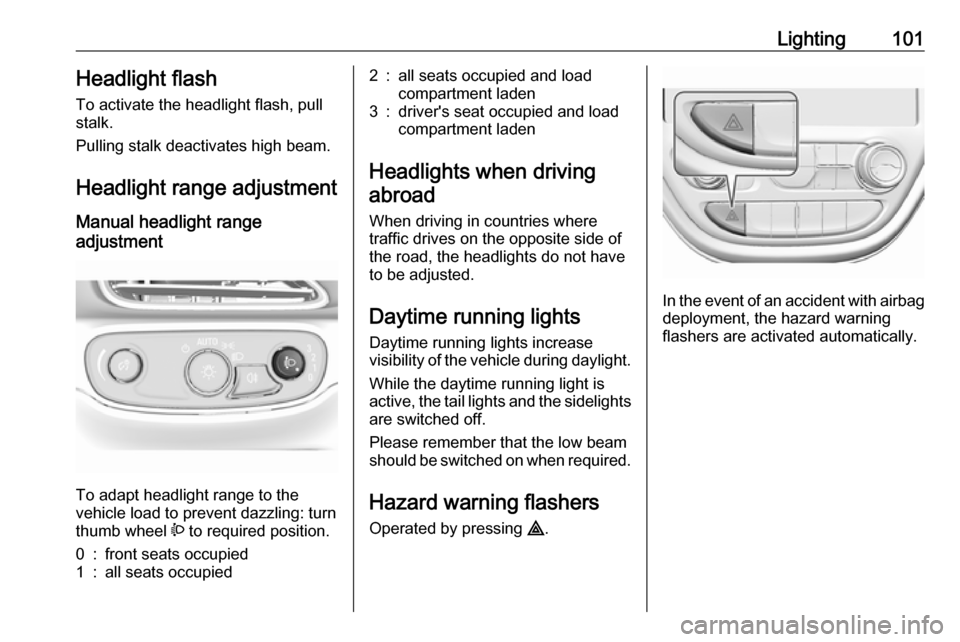
To adapt headlight range to the
vehicle load to prevent dazzling: turn
thumb wheel ? to required position.
0:front seats occupied1:all seats occupied2:all seats occupied and load
compartment laden3:driver's seat occupied and load
compartment laden
Headlights when driving
abroad
When driving in countries where
traffic drives on the opposite side of
the road, the headlights do not have
to be adjusted.
Daytime running lights Daytime running lights increase
visibility of the vehicle during daylight.
While the daytime running light is
active, the tail lights and the sidelights are switched off.
Please remember that the low beam
should be switched on when required.
Hazard warning flashers
Operated by pressing ¨.
In the event of an accident with airbag
deployment, the hazard warning
flashers are activated automatically.
Page 168 of 271

166Driving and operatingResume limit speed
Press RES/+ . The stored speed limit
will be obtained.
Switching off the system
Press L, the speed limit indication
extinguishes in the Driver Information Centre. The stored speed is deleted.
By pressing m to activate cruise
control or adaptive cruise control,
speed limiter is also deactivated and
the stored speed is deleted.
By switching off the vehicle, speed
limiter is also deactivated, but the
speed limit will be stored for next
speed limiter activation.
Forward collision alert The forward collision alert may help to
avoid or reduce the harm caused by
front-end crashes.
The forward collision alert uses the front camera system in the
windscreen to detect a vehicle
directly ahead, in your path, within a
distance of approx. 60 m.
A vehicle ahead is indicated by the
control indicator A.
If a vehicle directly ahead is
approached too quickly, a warning
chime is sounded.
Additionally, the driver is notified by a flashing red LED stripe which is
projected on the windscreen in the
driver's field of view.
A precondition is that forward collision alert is not deactivated in the vehicle
personalisation 3 90.
Activation
Forward collision alert operates
automatically above 8 km/h, if it is not deactivated in the vehicle
personalisation menu.
Alerting the driver
The vehicle ahead control indicator
A illuminates green in the instrument
cluster when the system has detected
a vehicle in the driving path.
The control indicator A changes to
yellow when the distance to a
preceding moving vehicle gets too
small or when approaching another
vehicle too rapidly.Caution
The colour lighting of this control
indicator does not correspond to
local traffic laws on following
distance. The driver bears full
responsibility for maintaining safe
following distance according to
applicable traffic rules, weather
and road conditions etc. at all
times.
When the time to a potential collision
with a vehicle in front gets too small
and a collision is imminent, the driver
is notified by a flashing red LED stripe which is projected on the windscreen
in the driver's field of view.
Page 171 of 271

Driving and operating169supplemental use only to reduce
the vehicle speed before a
collision.
The system may not react to
animals. After a sudden lane
change, the system needs a
certain time to detect the next
preceding vehicle.
The driver must always be ready
to take action and apply the brakes
and steer to avoid collisions.
Functionality
If equipped only with front camera the
active emergency braking operates in
a forward gear above walking speed
up to 80 km/h.
A precondition is that the system is
not deactivated in the vehicle
personalisation menu 3 90.
The system includes: ● brake preparation system
● emergency automatic braking ● forward looking brake assist
● front pedestrian protection system
Brake preparation system
When approaching a vehicle ahead
or a pedestrian so quickly that a
collision is likely, the brake
preparation system slightly
pressurises the brakes. This reduces
the response time, when a manual or automatic braking is requested.
The brake system is prepared so that
braking can occur more rapidly.
If equipped only with front camera the system operates up to a speed of
80 km/h.
Emergency automatic braking After activation of brake preparation
system and just before the imminent
collision, this function automatically
applies limited braking to reduce the
impact speed of the collision or
prevent a crash.
Depending on the situation, the
vehicle may automatically brake
moderately or hard. This front
automatic braking can only occur if a
vehicle ahead is detected, indicated
by the vehicle ahead indicator A
3 166. On vehicles with frontpedestrian protection, automatic
braking can also occur when a
pedestrian ahead is detected,
indicated by the pedestrian ahead
indicator 7.
The system operates up to a speed of
80 km/h.
Below a speed of 40 km/h the system can apply full braking.
Emergency automatic braking may slow the vehicle to a complete stop to
try to avoid a potential crash. If this
happens, emergency automatic
braking may engage the electric
parking brake to hold the vehicle at a
stop. To release, push the electric
parking brake switch or firmly depress the accelerator pedal.9 Warning
Emergency automatic braking is
an emergency crash preparation
feature and is not designed to
avoid crashes. Do not rely on the
system to brake the vehicle.
Emergency automatic braking will
Page 183 of 271

Driving and operating181Before changing a lane, always
check all mirrors, look over the
shoulder and use the turn lights.
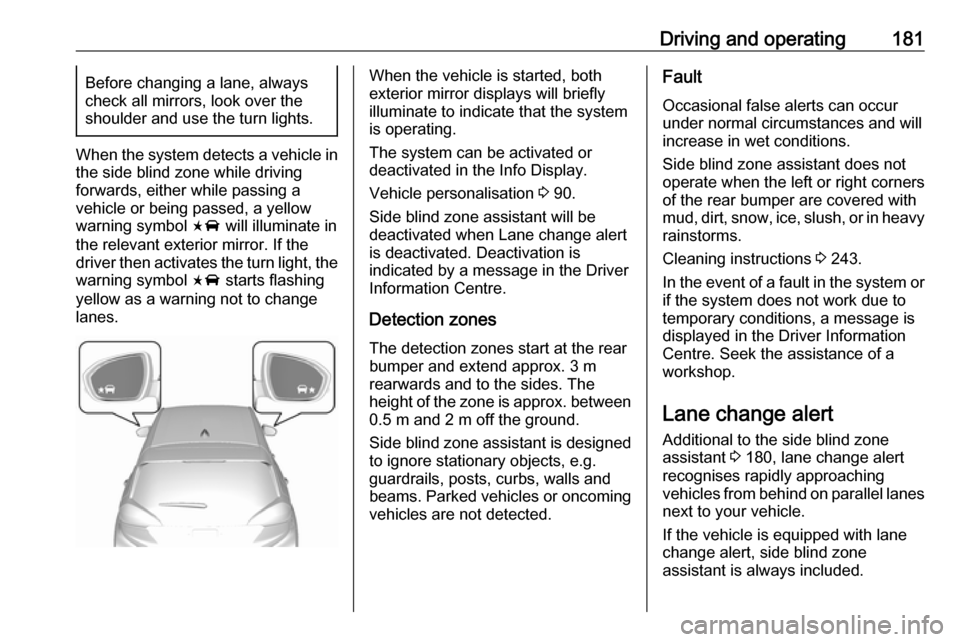
When the system detects a vehicle in
the side blind zone while driving
forwards, either while passing a
vehicle or being passed, a yellow
warning symbol F will illuminate in
the relevant exterior mirror. If the
driver then activates the turn light, the warning symbol F starts flashing
yellow as a warning not to change
lanes.
When the vehicle is started, both
exterior mirror displays will briefly illuminate to indicate that the system
is operating.
The system can be activated or
deactivated in the Info Display.
Vehicle personalisation 3 90.
Side blind zone assistant will be
deactivated when Lane change alert
is deactivated. Deactivation is
indicated by a message in the Driver Information Centre.
Detection zones
The detection zones start at the rear bumper and extend approx. 3 m
rearwards and to the sides. The
height of the zone is approx. between 0.5 m and 2 m off the ground.
Side blind zone assistant is designed
to ignore stationary objects, e.g.
guardrails, posts, curbs, walls and
beams. Parked vehicles or oncoming
vehicles are not detected.Fault
Occasional false alerts can occur
under normal circumstances and will
increase in wet conditions.
Side blind zone assistant does not
operate when the left or right corners
of the rear bumper are covered with
mud, dirt, snow, ice, slush, or in heavy rainstorms.
Cleaning instructions 3 243.
In the event of a fault in the system or
if the system does not work due to
temporary conditions, a message is
displayed in the Driver Information
Centre. Seek the assistance of a
workshop.
Lane change alert
Additional to the side blind zone
assistant 3 180, lane change alert
recognises rapidly approaching
vehicles from behind on parallel lanes
next to your vehicle.
If the vehicle is equipped with lane change alert, side blind zone
assistant is always included.
Page 184 of 271

182Driving and operatingThe system alerts visually in each
exterior mirror when detecting rapidly
approaching vehicles from behind.
The radar distance sensors are
located in the rear bumper.9 Warning
Lane change alert does not
replace driver vision.
Before changing a lane, always
check all mirrors, look over the
shoulder and use the turn light.
When the system detects an
approaching vehicle from behind
which drives considerably faster, the
yellow warning symbol F will
illuminate in the relevant exterior mirror. If the driver then activates the
turn light, the warning symbol F
starts flashing yellow as a warning not to change lanes.
When the vehicle is started, both
exterior mirror displays will briefly
come on to indicate that the system is
operating.
Detection zones
The system sensors cover a zone of
approx. 3.5 m parallel on both vehicle
sides and approx. 3 m rearwards on
side blind zone assistant (A) and
approx. 70 m rearwards on lane
change alert (B) on parallel lanes.
The zones start at each exterior
mirror. The height of the zone is
approx. between 0.5 m and 2 m off the ground.
Deactivation Activation or deactivation of the lane
change alert can be set in the vehicle
personalisation menu in the Info
Display.