ESP OPEL ANTARA 2009 Owner's Manual
[x] Cancel search | Manufacturer: OPEL, Model Year: 2009, Model line: ANTARA, Model: OPEL ANTARA 2009Pages: 234, PDF Size: 3.01 MB
Page 136 of 234
Driving and operation136
Drive control systems
Electronic Stability Control (ESC)
The Electronic Stability Control improves
driving stability when necessary,
independently of the type of road surface
and the tyre grip. It also prevents the drive
wheels from spinning.
The system monitors vehicle movements.
As soon as the vehicle starts to swerve
(understeers/oversteers), engine output is
reduced (the sound of the engine changes)
and individual wheels are specifically
braked. This considerably improves the
driving stability of the vehicle on snow and
ice and on wet or slippery road surfaces.
ESC is ready for operation after the ignition
is switched on and the ESC control
indicators
7, A and J illuminate then
extinguish after approx. 4 seconds. When the ESC comes into action, control
indicator
7 flashes in the instrument panel.
Some noise or vibration may be apparent.
The vehicle is now in a critical situation;
the ESC helps you to keep control of the
vehicle and reminds you to match your
speed to the road conditions.
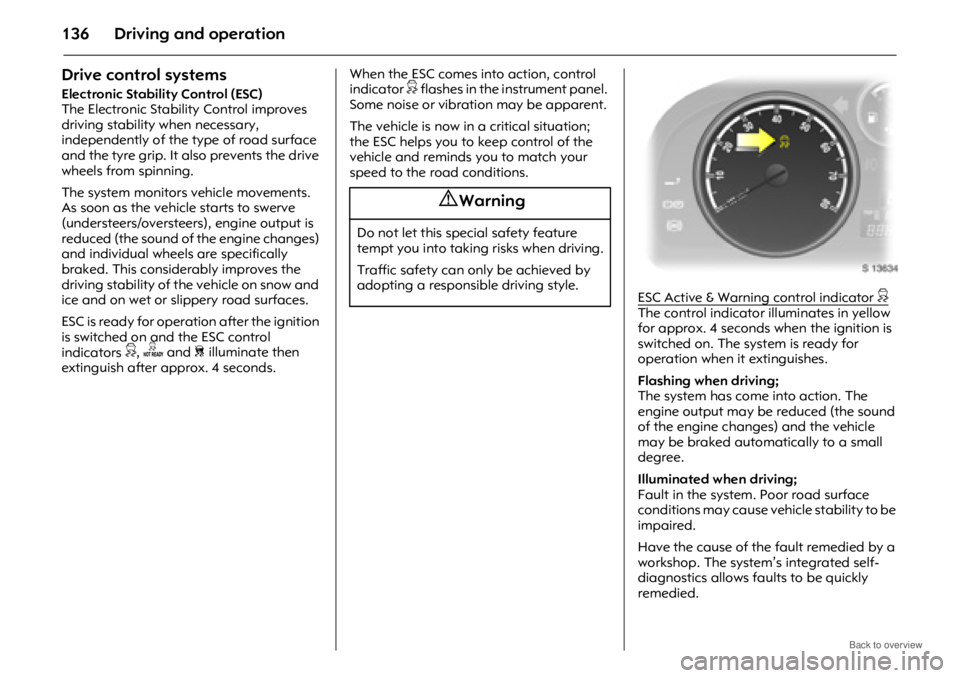
ESC A
ctive & Warning control indicator 7The control indicator illuminates in yellow
for approx. 4 seconds when the ignition is
switched on. The system is ready for
operation when it extinguishes.
Flashing when driving;
The system has come into action. The
engine output may be reduced (the sound
of the engine changes) and the vehicle
may be braked automatically to a small
degree.
Illuminated when driving;
Fault in the system. Poor road surface
conditions may cause vehicle stability to be
impaired.
Have the cause of the fault remedied by a
workshop. The system’s integrated self-
diagnostics allows faults to be quickly
remedied.
9 Warning
Do not let this special safety feature
tempt you into taking risks when driving.
Traffic safety can only be achieved by
adopting a responsible driving style.
Page 140 of 234
Driving and operation140
Cruise control 3
Cruise control can store and maintain
speeds over approx. 30 km/h (20 mph).
Deviation from the stored speed may occur
when driving uphill or downhill.
For safety reasons, cruise control cannot
be activated until the foot brake has been
depressed once.
Cruise control is operated with buttons
d, c and e on the turn signal lever. Do not use cruise control if it is not
advisable to maintain a constant speed
(e.g. in situations presenting a danger to
yourself and other road users, in heavy
traffic or on winding, slippery or greasy
roads).
With automatic transmission, only use
cruise control while in
D.
When cruise control is active, reaction
times may be increased, due to the
different position of the feet.
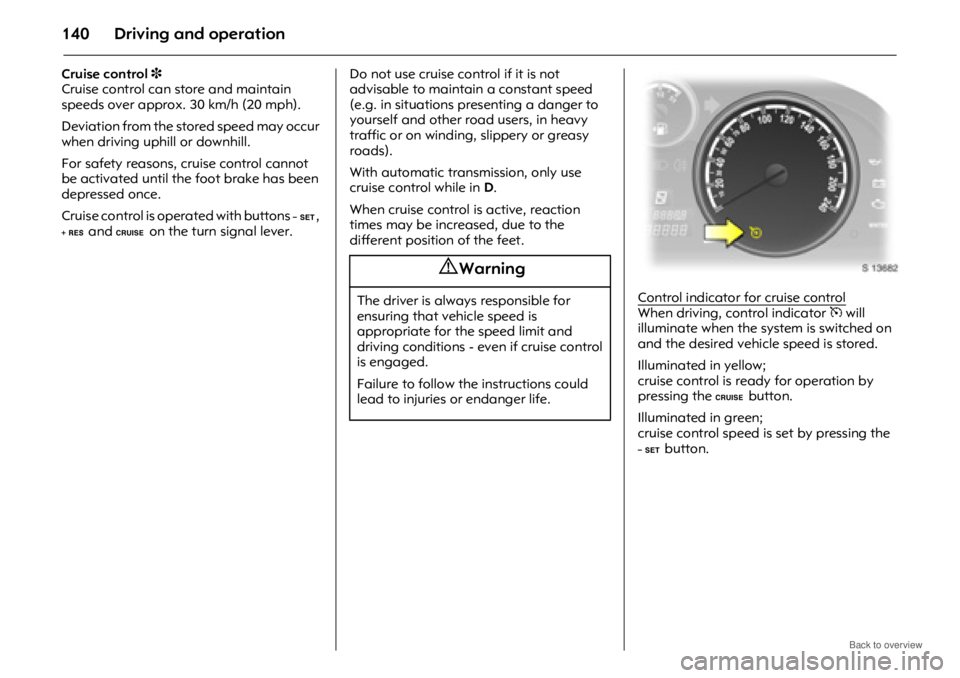
Control indicator for cruise control
When driving, control indicator m will
illuminate when the syst em is switched on
and the desired vehicle speed is stored.
Illuminated in yellow;
cruise control is ready for operation by
pressing the
ebutton.
Illuminated in green;
cruise control speed is set by pressing the
d button.
9 Warning
The driver is always responsible for
ensuring that vehicle speed is
appropriate for the speed limit and
driving conditions - even if cruise control
is engaged.
Failure to follow the instructions could
lead to injuries or endanger life.
Page 146 of 234

Driving and operation146
Brake assist
Rapid powerful application of the brake
pedal automatically applies maximum
brake force amplification to achieve the
shortest possible braking distance under
full braking (brake assist).
Maintain steady pressure on the brake
pedal for as long as full-on braking is to
continue. When the brake pedal is
released, the maximum brake force
amplification is taken away.Foot brake
The brake system comprises two separate
brake circuits.
If one brake circuit should fail, the vehicle
can still be braked with the second
remaining circuit.
If this happens, the brake pedal must be
fully depressed with greater pedal
pressure. The distance required for braking
will be greater.
If, at any time during driving, the brake
pedal can be depressed further than
normal, the vehicle repeatedly pulls to one
side under braking or brake noise is heard,
consult a workshop.
In order to utilise the full pedal travel,
particularly in the event of a brake circuit
fault, there must be no mats in the area of
the pedals - see page 128.
With the engine stopped, the brake servo
assistance is discontinued after the brake
pedal has been depressed once or twice.
The braking effect is not reduced, but
increased foot pressure will be necessary.
Take extra care when the vehicle is being
towed.
Check the brake lamps before starting out
on a journey. Shortly after the start of each
journey, the brake system should be tested
for its effectiveness at low speed and
without inconveniencing other road users,
especially if the brakes are wet, e.g. after
washing your vehicle.
Excessive braking when going downhill can
cause brakes to temporarily overheat. Shift
to a lower gear rather than continuously
applying brakes.
The brake fluid level should be checked
regularly - see page 196.
Page 148 of 234
Driving and operation148
Anti-lock Brake System (ABS)
u
The ABS continually monitors the vehicle's
brake system and prevents the wheels from
locking, irrespective of the road condition
and tyre grip.
It starts to regulate the braking pressure as
soon as a wheel shows a tendency to lock.
The vehicle remains steerable, even in the
event of very heavy braking, e.g. on bends
or when swerving to avoid an obstacle.
Even in the case of full-on braking, the ABS
makes it possible to drive round an
obstacle without releasing the brakes.
ABS control is made apparent through a
pulse in the brake pedal and the noise of
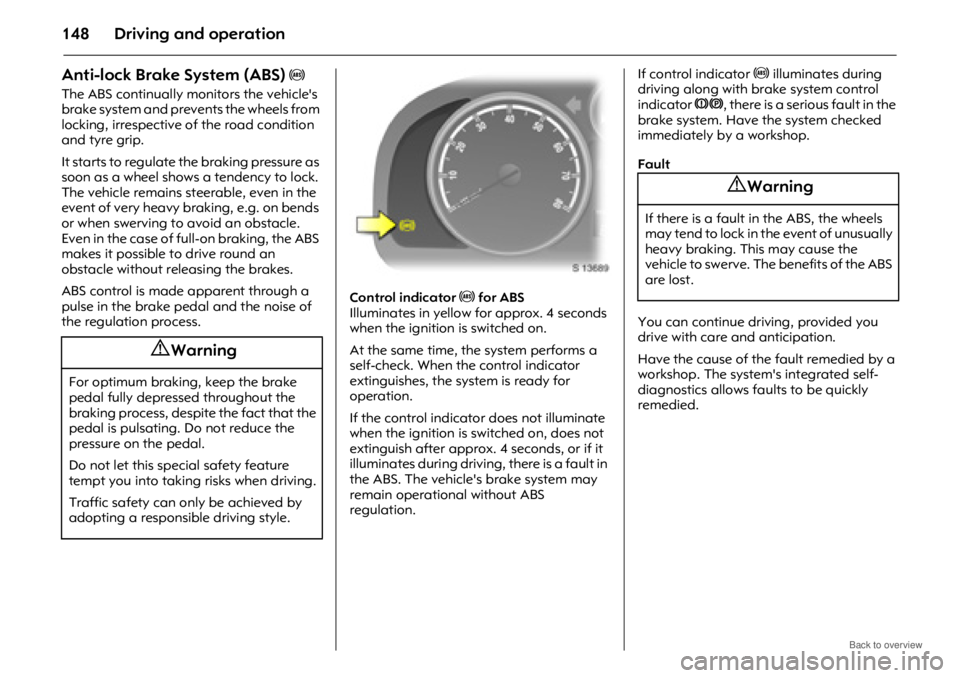
the regulation process. Control indicator
u for ABS
Illuminates in yellow for approx. 4 seconds
when the ignition is switched on.
At the same time, the system performs a
self-check. When the control indicator
extinguishes, the system is ready for
operation.
If the control indicato r does not illuminate
when the ignition is switched on, does not
extinguish after approx. 4 seconds, or if it
illuminates during driving, there is a fault in
the ABS. The vehicle's brake system may
remain operational without ABS
regulation. If control indicator
u illuminates during
driving along with brake system control
indicator 4, there is a serious fault in the
brake system. Have the system checked
immediately by a workshop.
Fault
You can continue driving, provided you
drive with care and anticipation.
Have the cause of the fault remedied by a
workshop. The system's integrated self-
diagnostics allows faults to be quickly
remedied.
9 Warning
For optimum braking, keep the brake
pedal fully depresse d throughout the
braking process, despite the fact that the
pedal is pulsating. Do not reduce the
pressure on the pedal.
Do not let this special safety feature
tempt you into taking risks when driving.
Traffic safety can only be achieved by
adopting a responsible driving style.
9 Warning
If there is a fault in the ABS, the wheels
may tend to lock in the event of unusually
heavy braking. This may cause the
vehicle to swerve. The benefits of the ABS
are lost.
Page 149 of 234

Driving and operation149
Wheels, tyres
See page 223 for suitable tyres and
restrictions.
Factory-fitted tyres are matched to the
chassis and offer optimum driving comfort
and safety.
Changing tyre/wheel type
Note the necessary modifications before
switching to different tyres or wheels.
If wheel rims of a different type are to be
installed, the wheel nuts may also need to
be changed. We recommend you consult
an Opel Partner.
If tyres of a different size to those fitted at
the factory are used (this includes winter
tyres), the electron ic speedometer may
possibly need to be reprogrammed, to
ensure that the speed displayed is correct. Vehicles with tyre pressure monitoring
system
3
When using winter tyres, or when switching
to different tyre sizes, sensors for the tyre
pressure monitoring syst em can be fitted at
a later date by a workshop, upon request.
Otherwise, the system would not indicate
tyre pressure deviations.
Tyre pressure monitoring system -
see page 144.
Fitting new tyres
New tyres should be fitted in pairs, or, for
preference, in sets. Make sure that both
tyres on an axle are:
z the same size,
z the same design,
z the same make,
z and have the same tread pattern.
Fit directional tyres such that they roll in the
direction of travel. The rolling direction is
indicated by a symbol (e.g. an arrow) on
the sidewall.
Tyres fitted opposing the rolling direction
(e.g. when a tyre is changed) should be
refitted as soon as possible. This is the only
way to obtain full benefit from the design
properties of the tyre.
Observe legal requirements when
disposing of tyres. Some brands of tyres have a beaded edge
for alloy wheels, to protect against
damage. If wheel trims are used on steel
wheels with beaded-edge tyres, the
following procedure must be followed:
z
Wheel trims and tyres that are approved
by Opel for the respective vehicle and
comply with all of the relevant wheel and
tyre combination requ irements must be
used.
z If the wheel trims and tyres used are not
Opel-approved, the tyres must not have
a beaded edge.
9 Warning
Use of unsuitable tyres or wheels may
lead to accidents and render the vehicle
unroadworthy.
9 Warning
Use of unsuitable tyres or wheel trims
could lead to sudden pressure loss and
thereby accidents.
Page 152 of 234
Driving and operation152
Tyre designations
Meanings:
e.g. 235/60 R 17 102 H
Speed code letters: Winter tyres
3
See page 223 for restrictions.
Winter tyres improve safety at extremely
low outside temperatures and should
therefore be fitted on all wheels.
The design of summer tyres means they
have limited qualities for winter driving.
If the maximum permissible speed for the
winter tyres is less than that of the vehicle,
a notice indicating the maximum
permissible speed for the tyres must be
affixed within the driver's field of vision 3
1).
If you use the spare wheel when it is fitted
with a summer tyre; the vehicle's
driveability may be affected, especially on
slippery road surfaces. Obtain a
replacement for the faulty tyre as soon as
possible, and have the wheel balanced
and fitted to the vehicle.
Ensure that winter tyres are inflated to the
correct pressure specified by the tyre
manufacturer.
If winter tyres are installed that have not
been approved for your vehicle, ESC
performance may be affected. Consult a
workshop regarding availability of
approved winter tyres.
Wheel trims 3
If the wheel trims and tyres used are not
Opel-approved, make sure the tyres do not
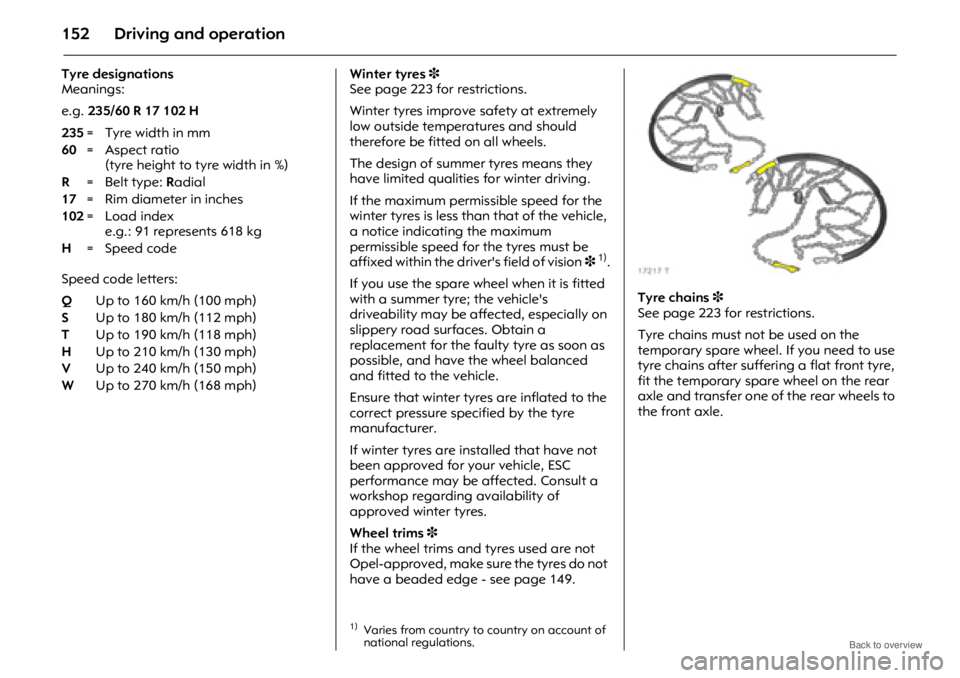
have a beaded edge - see page 149. Tyre chains
3
See page 223 for restrictions.
Tyre chains must not be used on the
temporary spare wheel. If you need to use
tyre chains after suffering a flat front tyre,
fit the temporary spare wheel on the rear
axle and transfer one of the rear wheels to
the front axle.
235
=Tyre width inmm
60 =Aspect ratio
(tyre height to tyre width in %)
R =Belt type: Radial
17 = Rim diameter in inches
102 =Load index
e.g.: 91 represents 618 kg
H = Speed code
Q Up to 160 km/h (100 mph)
S Up to 180 km/h (112 mph)
T Up to 190 km/h (118 mph)
H Up to 210 km/h (130 mph)
V Up to 240 km/h (150 mph)
W Up to 270 km/h (168 mph)
1)Varies from country to country on account of
national regulations.
Page 163 of 234
Driving and operation163
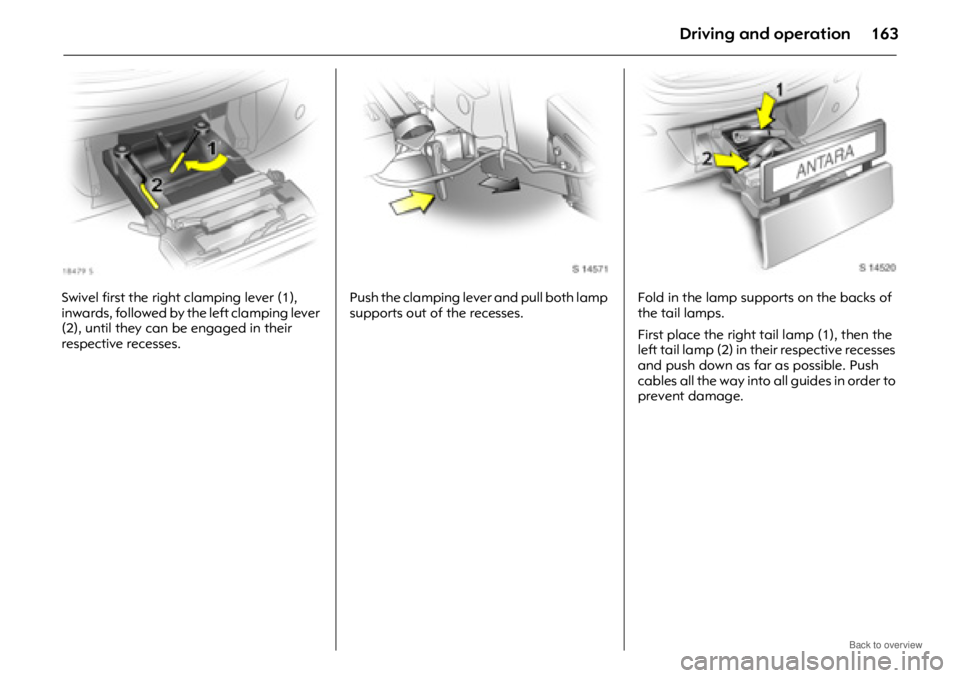
Swivel first the right clamping lever (1),
inwards, followed by the left clamping lever
(2), until they can be engaged in their
respective recesses.Push the clamping lever and pull both lamp
supports out of the recesses.
Fold in the lamp supports on the backs of
the tail lamps.
First place the right tail lamp (1), then the
left tail lamp (2) in their respective recesses
and push down as far as possible. Push
cables all the way into all guides in order to
prevent damage.
Page 177 of 234
Self-help, vehicle care177
Warning triangle
¨ 3 ,
First aid kit
+3
Your first aid kit and warning triangle can
be accommodated below the floor cover in
the luggage compartment.
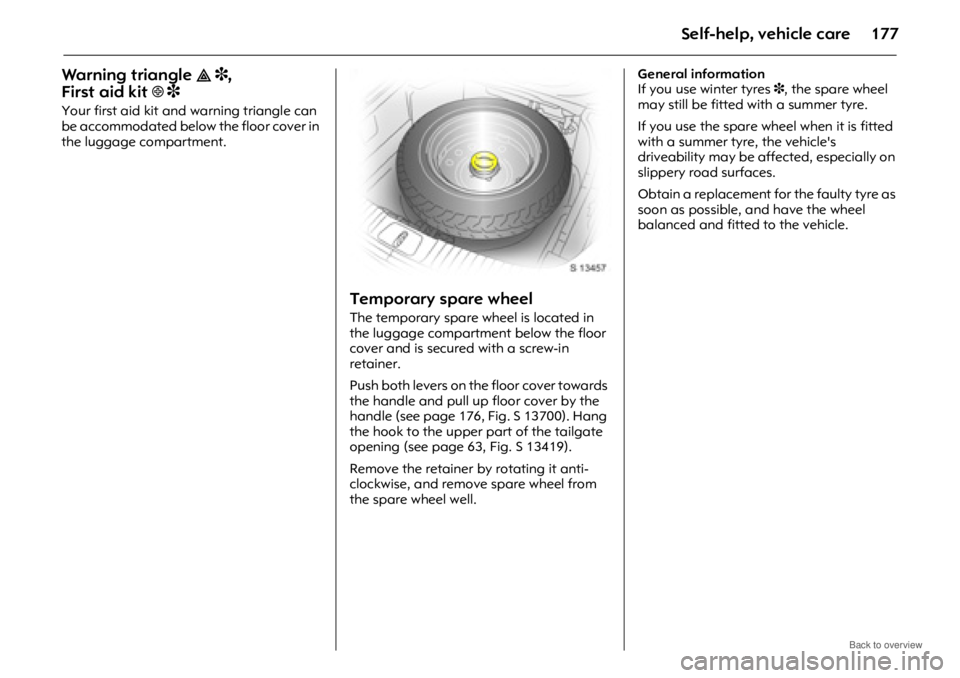
Temporary spare wheel
The temporary spare wheel is located in
the luggage compartment below the floor
cover and is secured with a screw-in
retainer.
Push both levers on the floor cover towards
the handle and pull up floor cover by the
handle (see page 176, Fig. S 13700). Hang
the hook to the upper part of the tailgate
opening (see page 63, Fig. S 13419).
Remove the retainer by rotating it anti-
clockwise, and remove spare wheel from
the spare wheel well. General information
If you use winter tyres
3, the spare wheel
may still be fitted with a summer tyre.
If you use the spare wheel when it is fitted
with a summer tyre, the vehicle's
driveability may be affected, especially on
slippery road surfaces.
Obtain a replacement for the faulty tyre as
soon as possible, and have the wheel
balanced and fitted to the vehicle.
Page 182 of 234
Self-help, vehicle care182
When replacing a fuse, turn off the
respective switch and the ignition.
A defective fuse can be recognized by its
melted wire. A new fuse should only be
installed after the cause of the trouble has
been eliminated.
There is a fuse extractor in the engine
compartment fuse box. Do not use tools
that conduct electricity when changing
fuses.Only install fuses of the specified rating.
Each fuse has its rating written on it, in
addition the fuses are colour coded.Fuses and the most important
circuits they protect
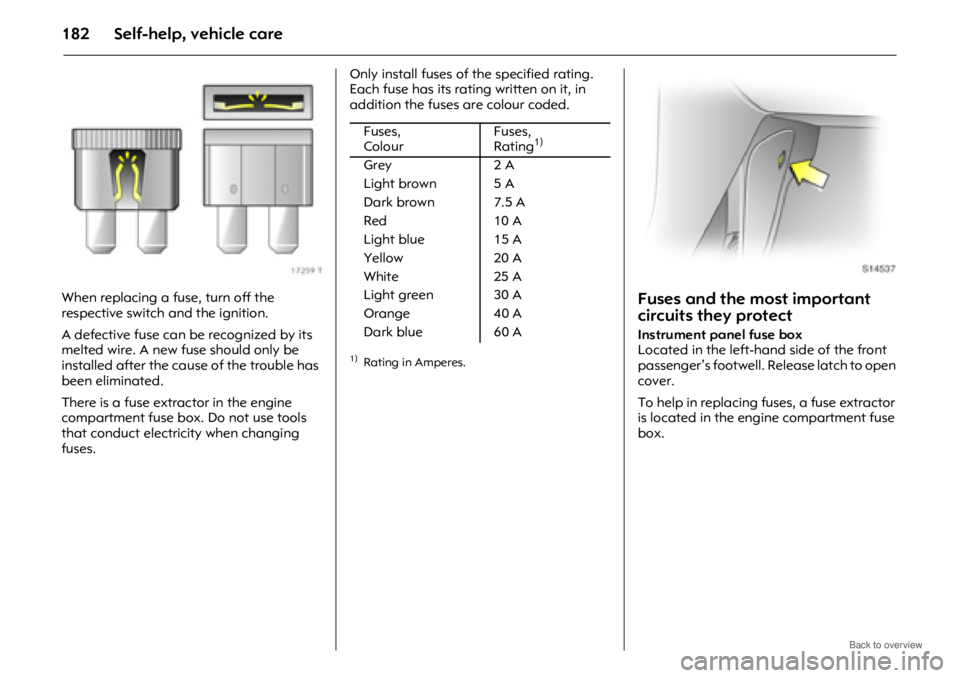
Instrument panel fuse box
Located in the left-hand side of the front
passenger’s footwell. Release latch to open
cover.
To help in replacing fu
ses, a fuse extractor
is located in the engine compartment fuse
box.
Fuses,
Colour Fuses,
Rating1)
1)Rating in Amperes.
Grey
2 A
Light brown 5 A
Dark brown 7.5 A
Red 10 A
Light blue 15 A
Yellow 20 A
White 25 A
Light green 30 A
Orange 40 A
Dark blue 60 A
Page 191 of 234

Self-help, vehicle care191
Centre high-mounted stop lamp,
instrument panel and glove compartment
illumination
We recommend having bulb replacements
carried out by a workshop.
Opel genuine parts and
accessories
We recommend the use of “Opel genuine
parts and accessories” and conversion
parts released expressly for your vehicle
type. These parts have undergone special
tests to establish their reliability, safety and
specific suitability for your vehicle. Despite
continuous market monitoring, we cannot
assess or guarantee these attributes for
other products, even if they have been
granted approval by the relevant
authorities or in some other form.
“Opel genuine parts and accessories” and
conversion parts approved by Opel can be
obtained from your Op el Partner, who can
provide comprehensive advice about
permitted technical changes and ensure
that the part is installed correctly.
A note on safety
To avoid the possibility of injury, only carry
out engine compartment checks (e.g.
checking the brake fluid level or the engine
oil level) when the igni tion is switched off. Never carry out any re
pairs or adjustment
and maintenance work on the vehicle
yourself. This especially applies to the
engine, chassis and safety parts. You may,
out of ignorance, infringe the provisions of
the law and, by not performing the work
properly, you may endanger yourself and
other road users.
Checking and topping up fluids
To aid identification, the engine oil filler
cap, the coolant filler cap, the lid of the
fluid container for the windscreen washer
system and the handle of the engine oil
gauge (dipstick) may be coloured yellow.
9 Warning
The cooling fan may be operated by a
thermoswitch and can therefore start to
operate unexpectedly, even when the
ignition is switched off; risk of injury.
Electronic ignition systems generate very
high voltages. Do not touch the ignition
system; high voltage can be fatal.