sensor OPEL ANTARA 2017.5 Manual user
[x] Cancel search | Manufacturer: OPEL, Model Year: 2017.5, Model line: ANTARA, Model: OPEL ANTARA 2017.5Pages: 225, PDF Size: 6.2 MB
Page 16 of 225
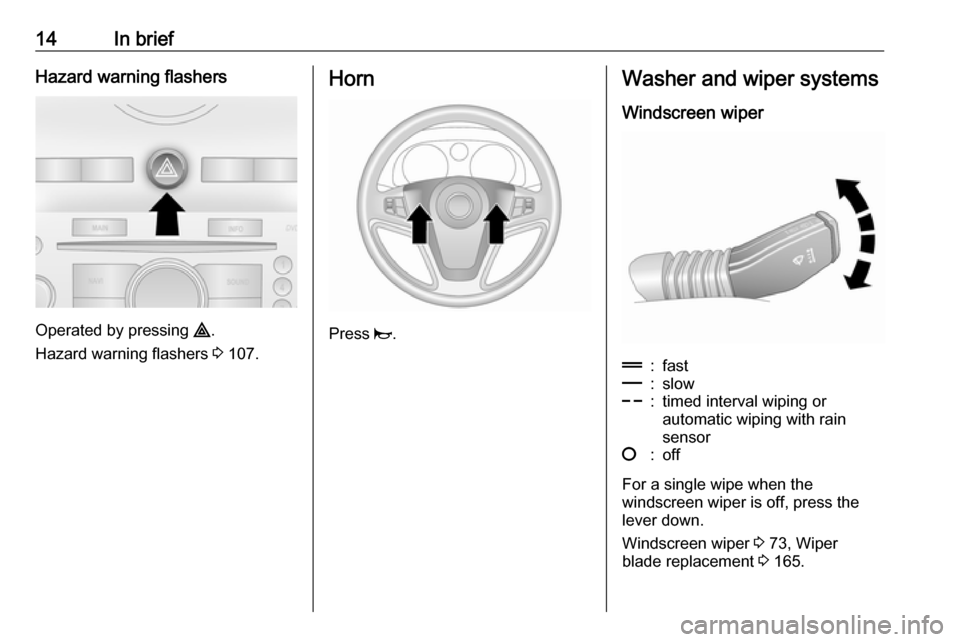
14In briefHazard warning flashers
Operated by pressing ¨.
Hazard warning flashers 3 107.
Horn
Press j.
Washer and wiper systems
Windscreen wiper&:fast%:slow$:timed interval wiping or
automatic wiping with rain
sensor§:off
For a single wipe when the
windscreen wiper is off, press the
lever down.
Windscreen wiper 3 73, Wiper
blade replacement 3 165.
Page 32 of 225
30Keys, doors and windowsDo not use sharp instruments or
abrasive cleaners on the exterior
mirrors and avoid scratching or
damaging the heating elements.
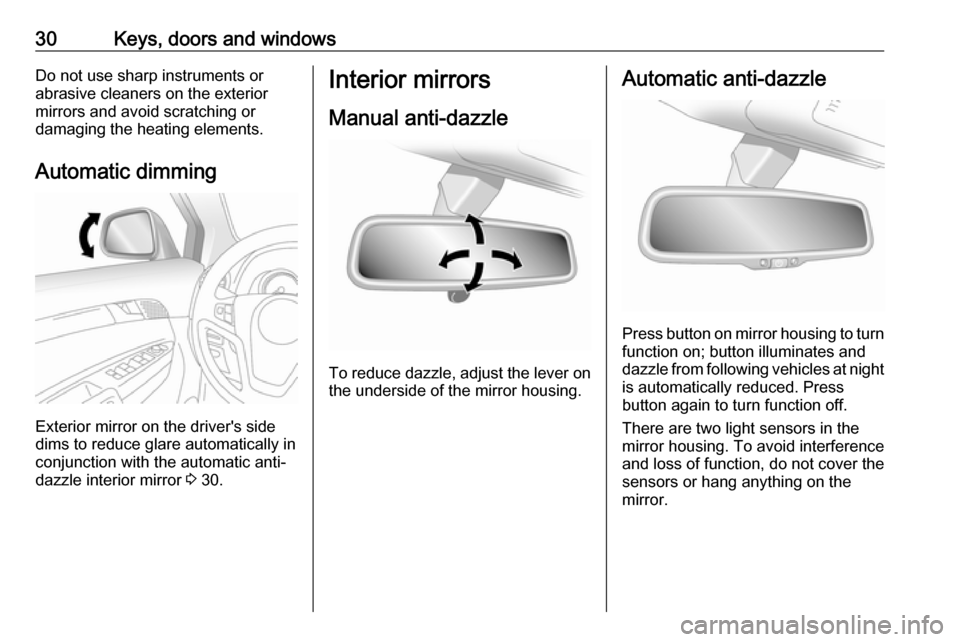
Automatic dimming
Exterior mirror on the driver's side
dims to reduce glare automatically in
conjunction with the automatic anti-
dazzle interior mirror 3 30.
Interior mirrors
Manual anti-dazzle
To reduce dazzle, adjust the lever on the underside of the mirror housing.
Automatic anti-dazzle
Press button on mirror housing to turn
function on; button illuminates and
dazzle from following vehicles at night
is automatically reduced. Press
button again to turn function off.
There are two light sensors in the
mirror housing. To avoid interference
and loss of function, do not cover the
sensors or hang anything on the mirror.
Page 33 of 225
Keys, doors and windows31Windows
Windscreen
Heat-reflecting windscreen
The heat-reflecting windscreen has a
coating which reflects solar radiation. Also data signals, e.g. from toll
stations, might be reflected.
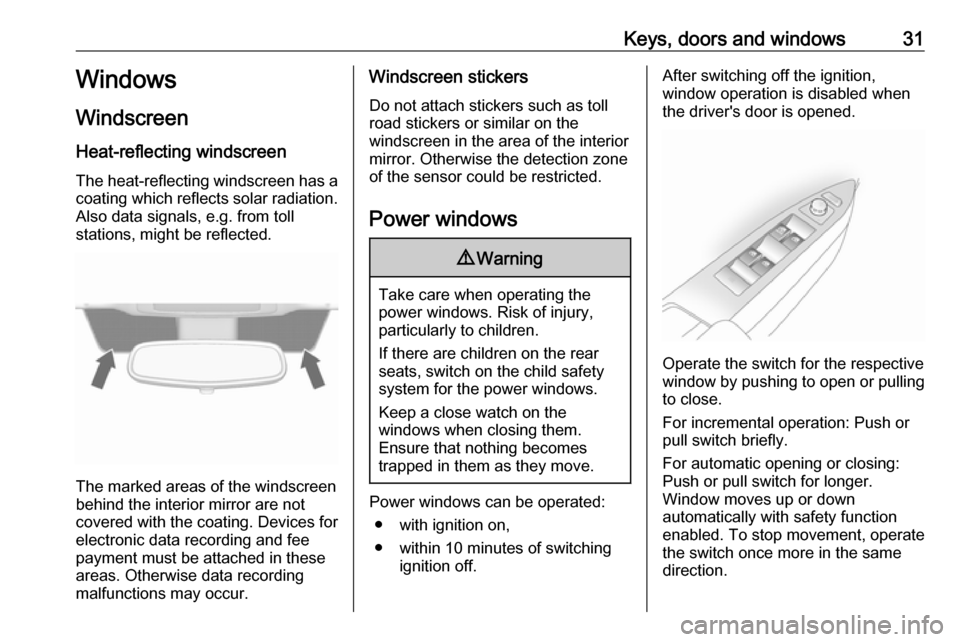
The marked areas of the windscreen
behind the interior mirror are not
covered with the coating. Devices for
electronic data recording and fee
payment must be attached in these
areas. Otherwise data recording
malfunctions may occur.
Windscreen stickers
Do not attach stickers such as toll
road stickers or similar on the
windscreen in the area of the interior
mirror. Otherwise the detection zone
of the sensor could be restricted.
Power windows9 Warning
Take care when operating the
power windows. Risk of injury,
particularly to children.
If there are children on the rear seats, switch on the child safety
system for the power windows.
Keep a close watch on the
windows when closing them.
Ensure that nothing becomes
trapped in them as they move.
Power windows can be operated:
● with ignition on,
● within 10 minutes of switching ignition off.
After switching off the ignition,
window operation is disabled when
the driver's door is opened.
Operate the switch for the respective
window by pushing to open or pulling to close.
For incremental operation: Push or
pull switch briefly.
For automatic opening or closing:
Push or pull switch for longer.
Window moves up or down
automatically with safety function
enabled. To stop movement, operate
the switch once more in the same
direction.
Page 72 of 225

70StorageLoading information● Heavy objects in the load compartment should be evenlydistributed and placed as far
forward as possible. Ensure the
backrests are securely engaged.
If objects can be stacked, the
heavier objects should be placed
at the bottom.
With rear seats in the folded position, objects must not be stacked higher than the seat
backrests.
● Secure objects with lashing straps attached to lashing eyes
3 69.
● Secure loose objects in the load compartment, e.g. with a luggagefloor net, to prevent sliding.
● When transporting objects in the load compartment, the backrests
of the rear seats must not be
angled forward.
● Do not allow the load to protrude above the upper edge of the
backrests.● Do not place any objects on the load compartment cover or the
instrument panel, and do not cover the sensor on top of the
instrument panel.
● The load must not obstruct the operation of the pedals, electricalparking brake and gear selector,
or hinder the freedom of
movement of the driver. Do not
place any unsecured objects in
the interior.
● Do not drive with an open load compartment.9Warning
Always make sure that the load in
the vehicle is securely stowed.
Otherwise objects can be thrown
around inside the vehicle and
cause personal injury or damage
to the load or vehicle.
● The payload is the difference
between the permitted gross
vehicle weight (see identification
plate 3 205) and the EC kerb
weight.
To calculate the EC kerb weight,
enter the data for your vehicle in
the weights table at the front of
this manual.
The EC kerb weight includes
weights for the driver (68 kg),
luggage (7 kg) and all fluids (fuel
tank 90% full).
Optional equipment and
accessories increase the kerb
weight.
● Driving with a roof load increases
the sensitivity of the vehicle to
cross-winds and has a
detrimental effect on vehicle
handling due to the vehicle's
higher centre of gravity.
Distribute the load evenly and
secure it properly with retaining
straps. Adjust the tyre pressure
and vehicle speed according to
the load conditions. Check and
retighten the straps frequently.
Do not drive faster than
120 km/h.
The permissible roof load is
100 kg. The roof load is the
combined weight of the roof rack and the load.
Page 75 of 225
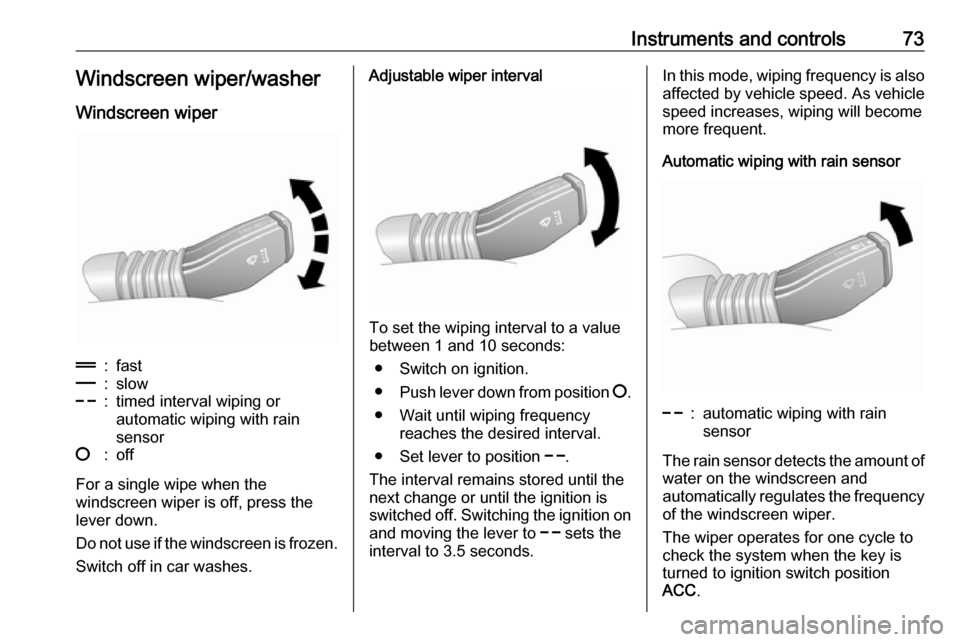
Instruments and controls73Windscreen wiper/washerWindscreen wiper&:fast%:slow$:timed interval wiping or
automatic wiping with rain
sensor§:off
For a single wipe when the
windscreen wiper is off, press the
lever down.
Do not use if the windscreen is frozen.
Switch off in car washes.
Adjustable wiper interval
To set the wiping interval to a value
between 1 and 10 seconds:
● Switch on ignition.
● Push lever down from position §.
● Wait until wiping frequency reaches the desired interval.
● Set lever to position $.
The interval remains stored until the
next change or until the ignition is
switched off. Switching the ignition on
and moving the lever to $ sets the
interval to 3.5 seconds.
In this mode, wiping frequency is also
affected by vehicle speed. As vehicle speed increases, wiping will become
more frequent.
Automatic wiping with rain sensor$:automatic wiping with rain
sensor
The rain sensor detects the amount of water on the windscreen and
automatically regulates the frequency
of the windscreen wiper.
The wiper operates for one cycle to
check the system when the key is
turned to ignition switch position
ACC .
Page 76 of 225

74Instruments and controlsTo turn wiper off, move lever to
position §.
Keep the rain sensor area clean by
activating the windscreen washer
system.
Windscreen and headlight
washer
Pull lever. Washer fluid is sprayed
onto the windscreen.
If the lever is held longer, the wiper
operates for two cycles after the lever has been released and once more
after a 3 second delay.
If the headlights are on, washer fluid
is also sprayed onto the headlights.
The headlight washer system can
only be operated again after a short
delay. If washer fluid level is low then
this delay is increased.
Control indicator G illuminates in the
instrument cluster when the washer
fluid level is low.
Wiper activated lighting With light switch in the AUTO
position, when the windscreen wiper
is operated for 8 cycles or more the
exterior lights illuminate
automatically.
Rear window wiper/washer
Move lever to activate the rear
window wiper:
Push lever:wiper onPull lever:wiper off
Page 89 of 225

Instruments and controls87Ultrasonic parking assist
r illuminates yellow.
Fault in system
or
Fault due to sensors that are dirty or
covered by ice or snow
or
Interference due to external sources of ultrasound. Once the source of
interference is removed, the system
will operate normally.
Have the cause of the fault in the
system remedied by a workshop.
Ultrasonic parking assist 3 148.
Electronic Stability Control
b illuminates or flashes yellow.
When the engine is started, b
illuminates briefly. If it does not
illuminate, seek the assistance of a
workshop.Illuminates
Fault in the system. Continued driving
is possible. Driving stability, however,
may deteriorate depending on road
surface conditions.
Have the cause of the fault remedied
by a workshop.
Flashes
The system is actively engaged.
Engine output may be reduced and
the vehicle may be braked
automatically to a small degree.
Electronic Stability Control 3 145.
Electronic Stability Control
off
t illuminates yellow.
When the ignition is switched on, t
illuminates briefly. If it does not
illuminate, seek the assistance of a
workshop.
Illuminates when ESC has been
switched off manually by pressing button t on the centre console.
Electronic Stability Control 3 145.Engine coolant temperature
W illuminates red.
When the engine is started, W
illuminates briefly. If it does not
illuminate, seek the assistance of a
workshop.
Illuminates when the engine is
running
Stop vehicle and switch off engine.Caution
Coolant temperature too high.
Check coolant level 3 160.
If there is sufficient coolant, seek the
assistance of a workshop.
Preheating
! illuminates yellow.
Preheating is activated. Only
activates when outside temperature
is low. Start the engine when control
indicator extinguishes.
Page 90 of 225

88Instruments and controlsIf it illuminates during driving or if the
engine cannot be started, seek the
assistance of a workshop as soon as
possible.
Starting the engine 3 125.
Diesel particle filter % illuminates or flashes yellow.
The diesel particle filter requires
cleaning.
Continue driving until %
extinguishes.
Illuminates during driving
Control indicator % illuminates,
accompanied by a warning chime,
when the diesel particle filter is full. Start cleaning process as soon as
possible.
Flashes during driving
Control indicator % flashes when the
maximum filling level of the filter is
reached. Start cleaning process
immediately to avoid damage to theengine. A warning chime sounds
every 3 minutes until the cleaning process is complete.
Diesel particle filter 3 129, Stop-start
system 3 126.
AdBlue
Y flashes yellow.
AdBlue level is low. Refill AdBlue as soon as possible, to avoid prevention of engine starts.
A corresponding message may also
appear in the Driver Information
Centre 3 91.
AdBlue 3 131.
Tyre pressure monitoring system
w illuminates or flashes yellow.
Illuminates
Tyre pressure loss. Stop immediately
and check tyre pressure.
A corresponding message also
appears on the Info-Display 3 92.Flashes
Fault in system or tyre without
pressure sensor mounted (e.g. spare wheel). After approx. one minute the
control indicator illuminates
continuously. A corresponding
message also appears on the Info-
Display.
Consult a workshop.
Tyre pressure monitoring system 3 183.
Engine oil pressure
I illuminates red.
Illuminates when the ignition is
switched on and extinguishes shortly
after the engine starts. If it does not
illuminate, seek the assistance of a
workshop.
Page 108 of 225

106LightingTail lightsTail lights illuminate together with low
beam/high beam and sidelights.
Automatic light control
When the automatic light control
function is switched on and the
engine is running, low beam switches on automatically depending on
outside light conditions.
For reasons of safety, the light switch
should always remain in the AUTO
position.
To ensure automatic light control
functions properly, do not cover the
light sensor on top of the instrument
panel.
Driving abroad 3 107.
Wiper activated lighting With light switch in the AUTO
position, when the windscreen wiper
is operated for 8 cycles or more the
exterior lights illuminate
automatically.
High beam
To switch from low to high beam,
push lever.
To switch to low beam, pull lever back
again.
Control indicator C 3 90.
Headlight flash
To activate the headlight flash, pull
lever.
Headlight range adjustment
Manual headlight range
adjustment ?
Page 119 of 225
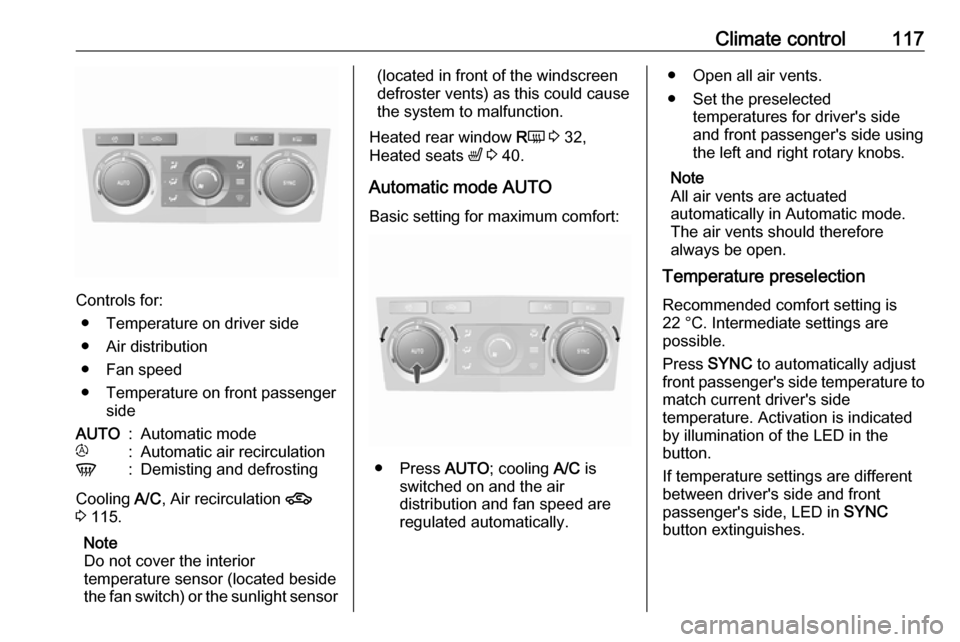
Climate control117
Controls for:● Temperature on driver side
● Air distribution
● Fan speed
● Temperature on front passenger side
AUTO:Automatic modet:Automatic air recirculationV:Demisting and defrosting
Cooling A/C, Air recirculation 4
3 115.
Note
Do not cover the interior
temperature sensor (located beside the fan switch) or the sunlight sensor
(located in front of the windscreen
defroster vents) as this could cause the system to malfunction.
Heated rear window RÜ 3 32,
Heated seats ß 3 40.
Automatic mode AUTO Basic setting for maximum comfort:
● Press AUTO; cooling A/C is
switched on and the air
distribution and fan speed are
regulated automatically.
● Open all air vents.
● Set the preselected temperatures for driver's side
and front passenger's side using the left and right rotary knobs.
Note
All air vents are actuated
automatically in Automatic mode.
The air vents should therefore
always be open.
Temperature preselection
Recommended comfort setting is
22 °C. Intermediate settings are
possible.
Press SYNC to automatically adjust
front passenger's side temperature to
match current driver's side
temperature. Activation is indicated
by illumination of the LED in the
button.
If temperature settings are different
between driver's side and front
passenger's side, LED in SYNC
button extinguishes.