ignition OPEL ANTARA 2017.5 User Guide
[x] Cancel search | Manufacturer: OPEL, Model Year: 2017.5, Model line: ANTARA, Model: OPEL ANTARA 2017.5Pages: 225, PDF Size: 6.2 MB
Page 33 of 225
Keys, doors and windows31Windows
Windscreen
Heat-reflecting windscreen
The heat-reflecting windscreen has a
coating which reflects solar radiation. Also data signals, e.g. from toll
stations, might be reflected.
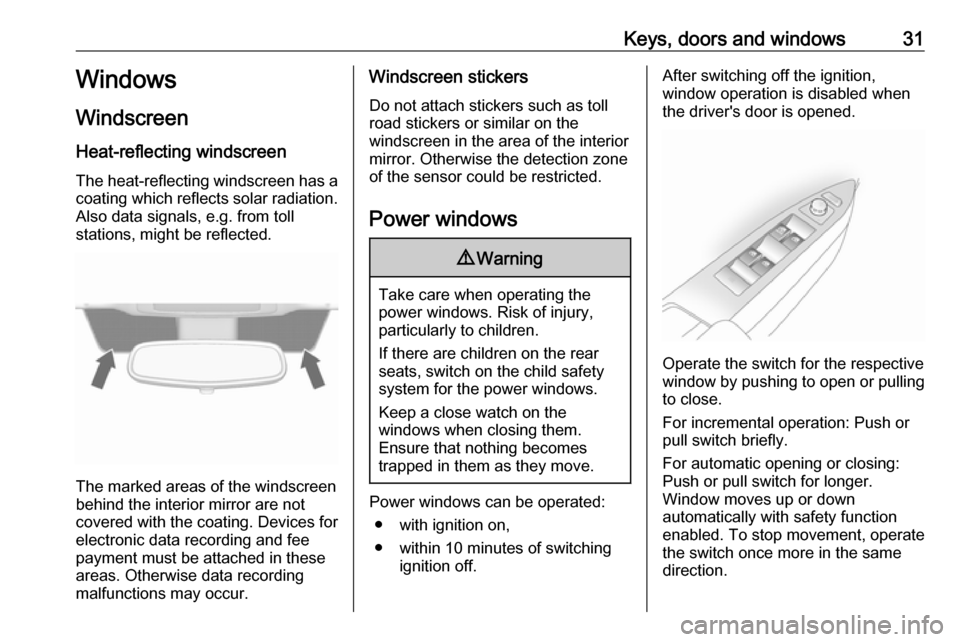
The marked areas of the windscreen
behind the interior mirror are not
covered with the coating. Devices for
electronic data recording and fee
payment must be attached in these
areas. Otherwise data recording
malfunctions may occur.
Windscreen stickers
Do not attach stickers such as toll
road stickers or similar on the
windscreen in the area of the interior
mirror. Otherwise the detection zone
of the sensor could be restricted.
Power windows9 Warning
Take care when operating the
power windows. Risk of injury,
particularly to children.
If there are children on the rear seats, switch on the child safety
system for the power windows.
Keep a close watch on the
windows when closing them.
Ensure that nothing becomes
trapped in them as they move.
Power windows can be operated:
● with ignition on,
● within 10 minutes of switching ignition off.
After switching off the ignition,
window operation is disabled when
the driver's door is opened.
Operate the switch for the respective
window by pushing to open or pulling to close.
For incremental operation: Push or
pull switch briefly.
For automatic opening or closing:
Push or pull switch for longer.
Window moves up or down
automatically with safety function
enabled. To stop movement, operate
the switch once more in the same
direction.
Page 34 of 225
32Keys, doors and windowsAdditional switches are located in thefront passenger's door and the reardoors. The rear windows do not open
fully.
Safety function
If the window glass encounters
resistance above the middle of the
window during automatic closing, it is
immediately stopped and opened again.
Override safety function
In the event of closing difficulties due
to frost or the like, pull the relevant window switch several times until thewindow is closed. The window moves
up with the safety function disabled.Child safety system for rear
windows
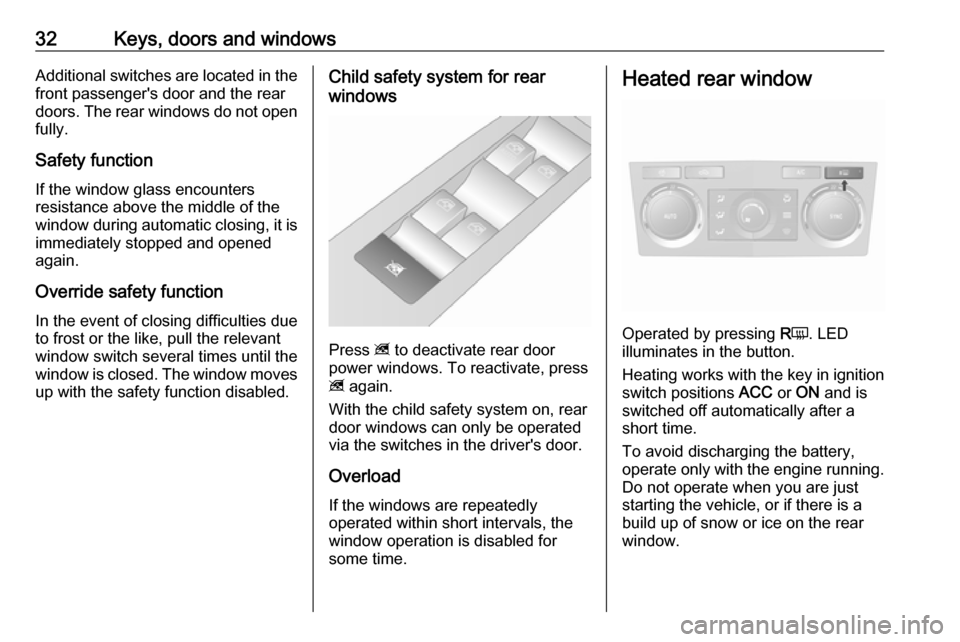
Press z to deactivate rear door
power windows. To reactivate, press
z again.
With the child safety system on, rear
door windows can only be operated via the switches in the driver's door.
Overload
If the windows are repeatedly
operated within short intervals, the
window operation is disabled for
some time.
Heated rear window
Operated by pressing RÜ . LED
illuminates in the button.
Heating works with the key in ignition
switch positions ACC or ON and is
switched off automatically after a
short time.
To avoid discharging the battery,
operate only with the engine running. Do not operate when you are juststarting the vehicle, or if there is a
build up of snow or ice on the rear
window.
Page 36 of 225

34Keys, doors and windowsGeneral hints
Function standby
The sunroof can be operated:
● with ignition on,
● within 10 minutes of switching ignition off,
After switching off the ignition,
sunroof operation is disabled when
driver's door is opened.
Page 42 of 225
40Seats, restraintsHeating
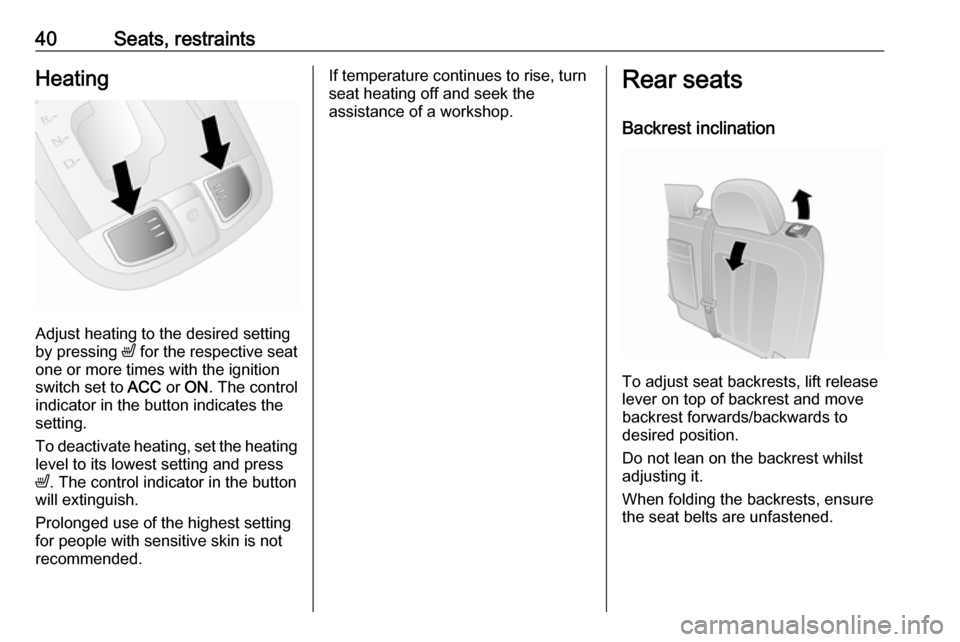
Adjust heating to the desired setting
by pressing ß for the respective seat
one or more times with the ignition
switch set to ACC or ON . The control
indicator in the button indicates the
setting.
To deactivate heating, set the heating level to its lowest setting and press
ß . The control indicator in the button
will extinguish.
Prolonged use of the highest setting
for people with sensitive skin is not
recommended.
If temperature continues to rise, turn
seat heating off and seek the
assistance of a workshop.Rear seats
Backrest inclination
To adjust seat backrests, lift release
lever on top of backrest and move
backrest forwards/backwards to
desired position.
Do not lean on the backrest whilst
adjusting it.
When folding the backrests, ensure
the seat belts are unfastened.
Page 46 of 225

44Seats, restraintsUnfasten
To release belt, press red button on
belt buckle.
Using the seat belt while pregnant9 Warning
The lap belt must be positioned as
low as possible across the pelvis
to prevent pressure on the
abdomen.
Front passenger seat belt
reminder
When the engine is running, control
indicator k flashes then illuminates if
the passenger seat is occupied and
the seat belt is not engaged.
If vehicle speed exceeds 22 km/h, k
will flash for 100 seconds along with
a warning chime, then illuminate until the seat belt is fastened.
Illuminates briefly when ignition is
switched on.
Control indicator X for driver's seat
belt reminder 3 83.
Page 50 of 225
48Seats, restraints9Danger
Do not use a child restraint system
on the passenger seat with active
front airbag.
Airbag deactivation 3 50.
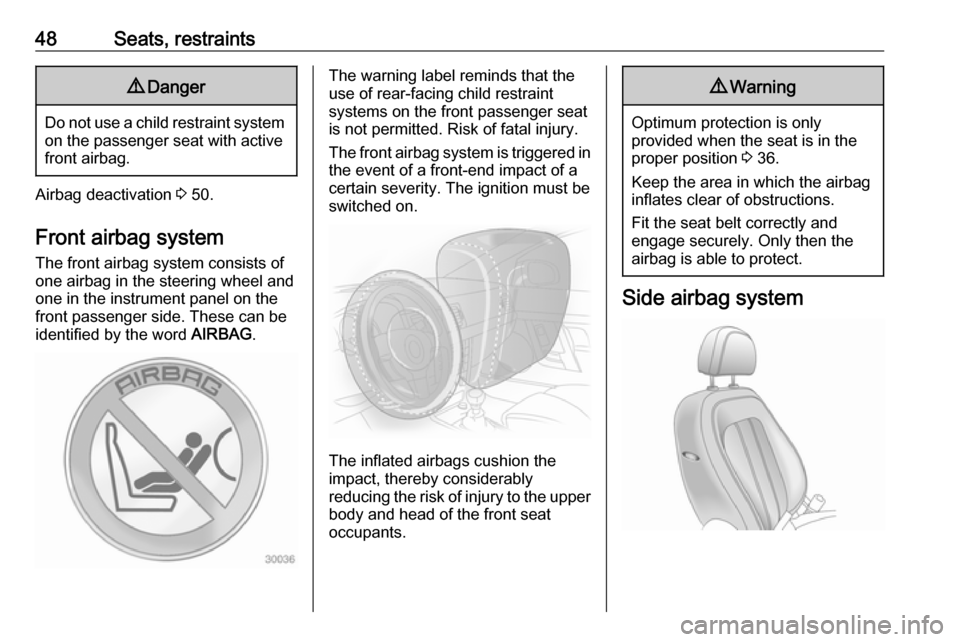
Front airbag system
The front airbag system consists of
one airbag in the steering wheel and
one in the instrument panel on the
front passenger side. These can be
identified by the word AIRBAG.
The warning label reminds that the
use of rear-facing child restraint
systems on the front passenger seat
is not permitted. Risk of fatal injury.
The front airbag system is triggered in
the event of a front-end impact of a
certain severity. The ignition must be
switched on.
The inflated airbags cushion the
impact, thereby considerably
reducing the risk of injury to the upper body and head of the front seat
occupants.
9 Warning
Optimum protection is only
provided when the seat is in the
proper position 3 36.
Keep the area in which the airbag
inflates clear of obstructions.
Fit the seat belt correctly and
engage securely. Only then the
airbag is able to protect.
Side airbag system
Page 51 of 225

Seats, restraints49The side airbag system consists of an
airbag in each front seat backrest.
This can be identified by the word
AIRBAG .
The side airbag system is triggered in
the event of a side impact of a certain severity. The ignition must be
switched on.
The inflated airbags cushion the
impact, thereby considerably
reducing the risk of injury to the upper body and pelvis in the event of a side-
on collision.
9 Warning
Keep the area in which the airbag
inflates clear of obstructions.
Note
Only use protective seat covers that have been approved for the vehicle.Be careful not to cover the airbags.
Curtain airbag system
The curtain airbag system consists of an airbag in the roof frame on each
side. This can be identified by the
word AIRBAG on the roof pillars.
The curtain airbag system is triggered
in the event of a side-on impact of a
certain severity. The ignition must be
switched on.
The inflated airbags cushion the
impact, thereby considerably
reducing the risk of injury to the head in the event of a side-on impact.
9 Warning
Keep the area in which the airbag
inflates clear of obstructions.
The hooks on the handles in the
roof frame are only suitable for
hanging up light articles of
clothing, without coat hangers. Do not keep any items in these
clothes.
Page 52 of 225
50Seats, restraintsAirbag deactivation
The front passenger airbag system
must be deactivated for child restraint system on the passenger seat
according to the instructions in the
table 3 52. The belt pretensioners
and all driver airbag systems will
remain active.
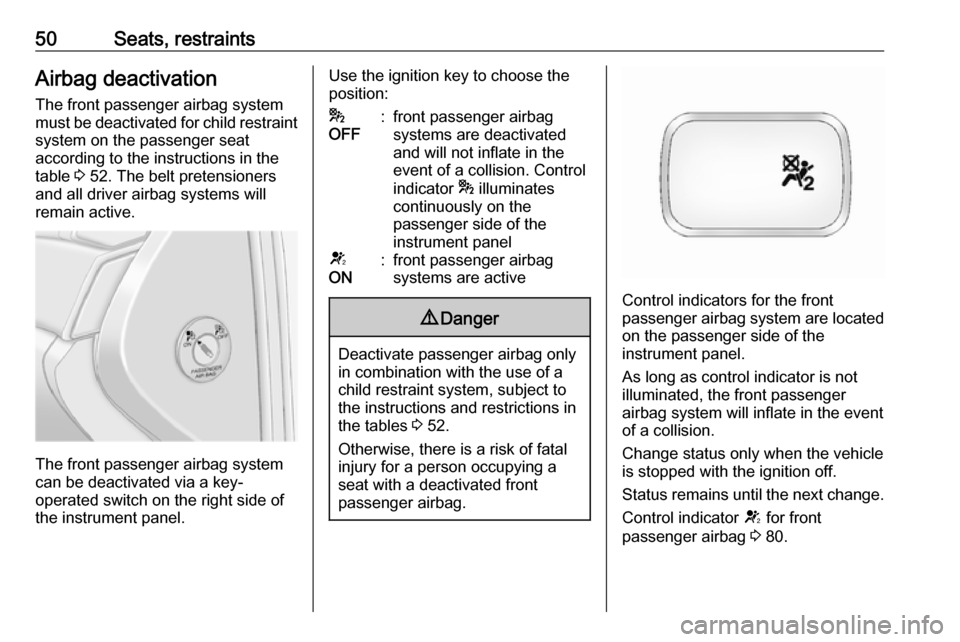
The front passenger airbag system
can be deactivated via a key-
operated switch on the right side of
the instrument panel.
Use the ignition key to choose theposition:*
OFF:front passenger airbag
systems are deactivated
and will not inflate in the
event of a collision. Control
indicator * illuminates
continuously on the
passenger side of the
instrument panelV
ON:front passenger airbag
systems are active9 Danger
Deactivate passenger airbag only
in combination with the use of a
child restraint system, subject to
the instructions and restrictions in
the tables 3 52.
Otherwise, there is a risk of fatal
injury for a person occupying a
seat with a deactivated front
passenger airbag.
Control indicators for the front
passenger airbag system are located
on the passenger side of the
instrument panel.
As long as control indicator is not
illuminated, the front passenger
airbag system will inflate in the event
of a collision.
Change status only when the vehicle
is stopped with the ignition off.
Status remains until the next change.
Control indicator V for front
passenger airbag 3 80.
Page 75 of 225
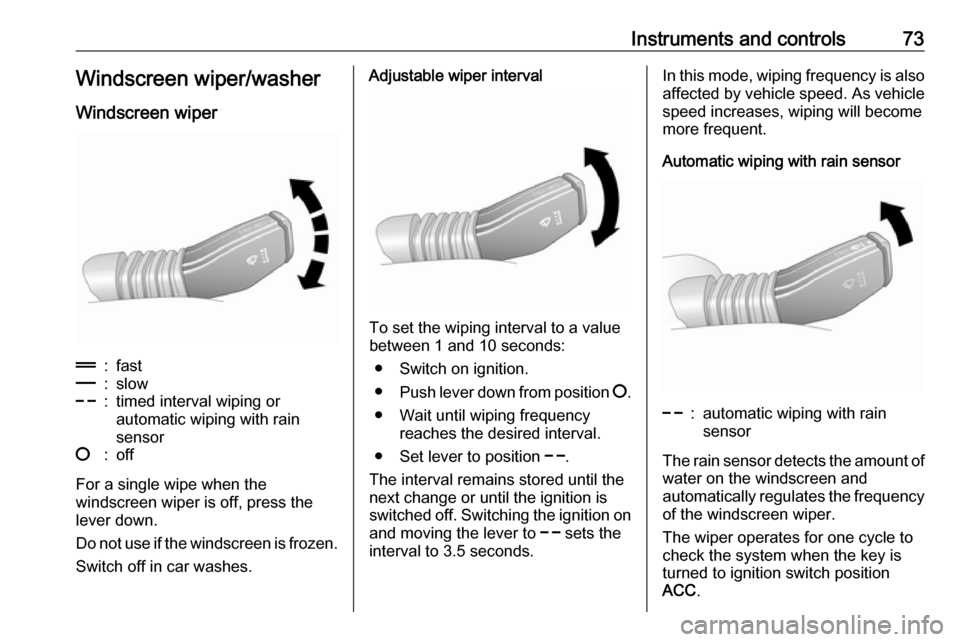
Instruments and controls73Windscreen wiper/washerWindscreen wiper&:fast%:slow$:timed interval wiping or
automatic wiping with rain
sensor§:off
For a single wipe when the
windscreen wiper is off, press the
lever down.
Do not use if the windscreen is frozen.
Switch off in car washes.
Adjustable wiper interval
To set the wiping interval to a value
between 1 and 10 seconds:
● Switch on ignition.
● Push lever down from position §.
● Wait until wiping frequency reaches the desired interval.
● Set lever to position $.
The interval remains stored until the
next change or until the ignition is
switched off. Switching the ignition on
and moving the lever to $ sets the
interval to 3.5 seconds.
In this mode, wiping frequency is also
affected by vehicle speed. As vehicle speed increases, wiping will become
more frequent.
Automatic wiping with rain sensor$:automatic wiping with rain
sensor
The rain sensor detects the amount of water on the windscreen and
automatically regulates the frequency
of the windscreen wiper.
The wiper operates for one cycle to
check the system when the key is
turned to ignition switch position
ACC .
Page 79 of 225
Instruments and controls77With the navigation system, date and
time are set automatically upon
receipt of a GPS satellite signal. If the
displayed time does not match local
time, it can be corrected manually or
automatically by receiving an RDS
time signal.
Some RDS transmitters do not send
a correct time signal. In such cases,
switch off automatic time
synchronisation and set the time
manually.
To set date and time manually, select
menu item Time, Date from the
Settings menu. The menu is
displayed. Select the menu items
required and make the desired
setting.
To correct time with the help of RDS,
select menu item Synchron. clock
automatical. from the Time, Date
menu. The box in front of Synchron.
clock automatical. will be checked.
Graphic-Info-Display,
Colour-Info-Display 3 94.Power outlets
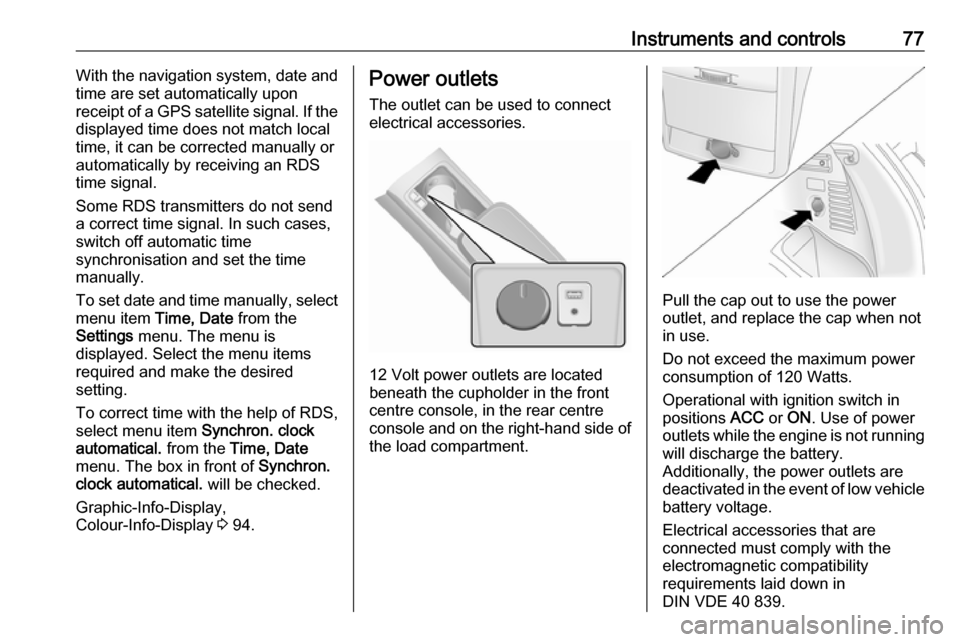
The outlet can be used to connect electrical accessories.
12 Volt power outlets are located
beneath the cupholder in the front
centre console, in the rear centre
console and on the right-hand side of
the load compartment.
Pull the cap out to use the power
outlet, and replace the cap when not in use.
Do not exceed the maximum power
consumption of 120 Watts.
Operational with ignition switch in
positions ACC or ON . Use of power
outlets while the engine is not running will discharge the battery.
Additionally, the power outlets are
deactivated in the event of low vehicle
battery voltage.
Electrical accessories that are
connected must comply with the
electromagnetic compatibility
requirements laid down in
DIN VDE 40 839.