roof OPEL ANTARA 2017.5 Owner's Manual
[x] Cancel search | Manufacturer: OPEL, Model Year: 2017.5, Model line: ANTARA, Model: OPEL ANTARA 2017.5Pages: 225, PDF Size: 6.2 MB
Page 20 of 225
18In briefStop-start system
If the vehicle is at a low speed or at astandstill and certain conditions are
fulfilled, activate an Autostop as
follows:
● Depress the clutch pedal
● shift the selector lever to N
● release the clutch pedal
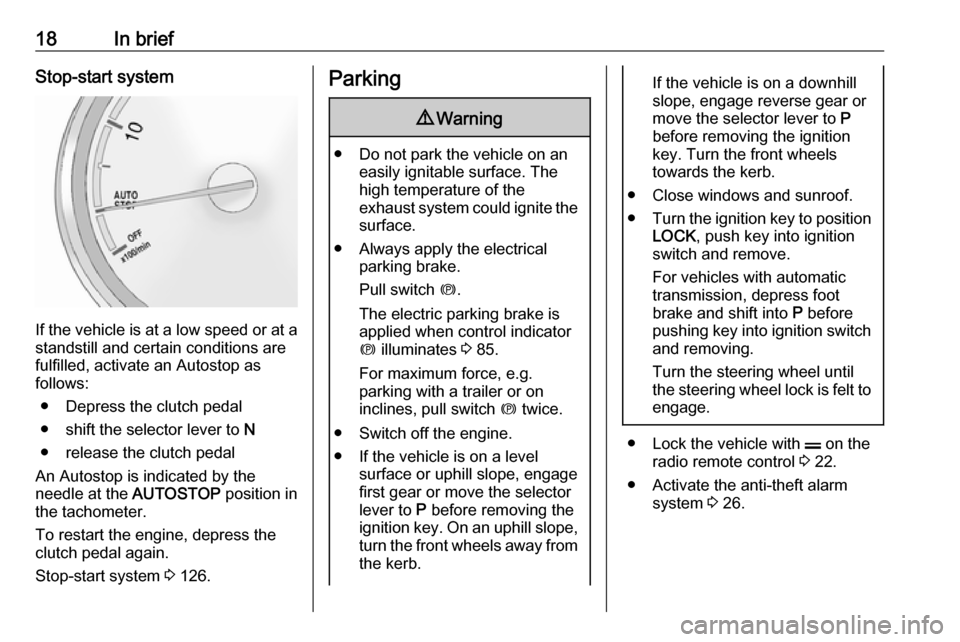
An Autostop is indicated by the
needle at the AUTOSTOP position in
the tachometer.
To restart the engine, depress the clutch pedal again.
Stop-start system 3 126.
Parking9 Warning
● Do not park the vehicle on an
easily ignitable surface. The
high temperature of the
exhaust system could ignite the
surface.
● Always apply the electrical parking brake.
Pull switch m.
The electric parking brake is
applied when control indicator
m illuminates 3 85.
For maximum force, e.g.
parking with a trailer or on
inclines, pull switch m twice.
● Switch off the engine. ● If the vehicle is on a level surface or uphill slope, engage
first gear or move the selector
lever to P before removing the
ignition key. On an uphill slope, turn the front wheels away from
the kerb.
If the vehicle is on a downhill
slope, engage reverse gear or
move the selector lever to P
before removing the ignition
key. Turn the front wheels
towards the kerb.
● Close windows and sunroof.
● Turn the ignition key to position
LOCK , push key into ignition
switch and remove.
For vehicles with automatic
transmission, depress foot
brake and shift into P before
pushing key into ignition switch and removing.
Turn the steering wheel until
the steering wheel lock is felt to
engage.
● Lock the vehicle with p on the
radio remote control 3 22.
● Activate the anti-theft alarm system 3 26.
Page 22 of 225
20Keys, doors and windowsKeys, doors and
windowsKeys, locks ................................... 20
Keys .......................................... 20
Car Pass .................................... 21
Radio remote control .................21
Central locking system ..............22
Child locks ................................. 23
Doors ........................................... 24
Load compartment ....................24
Vehicle security ............................ 25
Anti-theft locking system ...........25
Anti-theft alarm system ..............26
Immobiliser ................................ 28
Exterior mirrors ............................ 28
Convex shape ........................... 28
Electric adjustment ....................28
Folding mirrors .......................... 29
Heated mirrors ........................... 29
Automatic dimming ....................30
Interior mirrors ............................. 30
Manual anti-dazzle ....................30
Automatic anti-dazzle ................30
Windows ...................................... 31
Windscreen ............................... 31Power windows......................... 31
Heated rear window ..................32
Sun visors .................................. 33
Roof ............................................. 33
Sunroof ...................................... 33Keys, locks
Keys Replacement keys
The key number is specified in the Car Pass or on a detachable tag.
The key number must be quoted
when ordering replacement keys as it
is a component of the immobiliser
system.
Locks 3 198.
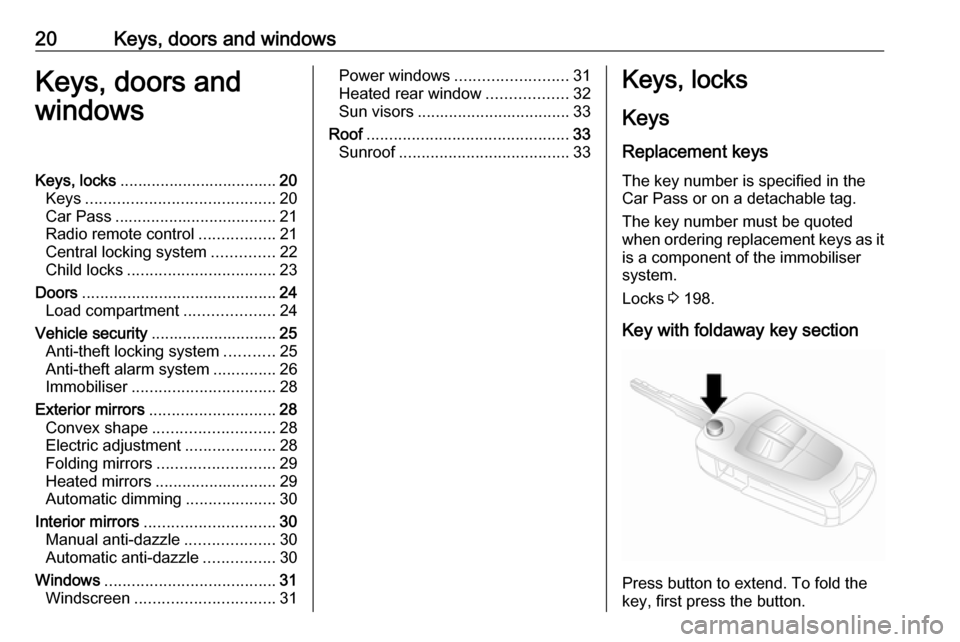
Key with foldaway key section
Press button to extend. To fold the
key, first press the button.
Page 24 of 225
22Keys, doors and windowsExtend the key and open the unit.
Replace the battery (battery type
CR2032), paying attention to the
installation position. Close the unit.
Key with fixed key sectionOpen the unit with a small screwdriver
in the notch on the cover. Replace the battery (battery type CR2032), paying
attention to the installation position.
Close the unit.
Central locking system Unlocks and locks doors, load
compartment and fuel filler flap.
A pull on an interior door handle
unlocks the respective door. Pulling the handle once more opens the door.
Note
In the event of an accident in which
airbags or belt pretensioners are
deployed, the vehicle is
automatically unlocked.Unlocking
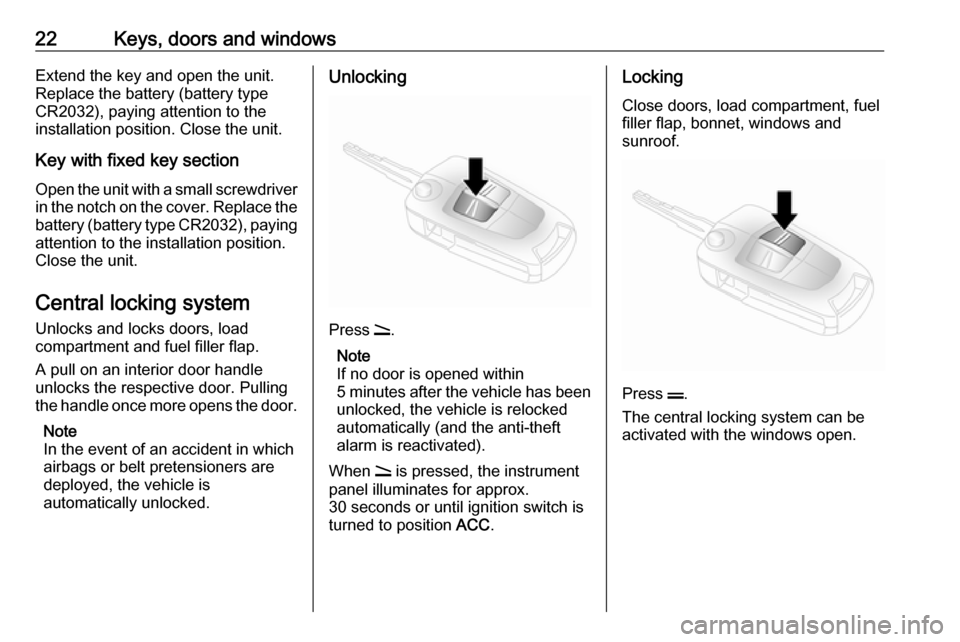
Press q.
Note
If no door is opened within
5 minutes after the vehicle has been unlocked, the vehicle is relocked
automatically (and the anti-theft
alarm is reactivated).
When q is pressed, the instrument
panel illuminates for approx.
30 seconds or until ignition switch is
turned to position ACC.
Locking
Close doors, load compartment, fuelfiller flap, bonnet, windows and
sunroof.
Press p.
The central locking system can be
activated with the windows open.
Page 28 of 225
26Keys, doors and windowsActivating
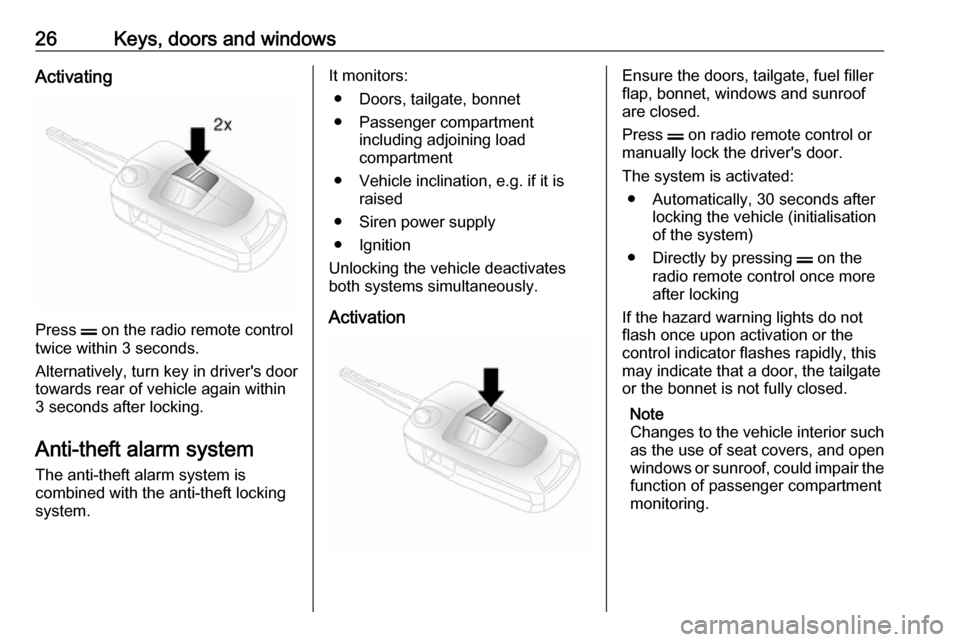
Press p on the radio remote control
twice within 3 seconds.
Alternatively, turn key in driver's door
towards rear of vehicle again within
3 seconds after locking.
Anti-theft alarm system The anti-theft alarm system is
combined with the anti-theft locking
system.
It monitors:
● Doors, tailgate, bonnet
● Passenger compartment including adjoining load
compartment
● Vehicle inclination, e.g. if it is raised
● Siren power supply
● Ignition
Unlocking the vehicle deactivates both systems simultaneously.
ActivationEnsure the doors, tailgate, fuel filler
flap, bonnet, windows and sunroof
are closed.
Press p on radio remote control or
manually lock the driver's door.
The system is activated: ● Automatically, 30 seconds after locking the vehicle (initialisation
of the system)
● Directly by pressing p on the
radio remote control once more
after locking
If the hazard warning lights do not flash once upon activation or the
control indicator flashes rapidly, this
may indicate that a door, the tailgate
or the bonnet is not fully closed.
Note
Changes to the vehicle interior such
as the use of seat covers, and open
windows or sunroof, could impair the
function of passenger compartment
monitoring.
Page 29 of 225
Keys, doors and windows27Activation without monitoring of
passenger compartment and
vehicle inclination
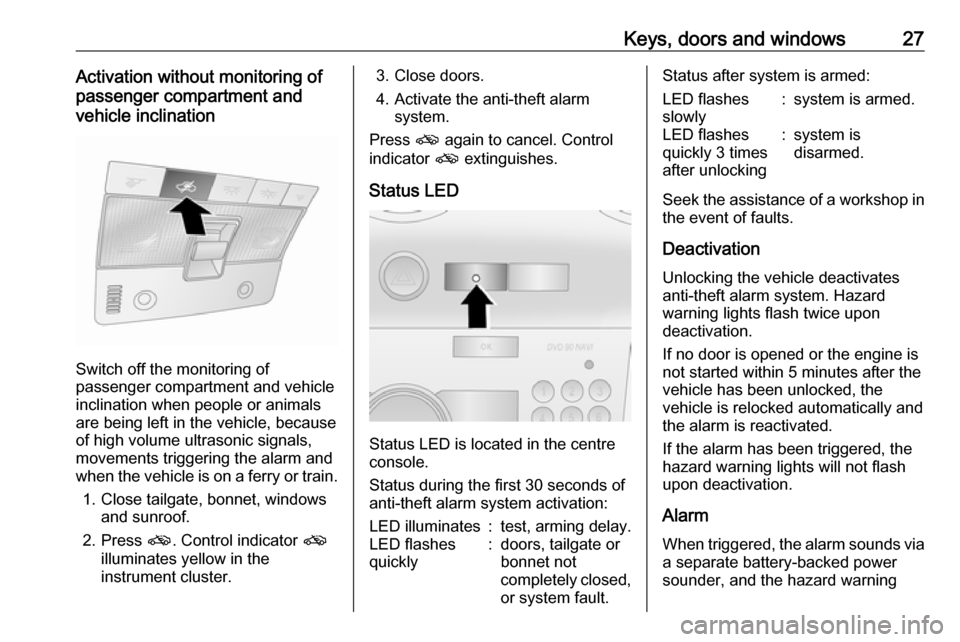
Switch off the monitoring of
passenger compartment and vehicle
inclination when people or animals
are being left in the vehicle, because
of high volume ultrasonic signals,
movements triggering the alarm and
when the vehicle is on a ferry or train.
1. Close tailgate, bonnet, windows and sunroof.
2. Press o. Control indicator o
illuminates yellow in the
instrument cluster.
3. Close doors.
4. Activate the anti-theft alarm system.
Press o again to cancel. Control
indicator o extinguishes.
Status LED
Status LED is located in the centre
console.
Status during the first 30 seconds of
anti-theft alarm system activation:
LED illuminates:test, arming delay.LED flashes
quickly:doors, tailgate or
bonnet not
completely closed,
or system fault.Status after system is armed:LED flashes
slowly:system is armed.LED flashes
quickly 3 times
after unlocking:system is
disarmed.
Seek the assistance of a workshop in
the event of faults.
Deactivation
Unlocking the vehicle deactivates
anti-theft alarm system. Hazard
warning lights flash twice upon
deactivation.
If no door is opened or the engine is
not started within 5 minutes after the
vehicle has been unlocked, the
vehicle is relocked automatically and
the alarm is reactivated.
If the alarm has been triggered, the
hazard warning lights will not flash
upon deactivation.
AlarmWhen triggered, the alarm sounds via
a separate battery-backed power
sounder, and the hazard warning
Page 35 of 225
Keys, doors and windows33Do not use sharp instruments or
abrasive cleaners on the rear window
and avoid scratching or damaging the
heating elements.
Sun visors
The sun visors can be folded down orswivelled to the side to prevent
dazzling.
Sun visors have vanity mirrors and a
ticket holder on the rear. When the
vanity mirror covers are opened, the
sun visor light illuminates.
The mirror covers should be closed
when driving.
Roof
Sunroof9 Warning
Take care when operating the
sunroof. Risk of injury, particularly to children.
Keep a close watch on the
movable parts when operating
them. Ensure that nothing
becomes trapped in them as they
move.
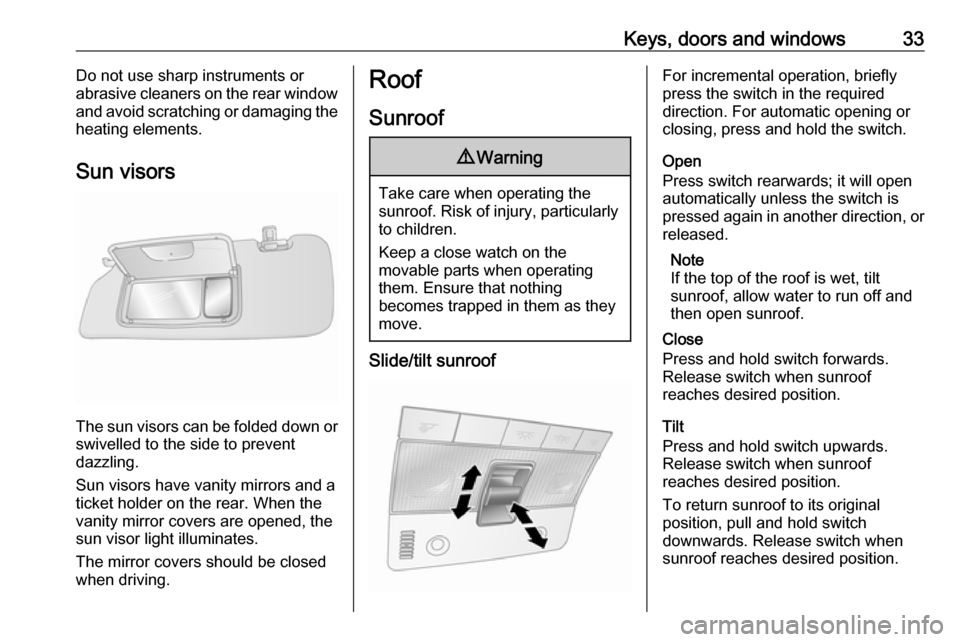
Slide/tilt sunroof
For incremental operation, briefly
press the switch in the required
direction. For automatic opening or
closing, press and hold the switch.
Open
Press switch rearwards; it will open
automatically unless the switch is
pressed again in another direction, or
released.
Note
If the top of the roof is wet, tilt
sunroof, allow water to run off and
then open sunroof.
Close
Press and hold switch forwards.
Release switch when sunroof
reaches desired position.
Tilt
Press and hold switch upwards.
Release switch when sunroof
reaches desired position.
To return sunroof to its original
position, pull and hold switch
downwards. Release switch when
sunroof reaches desired position.
Page 36 of 225

34Keys, doors and windowsGeneral hints
Function standby
The sunroof can be operated:
● with ignition on,
● within 10 minutes of switching ignition off,
After switching off the ignition,
sunroof operation is disabled when
driver's door is opened.
Page 38 of 225
36Seats, restraintsStow head restraints securely in load
compartment.
Active head restraints
In the event of a rear-end impact, the active head restraints automatically
tilt forwards. Thus the head is
supported so that the risk of whiplash
injury is reduced.
Note
Do not attach objects or components that are not approved for your
vehicle to the head restraints. These
affect the protective effect of the
head restraints and can be propelled
through the vehicle in an
uncontrolled manner if the driver
brakes hard or an accident occurs.
Note
Approved accessories may only be
attached if the seat is not in use.Front seats
Seat position9 Warning
Only drive with the seat correctly
adjusted.
9 Danger
Do not sit nearer than 25 cm from
the steering wheel, to permit safe
airbag deployment.
9 Warning
Never adjust seats while driving as
they could move uncontrollably.
9 Warning
Never store any objects under the
seats.
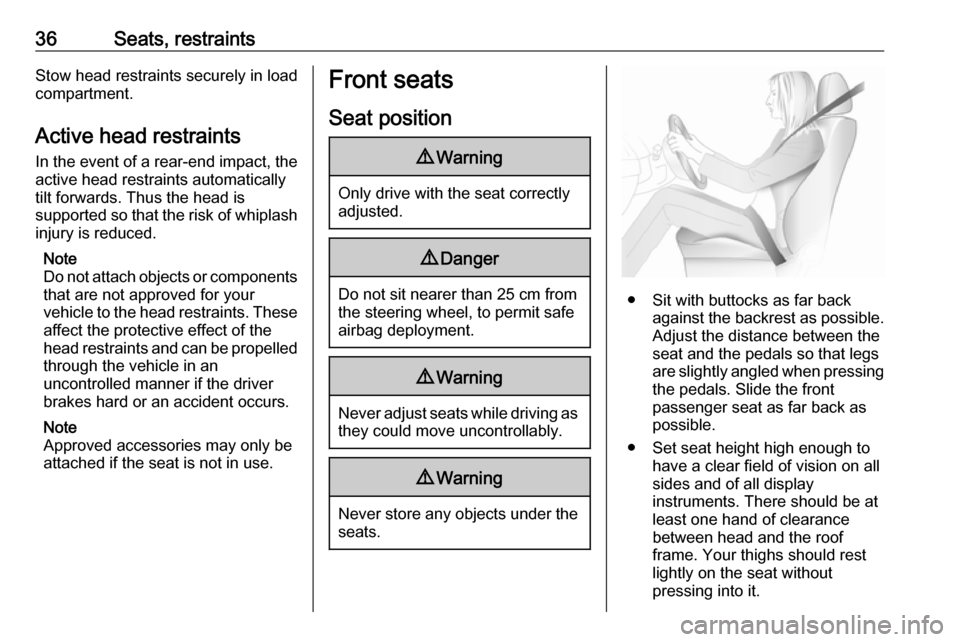
● Sit with buttocks as far back against the backrest as possible.
Adjust the distance between the
seat and the pedals so that legs
are slightly angled when pressing the pedals. Slide the front
passenger seat as far back as
possible.
● Set seat height high enough to have a clear field of vision on allsides and of all display
instruments. There should be at
least one hand of clearance
between head and the roof
frame. Your thighs should rest
lightly on the seat without
pressing into it.
Page 51 of 225

Seats, restraints49The side airbag system consists of an
airbag in each front seat backrest.
This can be identified by the word
AIRBAG .
The side airbag system is triggered in
the event of a side impact of a certain severity. The ignition must be
switched on.
The inflated airbags cushion the
impact, thereby considerably
reducing the risk of injury to the upper body and pelvis in the event of a side-
on collision.
9 Warning
Keep the area in which the airbag
inflates clear of obstructions.
Note
Only use protective seat covers that have been approved for the vehicle.Be careful not to cover the airbags.
Curtain airbag system
The curtain airbag system consists of an airbag in the roof frame on each
side. This can be identified by the
word AIRBAG on the roof pillars.
The curtain airbag system is triggered
in the event of a side-on impact of a
certain severity. The ignition must be
switched on.
The inflated airbags cushion the
impact, thereby considerably
reducing the risk of injury to the head in the event of a side-on impact.
9 Warning
Keep the area in which the airbag
inflates clear of obstructions.
The hooks on the handles in the
roof frame are only suitable for
hanging up light articles of
clothing, without coat hangers. Do not keep any items in these
clothes.
Page 58 of 225

56StorageStorageStorage compartments................56
Instrument panel storage ...........56
Glovebox ................................... 57
Cupholders ................................ 57
Sunglasses storage ...................57
Underseat storage .....................57
Armrest storage .........................58
Centre console storage .............58
Rear carrier system ...................58
Load compartment .......................67
Load compartment cover ...........67
Rear floor storage cover ............68
Lashing eyes ............................. 69
Warning triangle ........................69
First aid kit ................................. 69
Fire extinguisher ........................69
Roof rack system .........................69
Roof rack ................................... 69
Loading information .....................70Storage compartments9Warning
Do not store heavy or sharp
objects in the storage
compartments. Otherwise vehicle
occupants could be injured by
objects being thrown around in the
event of hard braking, a sudden
change in direction or an accident.
Instrument panel storage
Console net
Located in the front passenger foot
well.
Coin storage
Pull handle to open. Push door firmly
to close.
Card holder Located above the coin storage
compartment. A card can be retained
in the slot for convenient use.