buttons OPEL ASTRA J 2015 Manual user
[x] Cancel search | Manufacturer: OPEL, Model Year: 2015, Model line: ASTRA J, Model: OPEL ASTRA J 2015Pages: 343, PDF Size: 10.27 MB
Page 207 of 343

Driving and operating205
Due to the high position of the camera
the rear bumper can be seen on the
display as a guide to position.
The area displayed by the camera is
limited. The distance of the image that appears on the display differs from
the actual distance.
Guiding lines
Dynamic guiding lines are horizontal
lines in 1 metre intervals projected on
the picture to define the distance to
shown objects.Trajectory lane of the vehicle is
shown in accordance with the
steering angle.
The function can be deactivated in the
Settings menu in the Info-Display.
Vehicle personalisation 3 132.
Warning symbols
Warning symbols are indicated as
triangles 9 on the picture which show
obstacles detected by the rear
sensors of the advanced parking
assist.
Display settings
Brightness can be set with the up/
down buttons of the multifunction
knob.
Contrast can be set with left/right
buttons of the multifunction knob.
Deactivation
The camera is deactivated when a
certain forward speed is exceeded or if reverse gear is not engaged for
approx. 10 seconds.
Activation or deactivation of the rear
view camera can be changed in the Settings menu in the Info-Display.
Vehicle personalisation 3 132.
Page 262 of 343

260Vehicle careCaution
Tyre pressure monitoring system
warns only about low tyre pressure condition and does not replace
regular tyre maintenance by the
driver.
All wheels must be equipped with pressure sensors and the tyres must
have the prescribed pressure.
Note
In countries where the tyre pressure
monitoring system is legally
required, the use of wheels without
pressure sensors will invalidate the
vehicle type approval.
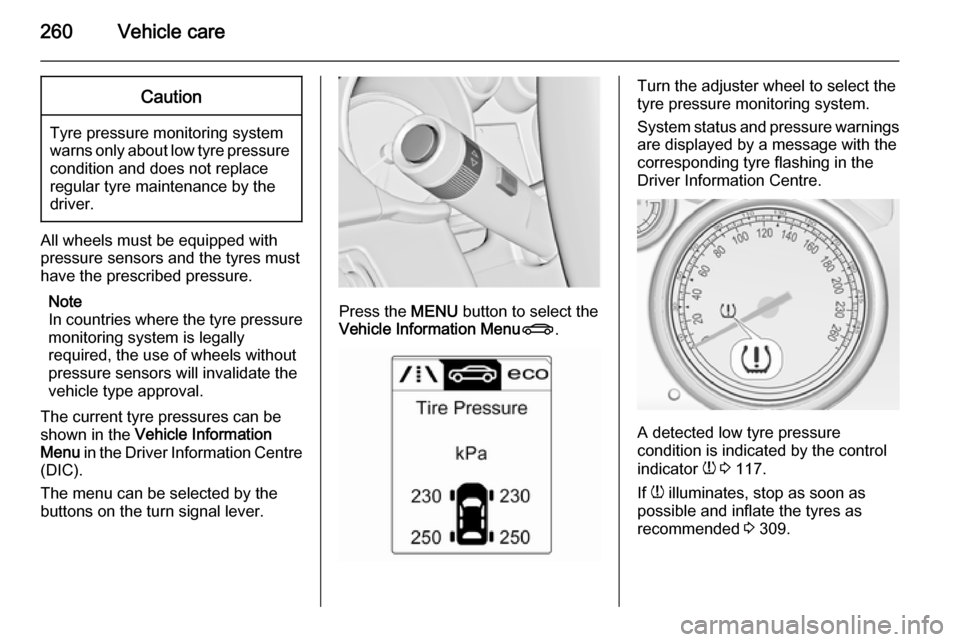
The current tyre pressures can be
shown in the Vehicle Information
Menu in the Driver Information Centre
(DIC).
The menu can be selected by the
buttons on the turn signal lever.
Press the MENU button to select the
Vehicle Information Menu X.
Turn the adjuster wheel to select the
tyre pressure monitoring system.
System status and pressure warnings
are displayed by a message with the
corresponding tyre flashing in the
Driver Information Centre.
A detected low tyre pressure
condition is indicated by the control
indicator w 3 117.
If w illuminates, stop as soon as
possible and inflate the tyres as
recommended 3 309.
Page 275 of 343

Vehicle care273
To remove:1. Open the floor cover.
2. Only 3-door hatchback: remove rear storage by pressing both
buttons. Fold down cover and
extract storage upwards.
3. The spare wheel is secured with a
wing nut. Untwist nut, remove
conus (only 3-door hatchback) to
take out the spare wheel.
Under the spare wheel there is the box with vehicle tools.
4. When, after a wheel change, no wheel is placed in the spare wheel
well, secure the tool box by
turning right back the wing nut and close floor cover.
Stowing a damaged full size wheel in the load compartment,3-door and 5-door hatchback
The spare wheel well is not designed for other tyre sizes than the spare
wheel. A damaged full size wheel
must be stowed in the load
compartment and secured with a
strap. Vehicle tools 3 256. To secure
the wheel:
1. Position the wheel outside up close to one sidewall of the load
compartment.
2. Place the loop end of the strap through the front lashing eye on
the appropriate side.
3. Place the hook end of the strap through the loop and pull it until
the strap is fastened securely to
the lashing eye.