lock OPEL ASTRA J 2017 Manual user
[x] Cancel search | Manufacturer: OPEL, Model Year: 2017, Model line: ASTRA J, Model: OPEL ASTRA J 2017Pages: 295, PDF Size: 8.23 MB
Page 28 of 295
26Keys, doors and windowsFault in radio remote control
system
Unlocking
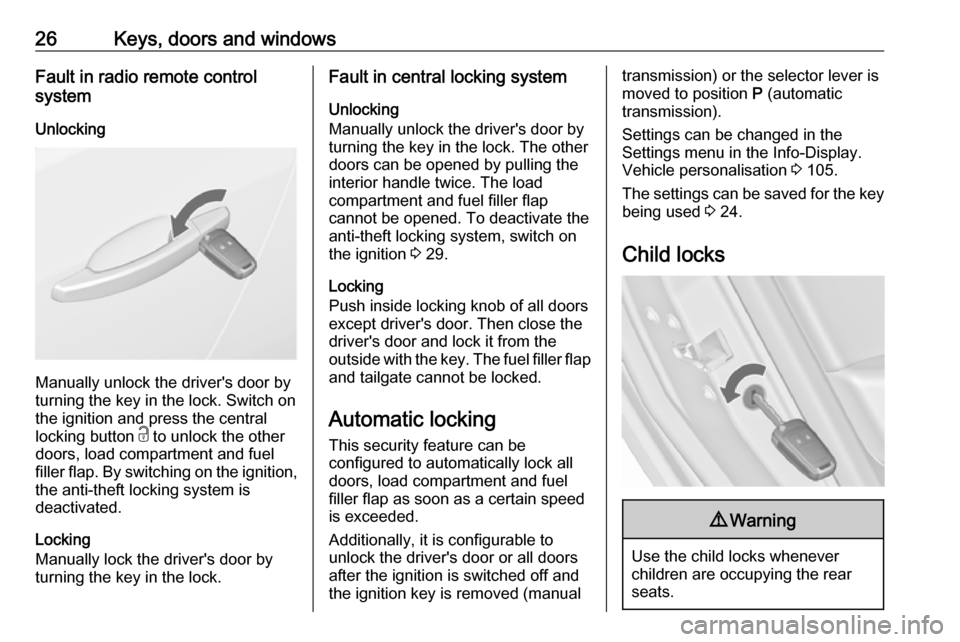
Manually unlock the driver's door by
turning the key in the lock. Switch on
the ignition and press the central
locking button c to unlock the other
doors, load compartment and fuel
filler flap. By switching on the ignition, the anti-theft locking system is
deactivated.
Locking
Manually lock the driver's door by
turning the key in the lock.
Fault in central locking system
Unlocking
Manually unlock the driver's door by
turning the key in the lock. The other
doors can be opened by pulling the
interior handle twice. The load
compartment and fuel filler flap
cannot be opened. To deactivate the
anti-theft locking system, switch on
the ignition 3 29.
Locking
Push inside locking knob of all doors
except driver's door. Then close the
driver's door and lock it from the
outside with the key. The fuel filler flap and tailgate cannot be locked.
Automatic locking
This security feature can be
configured to automatically lock all
doors, load compartment and fuel
filler flap as soon as a certain speed
is exceeded.
Additionally, it is configurable to
unlock the driver's door or all doors
after the ignition is switched off and
the ignition key is removed (manualtransmission) or the selector lever is
moved to position P (automatic
transmission).
Settings can be changed in the
Settings menu in the Info-Display.
Vehicle personalisation 3 105.
The settings can be saved for the key being used 3 24.
Child locks9 Warning
Use the child locks whenever
children are occupying the rear
seats.
Page 29 of 295

Keys, doors and windows27Using a key or suitable screwdriver,
turn the child lock in the rear door to
the horizontal position. The door
cannot be opened from the inside.
To deactivate, turn the child lock to
the vertical position.Doors
Load compartment TailgateOpening3-door hatchback
Press x on radio remote control or
push the brand emblem at the bottom
half to unlock and open the tailgate.
Pressing x opens the tailgate even
if the doors are locked.
4-door notchback
Page 30 of 295

28Keys, doors and windowsTo unlock the boot lid, press x on
the remote control for at least two
seconds, or, to open from the inside,
press x in the centre console; the
boot lid is opened slightly.
With the doors centrally locked, the
boot lid cannot be opened by pressing
x in the centre console.
Closing
Use one of the interior handles.
Do not push the touchpad switch or
the brand emblem whilst closing as
this will unlock the tailgate again.
Central locking system 3 24.
General hints for operating
tailgate
9 Danger
Do not drive with the tailgate open
or ajar, e.g. when transporting
bulky objects, since toxic exhaust
gases, which cannot be seen or
smelled, could enter the vehicle.
This can cause unconsciousness
and even death.Caution
Before opening the tailgate check
overhead obstructions, such as a
garage door, to avoid damage to
the tailgate. Always check the
moving area above and behind the tailgate.
Note
The installation of certain heavy
accessories onto the tailgate may
affect its ability to remain open.
Page 31 of 295
Keys, doors and windows29Vehicle security
Anti-theft locking system9 Warning
Do not use the system if there are
people in the vehicle! The doorscannot be unlocked from the
inside.
The system deadlocks all the doors. All doors must be closed otherwise
the system cannot be activated.
If the ignition was on, the driver's door
must be opened and closed once so
that the vehicle can be secured.
Unlocking the vehicle disables the
mechanical anti-theft locking system.
This is not possible with the central
locking button.
Activating
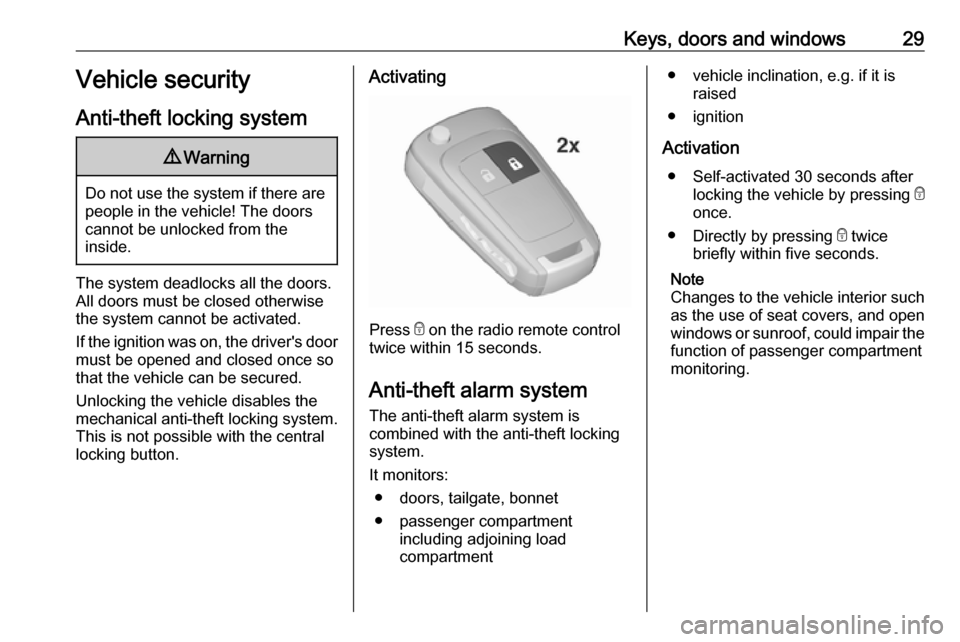
Press e on the radio remote control
twice within 15 seconds.
Anti-theft alarm system
The anti-theft alarm system is
combined with the anti-theft locking
system.
It monitors: ● doors, tailgate, bonnet
● passenger compartment including adjoining load
compartment
● vehicle inclination, e.g. if it is raised
● ignition
Activation ● Self-activated 30 seconds after locking the vehicle by pressing e
once.
● Directly by pressing e twice
briefly within five seconds.
Note
Changes to the vehicle interior such
as the use of seat covers, and open
windows or sunroof, could impair the function of passenger compartment
monitoring.
Page 32 of 295
30Keys, doors and windowsActivation without monitoring of
passenger compartment and
vehicle inclination
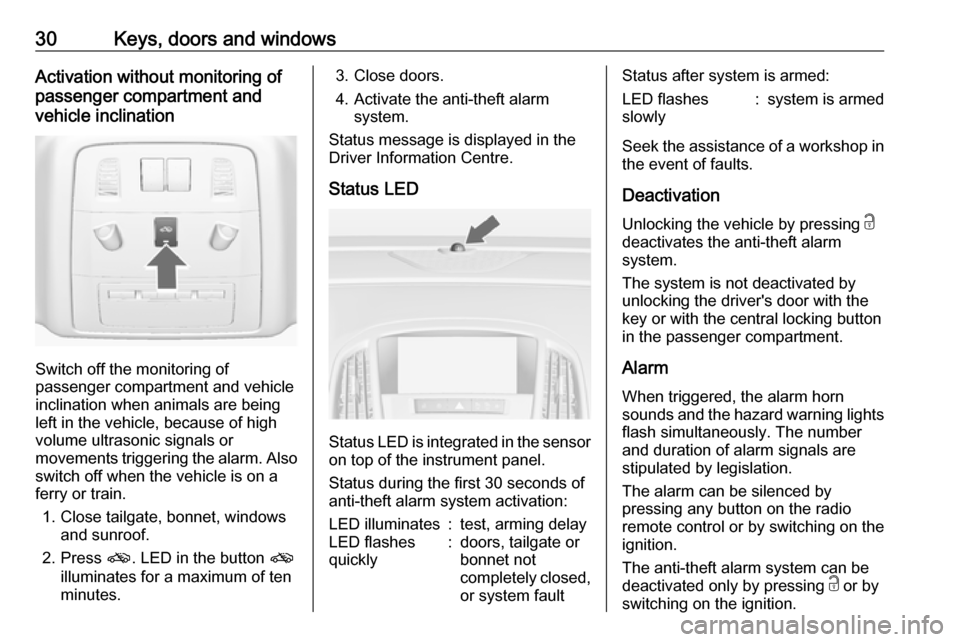
Switch off the monitoring of
passenger compartment and vehicle
inclination when animals are being
left in the vehicle, because of high
volume ultrasonic signals or
movements triggering the alarm. Also switch off when the vehicle is on a
ferry or train.
1. Close tailgate, bonnet, windows and sunroof.
2. Press o. LED in the button o
illuminates for a maximum of ten minutes.
3. Close doors.
4. Activate the anti-theft alarm system.
Status message is displayed in the
Driver Information Centre.
Status LED
Status LED is integrated in the sensor
on top of the instrument panel.
Status during the first 30 seconds of
anti-theft alarm system activation:
LED illuminates:test, arming delayLED flashes
quickly:doors, tailgate or
bonnet not
completely closed,
or system faultStatus after system is armed:LED flashes
slowly:system is armed
Seek the assistance of a workshop in
the event of faults.
Deactivation
Unlocking the vehicle by pressing c
deactivates the anti-theft alarm
system.
The system is not deactivated by
unlocking the driver's door with the
key or with the central locking button
in the passenger compartment.
Alarm
When triggered, the alarm horn
sounds and the hazard warning lights flash simultaneously. The numberand duration of alarm signals are
stipulated by legislation.
The alarm can be silenced by
pressing any button on the radio
remote control or by switching on the
ignition.
The anti-theft alarm system can be
deactivated only by pressing c or by
switching on the ignition.
Page 33 of 295
Keys, doors and windows31A triggered alarm, which has not been
interrupted by the driver, will be
indicated by the hazard warning
lights. They will flash quickly three
times the next time the vehicle is
unlocked with the radio remote
control. Additionally, a warning
message or a warning code is
displayed in the Driver Information Centre after switching on the ignition.
Vehicle messages 3 99.
If the vehicle's battery is to be
disconnected (e.g. for maintenance
work), the alarm siren must be
deactivated as follows: Switch the
ignition on then off, then disconnect
the vehicle's battery within
15 seconds.
Immobiliser The system is part of the ignition
switch and checks whether the
vehicle is allowed to be started with
the key being used.
The immobiliser is activated
automatically after the key has been removed from the ignition switch.If the control indicator d flashes when
the ignition is on, there is a fault in the
system; the engine cannot be started. Switch off the ignition and repeat the
start attempt.
If the control indicator continues
flashing, attempt to start the engine
using the spare key and seek the
assistance of a workshop.
Note
The immobiliser does not lock the
doors. You should always lock the
vehicle after leaving it and switch on the anti-theft alarm system 3 24,
3 29.
Control indicator d 3 92.Exterior mirrors
Convex shape The convex exterior mirror contains
an aspherical area and reduces blind spots. The shape of the mirror makes
objects appear smaller, which will affect the ability to estimate
distances.
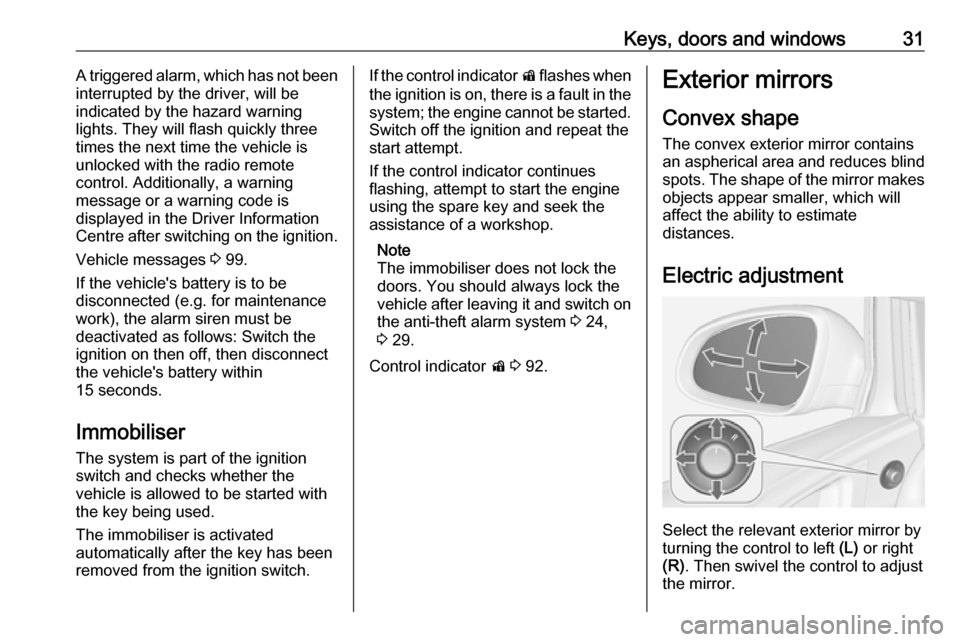
Electric adjustment
Select the relevant exterior mirror by
turning the control to left (L) or right
(R) . Then swivel the control to adjust
the mirror.
Page 44 of 295
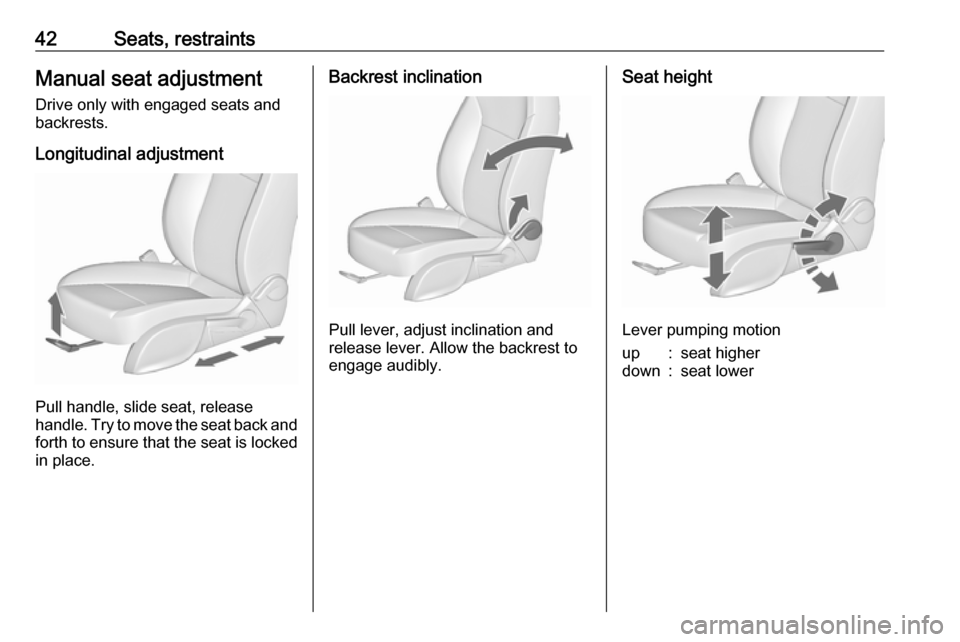
42Seats, restraintsManual seat adjustment
Drive only with engaged seats and
backrests.
Longitudinal adjustment
Pull handle, slide seat, release
handle. Try to move the seat back and forth to ensure that the seat is locked
in place.
Backrest inclination
Pull lever, adjust inclination and
release lever. Allow the backrest to
engage audibly.
Seat height
Lever pumping motion
up:seat higherdown:seat lower
Page 46 of 295

44Seats, restraintsSide bolster, OPC version
Adjust seat width and backrest width
using the switches to suit personal
requirements.
Operate front rocker switch to change seat width.
Operate rear rocker switch to change
backrest width.
Seat foldingCaution
When seat height is in highest
position, push head restraints
down and lift up sun visors before
folding backrest forwards.
Seat folding on manual operated
seats
Lift release lever and fold backrest
forwards, then slide seat forwards to
the stop.
To restore, slide the seat backwards
to the stop. Lift backrest to upright
position without operating any lever.
Ensure backrest engages.9 Warning
When folding up, ensure that the
seat is securely locked in position
before driving. Failure to do so
may result in personal injury in the event of hard braking or collision.
The memory function allows the seat
to engage in its original position.
Do not operate backrest inclination
lever while backrest is tilted forward.
Vehicles with panorama roof: to tilt
backrest forward, push head
restraints down and lift up sun visors.
Page 47 of 295

Seats, restraints45
The illustration shows the release
lever on OPC seat.
9 Warning
To avoid injury, move the backrest
to an upright position before
folding.
Seat folding on power seats
Lift release lever and fold backrest
forwards. The seat slides
automatically forwards to the stop.
To restore, lift backrest to upright
position and engage. The seat slides
automatically backwards to the
original position.
In case the head restraint of the
folded backrest is blocked by the
upper windscreen frame, allow the
seat to move backwards slightly
before lifting up the backrest 3 45.
Safety function
If the power seat encounters
resistance while sliding forward or
rearward, it is immediately stopped
and moved back.
Overload
If the folding function is electrically overloaded, the power supply is
automatically cut-off for a short time.
Power seat adjustment9 Warning
Care must be taken when
operating the power seats. There
is a risk of injury, particularly for
children. Objects could become
trapped.
Keep a close watch on the seats
when adjusting them. Vehicle
passengers should be informed
accordingly.
Page 50 of 295

48Seats, restraintsRear seats
Armrest
Fold armrest down. The armrest
contains cupholders and a storage
box.
Seat belts
The seat belts are locked during hard acceleration or deceleration of the
vehicle, holding the occupants in the
seat position. Therefore the risk of
injury is considerably reduced.
9 Warning
Fasten seat belt before each trip.
In the event of an accident, people
not wearing seat belts endanger their fellow occupants and
themselves.
Seat belts are designed to be used by only one person at a time. Child
restraint system 3 55.
Periodically check all parts of the belt
system for damage, soiling and
proper functionality.
Have damaged components
replaced. After an accident, have the
belts and triggered belt pretensioners replaced by a workshop.9 Warning
The openings in the backrests of
the OPC seats are not designed to mount or carry through any kind ofadditional seat belts.
Note
Make sure that the belts are not
damaged by shoes or sharp-edged
objects or trapped. Prevent dirt from
getting into the belt retractors.