light OPEL ASTRA J 2018 Manual user
[x] Cancel search | Manufacturer: OPEL, Model Year: 2018, Model line: ASTRA J, Model: OPEL ASTRA J 2018Pages: 295, PDF Size: 8.41 MB
Page 70 of 295
68StorageLowering
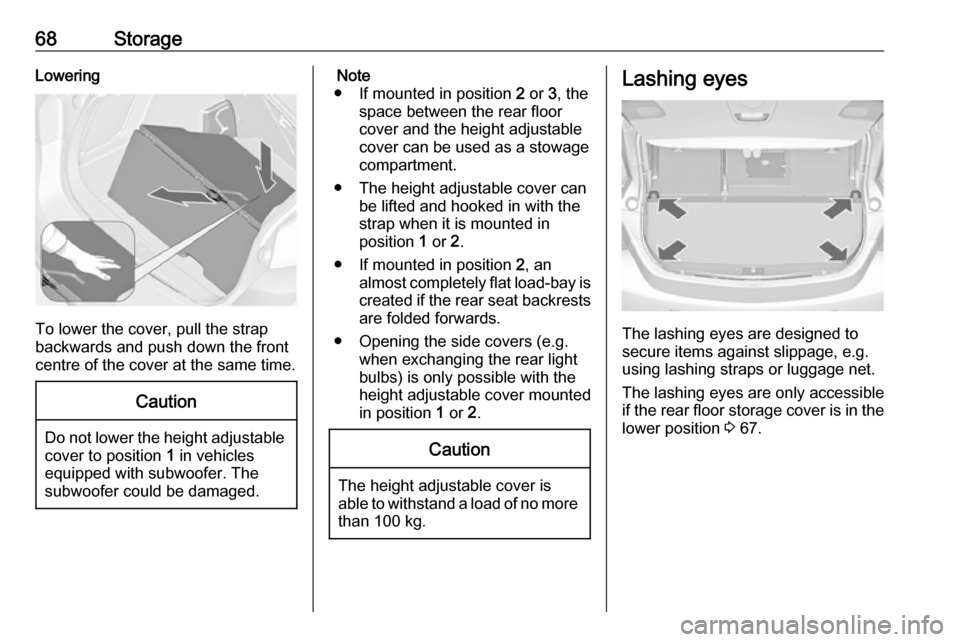
To lower the cover, pull the strap
backwards and push down the front centre of the cover at the same time.
Caution
Do not lower the height adjustable
cover to position 1 in vehicles
equipped with subwoofer. The
subwoofer could be damaged.
Note
● If mounted in position 2 or 3, the
space between the rear floor cover and the height adjustable
cover can be used as a stowage
compartment.
● The height adjustable cover can be lifted and hooked in with thestrap when it is mounted in
position 1 or 2.
● If mounted in position 2, an
almost completely flat load-bay is
created if the rear seat backrests are folded forwards.
● Opening the side covers (e.g. when exchanging the rear light
bulbs) is only possible with the
height adjustable cover mounted
in position 1 or 2.Caution
The height adjustable cover is
able to withstand a load of no more
than 100 kg.
Lashing eyes
The lashing eyes are designed to
secure items against slippage, e.g.
using lashing straps or luggage net.
The lashing eyes are only accessible
if the rear floor storage cover is in the lower position 3 67.
Page 74 of 295

72Instruments and controlsInstruments and
controlsControls ....................................... 73
Steering wheel adjustment ........73
Steering wheel controls .............73
Heated steering wheel ...............73
Horn ........................................... 74
Windscreen wiper/washer .........74
Rear window wiper/washer .......76
Outside temperature ..................76
Clock ......................................... 77
Power outlets ............................. 78
Cigarette lighter ......................... 79
Ashtrays .................................... 79
Warning lights, gauges and indi‐ cators ........................................... 80
Instrument cluster ......................80
Speedometer ............................. 80
Odometer .................................. 80
Trip odometer ............................ 80
Tachometer ............................... 80
Fuel gauge ................................ 81
Fuel selector .............................. 81
Engine coolant temperature gauge ....................................... 83
Service display .......................... 83Control indicators ......................84
Turn signal ................................. 87
Seat belt reminder .....................87
Airbag and belt tensioners .........87
Airbag deactivation ....................87
Charging system .......................88
Malfunction indicator light ..........88
Service vehicle soon .................88
Brake and clutch system ...........88
Operate pedal ............................ 88
Electric parking brake ................88
Electric parking brake fault ........89
Antilock brake system (ABS) .....89
Upshift ....................................... 89
Power steering .......................... 89
Lane departure warning ............89
Ultrasonic parking assist ...........90
Electronic Stability Control off ...90
Electronic Stability Control and Traction Control system ...........90
Traction Control system off .......90
Preheating ................................. 90
Diesel particle filter ....................90
Tyre pressure monitoring system ...................................... 91
Engine oil pressure ....................91
Low fuel ..................................... 91
Immobiliser ................................ 92
Reduced engine power .............92
Exterior light .............................. 92High beam................................. 92
High beam assist .......................92
Adaptive forward lighting ...........92
Fog light ..................................... 92
Rear fog light ............................. 92
Low washer fluid ........................92
Cruise control ............................ 92
Adaptive cruise control ..............92
Vehicle detected ahead .............93
Door open .................................. 93
Information displays .....................93
Driver Information Centre ..........93
Graphic-Info-Display, Colour- Info-Display .............................. 97
Smartphone controller ...............99
Vehicle messages ........................99
Warning chimes .......................102
Battery voltage ........................ 102
Trip computer ............................. 103
Vehicle personalisation ..............105
Telematics service .....................110
OnStar ..................................... 110
ERA GLONASS .......................113
Page 77 of 295

Instruments and controls75Automatic wiping with rain sensorINT:automatic wiping with rain
sensor
The rain sensor detects the amount of water on the windscreen and
automatically regulates the frequency
of the windscreen wiper.
If the wiper frequency is above
20 seconds, the wiper arm moves
slightly down to the park position.
Adjustable sensitivity of the rain
sensor
Turn the adjuster wheel to adjust the
sensitivity:
low sensitivity:turn adjuster
wheel downwardshigh sensitivity:turn adjuster
wheel upwards
Keep the sensor free from dust, dirt
and ice.
Windscreen and headlight
washer
Page 78 of 295
76Instruments and controlsPull lever. Washer fluid is sprayed
onto the windscreen and the wiper wipes a few times.
If the headlights are on, washer fluid
is also sprayed onto the headlights,
provided that the lever is pulled
sufficiently long. Afterwards, the
headlight washer system is
inoperable for 5 wash cycles or until
engine or headlights have been
switched off and on again.
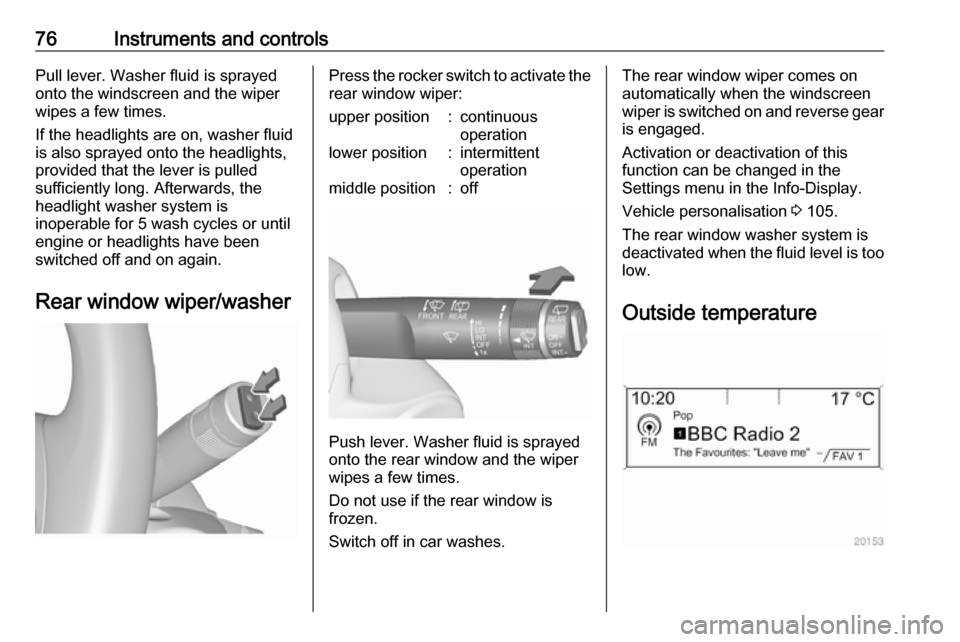
Rear window wiper/washerPress the rocker switch to activate the
rear window wiper:upper position:continuous
operationlower position:intermittent
operationmiddle position:off
Push lever. Washer fluid is sprayed
onto the rear window and the wiper
wipes a few times.
Do not use if the rear window is
frozen.
Switch off in car washes.
The rear window wiper comes on
automatically when the windscreen
wiper is switched on and reverse gear
is engaged.
Activation or deactivation of this
function can be changed in the
Settings menu in the Info-Display.
Vehicle personalisation 3 105.
The rear window washer system is deactivated when the fluid level is too
low.
Outside temperature
Page 81 of 295

Instruments and controls79A further 12 Volt power outlet is
located in the rear console. Fold the
cover downwards.
Do not exceed the maximum power
consumption of 120 watts.
With ignition off, the power outlets are
deactivated. Additionally, the power
outlets are deactivated in the event of
low vehicle battery voltage.
Electric accessories that are
connected must comply with the
electromagnetic compatibility
requirements laid down in
DIN VDE 40 839.
Do not connect any current-delivering
accessories, e.g. electric charging
devices or batteries.
Do not damage the outlet by using
unsuitable plugs.
Stop-start system 3 142.Cigarette lighter
The cigarette lighter is located in the
front console.
Press in cigarette lighter. It switches off automatically once the element is
glowing. Pull out lighter.
Ashtrays
Caution
To be used only for ash and not for combustible rubbish.
The portable ashtray can be placed inthe cupholders.
Page 82 of 295
80Instruments and controlsWarning lights, gauges
and indicators
Instrument cluster
In some versions, the needles of the
instruments briefly rotate to the end
position when the ignition is switched
on.
Speedometer
Indicates vehicle speed.
Odometer
The bottom line displays the recordeddistance in km.
Trip odometer The top line displays the recordeddistance since the last reset.
To reset, press SET/CLR on the turn
signal lever for a few seconds
3 93.
Some versions are equipped with a
reset knob between speedometer
and Driver Information Centre: to
reset press and hold the knob for a
few seconds with the ignition on.
Trip odometer counts up to a distance
of 2000 km and then restarts at 0.
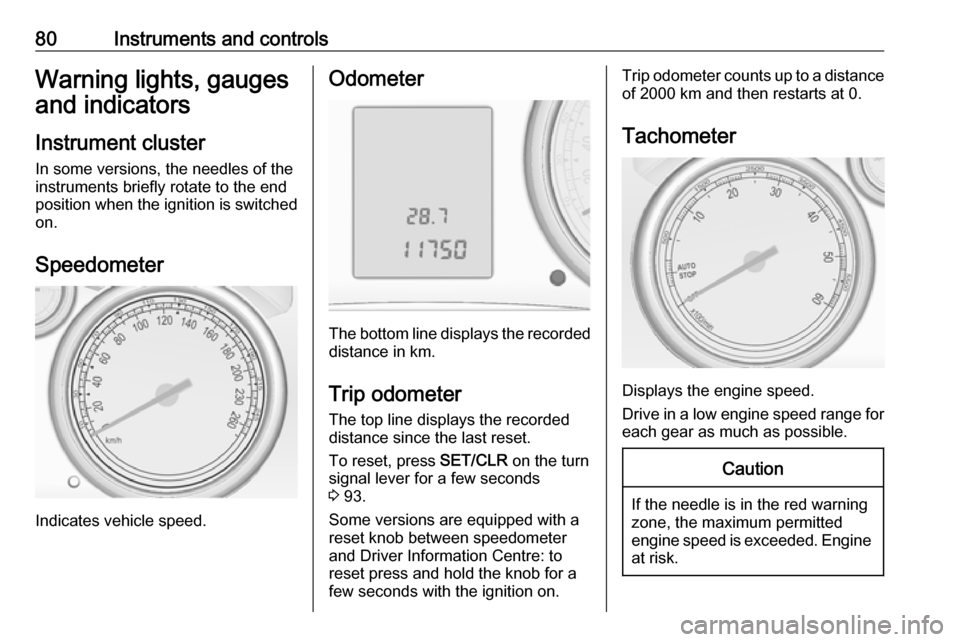
Tachometer
Displays the engine speed.
Drive in a low engine speed range for each gear as much as possible.
Caution
If the needle is in the red warning
zone, the maximum permitted
engine speed is exceeded. Engine at risk.
Page 84 of 295
82Instruments and controlsEvery six months, run the petrol tank
down until control indicator i
illuminates, then refuel. This helps
maintain fuel quality and system
function for petrol operation.
Fill the tank completely at regular
intervals to prevent corrosion in the
tank.
Faults and remedies
If gas mode is not possible, check the following:
● Is there enough liquid gas present?
● Is there enough petrol present for
starting?
Due to extreme temperatures in
combination with the gas
composition, it may take slightly
longer before the system switches
from petrol to gas mode.
In extreme situations, the system may
also switch back to petrol mode if the
minimum requirements are not
fulfilled. If conditions allow, it might be possible to manually switch back to
liquid gas operation.Seek the assistance of a workshop in
the event of all other faults.Caution
Repairs and adjustments may only be made by trained specialists in
order to maintain the safety and
warranty on the LPG system.
Liquid gas is given a particular odour
(odorised) so that any leaks can be
detected easily.
9 Warning
If you smell gas in the vehicle or in
the immediate vicinity, switch to petrol mode immediately. No
smoking. No naked flames or
ignition sources.
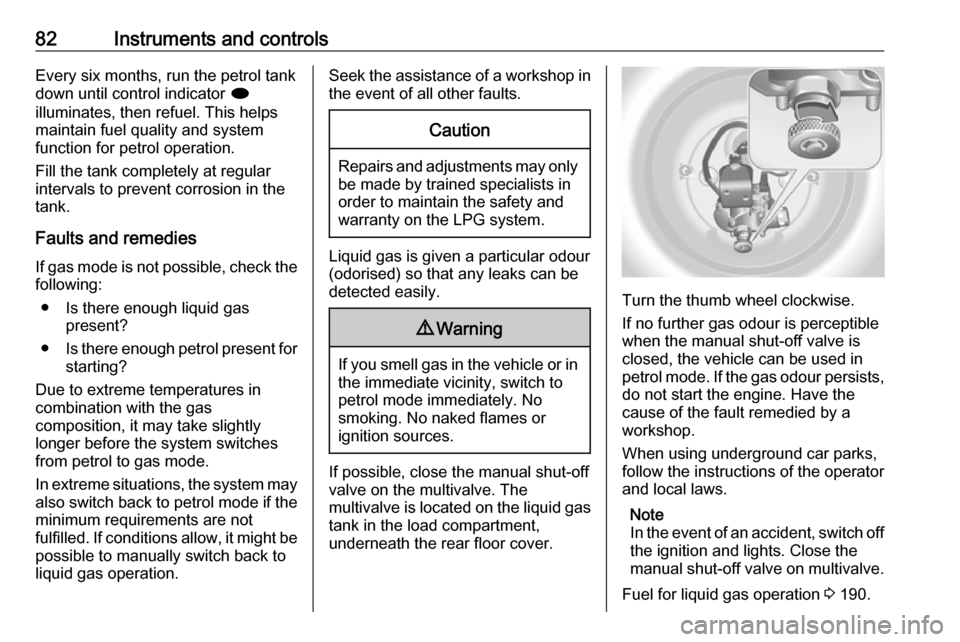
If possible, close the manual shut-off
valve on the multivalve. The
multivalve is located on the liquid gas
tank in the load compartment,
underneath the rear floor cover.
Turn the thumb wheel clockwise.
If no further gas odour is perceptible
when the manual shut-off valve is
closed, the vehicle can be used in
petrol mode. If the gas odour persists, do not start the engine. Have the
cause of the fault remedied by a
workshop.
When using underground car parks,
follow the instructions of the operator
and local laws.
Note
In the event of an accident, switch off
the ignition and lights. Close the
manual shut-off valve on multivalve.
Fuel for liquid gas operation 3 190.
Page 88 of 295
86Instruments and controlsControl indicators in the centre
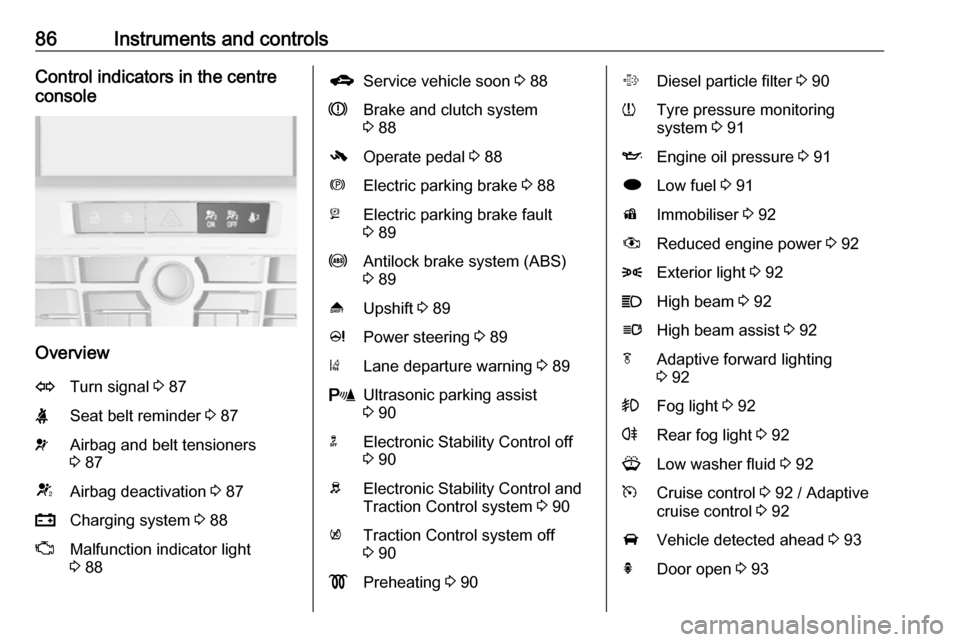
console
Overview
OTurn signal 3 87XSeat belt reminder 3 87vAirbag and belt tensioners
3 87VAirbag deactivation 3 87pCharging system 3 88ZMalfunction indicator light
3 88gService vehicle soon 3 88RBrake and clutch system
3 88-Operate pedal 3 88mElectric parking brake 3 88jElectric parking brake fault
3 89uAntilock brake system (ABS)
3 89[Upshift 3 89cPower steering 3 89)Lane departure warning 3 89rUltrasonic parking assist
3 90nElectronic Stability Control off
3 90bElectronic Stability Control and
Traction Control system 3 90kTraction Control system off
3 90!Preheating 3 90%Diesel particle filter 3 90wTyre pressure monitoring
system 3 91IEngine oil pressure 3 91iLow fuel 3 91dImmobiliser 3 92#Reduced engine power 3 928Exterior light 3 92CHigh beam 3 92lHigh beam assist 3 92fAdaptive forward lighting
3 92>Fog light 3 92rRear fog light 3 92GLow washer fluid 3 92mCruise control 3 92 / Adaptive
cruise control 3 92AVehicle detected ahead 3 93hDoor open 3 93
Page 89 of 295

Instruments and controls87Turn signal
O illuminates or flashes green.
Illuminates briefly The parking lights are switched on.
Flashes
A turn signal or the hazard warning
flashers are activated.
Rapid flashing: failure of a turn signal
light or associated fuse, failure of turn
signal light on trailer.
Bulb replacement 3 208, Fuses
3 222.
Turn signals 3 123.
Seat belt reminder
Seat belt reminder on front seats X for driver's seat illuminates or
flashes red.
k for front passenger seat illuminates
or flashes red, when the seat is
occupied.Illuminates
After the ignition has been switched
on until the seat belt has been
fastened.
Flashes
After having started the engine for a maximum of 100 seconds until the
seat belt has been fastened.
Airbag and belt tensioners v illuminates red.
When the ignition is switched on, the
control indicator illuminates for
approx. four seconds. If it does not
illuminate, does not go out after four
seconds or illuminates whilst driving,
there is a fault in the airbag system.
Seek the assistance of a workshop.
The airbags and belt pretensioners
may fail to trigger in the event of an
accident.
Deployment of the belt pretensioners
or airbags is indicated by continuous
illumination of v.9 Warning
Have the cause of the fault
remedied immediately by a
workshop.
Belt pretensioners, airbag system
3 48, 3 51.
Airbag deactivation
V illuminates yellow.
Illuminates for approx. 60 seconds
after the ignition is switched on. The
front passenger airbag is activated.
* illuminates yellow.
The front passenger airbag is
deactivated 3 54.
9 Danger
Risk of fatal injury for a child using
a child restraint system together
with activated front passenger
airbag.
Risk of fatal injury for an adult
person with deactivated front
passenger airbag.
Page 90 of 295
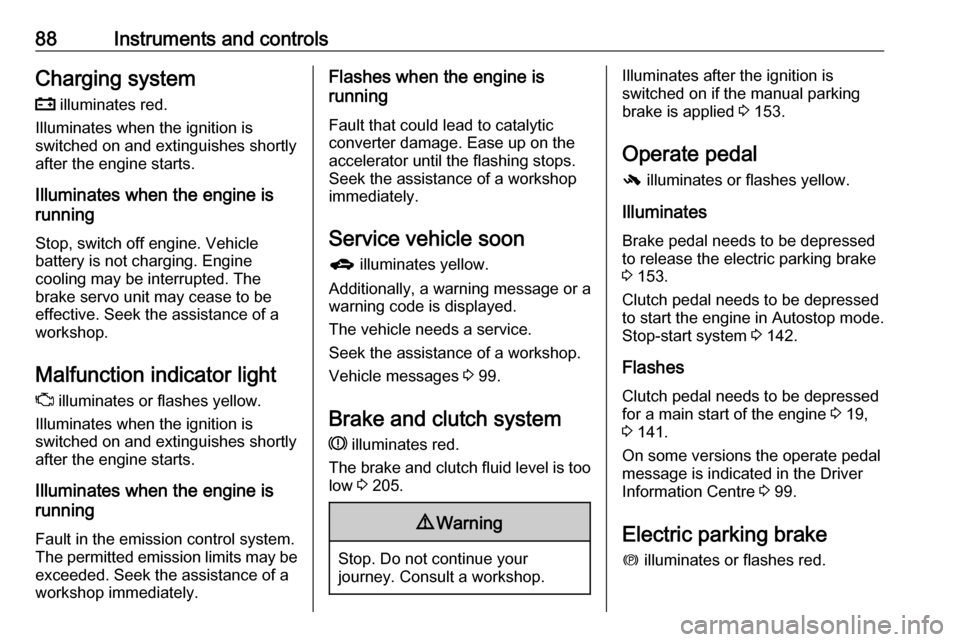
88Instruments and controlsCharging systemp illuminates red.
Illuminates when the ignition is
switched on and extinguishes shortly
after the engine starts.
Illuminates when the engine is
running
Stop, switch off engine. Vehicle
battery is not charging. Engine
cooling may be interrupted. The
brake servo unit may cease to be
effective. Seek the assistance of a
workshop.
Malfunction indicator light Z illuminates or flashes yellow.
Illuminates when the ignition is
switched on and extinguishes shortly
after the engine starts.
Illuminates when the engine is
running
Fault in the emission control system. The permitted emission limits may be exceeded. Seek the assistance of a
workshop immediately.Flashes when the engine is
running
Fault that could lead to catalytic converter damage. Ease up on the
accelerator until the flashing stops.
Seek the assistance of a workshop
immediately.
Service vehicle soon g illuminates yellow.
Additionally, a warning message or a
warning code is displayed.
The vehicle needs a service.
Seek the assistance of a workshop.
Vehicle messages 3 99.
Brake and clutch system
R illuminates red.
The brake and clutch fluid level is too low 3 205.9 Warning
Stop. Do not continue your
journey. Consult a workshop.
Illuminates after the ignition is
switched on if the manual parking
brake is applied 3 153.
Operate pedal - illuminates or flashes yellow.
Illuminates
Brake pedal needs to be depressed
to release the electric parking brake
3 153.
Clutch pedal needs to be depressed
to start the engine in Autostop mode.
Stop-start system 3 142.
Flashes
Clutch pedal needs to be depressed
for a main start of the engine 3 19,
3 141.
On some versions the operate pedal
message is indicated in the Driver
Information Centre 3 99.
Electric parking brake m illuminates or flashes red.