ECO mode OPEL ASTRA K 2019.5 Manual user
[x] Cancel search | Manufacturer: OPEL, Model Year: 2019.5, Model line: ASTRA K, Model: OPEL ASTRA K 2019.5Pages: 311, PDF Size: 9.52 MB
Page 5 of 311

Introduction3Vehicle specific dataPlease enter your vehicle's data on
the previous page to keep it easily
accessible.
Refer to the sections "Service and
maintenance", "Technical data", the
vehicle’s identification plate and
national registration documents.
Introduction
Your vehicle is a designed
combination of advanced technology, safety, environmental friendliness
and economy.
This Owner's Manual provides you
with all the necessary information to
enable you to drive your vehicle
safely and efficiently.
Make sure your passengers are
aware of the possible risk of accident
and injury which may result from
improper use of the vehicle.
You must always comply with the
specific laws and regulations of the
country that you are in. These laws
may differ from the information in this Owner's Manual.Disregarding the description given in
this manual may affect your warranty.
When this Owner's Manual refers to a
workshop visit, we recommend your
Opel Service Partner.
For gas vehicles we recommend an
Opel Repairer authorised for
servicing gas vehicles.
All Opel Service Partners provide
first-class service at reasonable
prices. Experienced mechanics
trained by Opel work according to
specific Opel instructions.
The customer literature pack should
always be kept ready to hand in the
vehicle.
Using this manual ● This manual describes all options
and features available for this
model. Certain descriptions,
including those for display and
menu functions, may not apply to
your vehicle due to model
variant, country specifications,
special equipment or
accessories.● The "In brief" section will give you
an initial overview.
● The table of contents at the beginning of this manual and
within each section shows where the information is located.
● The index will enable you to search for specific information.
● This Owner's Manual depicts left-
hand drive vehicles. Operation is similar for right-hand drive
vehicles.
● The Owner's Manual uses the engine identifier code. The
corresponding sales designation
and engineering code can be
found in the section "Technical
data".
● Directional data, e.g. left or right, or front or back, always relate to
the direction of travel.
● Displays may not support your specific language.
● Display messages and interior labelling are written in bold
letters.
Page 13 of 311

In brief111Power windows .....................41
2 Exterior mirrors .....................39
3 Central locking system ..........24
4 Side air vents ...................... 155
5 Cruise control .....................181
Speed limiter ....................... 183
Adaptive cruise control .......185
Forward collision alert .........192
6 Turn lights, headlight
flash, low / high beam,
high beam assist .................141
Exit lighting ......................... 145
Parking lights ...................... 142
Buttons for Driver
Information Centre ..............114
7 Instruments ........................ 102
Driver Information Centre .... 114
8 Buttons for Driver
Information Centre ..............114
9 Forward collision alert
indicator ............................. 192
10 Windscreen wiper and
washer, rear wiper and
washer ................................. 9211Centre air vents ................... 155
12 Info Display ......................... 119
13 Anti-theft alarm system
status LED ........................... 36
14 Hazard warning flashers ....141
15 Glovebox .............................. 71
16 CD player
17 Controls for Info Display
operation ............................. 119
18 Climate control system ........ 148
19 Fuse box ............................ 248
20 Traction Control system .....178
Electronic Stability Control . 179
Sport mode ........................ 181
Parking assist / Advanced
parking assist .....................199
Lane keep assist ................214
Eco button for stop-start
system ................................. 163
Fuel selector ....................... 104
21 Manual transmission ..........175
Automatic transmission ......172
22 Power outlet .......................... 97
23 Parking brake ......................17624Power button ....................... 159
25 Ignition switch .....................158
26 Steering wheel adjustment ..91
27 Horn ..................................... 92
28 Bonnet release lever ..........229
29 Storage compartment ...........72
30 Light switch ........................ 135
Headlight range
adjustment ......................... 138
Front / rear fog lights ..........142
Instrument illumination .......143
Page 27 of 311
Keys, doors and windows25Unlocking mode can be set in the
vehicle personalisation menu in the
Info Display. Two settings are
selectable:
● All doors, load compartment and fuel filler flap will be unlocked by
pressing c once.
● Only the driver's door and fuel filler flap will be unlocked by
pressing c once. To unlock all
doors and load compartment,
press c twice.
Select the relevant setting in Settings
I Vehicle in the Info Display.
Info Display 3 119.
Vehicle personalisation 3 123.
The setting can be saved for the remote control being used.
Memorised settings 3 24.
Unlocking and opening the tailgate 3 30.
Locking
Close doors, load compartment and fuel filler flap.
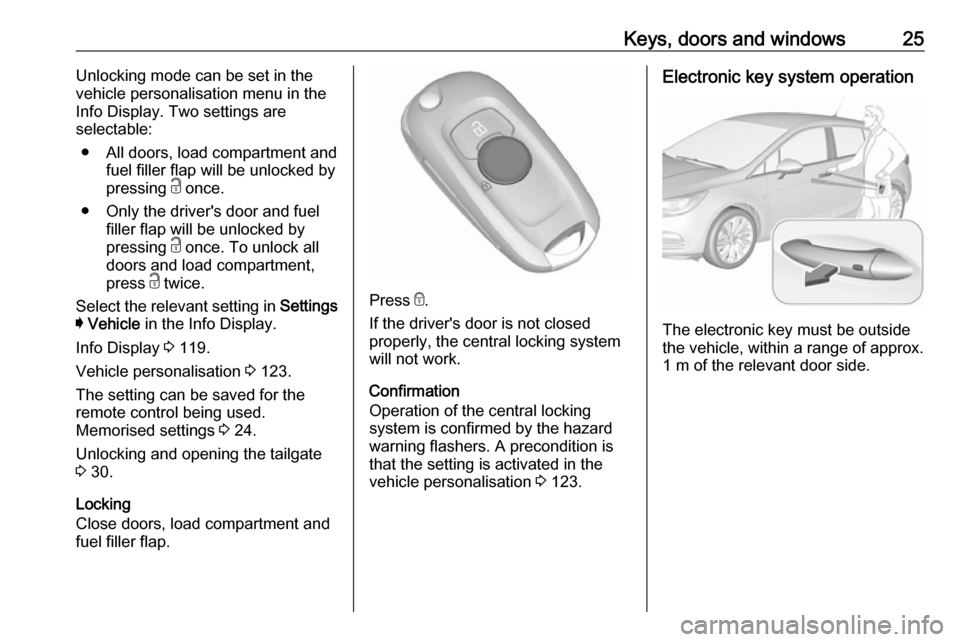
Press e.
If the driver's door is not closed properly, the central locking system will not work.
Confirmation
Operation of the central locking
system is confirmed by the hazard
warning flashers. A precondition is
that the setting is activated in the
vehicle personalisation 3 123.
Electronic key system operation
The electronic key must be outside
the vehicle, within a range of approx. 1 m of the relevant door side.
Page 28 of 311
26Keys, doors and windowsUnlocking
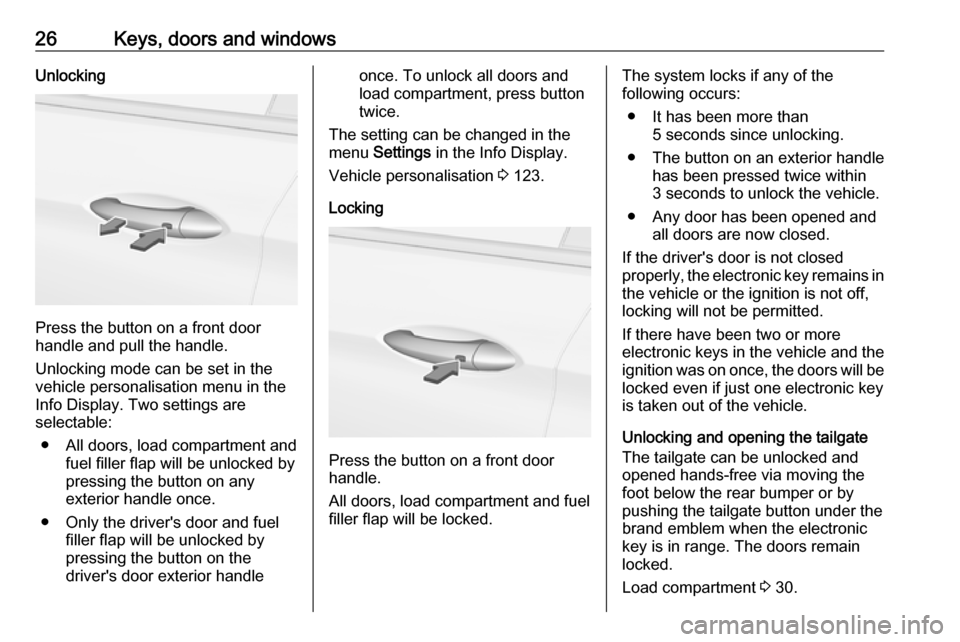
Press the button on a front door
handle and pull the handle.
Unlocking mode can be set in the
vehicle personalisation menu in the
Info Display. Two settings are
selectable:
● All doors, load compartment and fuel filler flap will be unlocked by
pressing the button on any
exterior handle once.
● Only the driver's door and fuel filler flap will be unlocked by
pressing the button on the
driver's door exterior handle
once. To unlock all doors and
load compartment, press button
twice.
The setting can be changed in the
menu Settings in the Info Display.
Vehicle personalisation 3 123.
Locking
Press the button on a front door
handle.
All doors, load compartment and fuel
filler flap will be locked.
The system locks if any of the
following occurs:
● It has been more than 5 seconds since unlocking.
● The button on an exterior handle has been pressed twice within
3 seconds to unlock the vehicle.
● Any door has been opened and all doors are now closed.
If the driver's door is not closed
properly, the electronic key remains in the vehicle or the ignition is not off,
locking will not be permitted.
If there have been two or more
electronic keys in the vehicle and the
ignition was on once, the doors will be
locked even if just one electronic key
is taken out of the vehicle.
Unlocking and opening the tailgate
The tailgate can be unlocked and
opened hands-free via moving the
foot below the rear bumper or by
pushing the tailgate button under the
brand emblem when the electronic
key is in range. The doors remain
locked.
Load compartment 3 30.
Page 36 of 311
34Keys, doors and windows● press C on the open tailgate,
or
● press C on the inside of the
driver's door.
Pressing one of the switches again
will reverse the direction of
movement.
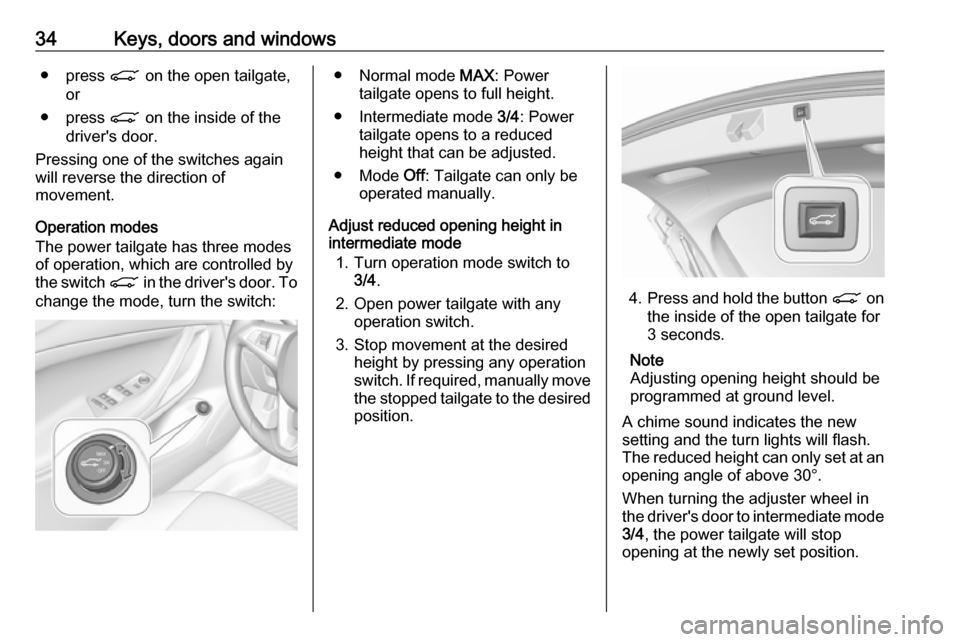
Operation modes
The power tailgate has three modes
of operation, which are controlled by
the switch C in the driver's door. To
change the mode, turn the switch:● Normal mode MAX: Power
tailgate opens to full height.
● Intermediate mode 3/4: Power
tailgate opens to a reduced
height that can be adjusted.
● Mode Off: Tailgate can only be
operated manually.
Adjust reduced opening height in
intermediate mode
1. Turn operation mode switch to 3/4 .
2. Open power tailgate with any operation switch.
3. Stop movement at the desired height by pressing any operation
switch. If required, manually move
the stopped tailgate to the desired
position.
4. Press and hold the button C on
the inside of the open tailgate for
3 seconds.
Note
Adjusting opening height should be programmed at ground level.
A chime sound indicates the new
setting and the turn lights will flash.
The reduced height can only set at an
opening angle of above 30°.
When turning the adjuster wheel in
the driver's door to intermediate mode 3/4 , the power tailgate will stop
opening at the newly set position.
Page 98 of 311
96Instruments and controlsGraphic Info DisplayPress MENU to open the respective
audio menu.
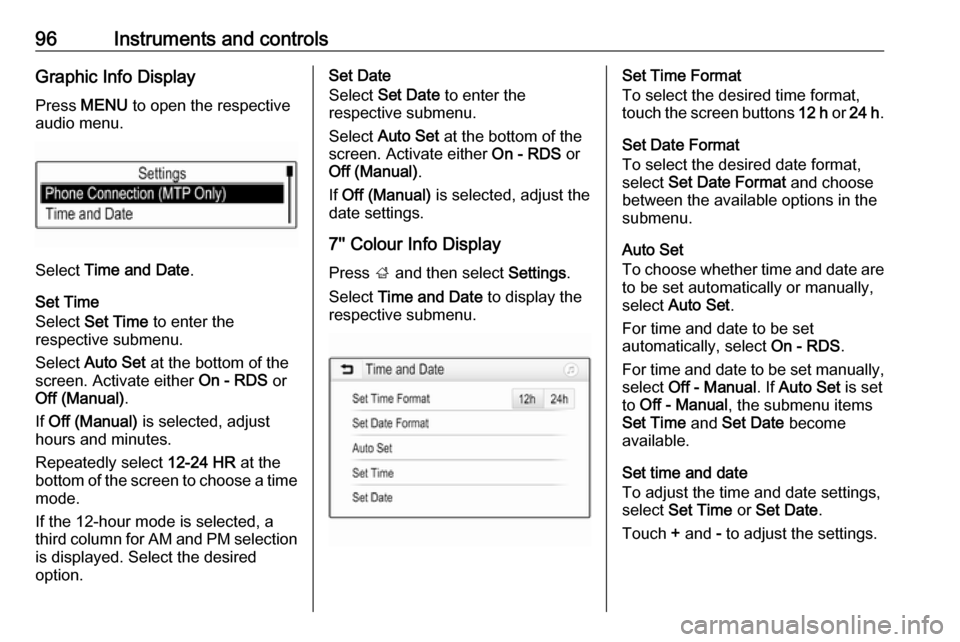
Select Time and Date .
Set Time
Select Set Time to enter the
respective submenu.
Select Auto Set at the bottom of the
screen. Activate either On - RDS or
Off (Manual) .
If Off (Manual) is selected, adjust
hours and minutes.
Repeatedly select 12-24 HR at the
bottom of the screen to choose a time mode.
If the 12-hour mode is selected, a
third column for AM and PM selection
is displayed. Select the desired
option.
Set Date
Select Set Date to enter the
respective submenu.
Select Auto Set at the bottom of the
screen. Activate either On - RDS or
Off (Manual) .
If Off (Manual) is selected, adjust the
date settings.
7'' Colour Info Display
Press ; and then select Settings.
Select Time and Date to display the
respective submenu.Set Time Format
To select the desired time format,
touch the screen buttons 12 h or 24 h .
Set Date Format
To select the desired date format,
select Set Date Format and choose
between the available options in the
submenu.
Auto Set
To choose whether time and date are
to be set automatically or manually,
select Auto Set .
For time and date to be set
automatically, select On - RDS.
For time and date to be set manually, select Off - Manual . If Auto Set is set
to Off - Manual , the submenu items
Set Time and Set Date become
available.
Set time and date
To adjust the time and date settings, select Set Time or Set Date .
Touch + and - to adjust the settings.
Page 107 of 311
Instruments and controls105The LED status shows the current
operating mode.LED off:petrol operationLED illu‐
minates:natural gas operationLED
flashes for
approx.
five
seconds:fuel mode transition is
selected but switching
is not possibleLED
flashes:fuel mode transition in
process, flashing stops
if transition is completed
Switching is not possible at high loads (e.g. powerful acceleration, driving at
full throttle).
If the selector switch is operated
several times within a short time, a
switchover inhibitor is activated. The
engine remains in the current
operating mode. The inhibitor
remains active until the ignition is
switched off.
A slight loss of power and torque can
be expected during petrol operation.
You must therefore adapt your driving style, e.g. during overtaking
manoeuvres and high vehicle loads
(e.g. towing loads) accordingly.
The vehicle consumes petrol when
starting the engine and even when in
certain natural gas operating modes. The petrol consumption in natural gas
operating mode can vary depending
on driving behaviour (e.g. high load or
towing). In case of a low fuel level, a
corresponding message is displayed
as a reminder to refuel.
Note
Always ensure that there is enough
petrol in the tank.
Fuel for natural gas operation 3 218.
Forced fuel mode transitionNatural gas tank is running low
As soon as the natural gas tank is
empty, petrol operation is
automatically engaged. Manually
engaging natural gas operation mode is not possible until natural gas
refuelling is detected.
Before the petrol fuel system runs empty, a warning message will be
displayed and cannot be dismissed.Petrol tank is running low while
natural gas is available
If the remaining petrol level in the tank falls below a certain level, natural gas
operation is automatically engaged
provided there is a sufficient natural
gas level in the tank. Manually
engaging petrol operation mode is not
possible.
Before both fuel systems run empty,
a warning message will be displayed
and cannot be dismissed.
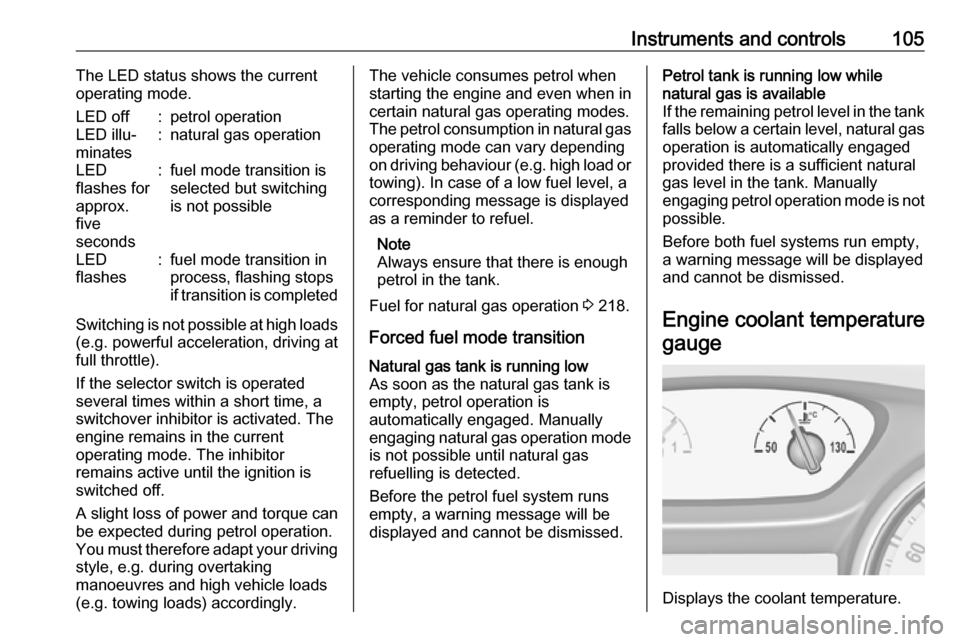
Engine coolant temperaturegauge
Displays the coolant temperature.
Page 112 of 311

110Instruments and controlsIlluminates
Electric parking brake is operating
with degraded performance 3 176.
Flashes
Electric parking brake is in service mode. Stop vehicle, apply and
release the electric parking brake to
reset.9 Warning
Have the cause of the fault
remedied immediately by a
workshop. Avoid parking on
inclines until the cause of the fault has been remedied.
Antilock brake system
(ABS)
u illuminates yellow.
Illuminates for a few seconds after the
ignition is switched on. The system is ready for operation when the control
indicator extinguishes.
If the control indicator does not go out after a few seconds, or if it illuminates while driving, there is a fault in the
ABS. The brake system remains
operational but without ABS
regulation.
Antilock brake system 3 175.
Gear shifting
R or S with the number of a higher or
lower gear is indicated, when up- or
downshifting is recommended for fuel
saving reasons.
Following distance
E indicates the following distance
setting of the alert timing sensitivity
for the forward collision alert using
filled distance bars.
Forward collision alert 3 192.
Lane keep assist a illuminates green or yellow, or
flashes yellow.Illuminates green
The system is switched on and ready
to operate.
Illuminates yellow
The system approaches a detected
lane marking without using the turn
lights in that direction.
Flashes yellow
The system recognizes that the lane
is departed significantly.
Lane keep assist 3 214.
Electronic Stability Control off
n illuminates yellow.
The system is deactivated.
Electronic Stability Control and Traction Control system
b illuminates or flashes yellow.
Page 118 of 311

116Instruments and controlsSome of the displayed functions differ
when the vehicle is being driven or at
a standstill and some functions are
only active when the vehicle is being
driven.
Trip / fuel information menu, ;
or Info
The following list contains all possible
Info Menu pages. Some may not be
available for your particular vehicle.
Depending on the display, some
functions are symbolised.
Turn the adjuster wheel or press Q
or P to select a page:
● Trip odometer 1/2 or A/B
● Average fuel consumption
● Average speed
● Digital speed
● Fuel range
● Instantaneous fuel consumption
● Remaining oil life
● Tyre pressure
● Traffic sign assistant
● Following distance
● Timer● Outside temperature ● AdBlue level
On Midlevel display the pages
Remaining Oil Life, Tyre Pressure,
Traffic Sign Assistant and Following
Distance are displayed in the Vehicle information menu, select ?.
Trip odometer 1/2 or A/B
Trip odometer displays the current
distance since a certain reset.
Trip odometer counts up to a distance
of 9,999 km then restarts at 0.
To reset on Midlevel display, press
SET/CLR for a few seconds.
To reset on Uplevel display, press >
and confirm with 9.
The information of trip odometer page
1/A and 2/B can be reset separately
while the respective display is active.
Average Fuel Consumption
Display of average consumption. The measurement can be reset at any
time and starts with a default value.To reset on Midlevel display, press
SET/CLR for a few seconds, on
Uplevel display, press > and confirm
with 9.
On vehicles with bi-fuel engines:
Average consumption is indicated for
the currently selected mode, CNG or
petrol.
Average speed
Display of average speed. The
measurement can be reset at any
time.
To reset on Midlevel display, press
SET/CLR for a few seconds, on
Uplevel display, press > and confirm
with 9.
Digital speed
Digital display of the instantaneous
speed.
Fuel range
Range is calculated from current fuel
level and current consumption. The
display shows average values.
After refuelling, the range is updated
automatically after a brief delay.
Page 119 of 311
Instruments and controls117When the fuel level is low, a message
appears on the display and the
control indicator Y in the fuel gauge
illuminates.
When the fuel tank must be refuelled
immediately, a warning message
appears and remains on the display.
Additionally, control indicator Y in the
fuel gauge flashes 3 112.
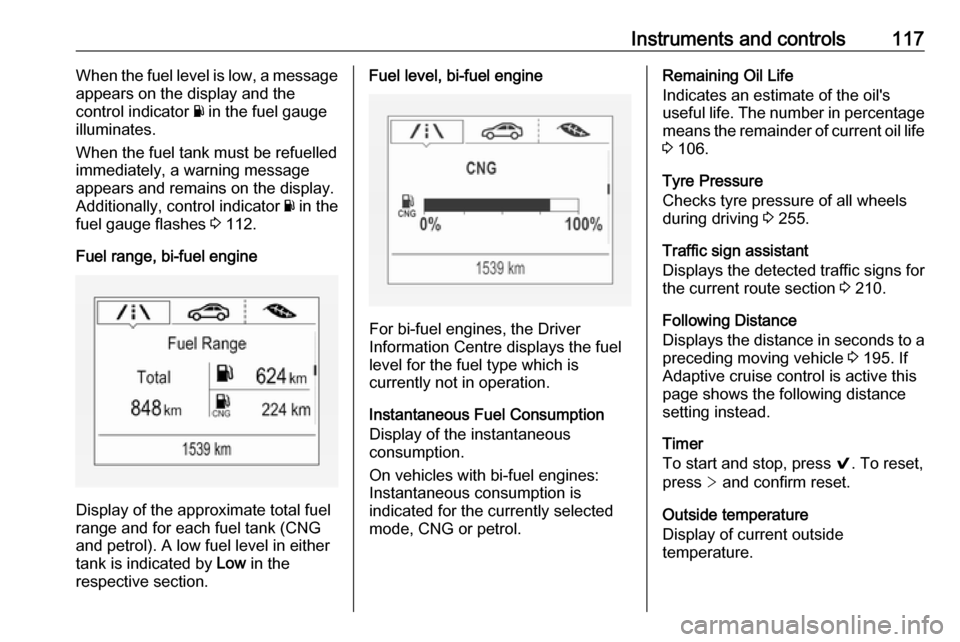
Fuel range, bi-fuel engine
Display of the approximate total fuel
range and for each fuel tank (CNG
and petrol). A low fuel level in either
tank is indicated by Low in the
respective section.
Fuel level, bi-fuel engine
For bi-fuel engines, the Driver
Information Centre displays the fuel level for the fuel type which is
currently not in operation.
Instantaneous Fuel Consumption
Display of the instantaneous
consumption.
On vehicles with bi-fuel engines:
Instantaneous consumption is
indicated for the currently selected
mode, CNG or petrol.
Remaining Oil Life
Indicates an estimate of the oil's
useful life. The number in percentage means the remainder of current oil life 3 106.
Tyre Pressure
Checks tyre pressure of all wheels
during driving 3 255.
Traffic sign assistant
Displays the detected traffic signs for
the current route section 3 210.
Following Distance
Displays the distance in seconds to a
preceding moving vehicle 3 195. If
Adaptive cruise control is active this
page shows the following distance
setting instead.
Timer
To start and stop, press 9. To reset,
press > and confirm reset.
Outside temperature
Display of current outside
temperature.