headlights OPEL CASCADA 2015 Manual user
[x] Cancel search | Manufacturer: OPEL, Model Year: 2015, Model line: CASCADA, Model: OPEL CASCADA 2015Pages: 253, PDF Size: 7.58 MB
Page 121 of 253
Lighting119Reversing lightsThe reversing light comes on when
the ignition is on and reverse gear is
selected.
Misted light covers The inside of the light housing may
mist up briefly in poor, wet and cold weather conditions, in heavy rain or
after washing. The mist disappears
quickly by itself; to help switch on the
headlights.Interior lighting
Instrument panel
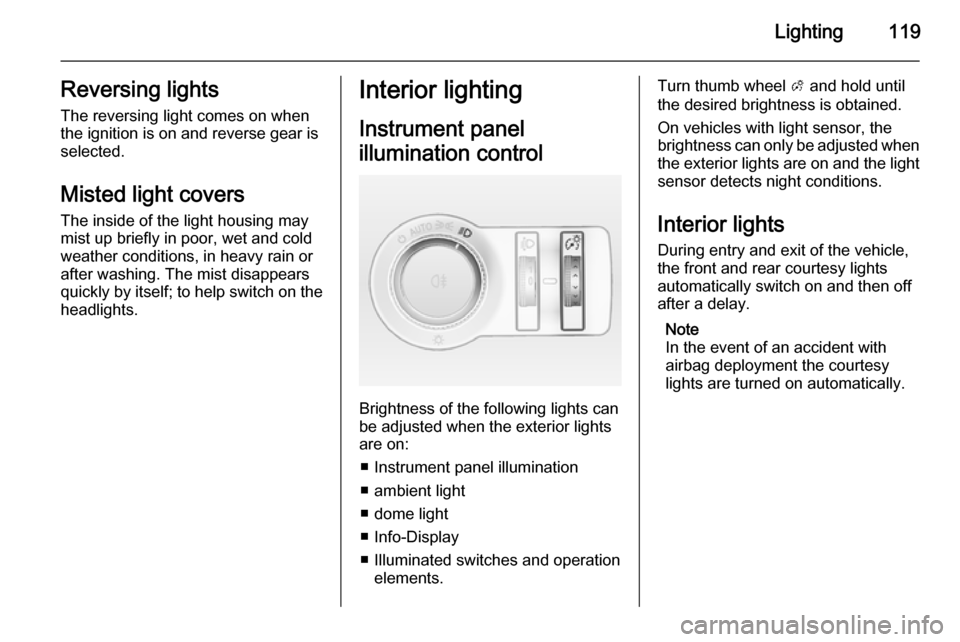
illumination control
Brightness of the following lights can
be adjusted when the exterior lights
are on:
■ Instrument panel illumination
■ ambient light
■ dome light
■ Info-Display
■ Illuminated switches and operation elements.
Turn thumb wheel A and hold until
the desired brightness is obtained.
On vehicles with light sensor, the
brightness can only be adjusted when
the exterior lights are on and the light sensor detects night conditions.
Interior lights
During entry and exit of the vehicle,
the front and rear courtesy lights
automatically switch on and then off
after a delay.
Note
In the event of an accident with airbag deployment the courtesy
lights are turned on automatically.
Page 122 of 253
120Lighting
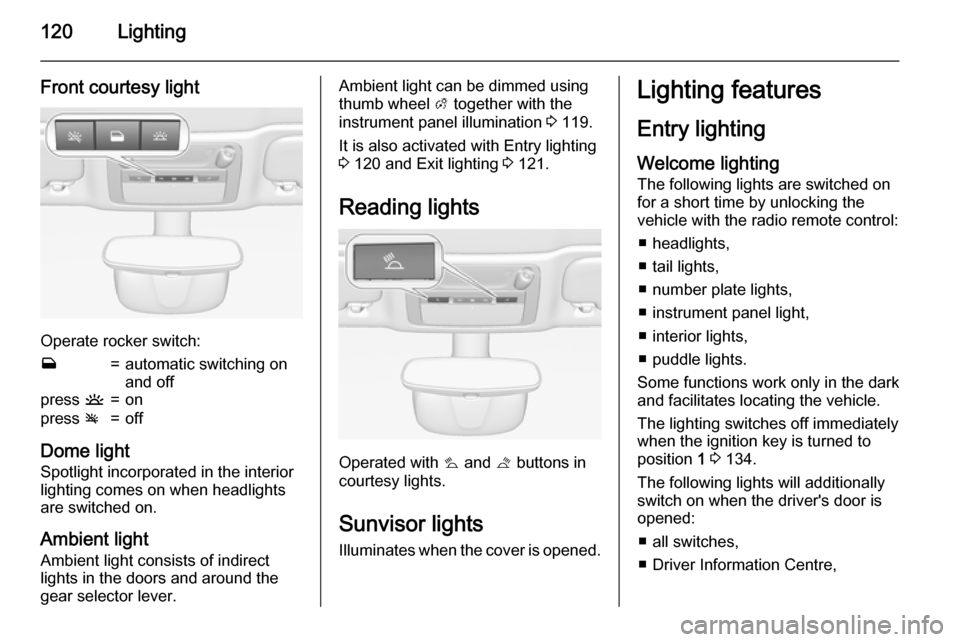
Front courtesy light
Operate rocker switch:
w=automatic switching on
and offpress u=onpress v=off
Dome light
Spotlight incorporated in the interior
lighting comes on when headlights
are switched on.
Ambient light Ambient light consists of indirect
lights in the doors and around the
gear selector lever.
Ambient light can be dimmed using
thumb wheel A together with the
instrument panel illumination 3 119.
It is also activated with Entry lighting
3 120 and Exit lighting 3 121.
Reading lights
Operated with s
and t buttons in
courtesy lights.
Sunvisor lights Illuminates when the cover is opened.
Lighting features
Entry lighting
Welcome lighting
The following lights are switched on
for a short time by unlocking the
vehicle with the radio remote control:
■ headlights,
■ tail lights,
■ number plate lights,
■ instrument panel light,
■ interior lights,
■ puddle lights.
Some functions work only in the dark
and facilitates locating the vehicle.
The lighting switches off immediately
when the ignition key is turned to
position 1 3 134.
The following lights will additionally
switch on when the driver's door is
opened:
■ all switches,
■ Driver Information Centre,
Page 123 of 253
Lighting121
■ door pocket lights,
■ console lights.
Activation, deactivation and duration
of this function can be changed in the
Info-Display. Vehicle personalisation
3 104.
The settings can be saved for the key being used 3 22.
Exit lighting The following lights switch on if the
key is removed from the ignition
switch:
■ Interior lights
■ Instrument panel light (only when it
is dark)
■ Door and console lights
■ Puddle lights
They will switch off automatically after
a delay and will be activated again if
the driver's door is opened.
Headlights, tail lights and number
plate lights illuminate the surrounding area for an adjustable time after
leaving the vehicle.Path lighting
Headlights, tail lights and number
plate lights illuminate the surrounding area for an adjustable time after
leaving the vehicle.
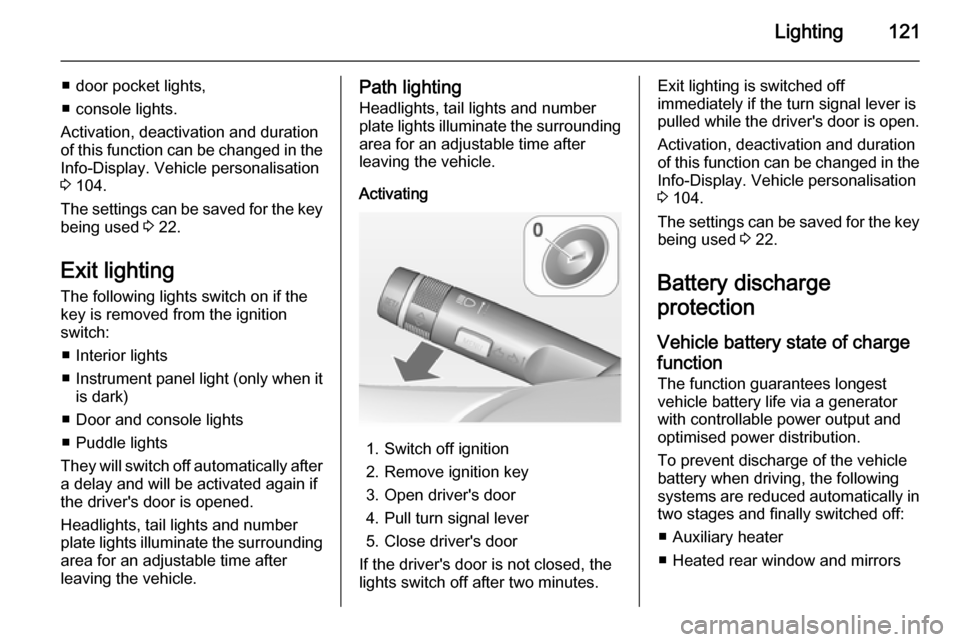
Activating
1. Switch off ignition
2. Remove ignition key
3. Open driver's door
4. Pull turn signal lever
5. Close driver's door
If the driver's door is not closed, the
lights switch off after two minutes.
Exit lighting is switched off
immediately if the turn signal lever is pulled while the driver's door is open.
Activation, deactivation and duration
of this function can be changed in the Info-Display. Vehicle personalisation
3 104.
The settings can be saved for the key being used 3 22.
Battery discharge
protection
Vehicle battery state of charge
function
The function guarantees longest
vehicle battery life via a generator
with controllable power output and
optimised power distribution.
To prevent discharge of the vehicle
battery when driving, the following
systems are reduced automatically in two stages and finally switched off:
■ Auxiliary heater
■ Heated rear window and mirrors
Page 170 of 253
168Driving and operating
Activation or deactivation of the rear
view camera can be changed in the
Settings menu in the Info-Display.
Vehicle personalisation 3 104.
Fault Fault messages are displayed with a9 on the top line of the Info-Display.
The rear view camera may not
operate properly when:
■ the surrounding is dark,
■ the sun or the beam of headlights is
shining directly into the camera
lens,
■ ice, snow, mud, or anything else covers the camera lens. Clean the
lens, rinse it with water, and wipe it
with a soft cloth,
■ the vehicle had a rear end accident,
■ there are extreme temperature changes.Traffic sign assistant
Functionality
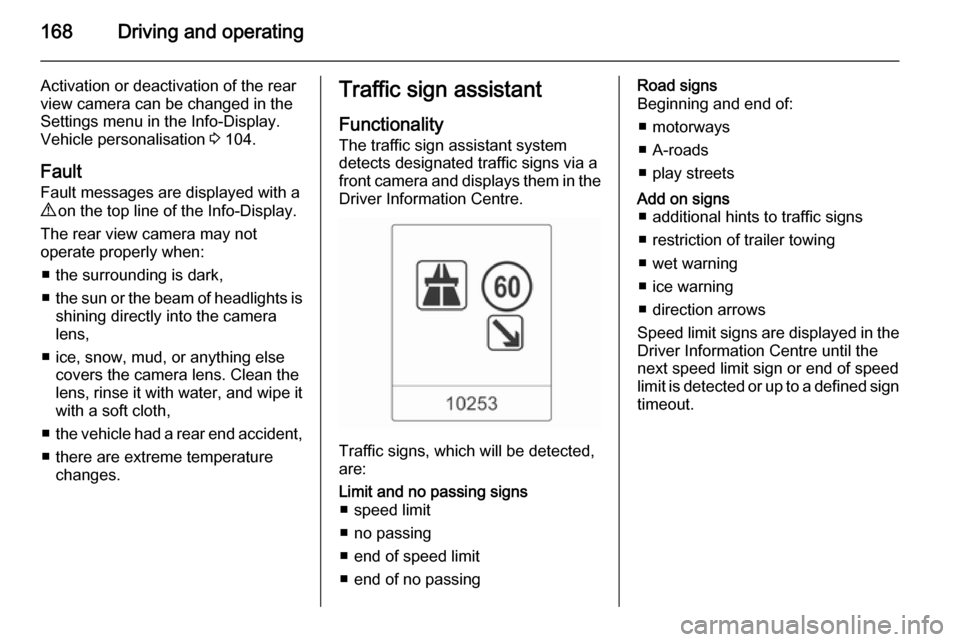
The traffic sign assistant system
detects designated traffic signs via a
front camera and displays them in the
Driver Information Centre.
Traffic signs, which will be detected,
are:
Limit and no passing signs ■ speed limit
■ no passing
■ end of speed limit
■ end of no passingRoad signs
Beginning and end of:
■ motorways
■ A-roads
■ play streetsAdd on signs ■ additional hints to traffic signs
■ restriction of trailer towing
■ wet warning
■ ice warning
■ direction arrows
Speed limit signs are displayed in the
Driver Information Centre until the
next speed limit sign or end of speed
limit is detected or up to a defined sign timeout.
Page 185 of 253
Vehicle care1839Danger
The ignition system and Xenon
headlights use extremely high
voltage. Do not touch.
Bonnet
Opening
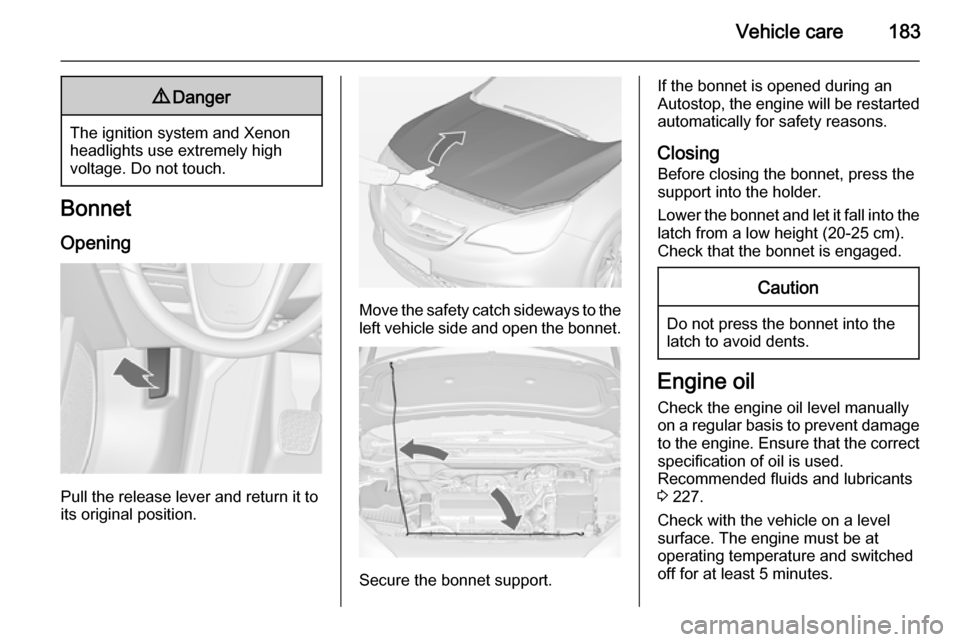
Pull the release lever and return it to
its original position.
Move the safety catch sideways to the left vehicle side and open the bonnet.
Secure the bonnet support.
If the bonnet is opened during an
Autostop, the engine will be restarted automatically for safety reasons.
Closing Before closing the bonnet, press the
support into the holder.
Lower the bonnet and let it fall into the
latch from a low height (20-25 cm).
Check that the bonnet is engaged.Caution
Do not press the bonnet into the
latch to avoid dents.
Engine oil
Check the engine oil level manually on a regular basis to prevent damage
to the engine. Ensure that the correct
specification of oil is used.
Recommended fluids and lubricants
3 227.
Check with the vehicle on a level
surface. The engine must be at
operating temperature and switched
off for at least 5 minutes.
Page 191 of 253

Vehicle care189
Lift the wiper arm until it stays in the
raised position, press button to
disengage the wiper blade and
remove.
Attach the wiper blade slightly angled
to the wiper arm and push until it
engages.
Lower wiper arm carefully.Bulb replacement
Switch off the ignition and switch off
the relevant switch or close the doors.
Only hold a new bulb at the base. Do
not touch the bulb glass with bare
hands.
Use only the same bulb type for
replacement.
Replace headlight bulbs from within the engine compartment.
Bulb check
After a bulb replacement switch on
the ignition, operate and check the
lights.Halogen headlights
Bi-Halogen Headlight (1) with one
bulb for low and high beam.
Sidelight/Daytime running light (2) .
Page 193 of 253
Vehicle care191
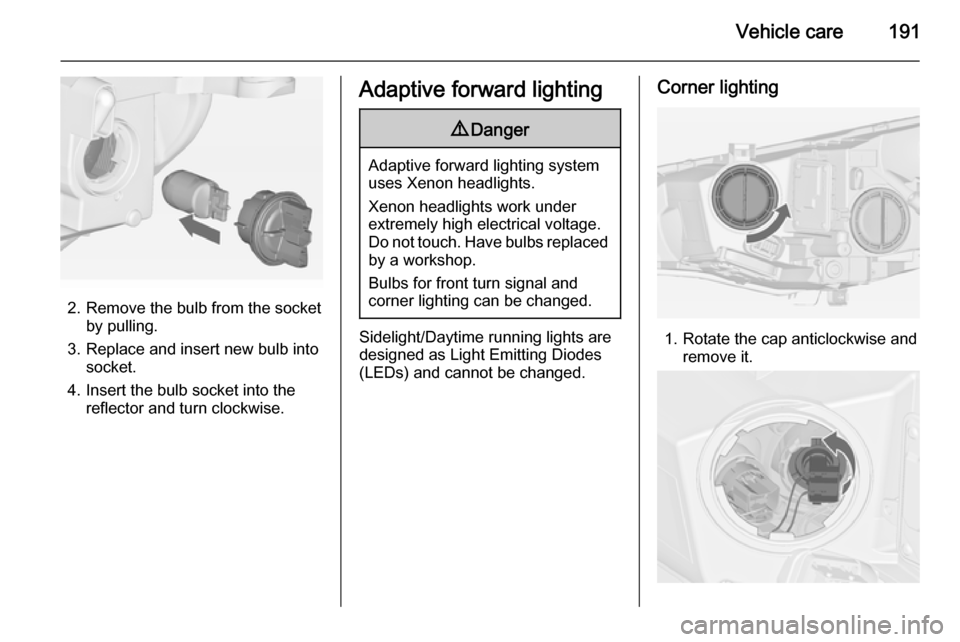
2. Remove the bulb from the socketby pulling.
3. Replace and insert new bulb into socket.
4. Insert the bulb socket into the reflector and turn clockwise.
Adaptive forward lighting9 Danger
Adaptive forward lighting system
uses Xenon headlights.
Xenon headlights work under
extremely high electrical voltage.
Do not touch. Have bulbs replaced by a workshop.
Bulbs for front turn signal and
corner lighting can be changed.
Sidelight/Daytime running lights are
designed as Light Emitting Diodes
(LEDs) and cannot be changed.
Corner lighting
1. Rotate the cap anticlockwise and remove it.
Page 195 of 253

Vehicle care193Front turn signal lights
1. Rotate cap (1) anticlockwise andremove it.
2. Graphic shows version withhalogen headlights.
Graphic shows version with
adaptive forward lighting
headlights.
Rotate bulb socket anticlockwise
to disengage and withdraw from
the reflector.
3. Remove the bulb from the socket by turning anticlockwise.
4. Replace and insert new bulb into socket by turning clockwise.
5. Insert the bulb socket into the reflector and turn clockwise.
6. Fit the cap and rotate clockwise.
Page 222 of 253
220Vehicle care
3. Connect the black lead to thenegative terminal of the booster
battery.
4. Connect the other end of the black
lead to a vehicle grounding point,
such as the engine block or an
engine mounting bolt. Connect as far away from the discharged
battery as possible, however at
least 60 cm.
Route the leads so that they cannot
catch on rotating parts in the engine
compartment.
To start the engine: 1. Start the engine of the vehicle providing the jump.
2. After 5 minutes, start the other engine. Start attempts should be
made for no longer than
15 seconds at an interval of 1 minute.
3. Allow both engines to idle for approx. 3 minutes with the leads
connected.4. Switch on electrical consumers (e.g. headlights, heated rear
window) of the vehicle receiving
the jump start.
5. Reverse above sequence exactly when removing leads.Towing
Towing the vehicle
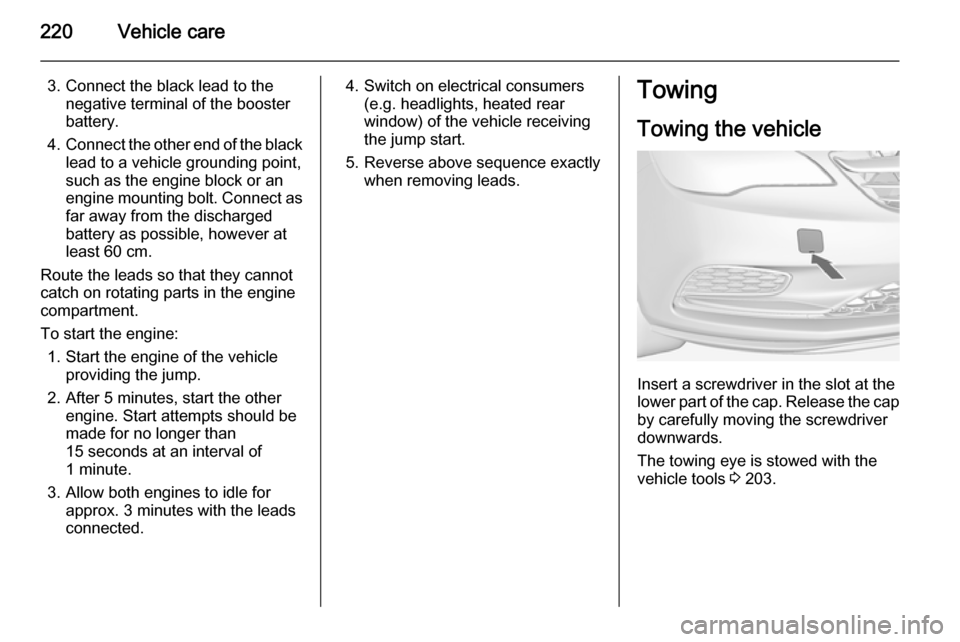
Insert a screwdriver in the slot at the
lower part of the cap. Release the cap
by carefully moving the screwdriver
downwards.
The towing eye is stowed with the
vehicle tools 3 203.
Page 249 of 253

247
Clock............................................. 82
Code ........................................... 102
Control indicators.......................... 88
Control of the vehicle .................133
Controls ........................................ 78
Convex shape .............................. 30
Coolant and antifreeze ...............227
Cruise control ...................... 95, 151
Cupholders .................................. 71
Curve lighting.............................. 114
D Danger, Warnings and Cautions ...3
Daytime running lights ...............114
Declaration of conformity ............241
Diesel fuel system bleeding .......188
Diesel particle filter ...............93, 139
Door open .................................... 95
Doors ............................................ 25
Driver assistance systems ..........151
Driver Information Centre .............96
Driving characteristics and towing tips .............................. 175
Driving hints ................................ 133
E
Electric adjustment ......................30
Electrical system......................... 197
Electric parking brake ...........92, 145
Electric parking brake fault ...........92Electronic climate control system 126
Electronic driving programmes ..142
Electronic Stability Control.......... 148
Electronic Stability Control and Traction Control system ............93
Electronic Stability Control off....... 93
End-of-life vehicle recovery .......182
Engine compartment fuse box ...198
Engine coolant ........................... 185
Engine coolant temperature gauge ....................................... 87
Engine data ............................... 234
Engine exhaust .......................... 139
Engine identification ...................230
Engine oil ................... 183, 227, 231
Engine oil pressure ......................94
Entry lighting .............................. 120
Event data recorders ..................243
Exit lighting ................................ 121
Exterior care .............................. 222
Exterior light ................................. 95
Exterior lighting ....................13, 110
Exterior mirrors ............................. 30
F
Fault ........................................... 143
First aid ......................................... 76
First aid kit ................................... 76
Fixed air vents ........................... 131
Fog light ....................................... 95Fog lights ................................... 192
Folding mirrors ............................. 30
Following distance indication ......156
Forward collision alert................. 154
Front airbag system .....................61
Front fog lights ........................... 118
Front seats.................................... 48
Front storage ................................ 71
Front turn signal lights ...............193
Fuel............................................. 172
Fuel consumption - CO 2-
Emissions ............................... 174
Fuel for diesel engines ..............173
Fuel for petrol engines ...............172
Fuel gauge ................................... 87
Fuses ......................................... 197
G
Gauges ......................................... 85
General information ...................175
Glovebox ..................................... 70
Graphic-Info-Display, Colour- Info-Display ............................ 100
Ground clearance .......................134
H Halogen headlights ....................189
Hand brake ......................... 144, 145
Hazard warning flashers ............117
Headlight flash ........................... 112