warning OPEL CASCADA 2015 Manual user
[x] Cancel search | Manufacturer: OPEL, Model Year: 2015, Model line: CASCADA, Model: OPEL CASCADA 2015Pages: 253, PDF Size: 7.58 MB
Page 37 of 253
Keys, doors and windows35
If the sun visors have integral mirrors,the mirror covers should be closed
when driving.
A ticket holder is located on the
backside of the sun visor.Roof
Soft top9 Warning
Take care when operating the soft
top. Risk of injury. Monitor the
action zone above, to the side and to the rear of the vehicle during
operation.
Make sure that no body parts or
objects could get pinched. Make
sure that people stay clear of the
action zone of the soft top or soft
top lid. Risk of injury.
Check the height, length and width of the available space before
operating the soft top, e.g. in a
garage, parking garage or when a
bicycle rack is fitted.
Vehicle passengers should be
informed accordingly.
Before leaving the vehicle, remove the ignition key in order to prevent
unauthorised operation of the
windows and the soft top.
Operation with the switch in the
centre console
Operable with ignition switch in
position 1 or 2 (ignition on) 3 134.
The soft top can be opened and
closed while driving up to a speed of
50 km/h.
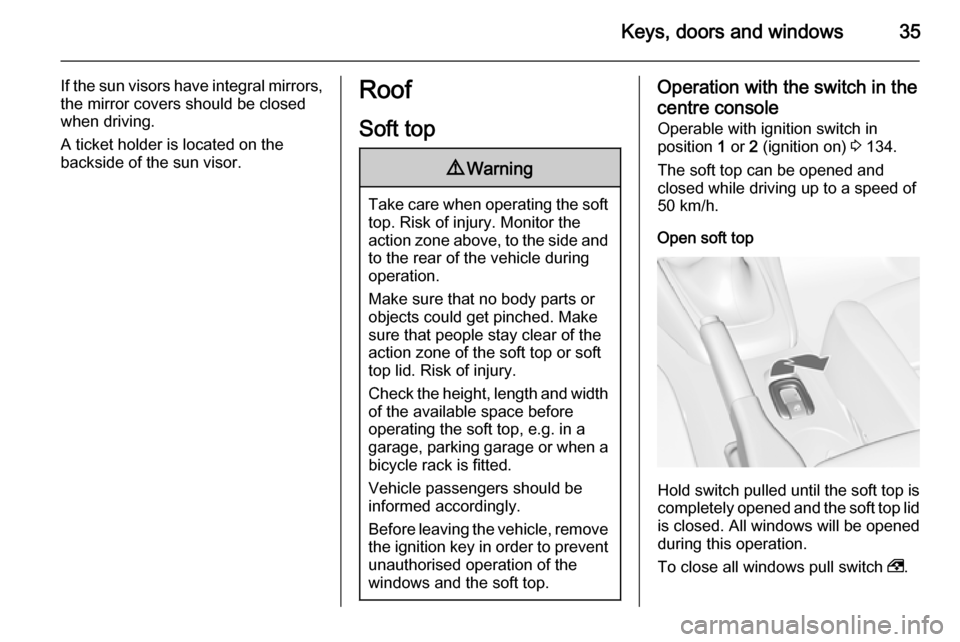
Open soft top
Hold switch pulled until the soft top is completely opened and the soft top lid
is closed. All windows will be opened
during this operation.
To close all windows pull switch ,.
Page 38 of 253
36Keys, doors and windows
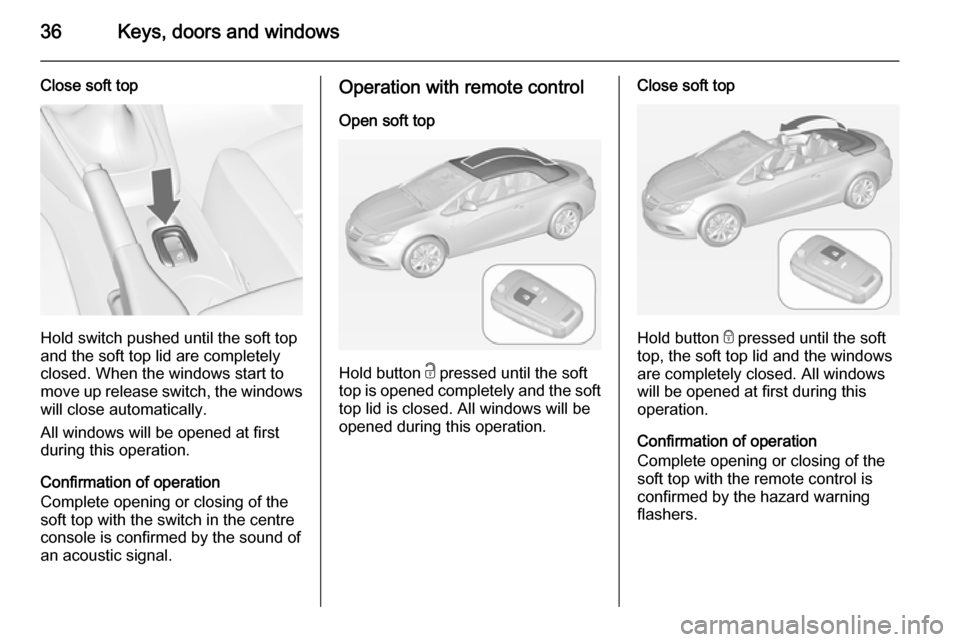
Close soft top
Hold switch pushed until the soft top
and the soft top lid are completely
closed. When the windows start to move up release switch, the windows will close automatically.
All windows will be opened at first
during this operation.
Confirmation of operation
Complete opening or closing of the
soft top with the switch in the centre
console is confirmed by the sound of
an acoustic signal.
Operation with remote control
Open soft top
Hold button c pressed until the soft
top is opened completely and the soft
top lid is closed. All windows will be
opened during this operation.
Close soft top
Hold button e pressed until the soft
top, the soft top lid and the windows
are completely closed. All windows
will be opened at first during this
operation.
Confirmation of operation
Complete opening or closing of the
soft top with the remote control is confirmed by the hazard warning
flashers.
Page 39 of 253
Keys, doors and windows37
Safety stopThe button on the remote control or
the switch in the centre console must
be actuated until the soft top is in its
respective end position. Releasing
the button or the switch during
operation stops soft top movement
immediately. The soft top remains in
intermediate position only for a
certain time. After this time a warning
chime sounds, the hydraulic pressure
in the system decreases and the soft top can start to move by itself.
Actuating button or switch once more continues operation.
Requirements for operation ■ Vehicle is stationary or driving with a speed up to 50 km/h.
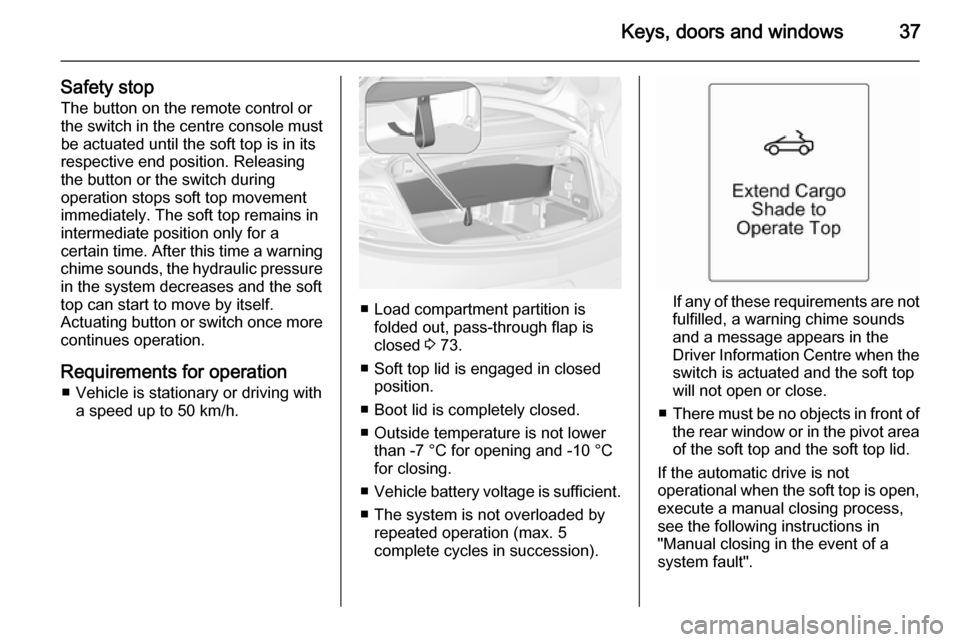
■ Load compartment partition isfolded out, pass-through flap is
closed 3 73.
■ Soft top lid is engaged in closed position.
■ Boot lid is completely closed.
■ Outside temperature is not lower than -7 °C for opening and -10 °C
for closing.
■ Vehicle battery voltage is sufficient.
■ The system is not overloaded by repeated operation (max. 5
complete cycles in succession).If any of these requirements are not
fulfilled, a warning chime sounds
and a message appears in the
Driver Information Centre when the switch is actuated and the soft top
will not open or close.
■ There must be no objects in front of
the rear window or in the pivot area of the soft top and the soft top lid.
If the automatic drive is not
operational when the soft top is open, execute a manual closing process,
see the following instructions in
"Manual closing in the event of a
system fault".
Page 40 of 253
38Keys, doors and windows
General hintsNote■ Always actuate the operation switch until the acoustic signal
sounds or the hazard warning flashers illuminate, to ensure thatthe soft top is completely opened
or closed.
■ The soft top can be held in an intermediate position to facilitate
cleaning of hood spaces and
gaskets. Release the switch in the
centre console during operation to
stop soft top movement in
intermediate position for a
maximum of 7 minutes when
ignition is on. After this time a warning chime sounds, the
hydraulic pressure in the system
decreases and the soft top can
start to move by itself.
■ Do not open the soft top if it is wet,
frozen or dirty.
■ Activating the soft top on uneven ground can lead to malfunctions
and damage.
■ Vehicle care 3 222.Manual closing in the event of a
system fault In case of malfunction of the electro-
hydraulic actuation, the opened soft
top can be closed manually.
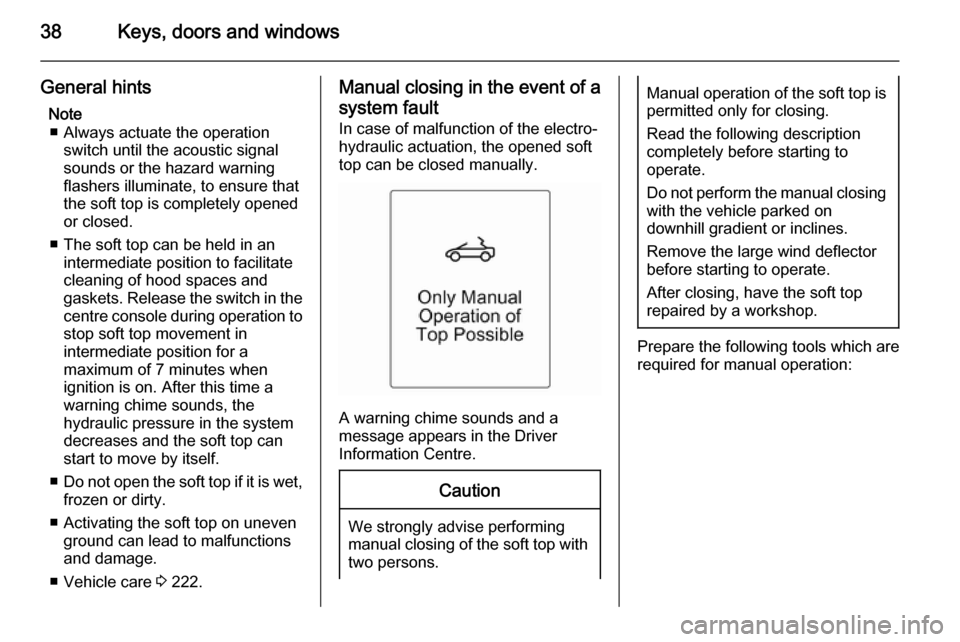
A warning chime sounds and a
message appears in the Driver
Information Centre.
Caution
We strongly advise performing manual closing of the soft top with
two persons.
Manual operation of the soft top is permitted only for closing.
Read the following description
completely before starting to
operate.
Do not perform the manual closing with the vehicle parked on
downhill gradient or inclines.
Remove the large wind deflector
before starting to operate.
After closing, have the soft top
repaired by a workshop.
Prepare the following tools which are
required for manual operation:
Page 47 of 253

Keys, doors and windows45
The airbag control indicator v
illuminates if the anti-roll bars have been deployed.
The system deploys with the soft top
opened or closed.
The soft top must not be operated if
the anti-roll bars have been deployed.
A continuous warning will sound and
a message appears in the Driver
Information Centre if the switch is
actuated.
Page 48 of 253
46Seats, restraintsSeats, restraintsHead restraints............................ 46
Front seats ................................... 48
Seat belts ..................................... 55
Airbag system .............................. 58
Child restraints ............................. 64Head restraints
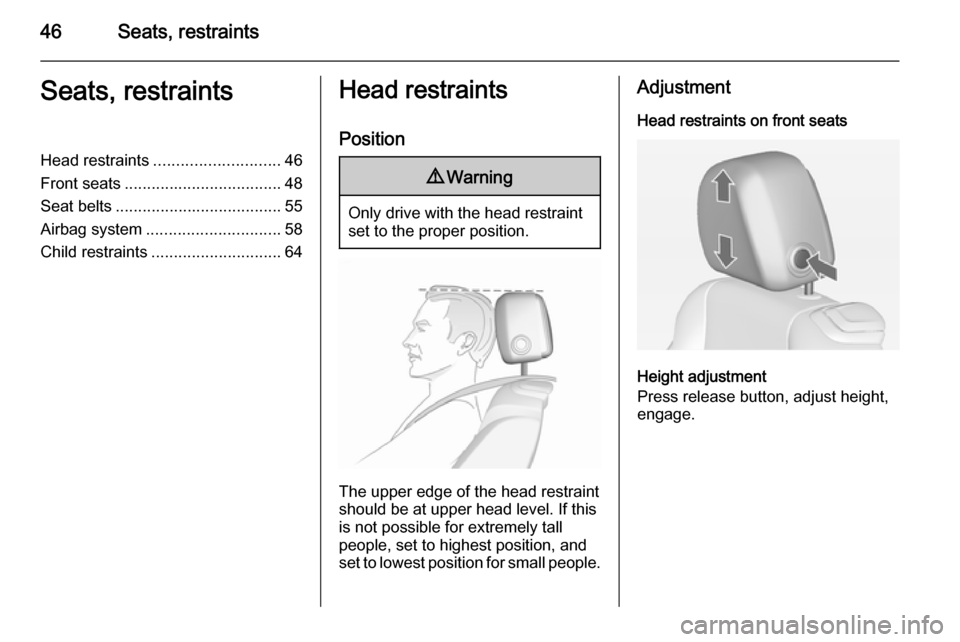
Position9 Warning
Only drive with the head restraint
set to the proper position.
The upper edge of the head restraint
should be at upper head level. If this
is not possible for extremely tall
people, set to highest position, and
set to lowest position for small people.
Adjustment
Head restraints on front seats
Height adjustment
Press release button, adjust height,
engage.
Page 50 of 253
48Seats, restraints
Note
Approved accessories may only be
attached if the seat is not in use.Front seats
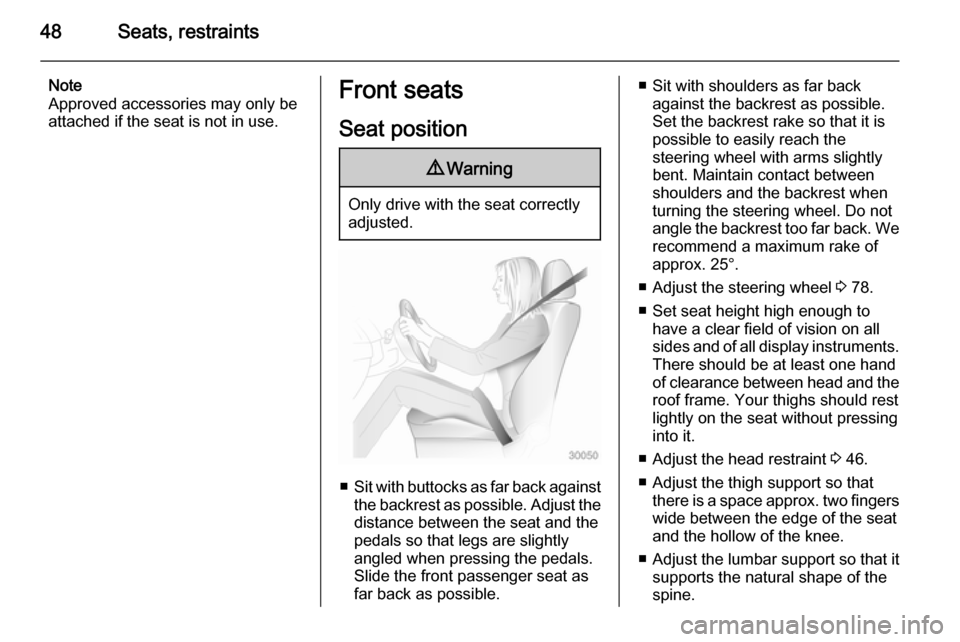
Seat position9 Warning
Only drive with the seat correctly
adjusted.
■ Sit with buttocks as far back against
the backrest as possible. Adjust the distance between the seat and the
pedals so that legs are slightly
angled when pressing the pedals.
Slide the front passenger seat as
far back as possible.
■ Sit with shoulders as far back against the backrest as possible.
Set the backrest rake so that it is possible to easily reach the
steering wheel with arms slightly bent. Maintain contact between
shoulders and the backrest when
turning the steering wheel. Do not
angle the backrest too far back. We recommend a maximum rake of
approx. 25°.
■ Adjust the steering wheel 3 78.
■ Set seat height high enough to have a clear field of vision on allsides and of all display instruments.
There should be at least one hand
of clearance between head and the
roof frame. Your thighs should rest
lightly on the seat without pressing
into it.
■ Adjust the head restraint 3 46.
■ Adjust the thigh support so that there is a space approx. two fingers
wide between the edge of the seat
and the hollow of the knee.
■ Adjust the lumbar support so that it
supports the natural shape of the
spine.
Page 51 of 253
Seats, restraints49Seat adjustment9Danger
Do not sit nearer than 25 cm from
the steering wheel, to permit safe
airbag deployment.
9 Warning
Never adjust seats while driving as
they could move uncontrollably.
Drive only with engaged seats and
backrests.
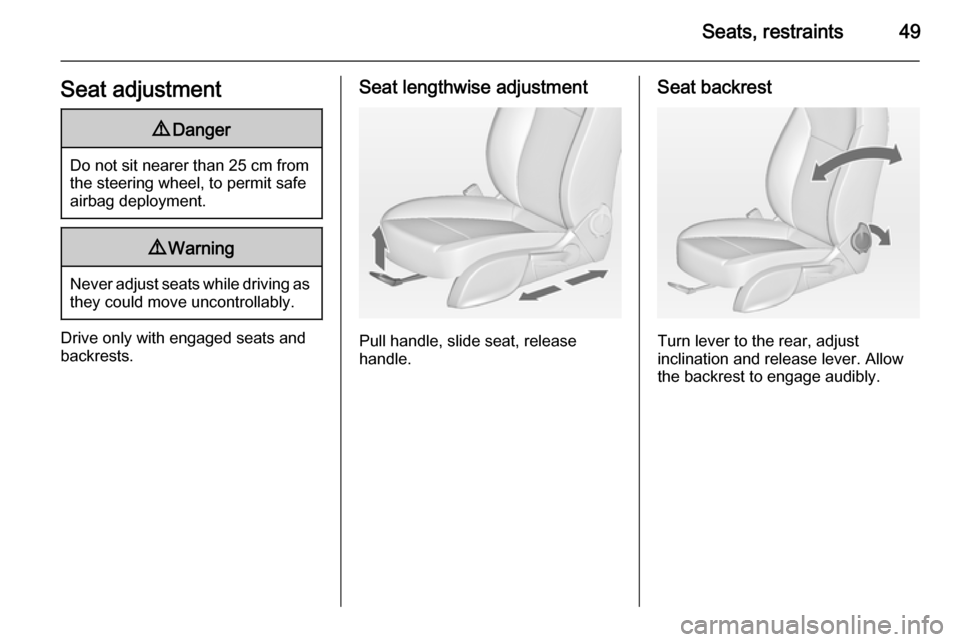
Seat lengthwise adjustment
Pull handle, slide seat, release
handle.
Seat backrest
Turn lever to the rear, adjust
inclination and release lever. Allow
the backrest to engage audibly.
Page 53 of 253
Seats, restraints51
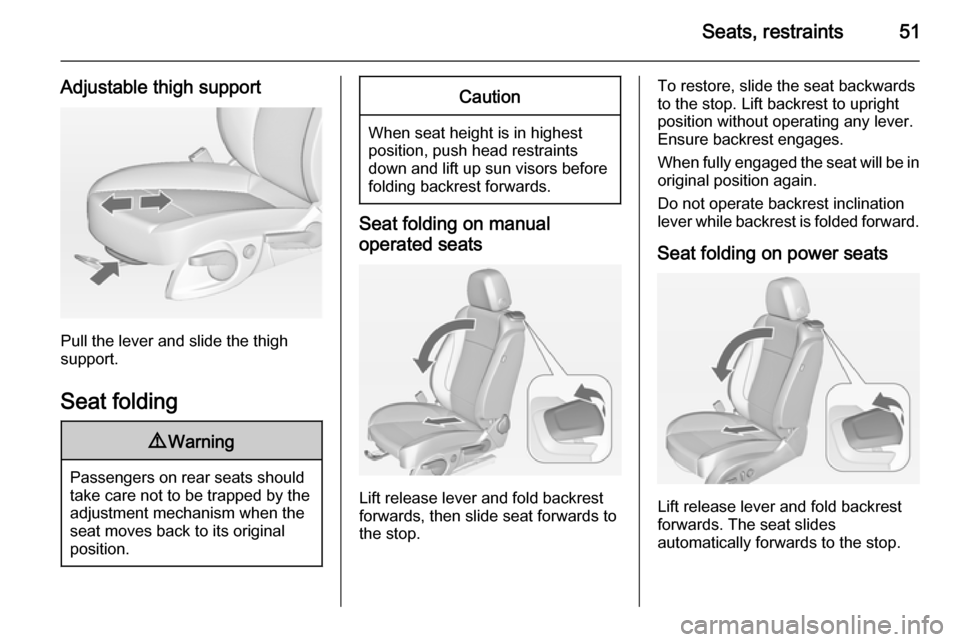
Adjustable thigh support
Pull the lever and slide the thigh
support.
Seat folding
9 Warning
Passengers on rear seats should
take care not to be trapped by the
adjustment mechanism when the
seat moves back to its original
position.
Caution
When seat height is in highest
position, push head restraints
down and lift up sun visors before
folding backrest forwards.
Seat folding on manual
operated seats
Lift release lever and fold backrest
forwards, then slide seat forwards to
the stop.
To restore, slide the seat backwards
to the stop. Lift backrest to upright
position without operating any lever.
Ensure backrest engages.
When fully engaged the seat will be in
original position again.
Do not operate backrest inclination
lever while backrest is folded forward.
Seat folding on power seats
Lift release lever and fold backrest
forwards. The seat slides
automatically forwards to the stop.
Page 54 of 253
52Seats, restraints
To restore, lift backrest to upright
position and engage. The seat slides
automatically backwards to the
original position.
In case the head restraint of the
folded backrest is blocked by the
upper windscreen frame, allow the
seat to move backwards or
downwards slightly 3 52, or set
head restraint to lowest position
3 46.
Safety function
If the power seat encounters
resistance while sliding forwards or
rearwards, it is immediately stopped
and moved in the opposite direction.
Note
Do not sit on the seat while seat is
moving.
Power disconnection
If seat remains in forward position
with opened door for more than
10 minutes, power adjustment is
disconnected. In this event, close and open the door or switch on ignition
and operate power adjustment again.Overload
If the folding function is electrically
overloaded, the power supply is
automatically cut-off for a short time.
Power seat adjustment9 Warning
Care must be taken when
operating the power seats. There
is a risk of injury, particularly for
children. Objects could become
trapped.
Keep a close watch on the seats
when adjusting them. Vehicle
passengers should be informed
accordingly.
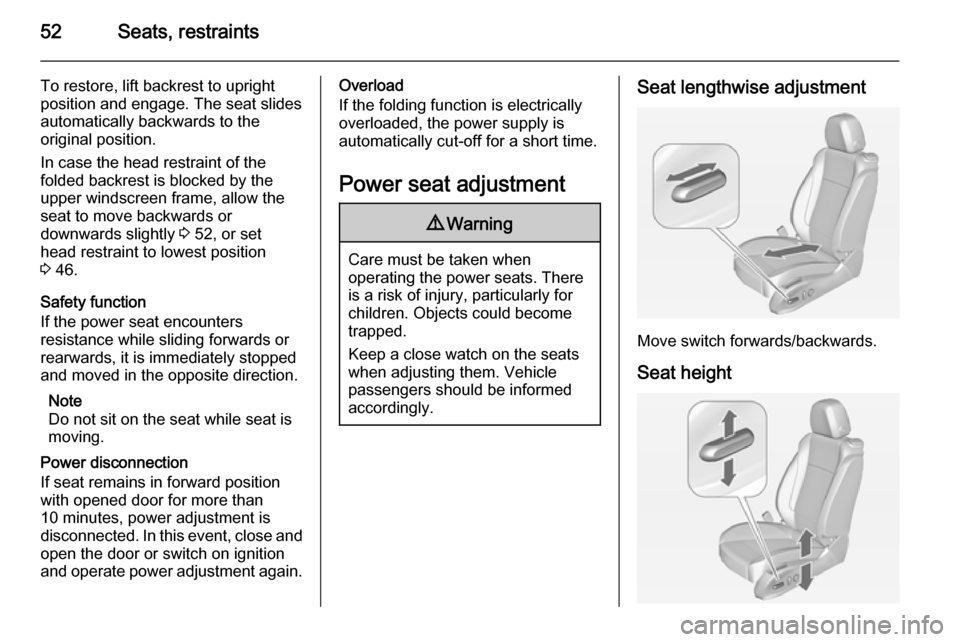
Seat lengthwise adjustment
Move switch forwards/backwards.
Seat height