display OPEL CASCADA 2015 Manual user
[x] Cancel search | Manufacturer: OPEL, Model Year: 2015, Model line: CASCADA, Model: OPEL CASCADA 2015Pages: 253, PDF Size: 7.58 MB
Page 119 of 253
Lighting117
Automatic high beam activation
operates at a speed above 40 km/h
and deactivates below 20 km/h.
Intelligent light ranging operates
above 55 km/h.
The green control indicator l
illuminates continuously when the
function is activated, the blue one 7
illuminates when high beam switches on automatically.
Deactivation
Push indicator lever once. It is also deactivated when front fog lights are
switched on.
Dynamic automatic headlight levelling
To prevent oncoming traffic from
dazzle, headlight levelling is
automatically adjusted based on
inclination information measured by
front and rear axle, acceleration or
deceleration and vehicle speed.Fault in Adaptive forward
lighting system When the system detects a failure in
the Adaptive forward lighting system,
the system moves to a preset position
to avoid dazzling of oncoming traffic.
If this is not possible, the affected headlight will be automatically
switched off. In any case, one
headlight will stay on. A warning is
displayed in the Driver Information Centre.
Hazard warning flashers
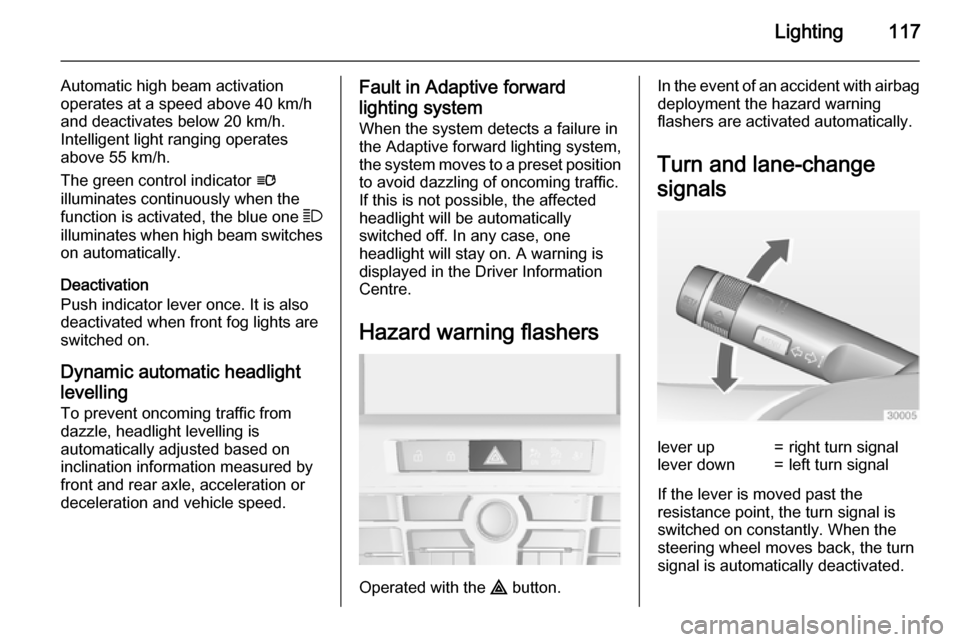
Operated with the ¨ button.
In the event of an accident with airbag
deployment the hazard warning
flashers are activated automatically.
Turn and lane-change
signalslever up=right turn signallever down=left turn signal
If the lever is moved past the
resistance point, the turn signal is
switched on constantly. When the
steering wheel moves back, the turn
signal is automatically deactivated.
Page 121 of 253
Lighting119Reversing lightsThe reversing light comes on when
the ignition is on and reverse gear is
selected.
Misted light covers The inside of the light housing may
mist up briefly in poor, wet and cold weather conditions, in heavy rain or
after washing. The mist disappears
quickly by itself; to help switch on the
headlights.Interior lighting
Instrument panel
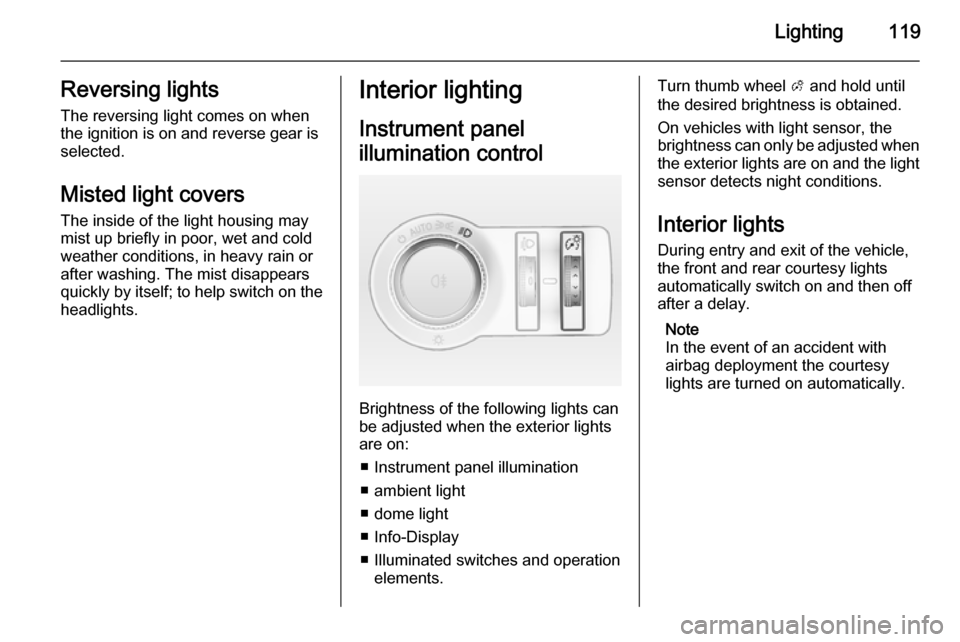
illumination control
Brightness of the following lights can
be adjusted when the exterior lights
are on:
■ Instrument panel illumination
■ ambient light
■ dome light
■ Info-Display
■ Illuminated switches and operation elements.
Turn thumb wheel A and hold until
the desired brightness is obtained.
On vehicles with light sensor, the
brightness can only be adjusted when
the exterior lights are on and the light sensor detects night conditions.
Interior lights
During entry and exit of the vehicle,
the front and rear courtesy lights
automatically switch on and then off
after a delay.
Note
In the event of an accident with airbag deployment the courtesy
lights are turned on automatically.
Page 123 of 253
Lighting121
■ door pocket lights,
■ console lights.
Activation, deactivation and duration
of this function can be changed in the
Info-Display. Vehicle personalisation
3 104.
The settings can be saved for the key being used 3 22.
Exit lighting The following lights switch on if the
key is removed from the ignition
switch:
■ Interior lights
■ Instrument panel light (only when it
is dark)
■ Door and console lights
■ Puddle lights
They will switch off automatically after
a delay and will be activated again if
the driver's door is opened.
Headlights, tail lights and number
plate lights illuminate the surrounding area for an adjustable time after
leaving the vehicle.Path lighting
Headlights, tail lights and number
plate lights illuminate the surrounding area for an adjustable time after
leaving the vehicle.
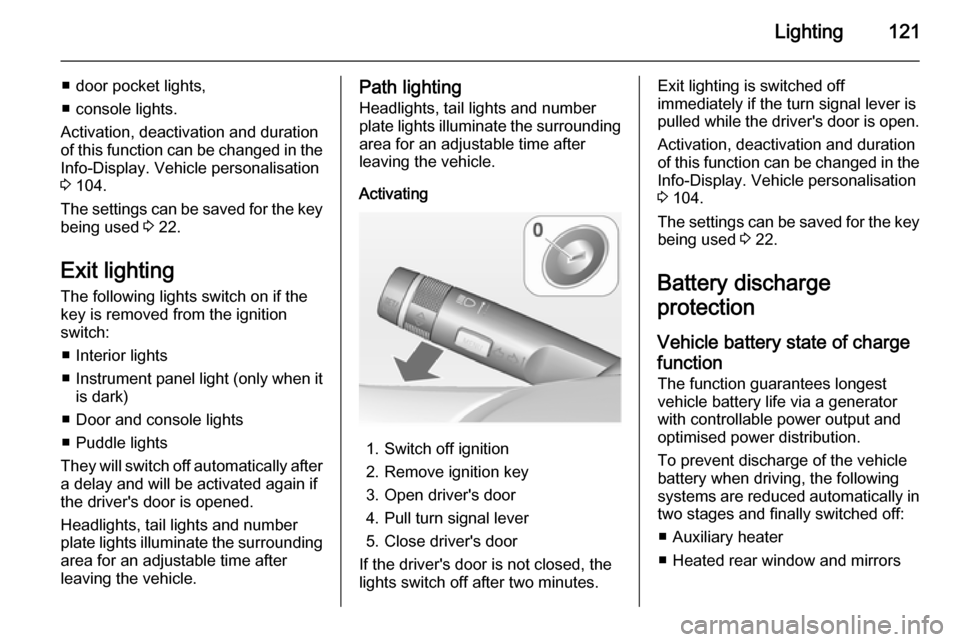
Activating
1. Switch off ignition
2. Remove ignition key
3. Open driver's door
4. Pull turn signal lever
5. Close driver's door
If the driver's door is not closed, the
lights switch off after two minutes.
Exit lighting is switched off
immediately if the turn signal lever is pulled while the driver's door is open.
Activation, deactivation and duration
of this function can be changed in the Info-Display. Vehicle personalisation
3 104.
The settings can be saved for the key being used 3 22.
Battery discharge
protection
Vehicle battery state of charge
function
The function guarantees longest
vehicle battery life via a generator
with controllable power output and
optimised power distribution.
To prevent discharge of the vehicle
battery when driving, the following
systems are reduced automatically in two stages and finally switched off:
■ Auxiliary heater
■ Heated rear window and mirrors
Page 124 of 253

122Lighting
■ Heated seats
■ Fan
In the second stage, a message
which confirms activation of the
vehicle battery discharge protection
will be displayed in the Driver
Information Centre.
Switching off electric lights
To prevent discharge of the vehicle
battery when the ignition is switched
off, some interior lights are switched
off automatically after some time.
Page 129 of 253
Climate control127
Heated rear window Ü 3 34, Heated
seats ß 3 54, Ventilated seats 3 54,
Heated steering wheel * 3 79.
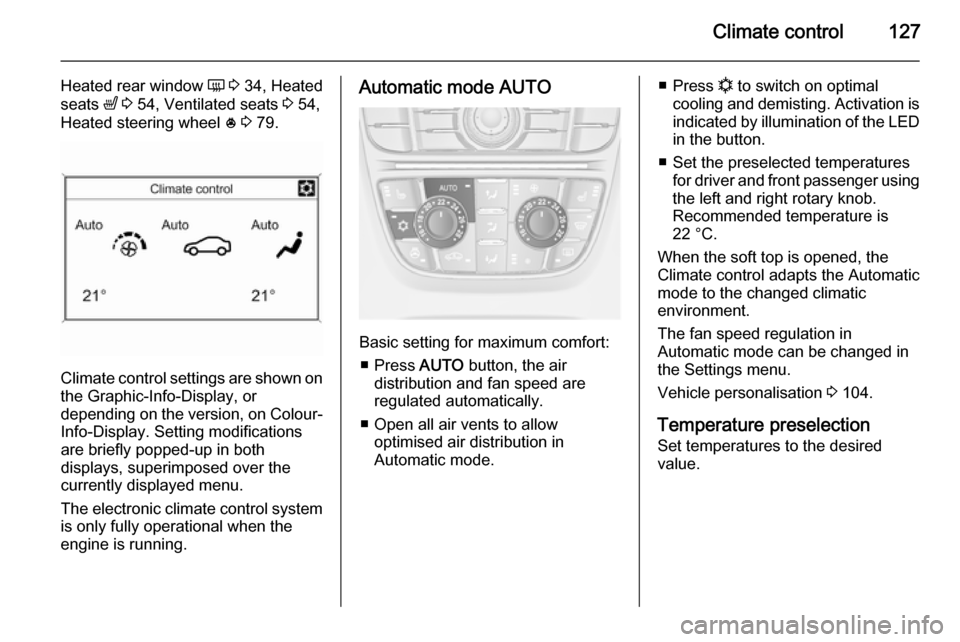
Climate control settings are shown on
the Graphic-Info-Display, or
depending on the version, on Colour- Info-Display. Setting modifications
are briefly popped-up in both
displays, superimposed over the
currently displayed menu.
The electronic climate control system
is only fully operational when the
engine is running.
Automatic mode AUTO
Basic setting for maximum comfort:
■ Press AUTO button, the air
distribution and fan speed are
regulated automatically.
■ Open all air vents to allow optimised air distribution in
Automatic mode.
■ Press n to switch on optimal
cooling and demisting. Activation is indicated by illumination of the LED
in the button.
■ Set the preselected temperatures for driver and front passenger using
the left and right rotary knob.
Recommended temperature is
22 °C.
When the soft top is opened, the
Climate control adapts the Automatic
mode to the changed climatic
environment.
The fan speed regulation in
Automatic mode can be changed in
the Settings menu.
Vehicle personalisation 3 104.
Temperature preselection
Set temperatures to the desired
value.
Page 130 of 253

128Climate control
If the minimum temperature Lo is set,
the climate control system runs at
maximum cooling, if cooling n is
switched on.
If the maximum temperature Hi is set,
the climate control system runs at
maximum heating.
Note
If n is switched on, reducing the set
cabin temperature can cause the
engine to restart from an Autostop or inhibit an Autostop.
Demisting and defrosting the
windows V
■
Press button V. Activation is
indicated by illumination of the LED
in the button.
■ Temperature and air distribution are set automatically and the fan
runs at high speed.
■ Switch on heated rear window Ü.
■ To return to previous mode: press button V, to return to Automatic
mode: press button AUTO.
Setting of automatic rear window
heating can be changed in the
Settings menu in the Info-Display.
Vehicle personalisation 3 104.
Note
If the V button is pressed while the
engine is running, an Autostop will
be inhibited until the V button is
pressed again.
If the s button is pressed with the fan
switched on and the engine running,
an Autostop will be inhibited until the s button is pressed again or until the
fan is switched off.
If the V button is pressed while the
engine is in an Autostop, the engine will restart automatically.
If the s button is pressed with the fan
switched on while the engine is in an Autostop, the engine will restart
automatically.
Stop-start system 3 136.
Page 131 of 253
Climate control129
Manual settingsClimate control system settings can
be changed by activating the buttons
and rotary knobs as follows.
Changing a setting will deactivate the Automatic mode.
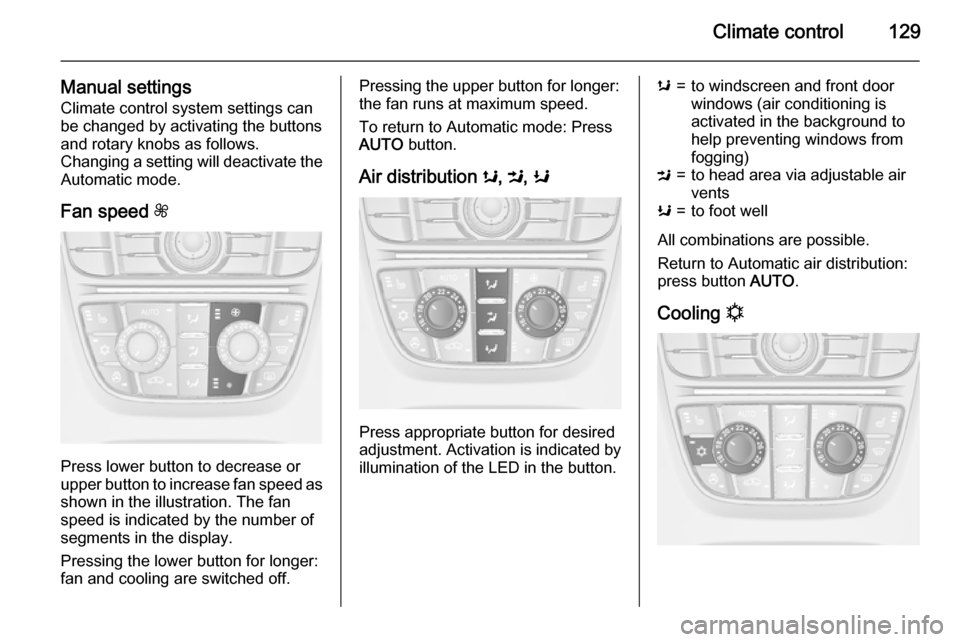
Fan speed Z
Press lower button to decrease or
upper button to increase fan speed as
shown in the illustration. The fan
speed is indicated by the number of
segments in the display.
Pressing the lower button for longer:
fan and cooling are switched off.
Pressing the upper button for longer:
the fan runs at maximum speed.
To return to Automatic mode: Press
AUTO button.
Air distribution s, M , K
Press appropriate button for desired
adjustment. Activation is indicated by illumination of the LED in the button.
s=to windscreen and front door
windows (air conditioning is
activated in the background to
help preventing windows from
fogging)M=to head area via adjustable air ventsK=to foot well
All combinations are possible.
Return to Automatic air distribution:
press button AUTO.
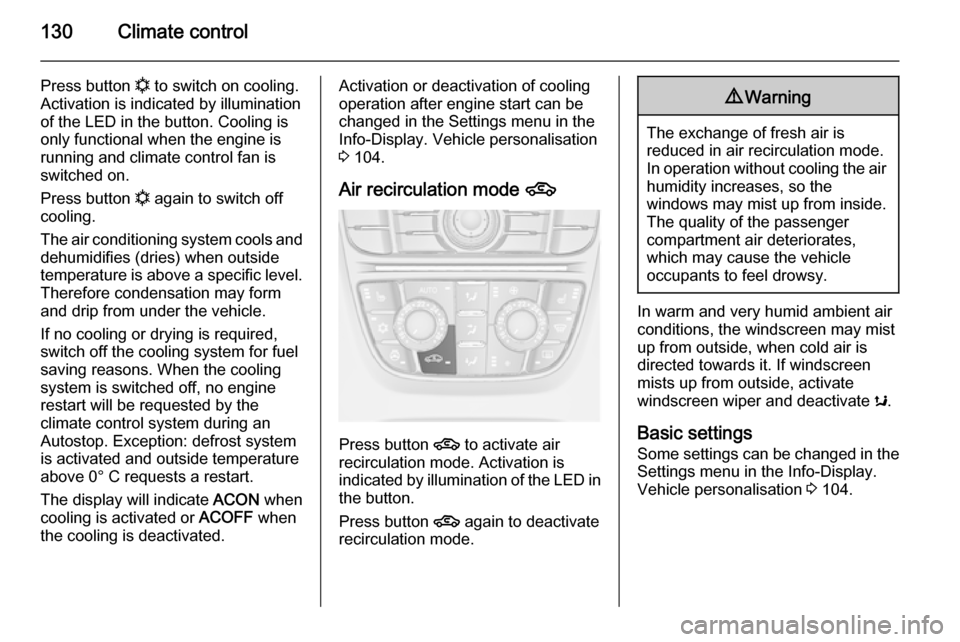
Cooling n
Page 132 of 253
130Climate control
Press button n to switch on cooling.
Activation is indicated by illumination
of the LED in the button. Cooling is
only functional when the engine is
running and climate control fan is switched on.
Press button n again to switch off
cooling.
The air conditioning system cools and
dehumidifies (dries) when outside
temperature is above a specific level. Therefore condensation may form
and drip from under the vehicle.
If no cooling or drying is required,
switch off the cooling system for fuel
saving reasons. When the cooling
system is switched off, no engine restart will be requested by the
climate control system during an
Autostop. Exception: defrost system
is activated and outside temperature
above 0° C requests a restart.
The display will indicate ACON when
cooling is activated or ACOFF when
the cooling is deactivated.Activation or deactivation of cooling
operation after engine start can be
changed in the Settings menu in the
Info-Display. Vehicle personalisation
3 104.
Air recirculation mode 4
Press button 4 to activate air
recirculation mode. Activation is
indicated by illumination of the LED in
the button.
Press button 4 again to deactivate
recirculation mode.
9 Warning
The exchange of fresh air is
reduced in air recirculation mode.
In operation without cooling the air humidity increases, so the
windows may mist up from inside.
The quality of the passenger
compartment air deteriorates,
which may cause the vehicle
occupants to feel drowsy.
In warm and very humid ambient air conditions, the windscreen may mist
up from outside, when cold air is
directed towards it. If windscreen
mists up from outside, activate
windscreen wiper and deactivate s.
Basic settings Some settings can be changed in the Settings menu in the Info-Display.
Vehicle personalisation 3 104.
Page 140 of 253

138Driving and operating
Restart of the engine by the
driver Depress the clutch pedal to restart the
engine.
The engine start is indicated by the
needle at the idle speed position in
the tachometer.
If the selector lever is shifted out of
neutral before depressing the clutch
first, control indicator - illuminates
or is shown as a symbol in the Driver Information Centre.
Control indicator - 3 91.
Restart of the engine by the
stop-start system The selector lever has to be in neutral
to enable an automatic restart.
If one of the following conditions
occurs during an Autostop, the
engine will be restarted automatically by the stop-start system:
■ The stop-start system is manually deactivated
■ the bonnet is opened
■ the driver's seat belt is unfastened and the driver's door is opened■ the engine temperature is too low
■ the charging level of the vehicle battery is below a defined level
■ the brake vacuum is not sufficient
■ the vehicle is driven at least at walking speed
■ the climate control system requests
an engine start
■ the air conditioning is manually switched on
If the bonnet is not fully closed, a
warning message is displayed in the
Driver Information Centre.
If an electrical accessory, e.g. a
portable CD player, is connected to
the power outlet, a brief power drop during restart might be noticeable.
Parking9 Warning
■ Do not park the vehicle on an
easily ignitable surface. The
high temperature of the exhaust system could ignite the surface.
■ Always apply the parking brake.
Activate the manual parking
brake without pressing the
release button. Apply as firmly
as possible on a downhill slope
or uphill slope. Depress foot
brake at the same time to
reduce operating force.
For vehicles with electric
parking brake, pull switch m for
approx. one second.
The electric parking brake is
applied when control indicator
m illuminates 3 91.
■ Switch off the engine. ■ If the vehicle is on a level surface or uphill slope, engage
first gear or set the selector lever
to position P before removing
the ignition key. On an uphill
slope, turn the front wheels
away from the kerb.
If the vehicle is on a downhill
slope, engage reverse gear or
set the selector lever to position P before removing the ignition
Page 143 of 253
Driving and operating141Automatic transmission
The automatic transmission permits
automatic gearshifting (automatic
mode) or manual gearshifting
(manual mode).
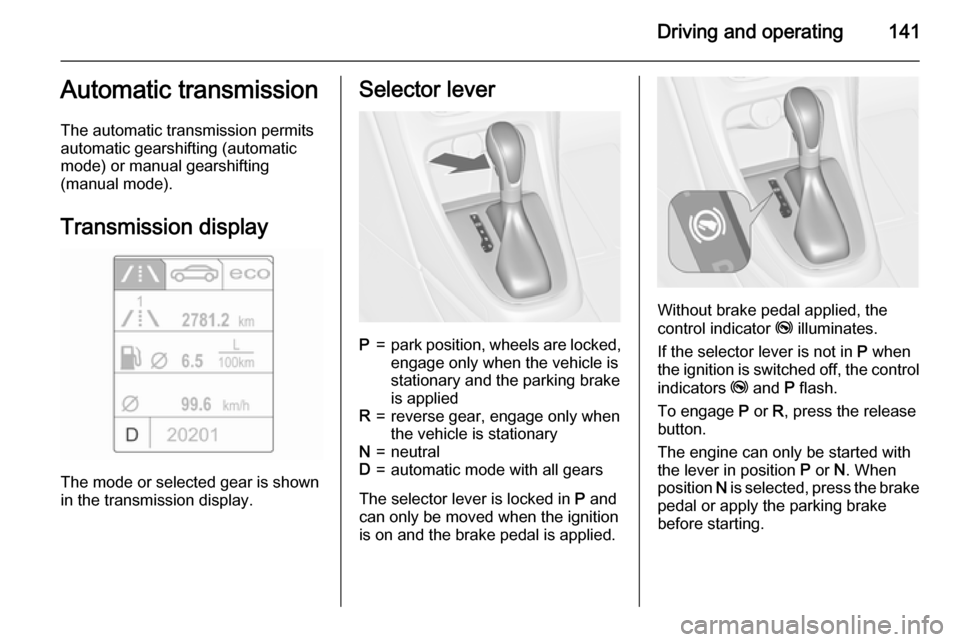
Transmission display
The mode or selected gear is shown
in the transmission display.
Selector leverP=park position, wheels are locked, engage only when the vehicle is
stationary and the parking brake
is appliedR=reverse gear, engage only when
the vehicle is stationaryN=neutralD=automatic mode with all gears
The selector lever is locked in P and
can only be moved when the ignition is on and the brake pedal is applied.
Without brake pedal applied, the
control indicator j illuminates.
If the selector lever is not in P when
the ignition is switched off, the control
indicators j and P flash.
To engage P or R, press the release
button.
The engine can only be started with the lever in position P or N. When
position N is selected, press the brake
pedal or apply the parking brake
before starting.