buttons OPEL CASCADA 2015 Manual user
[x] Cancel search | Manufacturer: OPEL, Model Year: 2015, Model line: CASCADA, Model: OPEL CASCADA 2015Pages: 253, PDF Size: 7.58 MB
Page 13 of 253

In brief11
1Power windows .....................32
2 Exterior mirrors .....................30
3 Cruise control .....................151
Speed limiter ....................... 153
Forward collision alert .........154
4 Side air vents ...................... 131
5 Turn and lane-change
signals, headlight flash,
low beam and high beam,
high beam assist .................117
Exit lighting ......................... 121
Parking lights ...................... 118
Buttons for Driver
Information Centre ................96
6 Instruments .......................... 85
7 Steering wheel controls .......78
8 Driver Information Centre ...... 96
9 Windscreen wiper,
windscreen washer
system, headlight washer
system ................................... 80
10 Sport mode ........................ 149
Central locking system ..........22Hazard warning flashers ....117
Control indicator for airbag
deactivation .......................... 90
Control indicator for front
passenger seat belt .............90
Tour mode .......................... 149
11 Info-Display ........................ 100
12 Anti-theft alarm system
status LED ........................... 27
13 Centre air vents .................. 131
14 Glovebox, lockable ...............70
15 Traction Control system .....147
Electronic Stability Control . 148
Parking assist systems .......157
Lane departure warning .....171
Eco button for stop-start
system ................................. 136
16 Climate control system ........ 123
17 AUX input, USB input ..........10
18 Power outlet .......................... 8419Soft top operation switch .....35
Central window switch .........32
20 Selector lever, manual
transmission ....................... 144
Automatic transmission ......141
21 Parking brake, manual or
electric operation ................145
22 Ignition switch with
steering wheel lock ............134
23 Horn ..................................... 79
Driver airbag ........................ 61
24 Bonnet release lever ..........183
25 Storage compartment ..........71
Fuse box ............................ 200
26 Steering wheel adjustment ..78
27 Light switch ........................ 110
Headlight range
adjustment ......................... 113
Front fog lights ...................118
Rear fog light ...................... 118 Instrument illumination .......119
Page 25 of 253
Keys, doors and windows23
Unlocking
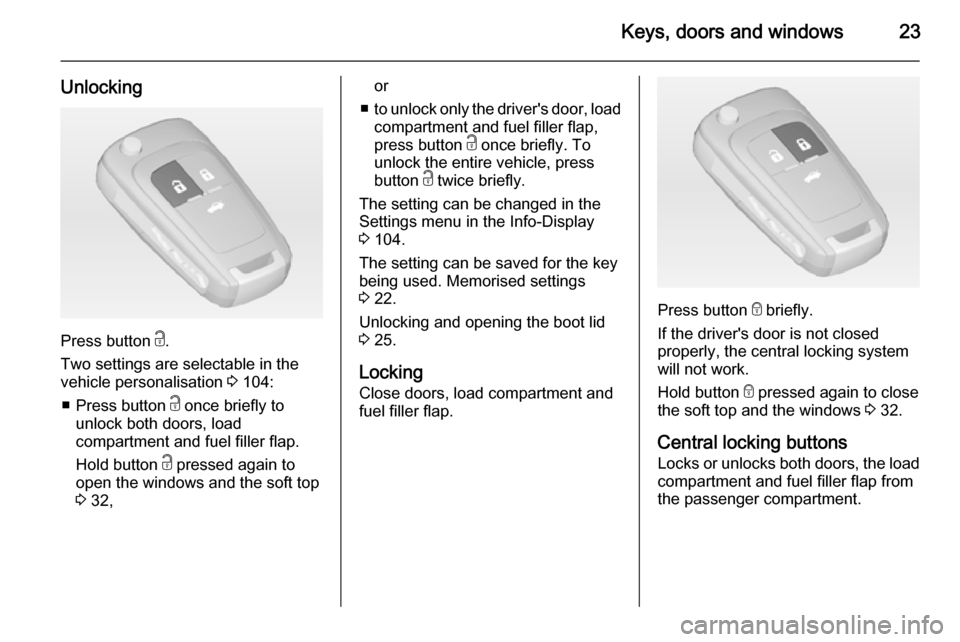
Press button c.
Two settings are selectable in the
vehicle personalisation 3 104:
■ Press button c once briefly to
unlock both doors, load
compartment and fuel filler flap.
Hold button c pressed again to
open the windows and the soft top
3 32,
or
■ to unlock only the driver's door, load
compartment and fuel filler flap,
press button c once briefly. To
unlock the entire vehicle, press
button c twice briefly.
The setting can be changed in the Settings menu in the Info-Display
3 104.
The setting can be saved for the key
being used. Memorised settings
3 22.
Unlocking and opening the boot lid 3 25.
Locking Close doors, load compartment and
fuel filler flap.
Press button e briefly.
If the driver's door is not closed
properly, the central locking system will not work.
Hold button e pressed again to close
the soft top and the windows 3 32.
Central locking buttons Locks or unlocks both doors, the load compartment and fuel filler flap from
the passenger compartment.
Page 90 of 253
88Instruments and controls
The remaining oil life duration is
displayed in the Vehicle Information
Menu .
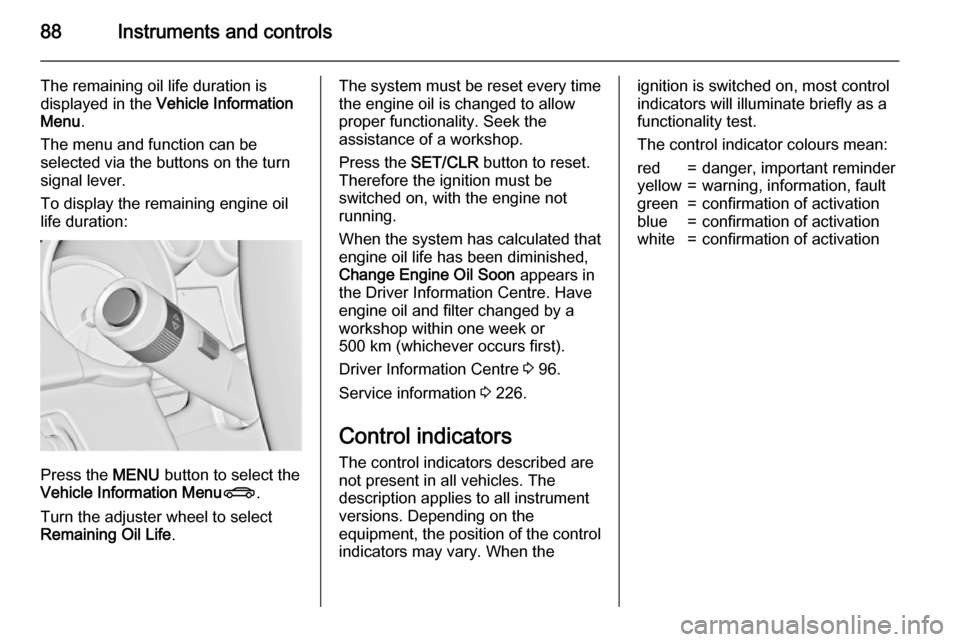
The menu and function can be
selected via the buttons on the turn
signal lever.
To display the remaining engine oil
life duration:
Press the MENU button to select the
Vehicle Information Menu X.
Turn the adjuster wheel to select Remaining Oil Life .
The system must be reset every time
the engine oil is changed to allow
proper functionality. Seek the
assistance of a workshop.
Press the SET/CLR button to reset.
Therefore the ignition must be
switched on, with the engine not
running.
When the system has calculated that
engine oil life has been diminished,
Change Engine Oil Soon appears in
the Driver Information Centre. Have
engine oil and filter changed by a
workshop within one week or
500 km (whichever occurs first).
Driver Information Centre 3 96.
Service information 3 226.
Control indicators The control indicators described are
not present in all vehicles. The
description applies to all instrument
versions. Depending on the
equipment, the position of the control indicators may vary. When theignition is switched on, most control
indicators will illuminate briefly as a
functionality test.
The control indicator colours mean:red=danger, important reminderyellow=warning, information, faultgreen=confirmation of activationblue=confirmation of activationwhite=confirmation of activation
Page 98 of 253
96Instruments and controlsInformation displaysDriver Information Centre The Driver Information Centre (DIC)
is located in the instrument cluster
between speedometer and
tachometer.
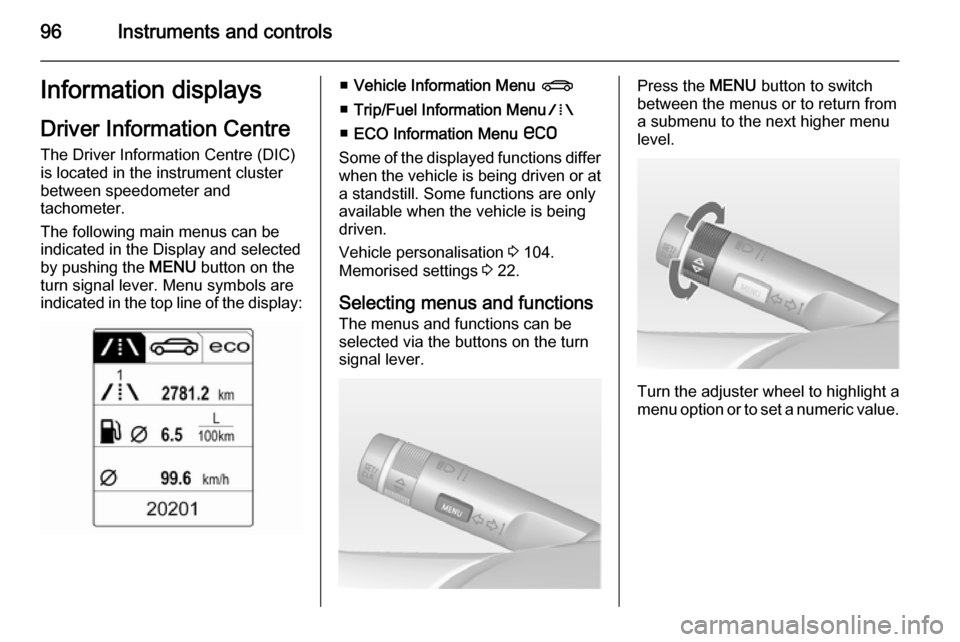
The following main menus can be
indicated in the Display and selected by pushing the MENU button on the
turn signal lever. Menu symbols are
indicated in the top line of the display:■ Vehicle Information Menu X
■ Trip/Fuel Information Menu W
■ ECO Information Menu s
Some of the displayed functions differ
when the vehicle is being driven or at a standstill. Some functions are only
available when the vehicle is being
driven.
Vehicle personalisation 3 104.
Memorised settings 3 22.
Selecting menus and functions
The menus and functions can be selected via the buttons on the turn
signal lever.Press the MENU button to switch
between the menus or to return from
a submenu to the next higher menu
level.
Turn the adjuster wheel to highlight a
menu option or to set a numeric value.
Page 122 of 253
120Lighting
Front courtesy light
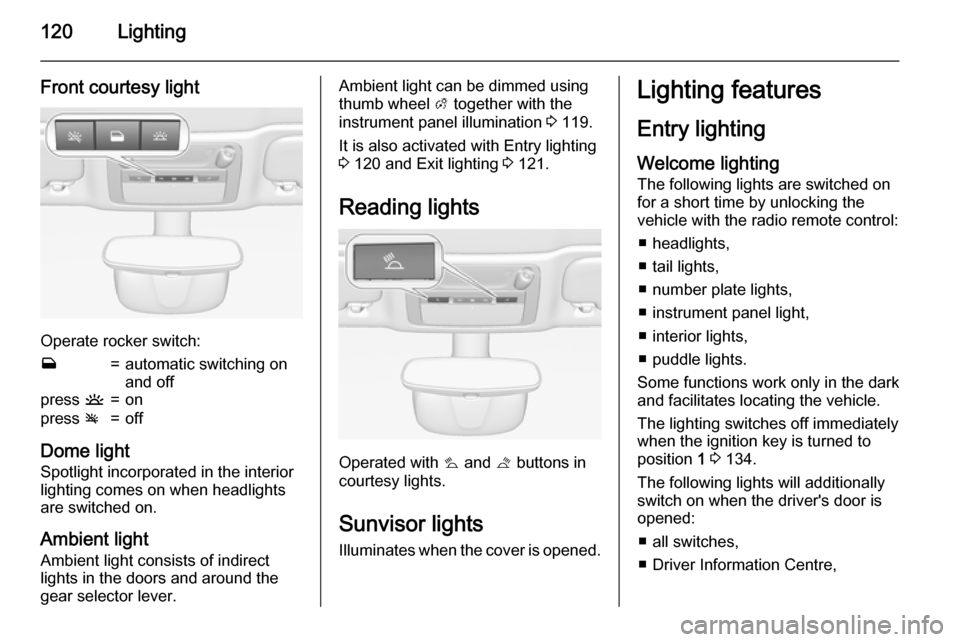
Operate rocker switch:
w=automatic switching on
and offpress u=onpress v=off
Dome light
Spotlight incorporated in the interior
lighting comes on when headlights
are switched on.
Ambient light Ambient light consists of indirect
lights in the doors and around the
gear selector lever.
Ambient light can be dimmed using
thumb wheel A together with the
instrument panel illumination 3 119.
It is also activated with Entry lighting
3 120 and Exit lighting 3 121.
Reading lights
Operated with s
and t buttons in
courtesy lights.
Sunvisor lights Illuminates when the cover is opened.
Lighting features
Entry lighting
Welcome lighting
The following lights are switched on
for a short time by unlocking the
vehicle with the radio remote control:
■ headlights,
■ tail lights,
■ number plate lights,
■ instrument panel light,
■ interior lights,
■ puddle lights.
Some functions work only in the dark
and facilitates locating the vehicle.
The lighting switches off immediately
when the ignition key is turned to
position 1 3 134.
The following lights will additionally
switch on when the driver's door is
opened:
■ all switches,
■ Driver Information Centre,
Page 131 of 253
Climate control129
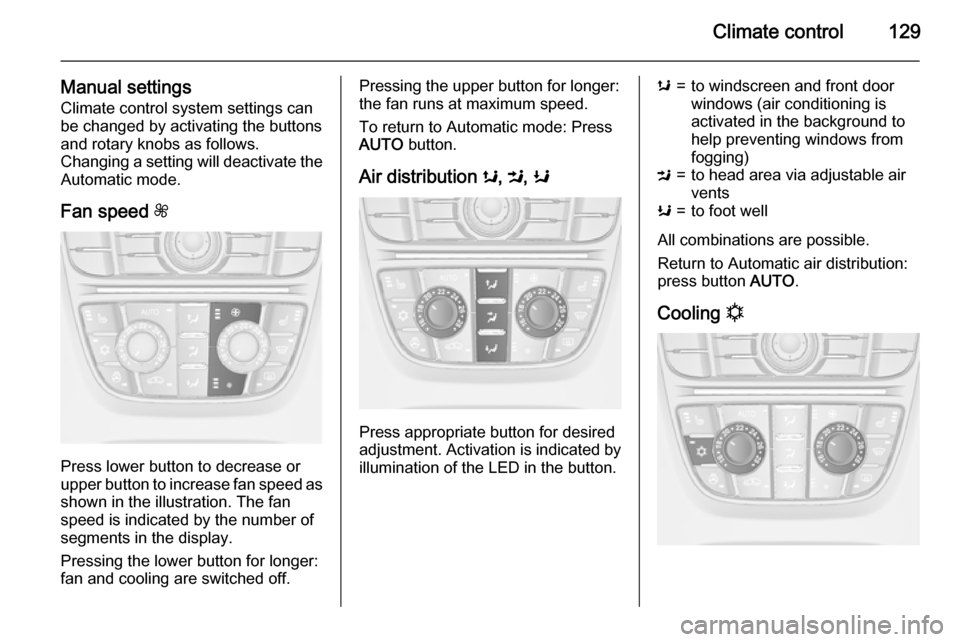
Manual settingsClimate control system settings can
be changed by activating the buttons
and rotary knobs as follows.
Changing a setting will deactivate the Automatic mode.
Fan speed Z
Press lower button to decrease or
upper button to increase fan speed as
shown in the illustration. The fan
speed is indicated by the number of
segments in the display.
Pressing the lower button for longer:
fan and cooling are switched off.
Pressing the upper button for longer:
the fan runs at maximum speed.
To return to Automatic mode: Press
AUTO button.
Air distribution s, M , K
Press appropriate button for desired
adjustment. Activation is indicated by illumination of the LED in the button.
s=to windscreen and front door
windows (air conditioning is
activated in the background to
help preventing windows from
fogging)M=to head area via adjustable air ventsK=to foot well
All combinations are possible.
Return to Automatic air distribution:
press button AUTO.
Cooling n
Page 151 of 253

Driving and operating149
ESC is operational after each engine
start as soon as the control indicator
b extinguishes.
When ESC operates b flashes.9 Warning
Do not let this special safety
feature tempt you into taking risks
when driving.
Adapt speed to the road
conditions.
Control indicator b 3 93.
Deactivation
For a more sporty behaviour ESC and
TC can be deactivated separately:
■ press button b briefly: only Traction
control system is inactive, ESC
remains active, k illuminates
■ hold button b pressed for min.
5 seconds: TC and ESC are
deactivated, k and n illuminate.
Additionally the selected mode is
displayed as status message in the
Driver Information Centre.
If the vehicle comes into threshold
with deactivated ESP, the system will reactivate ESP for the time duration
of the threshold, when the brake pedal is depressed once.
ESC is reactivated by pressing the
b button again. If the TC system was
previously disabled, both TC and
ESC are reactivated.
ESC is also reactivated the next time
the ignition is switched on.Interactive driving system
Flex Ride
Flex Ride driving system allows the
driver to select between three driving
modes:
■ SPORT mode: press button SPORT , LED illuminates.
■ TOUR mode: press button TOUR,
LED illuminates.
■ NORMAL mode: both buttons SPORT and TOUR are not
pressed, no LED illuminates.
Deactivate SPORT mode and TOUR
mode by pressing corresponding
button once more.
In each driving mode Flex Ride networks the following electronic
systems:
■ Continuous Damping Control.
■ Accelerator Pedal Control.
■ Steering Control.
■ Electronic Stability Control (ESC).
■ Antilock brake system (ABS) with cornering brake control (CBC).
■ Automatic transmission.
Page 169 of 253

Driving and operating167
The area displayed by the camera is
limited. The distance of the image that
appears on the display differs from
the actual distance.
Guiding lines
Dynamic guiding lines are horizontal
lines in 1 metre intervals projected on
the picture to define the distance to
shown objects.Trajectory lane of the vehicle is
shown in accordance with the
steering angle.
The function can be deactivated in the Settings menu in the Info-Display.
Vehicle personalisation 3 104.
Warning symbols
Warning symbols are indicated as
triangles 9 on the picture, which show
obstacles detected by the rear
sensors of the advanced parking
assist.
Additionally 9 appears on the top line
of the Info-Display with a warning to
check the vehicle surrounding.
The top line of the display can be
cleared by pressing the multifunction
knob.
Display settings
Brightness can be set with the up/
down buttons of the multifunction
knob.
Contrast can be set with left/right
buttons of the multifunction knob.
Deactivation
The camera is deactivated when a
certain forward speed is exceeded or if reverse gear is not engaged for
approx. 10 seconds.
Page 208 of 253

206Vehicle care
The current tyre pressures can be
shown in the Vehicle Information
Menu in the Driver Information Centre
(DIC).
The menu can be selected by the
buttons on the turn signal lever.
Press the MENU button to select the
Vehicle Information Menu X.
Turn the adjuster wheel to select the
tyre pressure monitoring system.
System status and pressure warnings
are displayed by a message with the
corresponding tyre flashing in the
DIC.A detected low tyre pressure
condition is indicated by the control
indicator w 3 94.
If w illuminates, stop as soon as
possible and inflate the tyres as
recommended 3 239.
If w flashes for 60-90 seconds and
then illuminates continuously, there is a fault in the system. Consult a
workshop.
After inflating, driving may be
required to update the tyre pressure
values in the DIC. During this time w
may illuminate.