ignition OPEL COMBO 2017 Manual user
[x] Cancel search | Manufacturer: OPEL, Model Year: 2017, Model line: COMBO, Model: OPEL COMBO 2017Pages: 195, PDF Size: 4.71 MB
Page 11 of 195
In brief9Exterior mirrorsManual adjustment
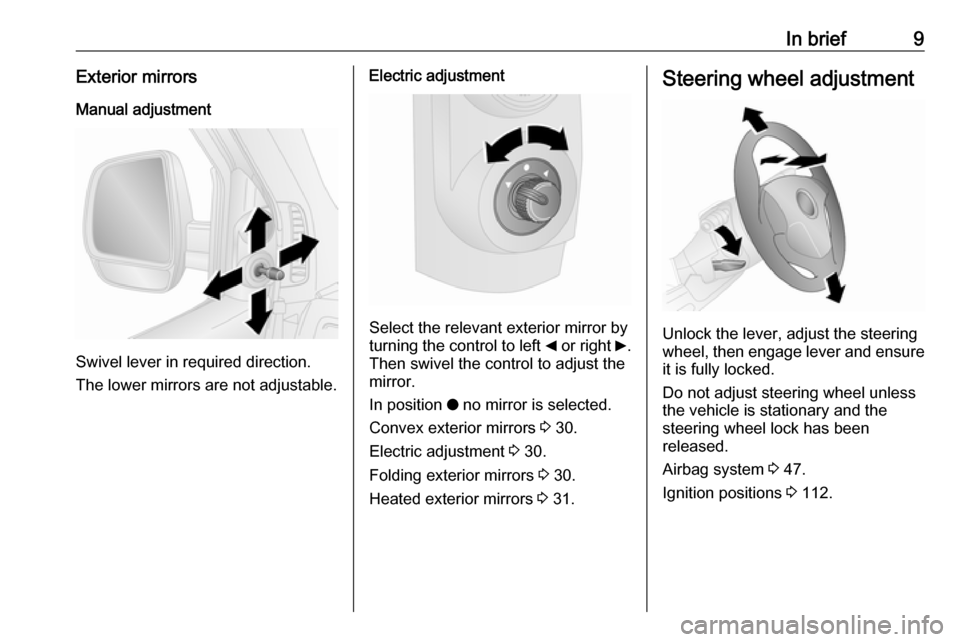
Swivel lever in required direction.
The lower mirrors are not adjustable.
Electric adjustment
Select the relevant exterior mirror by
turning the control to left _ or right 6.
Then swivel the control to adjust the
mirror.
In position o no mirror is selected.
Convex exterior mirrors 3 30.
Electric adjustment 3 30.
Folding exterior mirrors 3 30.
Heated exterior mirrors 3 31.
Steering wheel adjustment
Unlock the lever, adjust the steering
wheel, then engage lever and ensure it is fully locked.
Do not adjust steering wheel unless
the vehicle is stationary and the
steering wheel lock has been
released.
Airbag system 3 47.
Ignition positions 3 112.
Page 13 of 195

In brief111Fixed air vents ..................... 109
2 Side air vents ...................... 109
3 Light switch .......................... 98
High beam, low beam ...........98
Headlight flash ......................98
Daytime running lights ..........99
Turn and lane-change
signals ................................. 100
4 Instruments ........................... 75
Driver Information Centre ...... 89
5 Windscreen wiper/washer .....70
Rear window wiper/washer ..70
Headlamp washer .................71
Trip odometer reset ............... 75
6 Centre air vents .................. 109
7 Document holder, pocket
for Personal Navigation
Device .................................. 59
8 Headlight range
adjustment ........................... 99
Driver Information Centre
controls ................................ 89Trip computer........................ 95
Instrument illumination ........101
Hazard warning flashers .......99
Front fog lights ...................100
Rear fog light ...................... 100 Heated rear window ..............34
Heated exterior mirrors .........31
Clock ..................................... 71
Airbag deactivation ...............52
9 Front passenger airbag ........51
10 Glovebox .............................. 60
11 Heating and ventilation
system ................................. 105
Air conditioning system .......106
Electronic climate control
system ................................. 107
12 Selector lever, manual
transmission ....................... 118
Manual transmission automated ........................... 119
13 Ignition switch with
steering wheel lock ............11214Steering wheel controls .......69
15 Horn ..................................... 69
Driver airbag ........................ 51
16 Steering wheel adjustment ..69
17 Cruise control .....................127
18 Fuse box ............................. 153
19 Bonnet release lever ..........139
Page 21 of 195
In brief19Parking9Warning
● Do not park the vehicle on an
easily ignitable surface. The
high temperature of the
exhaust system could ignite the
surface.
● Always apply parking brake without pressing release
button. Apply as firmly as
possible on a downhill slope or
uphill slope. Depress brake
pedal at the same time to
reduce operating force.
● Switch off the engine.
● If the vehicle is on a level surface or uphill slope, engage
first gear before switching off
the ignition. On an uphill slope,
turn the front wheels away from
the kerb.
If the vehicle is on a downhill
slope, engage reverse gear
before switching off the ignition. Turn the front wheels towardsthe kerb.
● Close the windows.
● Turn the ignition key to position
0 and remove it from the
ignition switch. Turn the
steering wheel until the
steering wheel lock is felt to
engage.
● Lock the vehicle with e on the
remote control.
● The engine cooling fans may run
after the engine has been
switched off 3 139.
Caution
After running at high engine
speeds or with high engine loads,
operate the engine briefly at a low load or run in neutral for approx.30 seconds before switching off, in
order to protect the turbocharger.
Keys, locks 3 20.
Laying the vehicle up for a long period
of time 3 138.
Page 22 of 195

20Keys, doors and windowsKeys, doors and
windowsKeys, locks ................................... 20
Keys .......................................... 20
Car Pass .................................... 21
Radio remote control .................21
Manual door locks .....................22
Central locking system ..............24
Child locks ................................. 25
Doors ........................................... 26
Sliding door ............................... 26
Rear doors ................................. 26
Load compartment ....................27
Vehicle security ............................ 29
Anti-theft locking system ...........29
Immobiliser ................................ 29
Exterior mirrors ............................ 30
Convex shape ........................... 30
Manual adjustment ....................30
Electric adjustment ....................30
Folding mirrors .......................... 30
Heated mirrors ........................... 31
Interior mirrors ............................. 31
Manual anti-dazzle ....................31Windows...................................... 31
Windscreen ............................... 31
Manual windows ........................31
Power windows ......................... 31
Rear windows ............................ 33
Heated rear window ..................34
Sun visors .................................. 34Keys, locks
KeysCaution
Do not attach heavy or bulky itemsto the ignition key.
Replacement keys
The key number is specified in the
Car Pass or on a detachable tag.
The key number must be quoted
when ordering replacement keys as it
is a component of the immobiliser
system.
Locks 3 169.
Page 26 of 195
24Keys, doors and windowsCentral locking system
Unlocks and locks the front doors,
sliding side doors and load
compartment.
A pull on an interior door handle
unlocks and opens the respective
door.
For safety reasons, the vehicle
cannot be locked if the key is in the
ignition switch.
Unlocking Note
In the event of an accident of a
certain severity, the vehicle unlocks
automatically.
Fuel cut-off system 3 95.Van
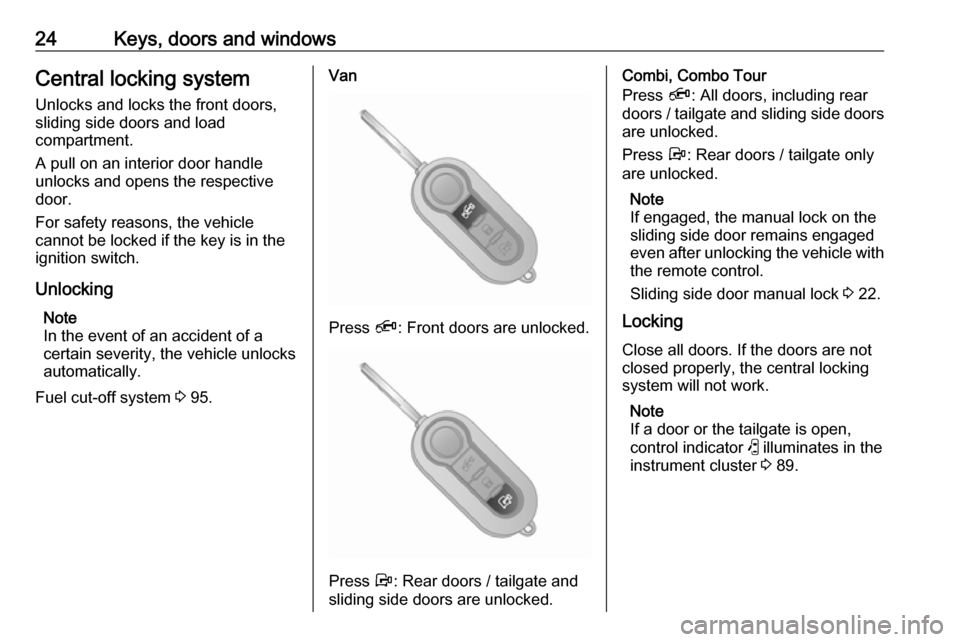
Press Ä: Front doors are unlocked.
Press Å: Rear doors / tailgate and
sliding side doors are unlocked.
Combi, Combo Tour
Press Ä: All doors, including rear
doors / tailgate and sliding side doors
are unlocked.
Press Å: Rear doors / tailgate only
are unlocked.
Note
If engaged, the manual lock on the sliding side door remains engaged
even after unlocking the vehicle with
the remote control.
Sliding side door manual lock 3 22.
Locking
Close all doors. If the doors are not
closed properly, the central locking
system will not work.
Note
If a door or the tailgate is open,
control indicator ( illuminates in the
instrument cluster 3 89.
Page 31 of 195
Keys, doors and windows29Vehicle security
Anti-theft locking system9 Warning
Do not use the system if there are
people in the vehicle! The doorscannot be unlocked from the
inside.
The system deadlocks all the doors. All doors must be closed otherwise
the system cannot be activated.
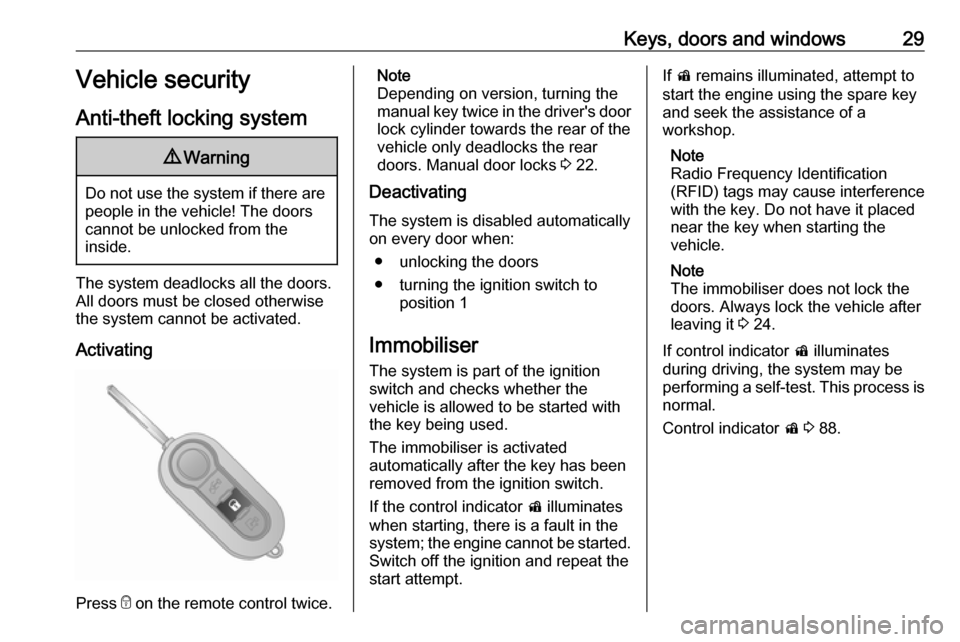
Activating
Press e on the remote control twice.
Note
Depending on version, turning the manual key twice in the driver's door lock cylinder towards the rear of the
vehicle only deadlocks the rear
doors. Manual door locks 3 22.
Deactivating
The system is disabled automatically
on every door when:
● unlocking the doors
● turning the ignition switch to position 1
Immobiliser
The system is part of the ignition
switch and checks whether the
vehicle is allowed to be started with
the key being used.
The immobiliser is activated
automatically after the key has been removed from the ignition switch.
If the control indicator d illuminates
when starting, there is a fault in the
system; the engine cannot be started. Switch off the ignition and repeat the
start attempt.If d remains illuminated, attempt to
start the engine using the spare key
and seek the assistance of a
workshop.
Note
Radio Frequency Identification
(RFID) tags may cause interference
with the key. Do not have it placed
near the key when starting the
vehicle.
Note
The immobiliser does not lock the
doors. Always lock the vehicle after
leaving it 3 24.
If control indicator d illuminates
during driving, the system may be
performing a self-test. This process is
normal.
Control indicator d 3 88.
Page 34 of 195

32Keys, doors and windowsKeep a close watch on the
windows when closing them.
Ensure that nothing becomes
trapped in them as they move.
Switch on ignition to operate power
windows.
Operate the switch for the respective
window by pushing to open or pulling to close.
Pushing or pulling briefly: window
moves up or down in stages if the
switch is held.
Pushing or pulling firmly and then
releasing: window moves up or down fully with safety function enabled. To
stop movement, operate the switch
once more in the same direction.
With the ignition key removed or in
position 0, the windows can be
operated for approx. 2 minutes and are deactivated as soon as a door is
opened.
Safety function
If the window glass encounters
resistance during automatic closing, it is immediately stopped and openedagain.
If the safety function is activated five times in less than a minute, the
safety function is deactivated. The
windows will only close in stages and not automatically.
Activate the window electronics by
opening the windows. The safety
function is restored and the windows
will operate normally.Overload
If the windows are repeatedly
operated within short intervals, the
window operation is disabled for
some time.
Initialising the power windows
If the windows cannot be closed
automatically (e.g. after
disconnecting the vehicle battery),
activate the window electronics as
follows:
1. Close doors.
2. Switch on ignition.
3. Pull switch until the window is closed and keep pulling for an
additional five seconds.
4. Repeat for each window.
Page 42 of 195
40Seats, restraintsHeating
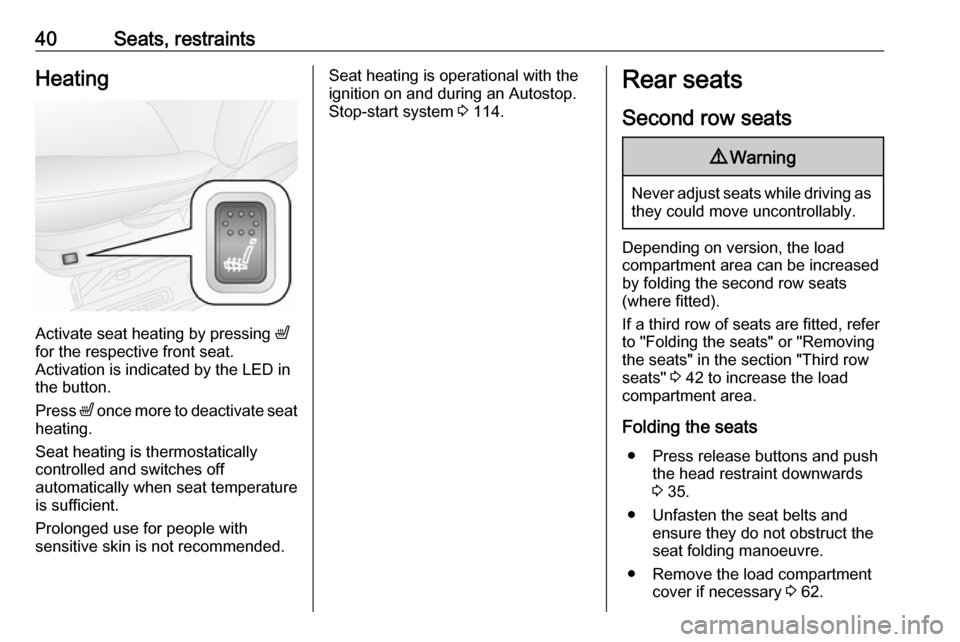
Activate seat heating by pressing ß
for the respective front seat.
Activation is indicated by the LED in
the button.
Press ß once more to deactivate seat
heating.
Seat heating is thermostatically
controlled and switches off
automatically when seat temperature
is sufficient.
Prolonged use for people with
sensitive skin is not recommended.
Seat heating is operational with the
ignition on and during an Autostop.
Stop-start system 3 114.Rear seats
Second row seats9 Warning
Never adjust seats while driving as
they could move uncontrollably.
Depending on version, the load
compartment area can be increased
by folding the second row seats
(where fitted).
If a third row of seats are fitted, refer
to "Folding the seats" or "Removing
the seats" in the section "Third row
seats" 3 42 to increase the load
compartment area.
Folding the seats ● Press release buttons and push the head restraint downwards
3 35.
● Unfasten the seat belts and ensure they do not obstruct the
seat folding manoeuvre.
● Remove the load compartment cover if necessary 3 62.
Page 53 of 195

Seats, restraints51MT: QATT tuża trażżin għat-tfal li
jħares lejn in-naħa ta’ wara fuq sit
protett b’AIRBAG ATTIV quddiemu;
dan jista’ jikkawża l-MEWT jew
ĠRIEĦI SERJI lit-TFAL.
Beyond the warning required by ECE
R94.02, for safety reasons never use
a forward-facing child restraint
system on the front passenger seat
with active front airbag.
The airbag label may be located on
both sides of the front passenger sun
visor.9 Danger
Do not use a child restraint system
on the passenger seat with active
front airbag.
Airbag deactivation 3 52.
Front airbag system
The front airbag system consists of
one airbag in the steering wheel and
one in the instrument panel on the
front passenger side. These can be
identified by the word AIRBAG.
Additionally, there may be a warning
label on the passenger's sun visor.
Child restraint systems 3 54.
Airbag deactivation 3 52.
The front airbag system is triggered in
the event of a front-end impact of a
certain severity. The ignition must be
switched on.
The inflated airbags cushion the
impact, thereby reducing the risk of
injury to the upper body and head of
the front seat occupants
considerably.9 Warning
Optimum protection is only
provided when the seat is in the
proper position.
Seat position 3 36.
Keep the area in which the airbag
inflates clear of obstructions.
Fasten the seat belt correctly and
engage securely. Only then is the
airbag able to protect.
Page 54 of 195
52Seats, restraintsSide airbag system
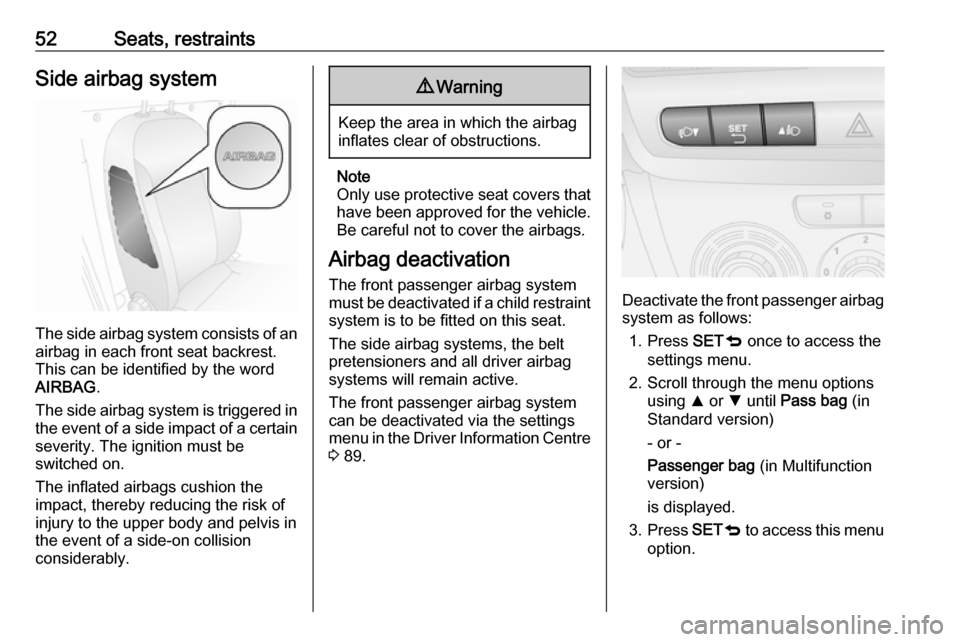
The side airbag system consists of an
airbag in each front seat backrest.
This can be identified by the word
AIRBAG .
The side airbag system is triggered in the event of a side impact of a certain
severity. The ignition must be
switched on.
The inflated airbags cushion the
impact, thereby reducing the risk of
injury to the upper body and pelvis in
the event of a side-on collision
considerably.
9 Warning
Keep the area in which the airbag
inflates clear of obstructions.
Note
Only use protective seat covers that have been approved for the vehicle.Be careful not to cover the airbags.
Airbag deactivation
The front passenger airbag system
must be deactivated if a child restraint
system is to be fitted on this seat.
The side airbag systems, the belt pretensioners and all driver airbag
systems will remain active.
The front passenger airbag system
can be deactivated via the settings
menu in the Driver Information Centre 3 89.
Deactivate the front passenger airbag
system as follows:
1. Press SETq once to access the
settings menu.
2. Scroll through the menu options using R or S until Pass bag (in
Standard version)
- or -
Passenger bag (in Multifunction
version)
is displayed.
3. Press SETq to access this menu
option.