warning OPEL COMBO 2017 Manual user
[x] Cancel search | Manufacturer: OPEL, Model Year: 2017, Model line: COMBO, Model: OPEL COMBO 2017Pages: 195, PDF Size: 4.71 MB
Page 6 of 195
4IntroductionDanger, Warnings andCautions9 Danger
Text marked 9 Danger provides
information on risk of fatal injury.
Disregarding this information may
endanger life.
9 Warning
Text marked 9 Warning provides
information on risk of accident or
injury. Disregarding this
information may lead to injury.
Caution
Text marked Caution provides
information on possible damage to
the vehicle. Disregarding this
information may lead to vehicle
damage.
Symbols
Page references are indicated with 3.
3 means "see page".
Page references and index entries
refer to the indented headings given
in the section table of content.
We wish you many hours of
pleasurable driving.
Adam Opel AG
Page 13 of 195

In brief111Fixed air vents ..................... 109
2 Side air vents ...................... 109
3 Light switch .......................... 98
High beam, low beam ...........98
Headlight flash ......................98
Daytime running lights ..........99
Turn and lane-change
signals ................................. 100
4 Instruments ........................... 75
Driver Information Centre ...... 89
5 Windscreen wiper/washer .....70
Rear window wiper/washer ..70
Headlamp washer .................71
Trip odometer reset ............... 75
6 Centre air vents .................. 109
7 Document holder, pocket
for Personal Navigation
Device .................................. 59
8 Headlight range
adjustment ........................... 99
Driver Information Centre
controls ................................ 89Trip computer........................ 95
Instrument illumination ........101
Hazard warning flashers .......99
Front fog lights ...................100
Rear fog light ...................... 100 Heated rear window ..............34
Heated exterior mirrors .........31
Clock ..................................... 71
Airbag deactivation ...............52
9 Front passenger airbag ........51
10 Glovebox .............................. 60
11 Heating and ventilation
system ................................. 105
Air conditioning system .......106
Electronic climate control
system ................................. 107
12 Selector lever, manual
transmission ....................... 118
Manual transmission automated ........................... 119
13 Ignition switch with
steering wheel lock ............11214Steering wheel controls .......69
15 Horn ..................................... 69
Driver airbag ........................ 51
16 Steering wheel adjustment ..69
17 Cruise control .....................127
18 Fuse box ............................. 153
19 Bonnet release lever ..........139
Page 16 of 195
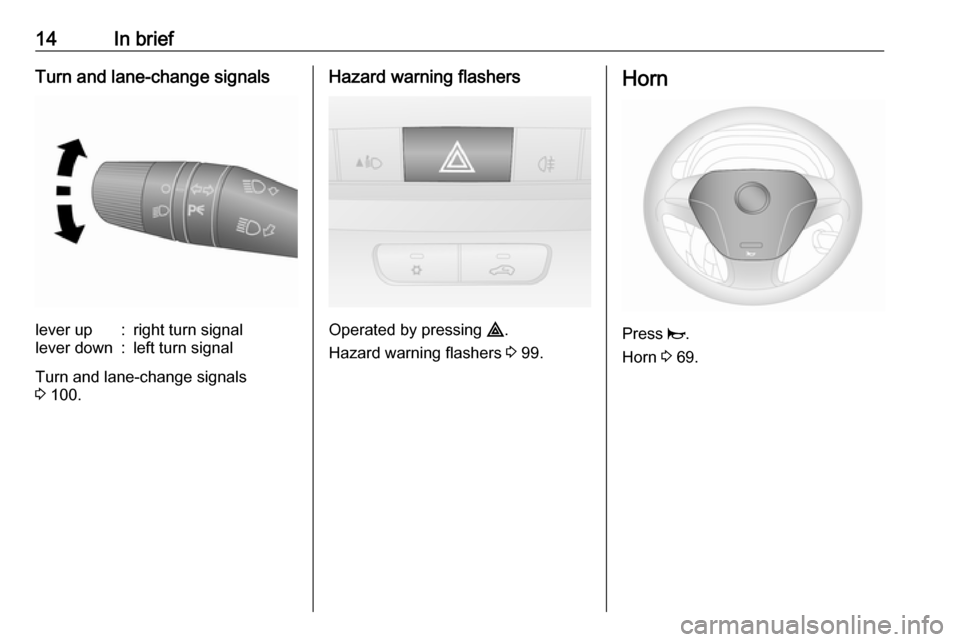
14In briefTurn and lane-change signalslever up:right turn signallever down:left turn signal
Turn and lane-change signals
3 100.
Hazard warning flashers
Operated by pressing ¨.
Hazard warning flashers 3 99.
Horn
Press j.
Horn 3 69.
Page 21 of 195
In brief19Parking9Warning
● Do not park the vehicle on an
easily ignitable surface. The
high temperature of the
exhaust system could ignite the
surface.
● Always apply parking brake without pressing release
button. Apply as firmly as
possible on a downhill slope or
uphill slope. Depress brake
pedal at the same time to
reduce operating force.
● Switch off the engine.
● If the vehicle is on a level surface or uphill slope, engage
first gear before switching off
the ignition. On an uphill slope,
turn the front wheels away from
the kerb.
If the vehicle is on a downhill
slope, engage reverse gear
before switching off the ignition. Turn the front wheels towardsthe kerb.
● Close the windows.
● Turn the ignition key to position
0 and remove it from the
ignition switch. Turn the
steering wheel until the
steering wheel lock is felt to
engage.
● Lock the vehicle with e on the
remote control.
● The engine cooling fans may run
after the engine has been
switched off 3 139.
Caution
After running at high engine
speeds or with high engine loads,
operate the engine briefly at a low load or run in neutral for approx.30 seconds before switching off, in
order to protect the turbocharger.
Keys, locks 3 20.
Laying the vehicle up for a long period
of time 3 138.
Page 23 of 195
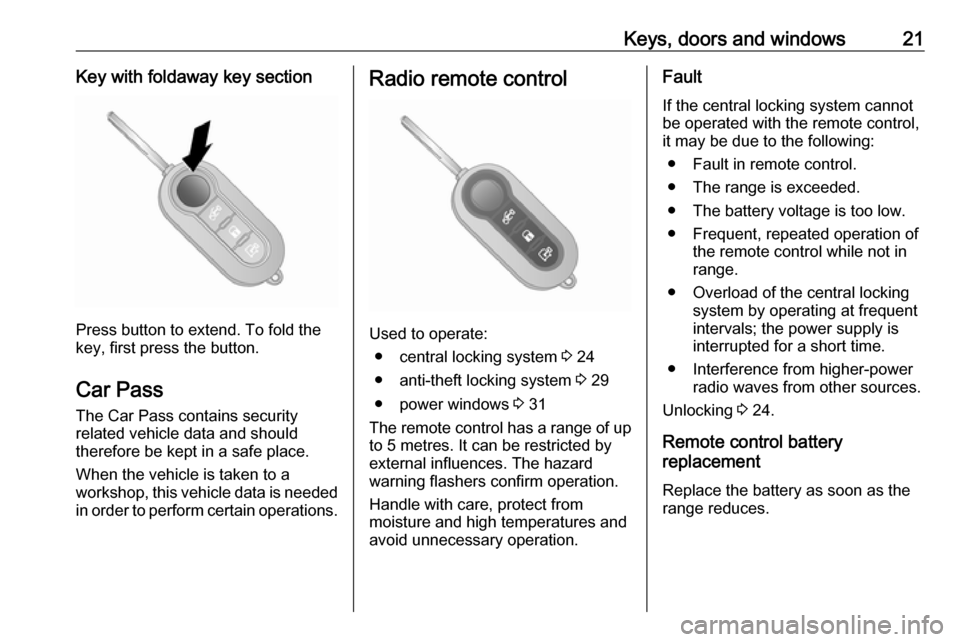
Keys, doors and windows21Key with foldaway key section
Press button to extend. To fold the
key, first press the button.
Car Pass The Car Pass contains security
related vehicle data and should
therefore be kept in a safe place.
When the vehicle is taken to a
workshop, this vehicle data is needed
in order to perform certain operations.
Radio remote control
Used to operate:
● central locking system 3 24
● anti-theft locking system 3 29
● power windows 3 31
The remote control has a range of up
to 5 metres. It can be restricted by
external influences. The hazard
warning flashers confirm operation.
Handle with care, protect from
moisture and high temperatures and
avoid unnecessary operation.
Fault
If the central locking system cannot be operated with the remote control,
it may be due to the following:
● Fault in remote control.
● The range is exceeded.
● The battery voltage is too low.
● Frequent, repeated operation of the remote control while not in
range.
● Overload of the central locking system by operating at frequent
intervals; the power supply is
interrupted for a short time.
● Interference from higher-power radio waves from other sources.
Unlocking 3 24.
Remote control battery
replacement
Replace the battery as soon as the
range reduces.
Page 27 of 195
Keys, doors and windows25
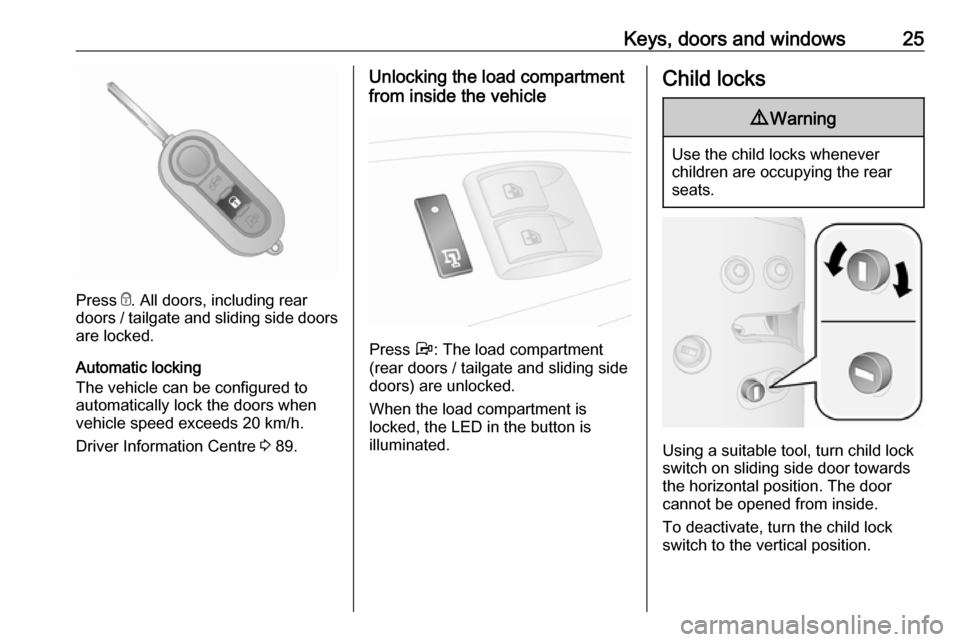
Press e. All doors, including rear
doors / tailgate and sliding side doors
are locked.
Automatic locking
The vehicle can be configured to
automatically lock the doors when
vehicle speed exceeds 20 km/h.
Driver Information Centre 3 89.
Unlocking the load compartment
from inside the vehicle
Press Å: The load compartment
(rear doors / tailgate and sliding side
doors) are unlocked.
When the load compartment is
locked, the LED in the button is
illuminated.
Child locks9 Warning
Use the child locks whenever
children are occupying the rear
seats.
Using a suitable tool, turn child lock
switch on sliding side door towards
the horizontal position. The door
cannot be opened from inside.
To deactivate, turn the child lock
switch to the vertical position.
Page 29 of 195
Keys, doors and windows27The door is opened from inside the
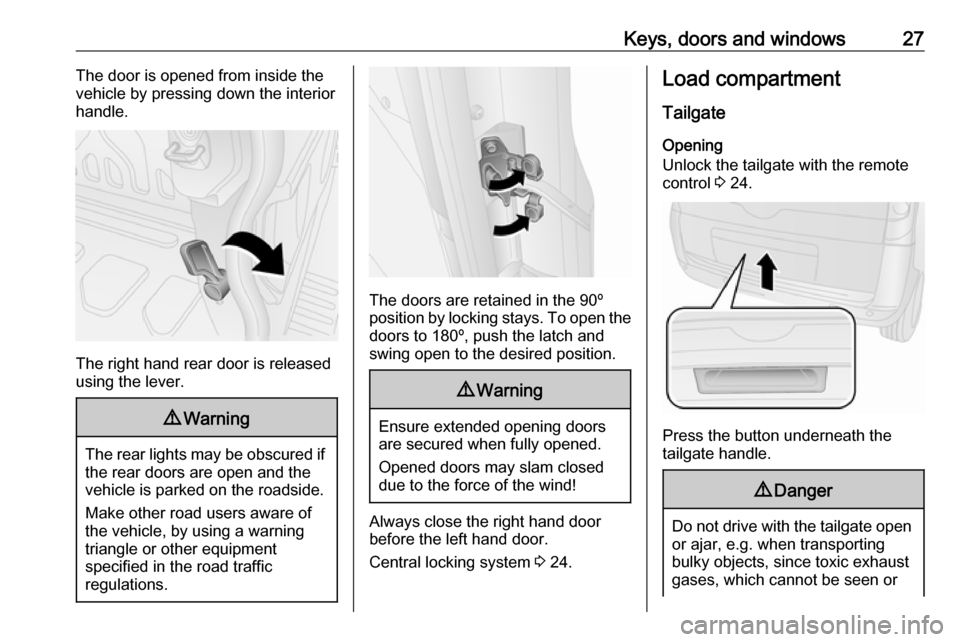
vehicle by pressing down the interior
handle.
The right hand rear door is released
using the lever.
9 Warning
The rear lights may be obscured if
the rear doors are open and the
vehicle is parked on the roadside.
Make other road users aware of the vehicle, by using a warning
triangle or other equipment
specified in the road traffic
regulations.
The doors are retained in the 90º
position by locking stays. To open the
doors to 180º, push the latch and
swing open to the desired position.
9 Warning
Ensure extended opening doors
are secured when fully opened.
Opened doors may slam closed due to the force of the wind!
Always close the right hand doorbefore the left hand door.
Central locking system 3 24.
Load compartment
TailgateOpening
Unlock the tailgate with the remote
control 3 24.
Press the button underneath the
tailgate handle.
9 Danger
Do not drive with the tailgate open
or ajar, e.g. when transporting
bulky objects, since toxic exhaust
gases, which cannot be seen or
Page 31 of 195
Keys, doors and windows29Vehicle security
Anti-theft locking system9 Warning
Do not use the system if there are
people in the vehicle! The doorscannot be unlocked from the
inside.
The system deadlocks all the doors. All doors must be closed otherwise
the system cannot be activated.
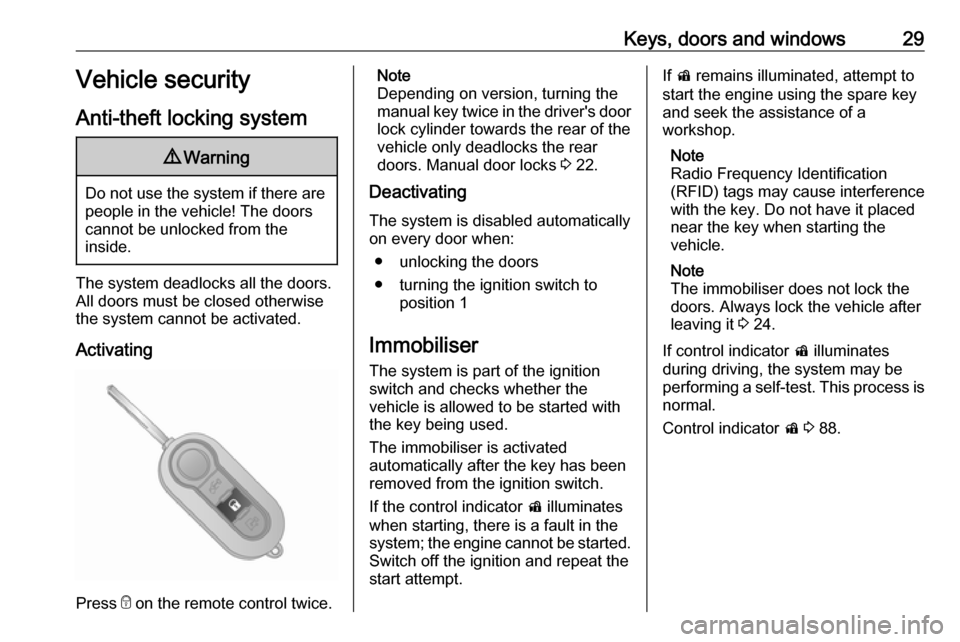
Activating
Press e on the remote control twice.
Note
Depending on version, turning the manual key twice in the driver's door lock cylinder towards the rear of the
vehicle only deadlocks the rear
doors. Manual door locks 3 22.
Deactivating
The system is disabled automatically
on every door when:
● unlocking the doors
● turning the ignition switch to position 1
Immobiliser
The system is part of the ignition
switch and checks whether the
vehicle is allowed to be started with
the key being used.
The immobiliser is activated
automatically after the key has been removed from the ignition switch.
If the control indicator d illuminates
when starting, there is a fault in the
system; the engine cannot be started. Switch off the ignition and repeat the
start attempt.If d remains illuminated, attempt to
start the engine using the spare key
and seek the assistance of a
workshop.
Note
Radio Frequency Identification
(RFID) tags may cause interference
with the key. Do not have it placed
near the key when starting the
vehicle.
Note
The immobiliser does not lock the
doors. Always lock the vehicle after
leaving it 3 24.
If control indicator d illuminates
during driving, the system may be
performing a self-test. This process is
normal.
Control indicator d 3 88.
Page 33 of 195
Keys, doors and windows31Heated mirrors
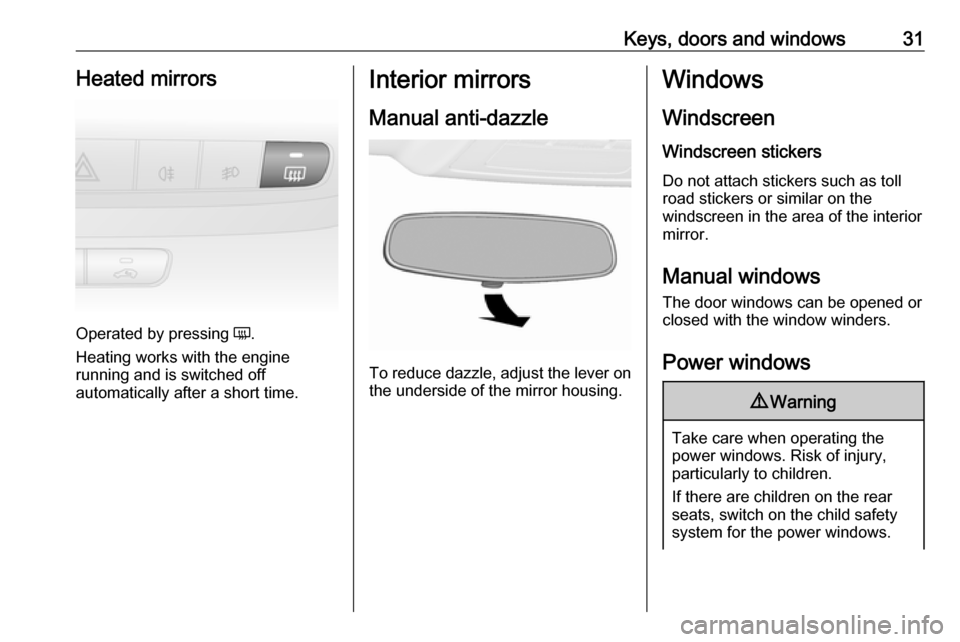
Operated by pressing Ü.
Heating works with the engine
running and is switched off
automatically after a short time.
Interior mirrors
Manual anti-dazzle
To reduce dazzle, adjust the lever on the underside of the mirror housing.
Windows
Windscreen
Windscreen stickers Do not attach stickers such as toll
road stickers or similar on the
windscreen in the area of the interior
mirror.
Manual windows
The door windows can be opened or
closed with the window winders.
Power windows9 Warning
Take care when operating the
power windows. Risk of injury,
particularly to children.
If there are children on the rear seats, switch on the child safety
system for the power windows.
Page 37 of 195
Seats, restraints35Seats, restraintsHead restraints............................ 35
Front seats ................................... 36
Seat position .............................. 36
Seat adjustment ........................37
Seat folding ............................... 38
Armrest ...................................... 39
Heating ...................................... 40
Rear seats ................................... 40
Second row seats ......................40
Third row seats .......................... 42
Seat belts ..................................... 44
Three-point seat belt .................45
Airbag system .............................. 47
Front airbag system ...................51
Side airbag system ....................52
Airbag deactivation ....................52
Child restraints ............................. 54
Child restraint systems ..............54
Child restraint installation locations ................................... 55
ISOFIX child restraint systems ..58
Top-tether fastening eyes ..........58Head restraints
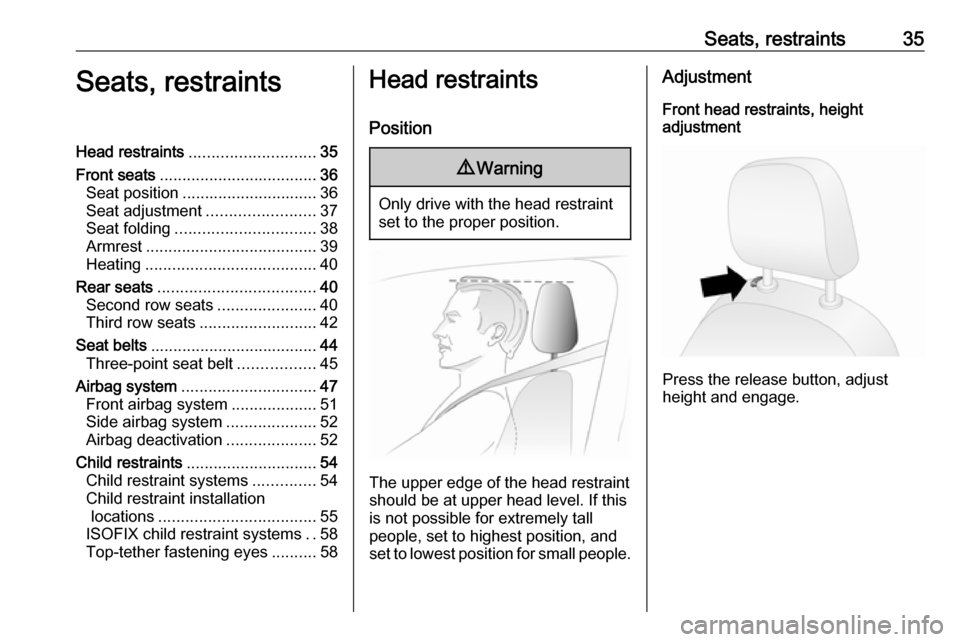
Position9 Warning
Only drive with the head restraint
set to the proper position.
The upper edge of the head restraint
should be at upper head level. If this
is not possible for extremely tall
people, set to highest position, and
set to lowest position for small people.
Adjustment
Front head restraints, height
adjustment
Press the release button, adjust
height and engage.