ECU OPEL COMBO E 2020 User Guide
[x] Cancel search | Manufacturer: OPEL, Model Year: 2020, Model line: COMBO E, Model: OPEL COMBO E 2020Pages: 283, PDF Size: 29.4 MB
Page 77 of 283

Storage75The separation of the four
compartments can be taken out.
The maximum permitted load is 6 kg.9 Warning
Secure objects to prevent them
from falling out and causing injury.
Slide the flaps to open.
Close whilst driving. The maximum
permitted load is 10 kg.
Pull handle to open.
Close whilst driving. The maximum
permitted load is 10 kg.
Underseat storage
Underseat drawer
There may be a drawer under the
front seats. To open lift the drawer a
bit and then pull.
Page 80 of 283
78Storage
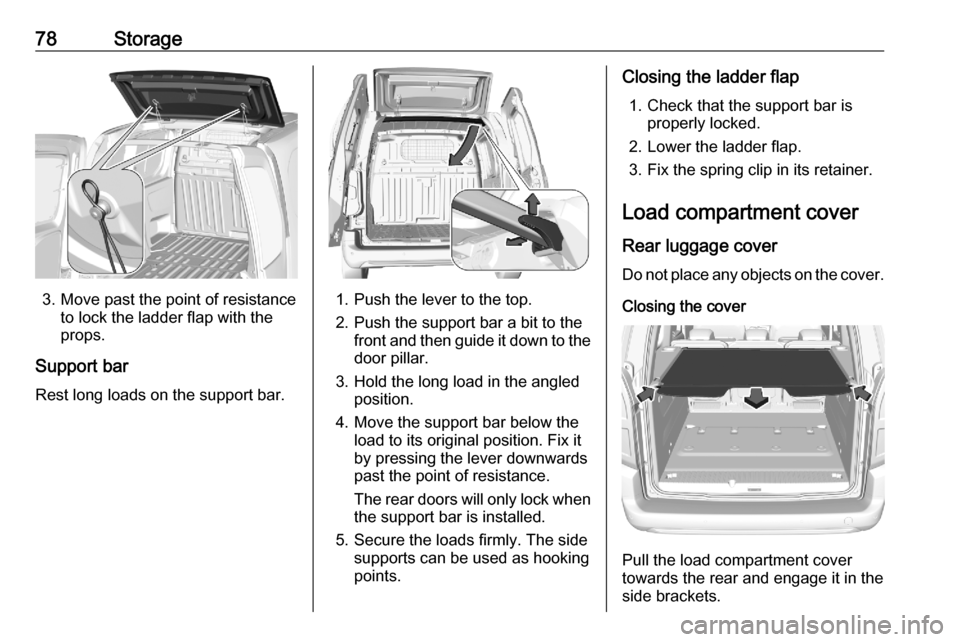
3. Move past the point of resistanceto lock the ladder flap with the
props.
Support bar Rest long loads on the support bar.1. Push the lever to the top.
2. Push the support bar a bit to the front and then guide it down to thedoor pillar.
3. Hold the long load in the angled position.
4. Move the support bar below the load to its original position. Fix it
by pressing the lever downwards
past the point of resistance.
The rear doors will only lock when the support bar is installed.
5. Secure the loads firmly. The side supports can be used as hooking
points.
Closing the ladder flap
1. Check that the support bar is properly locked.
2. Lower the ladder flap.
3. Fix the spring clip in its retainer.
Load compartment cover
Rear luggage cover Do not place any objects on the cover.
Closing the cover
Pull the load compartment cover
towards the rear and engage it in the
side brackets.
Page 83 of 283

Storage81Lashing eyes
The lashing eyes are designed to
secure items against slippage, e.g.
using lashing straps or luggage net.
Lashing eyes may be located on the
vehicle floor and / or in the sidewall.
The number and location of the
lashing eyes may vary depending on
the vehicle.
The maximum force applied to the
lashing eyes should not exceed
500 daN / 5 kN / 5000 N.
Depending on country, the maximum
force may be shown on a label.
Note
Specifications on the label always
have priority over those given in this manual.
Cargo management system
Depending on version, a partition
behind the front seats protects the
driver and front passengers against
the risk of load movement.
There may be a flap in the partition
behind the passenger seat which can
be removed to accommodate long
objects. A protective cover is
provided in the vehicle to assure safe transportation.
If the outer passenger seat backrest
is folded down and the partition flap is open, the centre seat has to stay free.
Removing the flap
1. Release the locking device, lower
the flap and then remove it.
2. Stow the flap behind the driver’s seat.
Page 86 of 283

84Storage
● Wind one strap around the barlocated under the front driver
seat cushion. The other one wind
around the bar of the passenger
seat. Then secure each hook to
the corresponding strap.
Tension both straps by pulling at
the loose end.
● Push down head restraints and fold down rear seat backrests
3 77.
Load compartment grille
Depending on version a partition
protects the driver and passengers
against the risk of load movement.
The partition can be placed behind
the front or rear seats.
There is a flap in the partition which
can be opened to accommodate long
objects. A protective cover is
provided in the vehicle to assure safe transportation.
If the side seat backrest is folded
down and the partition flap is open the centre seat has to stay free.
If the backrest of the rear seat is
lowered and the flap open to transport
long objects, the front passenger seat
has to stay free.
Page 87 of 283

Storage85Moving the partition
1. Release the four locking deviceson the top and the bottom of the
partition.
2. To be placed behind the front seats fold down the rear seat
backrests 3 53
3. Move the partition and lock the
four locking devices on the top
and the bottom.
9 Warning
Take care when operating the
bottom locking devices. Risk of
pinching.
Opening the flap
1. Depending on the positioning of the partition and the length of the
load fold down the outer rear seat
backrest and / or passenger seat
backrest 3 50, 53
2. Release the locking device of the
flap and open the flap.
3. Secure the flap with the rod.
Page 89 of 283
Storage87side pass one strap on each headrestraint.
With fitted protective cover the
maximum load on each of the folded
backrests is 100 kg.
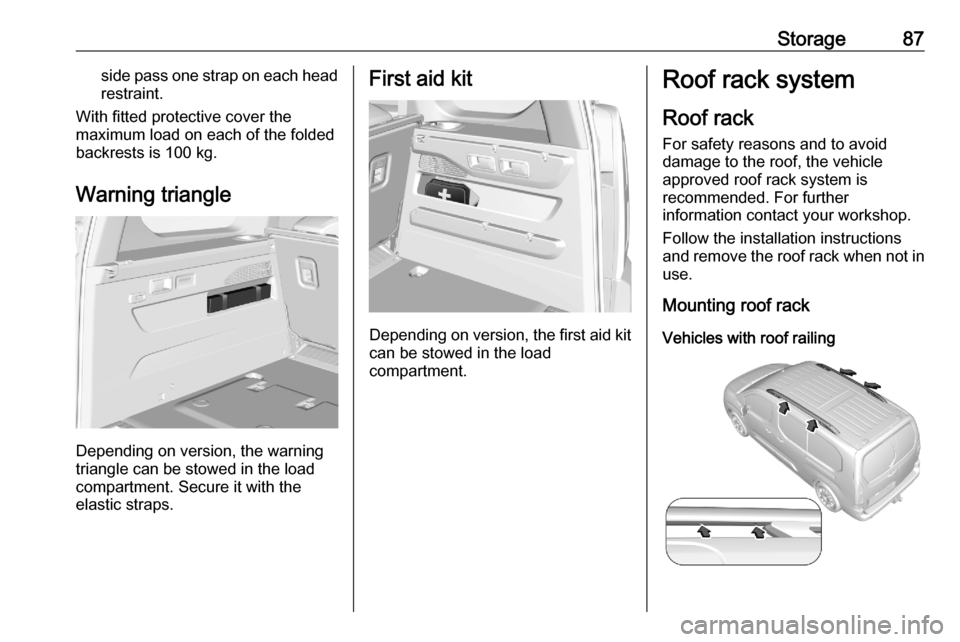
Warning triangle
Depending on version, the warning
triangle can be stowed in the load
compartment. Secure it with the
elastic straps.
First aid kit
Depending on version, the first aid kit can be stowed in the load
compartment.
Roof rack system
Roof rack
For safety reasons and to avoid
damage to the roof, the vehicle
approved roof rack system is
recommended. For further
information contact your workshop.
Follow the installation instructions
and remove the roof rack when not in use.
Mounting roof rack
Vehicles with roof railing
Page 90 of 283
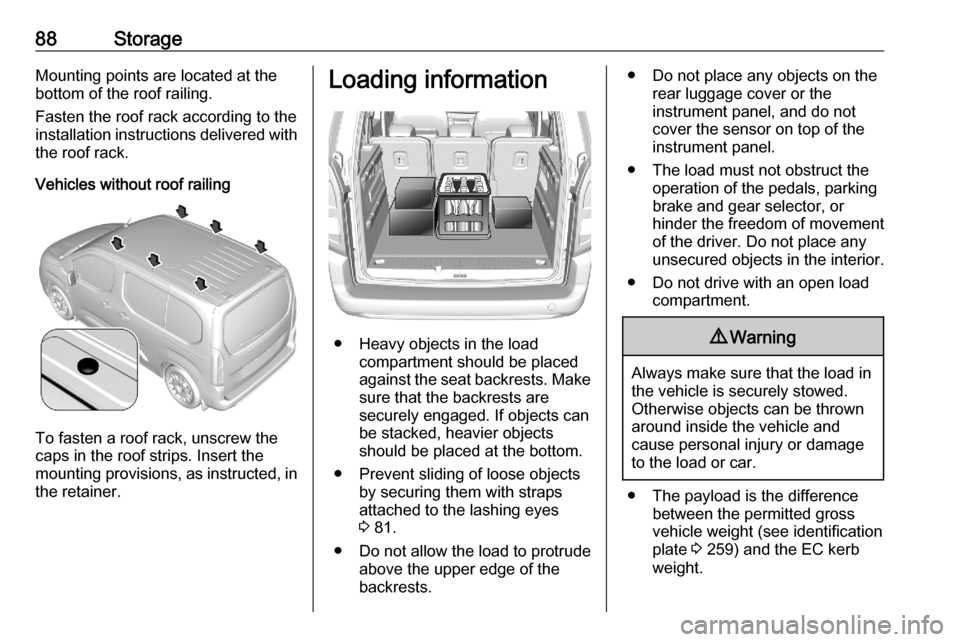
88StorageMounting points are located at the
bottom of the roof railing.
Fasten the roof rack according to the
installation instructions delivered with
the roof rack.
Vehicles without roof railing
To fasten a roof rack, unscrew the
caps in the roof strips. Insert the
mounting provisions, as instructed, in the retainer.
Loading information
● Heavy objects in the load compartment should be placed
against the seat backrests. Make
sure that the backrests are
securely engaged. If objects can
be stacked, heavier objects
should be placed at the bottom.
● Prevent sliding of loose objects by securing them with straps
attached to the lashing eyes
3 81.
● Do not allow the load to protrude above the upper edge of the
backrests.
● Do not place any objects on the rear luggage cover or the
instrument panel, and do not cover the sensor on top of theinstrument panel.
● The load must not obstruct the operation of the pedals, parking
brake and gear selector, or
hinder the freedom of movement
of the driver. Do not place any
unsecured objects in the interior.
● Do not drive with an open load compartment.9Warning
Always make sure that the load in
the vehicle is securely stowed.
Otherwise objects can be thrown
around inside the vehicle and
cause personal injury or damage
to the load or car.
● The payload is the difference between the permitted gross
vehicle weight (see identification
plate 3 259) and the EC kerb
weight.
Page 91 of 283
Storage89To calculate the payload, enter
the data for your vehicle in the
weights table at the front of this
manual.
The EC kerb weight includes
weights for the driver (68 kg),
luggage (7 kg) and all fluids (fuel
tank 90% full).
Optional equipment and
accessories increase the kerb
weight.
● Driving with a roof load increases
the sensitivity of the vehicle to
cross-winds and has a
detrimental effect on vehicle
handling due to the vehicle's
higher centre of gravity.
Distribute the load evenly and secure it properly with retaining
straps. Adjust the tyre pressure
and vehicle speed according to
the load conditions. Check and
retighten the straps frequently.
Do not drive faster
than 120 km/h.
The permissible roof load is:● 80 kg for vehicles with roof railing
● 100 kg for vehicles without roof railing and with two roofracks
● 150 kg for vehicles without roof railing and with three
roof racks, except vehicles
with seven seats
● 100 kg for vehicles without roof railing and with three
roof racks and seven seats
The roof load is the combined weight
of the roof rack and the load.
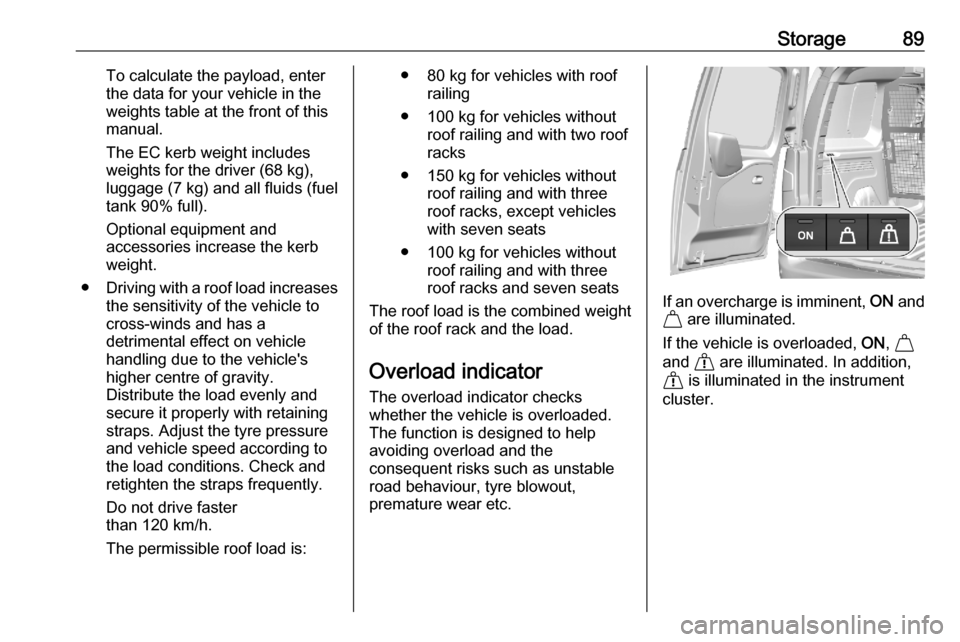
Overload indicator
The overload indicator checks
whether the vehicle is overloaded.
The function is designed to help
avoiding overload and the
consequent risks such as unstable
road behaviour, tyre blowout,
premature wear etc.
If an overcharge is imminent, ON and
% are illuminated.
If the vehicle is overloaded, ON, %
and & are illuminated. In addition,
& is illuminated in the instrument
cluster.
Page 105 of 283
Instruments and controls103distance. C flashes and then
illuminates permanently until service
is executed.
Reset of service interval After each service, the service
indicator must be reset to ensure
proper functionality. It is
recommended to seek the assistance
of a workshop.
If service is executed by yourself,
operate as following:
● switch off ignition
● press and hold button CHECK
● switch on ignition, the distance indication begins a countdown
● when the display indicates =0,
release the button
C disappearsRetrieving service information
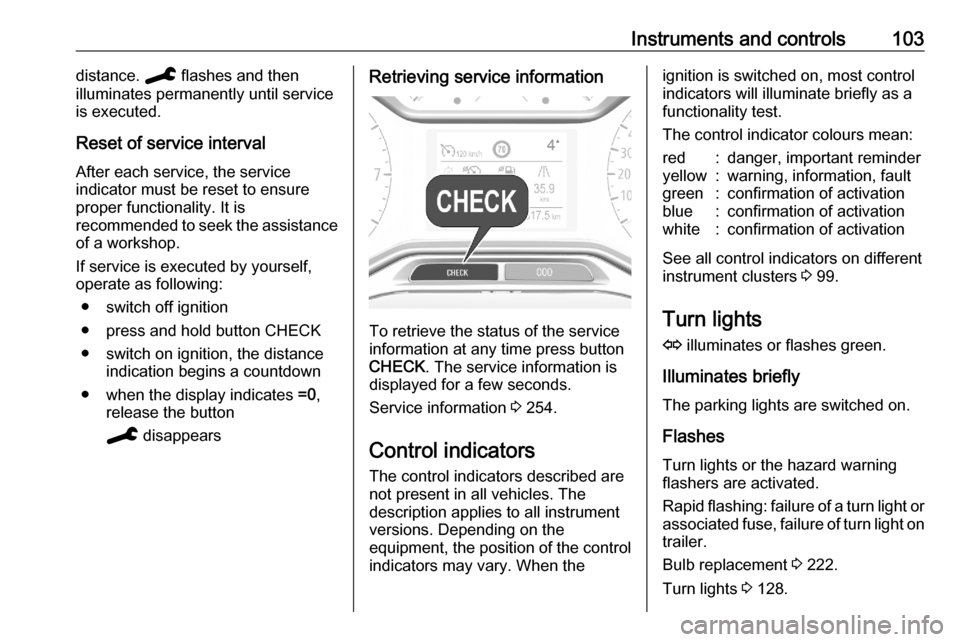
To retrieve the status of the service
information at any time press button
CHECK . The service information is
displayed for a few seconds.
Service information 3 254.
Control indicators The control indicators described are
not present in all vehicles. The
description applies to all instrument
versions. Depending on the
equipment, the position of the control indicators may vary. When the
ignition is switched on, most controlindicators will illuminate briefly as afunctionality test.
The control indicator colours mean:red:danger, important reminderyellow:warning, information, faultgreen:confirmation of activationblue:confirmation of activationwhite:confirmation of activation
See all control indicators on different
instrument clusters 3 99.
Turn lights
O illuminates or flashes green.
Illuminates briefly The parking lights are switched on.
Flashes
Turn lights or the hazard warning
flashers are activated.
Rapid flashing: failure of a turn light or associated fuse, failure of turn light on
trailer.
Bulb replacement 3 222.
Turn lights 3 128.
Page 121 of 283
Instruments and controls119●Comfort
Ambient lighting : Adjusts the
brightness of the ambient
lighting.
Rear wiper in reverse gear :
Activates or deactivates
automatic switching on of the
rear window wiper when reverse
gear is engaged.
● Vehicle
Unlocking boot only : Activation /
deactivation.
Plip action : Driver / all doors.
● Security
Fatigue Detection system :
Activates or deactivates the
driver drowsiness system.
● Driving assistance
Speed recommendation :
Activates or deactivates the
function.Colour Info Display Multimedia
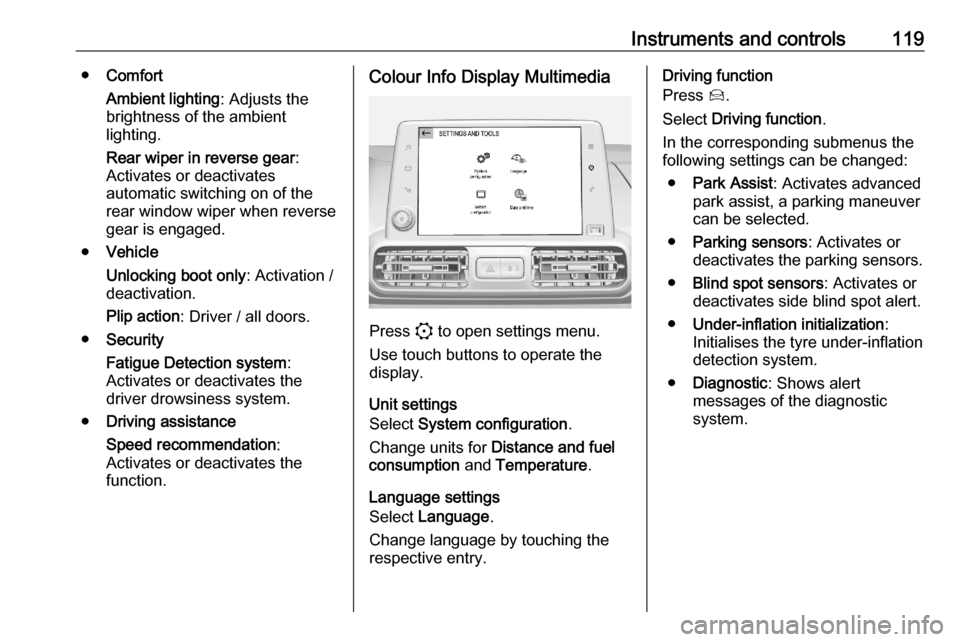
Press : to open settings menu.
Use touch buttons to operate the
display.
Unit settings
Select System configuration .
Change units for Distance and fuel
consumption and Temperature .
Language settings
Select Language .
Change language by touching the
respective entry.
Driving function
Press Í.
Select Driving function .
In the corresponding submenus the
following settings can be changed:
● Park Assist : Activates advanced
park assist, a parking maneuver
can be selected.
● Parking sensors : Activates or
deactivates the parking sensors.
● Blind spot sensors : Activates or
deactivates side blind spot alert.
● Under-inflation initialization :
Initialises the tyre under-inflation
detection system.
● Diagnostic : Shows alert
messages of the diagnostic
system.