wheel bolts OPEL CORSA 2009 Owners Manual
[x] Cancel search | Manufacturer: OPEL, Model Year: 2009, Model line: CORSA, Model: OPEL CORSA 2009Pages: 284, PDF Size: 4.96 MB
Page 190 of 284

184 Driving and operationTowing equipment
3
Only use towing equipment that has been
approved for your vehicle. Ask a workshop
to retrofit towing equipment. It may be
necessary to make changes that affect the
cooling system, heat shields or other
equipment.
Mounting dimensions of towing equipment
3269.
Stowage of coupling ball bar
The coupling ball bar is stowed in a bag in
the spare wheel well and secured to the
lashing eyes in the luggage compartment
3 187.
Picture no: 18389s.tif
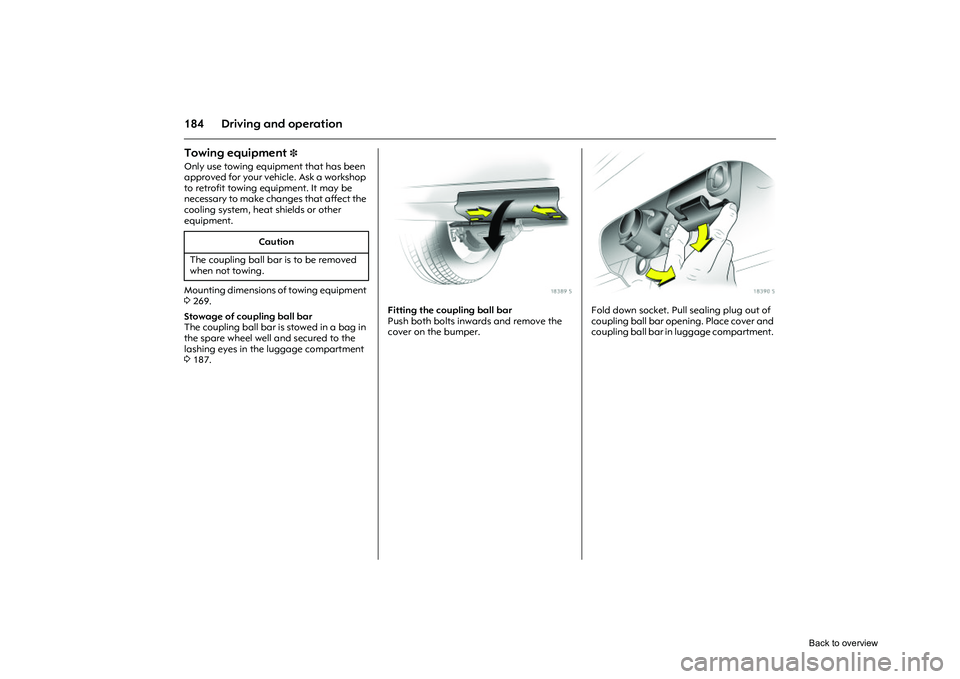
Fitting the coupling ball bar
Push both bolts inwards and remove the
cover on the bumper.
Picture no: 18390s.tif
Fold down socket. Pull sealing plug out of
coupling ball bar opening. Place cover and
coupling ball bar in luggage compartment.
Caution
The coupling ball bar is to be removed
when not towing.
Back to overview
Page 193 of 284

187
Driving and operation
Picture no: 18395s.tif
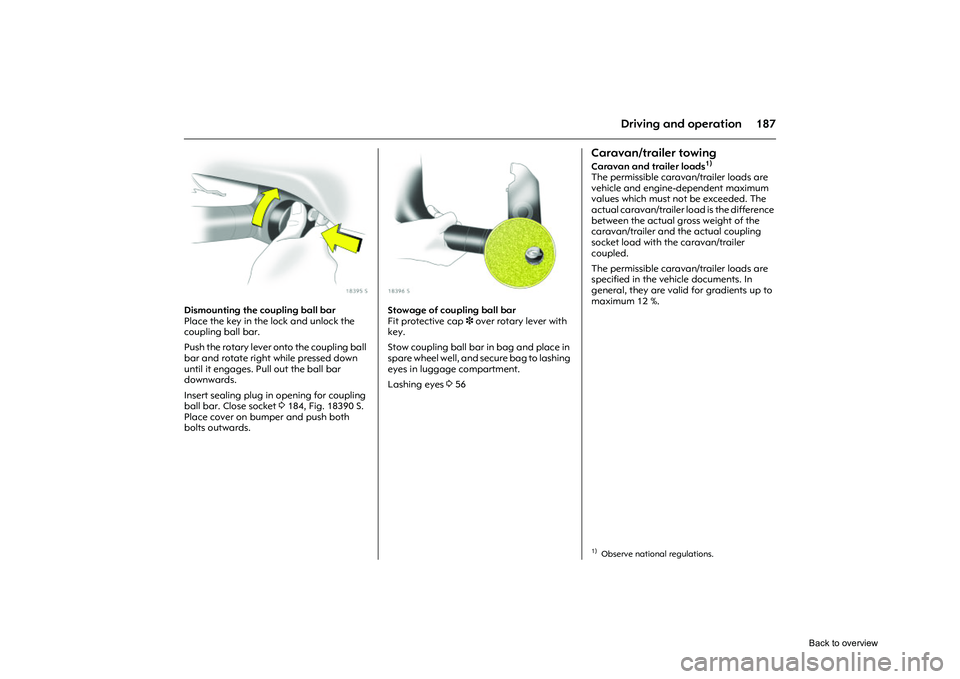
Dismounting the coupling ball bar
Place the key in the lock and unlock the
coupling ball bar.
Push the rotary lever onto the coupling ball
bar and rotate right while pressed down
until it engages. Pull out the ball bar
downwards.
Insert sealing plug in opening for coupling
ball bar. Close socket 3184, Fig. 18390 S.
Place cover on bumper and push both
bolts outwards.
Picture no: 18396s.tif
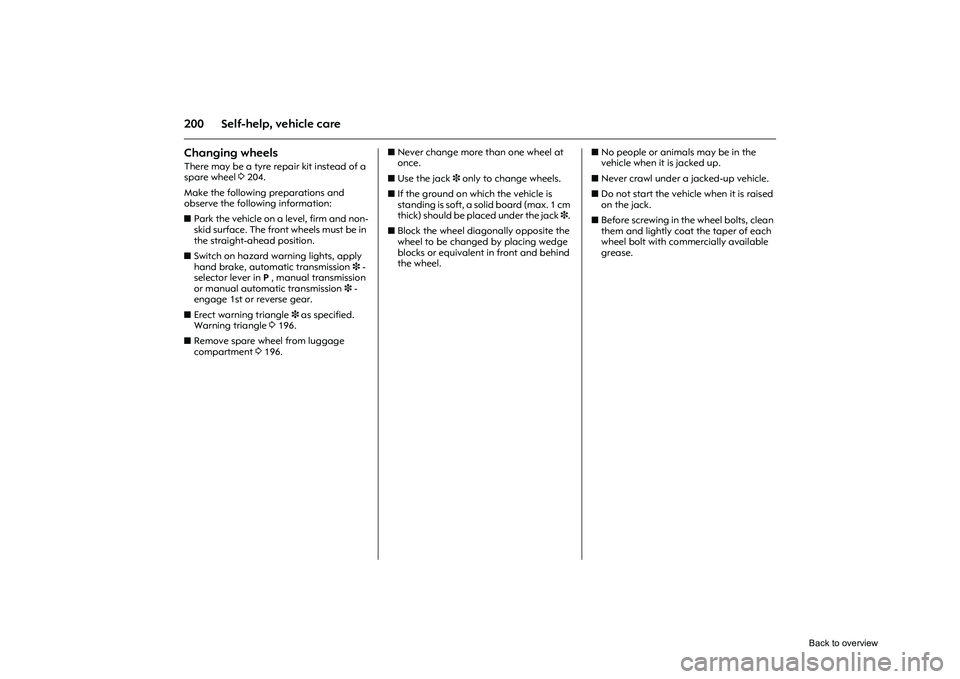
Stowage of coupling ball bar
Fit protective cap 3 over rotary lever with
key.
Stow coupling ball bar in bag and place in
spare wheel well, and se cure bag to lashing
eyes in luggage compartment.
Lashing eyes 356
Caravan/trailer towingCaravan and trailer loads
1)
The permissible caravan/trailer loads are
vehicle and engine-dependent maximum
values which must not be exceeded. The
actual caravan/trailer load is the difference
between the actual gross weight of the
caravan/trailer and the actual coupling
socket load with the caravan/trailer
coupled.
The permissible caravan/trailer loads are
specified in the vehicle documents. In
general, they are valid for gradients up to
maximum 12 %. 1)Observe national regulations.
Back to overview
Page 206 of 284

200 Self-help, vehicle careChanging wheels There may be a tyre repair kit instead of a
spare wheel 3204.
Make the following preparations and
observe the following information:
z Park the vehicle on a level, firm and non-
skid surface. The front wheels must be in
the straight-ahead position.
z Switch on hazard warning lights, apply
hand brake, automa tic transmission 3 -
selector lever in P , manual transmission
or manual automatic transmission 3 -
engage 1st or reverse gear.
z Erect warning triangle 3 as specified.
Warning triangle 3196.
z Remove spare wheel from luggage
compartment 3196. z
Never change more than one wheel at
once.
z Use the jack 3 only to change wheels.
z If the ground on which the vehicle is
standing is soft, a solid board (max. 1 cm
thick) should be placed under the jack 3.
z Block the wheel diagonally opposite the
wheel to be changed by placing wedge
blocks or equivalent in front and behind
the wheel. z
No people or animals may be in the
vehicle when it is jacked up.
z Never crawl under a jacked-up vehicle.
z Do not start the vehicle when it is raised
on the jack.
z Before screwing in the wheel bolts, clean
them and lightly coat the taper of each
wheel bolt with comm ercially available
grease.
Back to overview
Page 207 of 284

201
Self-help, vehicle care
Picture no: 17243t.tif
1. Pull off the wheel trim with the hook 3.
Vehicle tools 3 198.
For wheel trims with visible wheel bolts 3:
The trim can remain on the wheel. Do not
remove the retaining washers 3 on the
wheel bolts.
Picture no: 17244t.tif
Alloy wheels 3: Disengage the wheel bolt
caps with a screwdriver and remove.
Protect the wheel by inserting a soft cloth
between the screwdriver and ally wheel.
Picture no: 17245t.tif
2. Push the wheel bolt wrench 3 on as far
as possible and slacken the wheel bolts
half a turn.
Back to overview
Page 209 of 284

203
Self-help, vehicle care
5. Unscrew the wheel bolts. If the wheel bolts have retaining
washers 3, they must not be removed.
6. Change wheel. Notes on spare wheel 3197. Notes on temporary spare wheel
3 197.
Picture no: 17249t.tif
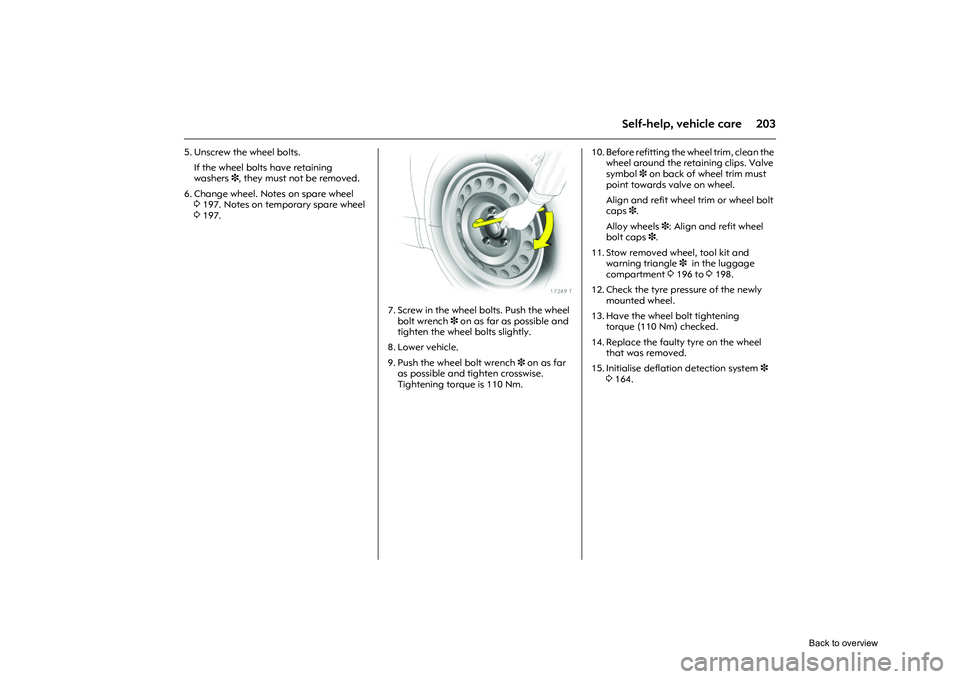
7. Screw in the wheel bolts. Push the wheel
bolt wrench 3 on as far as possible and
tighten the wheel bolts slightly.
8. Lower vehicle.
9. Push the wheel bolt wrench 3 on as far
as possible and tighten crosswise.
Tightening torque is 110 Nm. 10. Before refitting the wheel trim, clean the
wheel around the retaining clips. Valve
symbol 3 on back of wheel trim must
point towards valve on wheel.
Align and refit wheel trim or wheel bolt
caps 3.
Alloy wheels 3: Align and refit wheel
bolt caps 3.
11. Stow removed wheel, tool kit and warning triangle 3 in the luggage
compartment 3196 to 3198.
12. Check the tyre pressure of the newly mounted wheel.
13. Have the wheel bolt tightening torque (110 Nm) checked.
14. Replace the faulty tyre on the wheel that was removed.
15. Initialise deflation detection system 3
3 164.
Back to overview