Electric OPEL CORSA E 2017.5 Owner's Manual
[x] Cancel search | Manufacturer: OPEL, Model Year: 2017.5, Model line: CORSA E, Model: OPEL CORSA E 2017.5Pages: 269, PDF Size: 7.97 MB
Page 11 of 269
In brief9Exterior mirrors
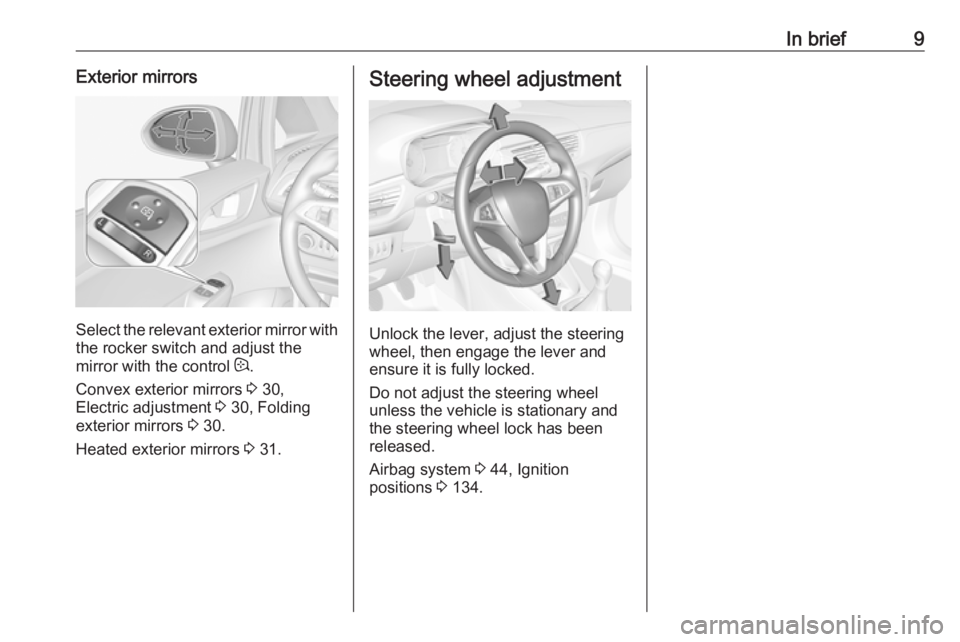
Select the relevant exterior mirror with
the rocker switch and adjust the
mirror with the control :.
Convex exterior mirrors 3 30,
Electric adjustment 3 30, Folding
exterior mirrors 3 30.
Heated exterior mirrors 3 31.
Steering wheel adjustment
Unlock the lever, adjust the steering
wheel, then engage the lever and
ensure it is fully locked.
Do not adjust the steering wheel
unless the vehicle is stationary and the steering wheel lock has been
released.
Airbag system 3 44, Ignition
positions 3 134.
Page 24 of 269
22Keys, doors and windowsKeys, doors and
windowsKeys, locks ................................... 22
Keys .......................................... 22
Car Pass .................................... 23
Radio remote control .................23
Memorised settings ...................24
Central locking system ..............24
Automatic locking ......................26
Child locks ................................. 26
Doors ........................................... 27
Load compartment ....................27
Vehicle security ............................ 28
Anti-theft locking system ...........28
Anti-theft alarm system ..............28
Immobiliser ................................ 29
Exterior mirrors ............................ 30
Convex shape ........................... 30
Electric adjustment ....................30
Folding mirrors .......................... 30
Heated mirrors ........................... 31
Interior mirrors ............................. 31
Manual anti-dazzle ....................31
Automatic anti-dazzle ................31Windows...................................... 32
Windscreen ............................... 32
Manual windows ........................32
Power windows ......................... 32
Heated rear window ..................33
Heated windscreen ....................34
Sun visors .................................. 34
Roof ............................................. 34
Sunroof ...................................... 34Keys, locks
KeysCaution
Do not attach heavy or bulky itemsto the ignition key.
Replacement keys
The key number is specified in the
Car Pass or on a detachable tag.
The key number must be quoted
when ordering replacement keys, as
it is a component of the immobiliser
system.
Locks 3 233.
The code number of the adapter for
the locking wheel bolts is specified on a card. It must be quoted when
ordering a replacement adapter.
Wheel changing 3 225.
Page 32 of 269
30Keys, doors and windowsThe immobiliser is activated
automatically after the key has been
removed from the ignition switch.
If the control indicator d flashes when
the ignition is on, there is a fault in the
system; the engine cannot be started. Switch off the ignition and repeat the
start attempt.
If the control indicator continues
flashing, attempt to start the engine
using the spare key and seek the
assistance of a workshop.
Note
The immobiliser does not lock the
doors. You should always lock the
vehicle after leaving it.
Switch on the anti-theft alarm
system 3 24, 3 28.
Control indicator d 3 95.Exterior mirrors
Convex shape
The convex exterior mirror contains
an aspherical area and reduces blind spots. The shape of the mirror makes objects appear smaller, which will
affect the ability to estimate
distances.
Electric adjustment
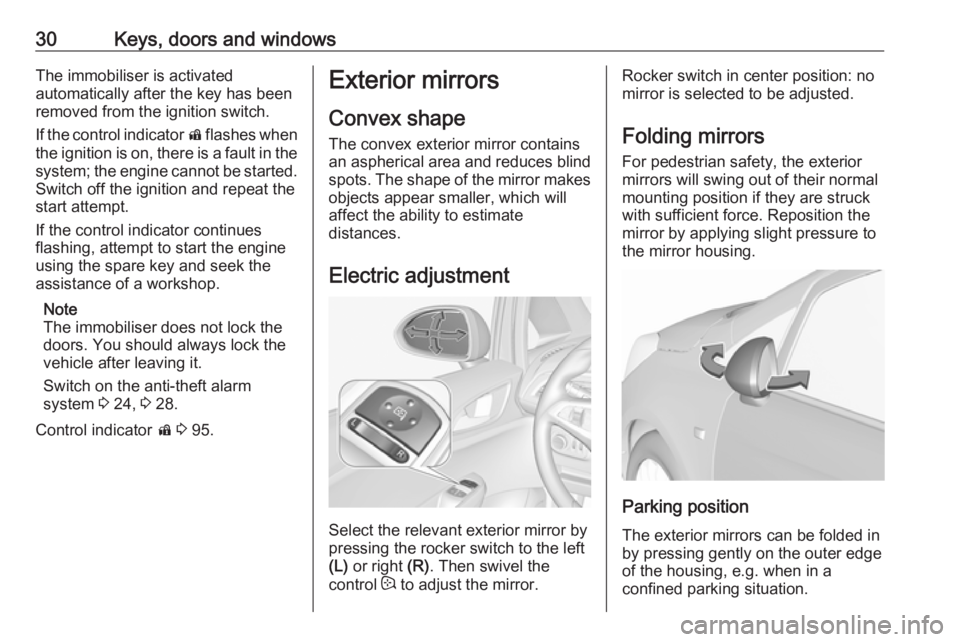
Select the relevant exterior mirror by
pressing the rocker switch to the left (L) or right (R). Then swivel the
control : to adjust the mirror.
Rocker switch in center position: no
mirror is selected to be adjusted.
Folding mirrors For pedestrian safety, the exterior
mirrors will swing out of their normal
mounting position if they are struck
with sufficient force. Reposition the
mirror by applying slight pressure to
the mirror housing.
Parking position
The exterior mirrors can be folded in
by pressing gently on the outer edge
of the housing, e.g. when in a
confined parking situation.
Page 84 of 269
82Instruments and controlsPower outlets
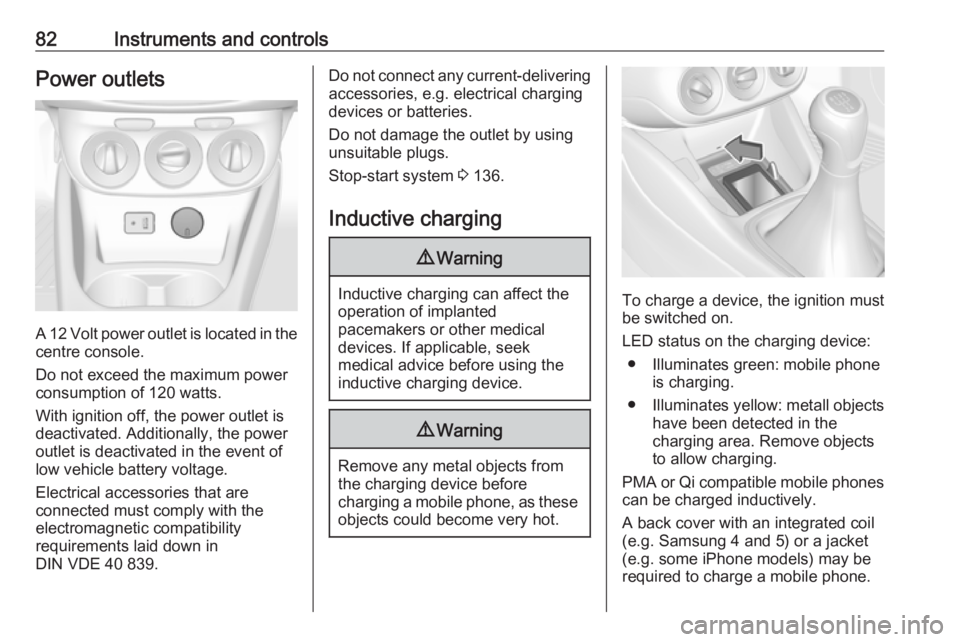
A 12 Volt power outlet is located in the
centre console.
Do not exceed the maximum power
consumption of 120 watts.
With ignition off, the power outlet is
deactivated. Additionally, the power outlet is deactivated in the event of
low vehicle battery voltage.
Electrical accessories that are
connected must comply with the
electromagnetic compatibility
requirements laid down in
DIN VDE 40 839.
Do not connect any current-delivering accessories, e.g. electrical charging
devices or batteries.
Do not damage the outlet by using
unsuitable plugs.
Stop-start system 3 136.
Inductive charging9 Warning
Inductive charging can affect the
operation of implanted
pacemakers or other medical
devices. If applicable, seek
medical advice before using the
inductive charging device.
9 Warning
Remove any metal objects from
the charging device before
charging a mobile phone, as these
objects could become very hot.
To charge a device, the ignition must
be switched on.
LED status on the charging device: ● Illuminates green: mobile phone is charging.
● Illuminates yellow: metall objects
have been detected in the
charging area. Remove objects
to allow charging.
PMA or Qi compatible mobile phones can be charged inductively.
A back cover with an integrated coil
(e.g. Samsung 4 and 5) or a jacket
(e.g. some iPhone models) may be
required to charge a mobile phone.
Page 107 of 269
Instruments and controls105Vehicle messages on
Colour-Info-Display
Some important messages appear
additionally in the
Colour-Info-Display. Some
messages only pop-up for a few
seconds.
Warning chimes When starting the engine or whilst
driving
Only one warning chime will sound at
a time.
The warning chime regarding
unfastened seat belts has priority
over any other warning chime.
● If seat belt is not fastened.
● If a door or the tailgate is not fully
closed when starting off.
● If a certain speed is exceeded with parking brake applied.
● If a programmed speed is exceeded.
● If a warning message appears in the Driver Information Centre orInfo-Display.● If the parking assist detects an object.
● If unintended lane change occurs.
● If the reverse gear is engaged and the rear end carrier
extended.
● If the diesel particle filter has reached the maximum filling
level.
When the vehicle is parked and/or the driver's door is opened
● With exterior lights on.
During an Autostop ● If the driver's door is opened.
Battery voltage
Uplevel display
When the vehicle battery voltage is
running low, a warning message will
appear in the Driver Information
Centre.
Midlevel displayWhen the vehicle battery voltage is
running low, a warning code 174 will appear in the Driver Information
Centre.
1. Switch off immediately any electrical consumers which are
not required for a safe drive, e.g.
seat heating, heated windscreen
and heated rear window or other
main consumers.
2. Charge the vehicle battery by driving continuously for a while or
by using a charging device.
The warning message or warning
code will disappear after the engine has been started twice consecutively
without a voltage drop.
If the vehicle battery cannot be
recharged, have the cause of the fault
remedied by a workshop.
Page 111 of 269
Instruments and controls109Telematics service
OnStar
OnStar is a personal connectivity and
service assistant with integrated
Wi-Fi hotspot. The OnStar service is
available 24 hours a day, seven days
a week.
Note
OnStar is not available for all
markets. For further information,
contact your workshop.
Note
In order to be available and
operational, OnStar needs a valid
OnStar subscription, functioning
vehicle electrics, mobile service and GPS satellite link.
To activate the OnStar services and
set up an account, press Z and speak
with an advisor.Depending on the equipment of the
vehicle, the following services are available:
● Emergency services and support
in the case of a vehicle
breakdown
● Wi-Fi hotspot
● Smartphone application
● Remote control, e.g. location of the vehicle, activation of horn and
lights, control of central locking
system
● Stolen vehicle assistance
● Vehicle diagnostics
● Destination download
Note
The OnStar module of the vehicle is
deactivated after ten days without an
ignition cycle. Functions requiring a
data connection will be available
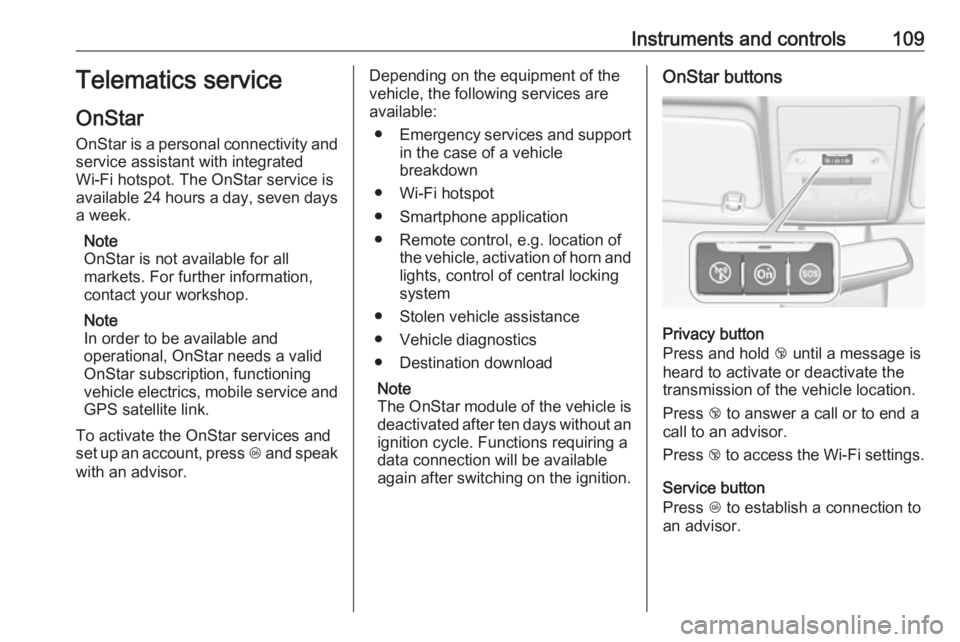
again after switching on the ignition.OnStar buttons
Privacy button
Press and hold j until a message is
heard to activate or deactivate the
transmission of the vehicle location.
Press j to answer a call or to end a
call to an advisor.
Press j to access the Wi-Fi settings.
Service button
Press Z to establish a connection to
an advisor.
Page 124 of 269
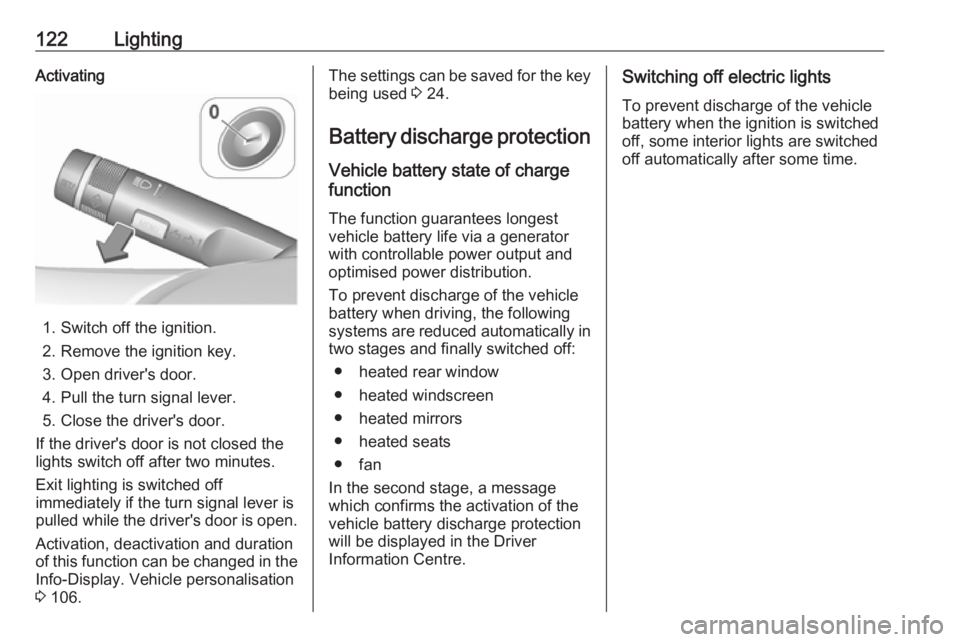
122LightingActivating
1. Switch off the ignition.
2. Remove the ignition key.
3. Open driver's door.
4. Pull the turn signal lever.
5. Close the driver's door.
If the driver's door is not closed the
lights switch off after two minutes.
Exit lighting is switched off
immediately if the turn signal lever is
pulled while the driver's door is open.
Activation, deactivation and duration
of this function can be changed in the Info-Display. Vehicle personalisation
3 106.
The settings can be saved for the key
being used 3 24.
Battery discharge protection
Vehicle battery state of charge
function
The function guarantees longestvehicle battery life via a generator
with controllable power output and
optimised power distribution.
To prevent discharge of the vehicle
battery when driving, the following
systems are reduced automatically in two stages and finally switched off:
● heated rear window
● heated windscreen
● heated mirrors
● heated seats
● fan
In the second stage, a message
which confirms the activation of the
vehicle battery discharge protection
will be displayed in the Driver
Information Centre.Switching off electric lights
To prevent discharge of the vehicle
battery when the ignition is switched off, some interior lights are switched
off automatically after some time.
Page 137 of 269
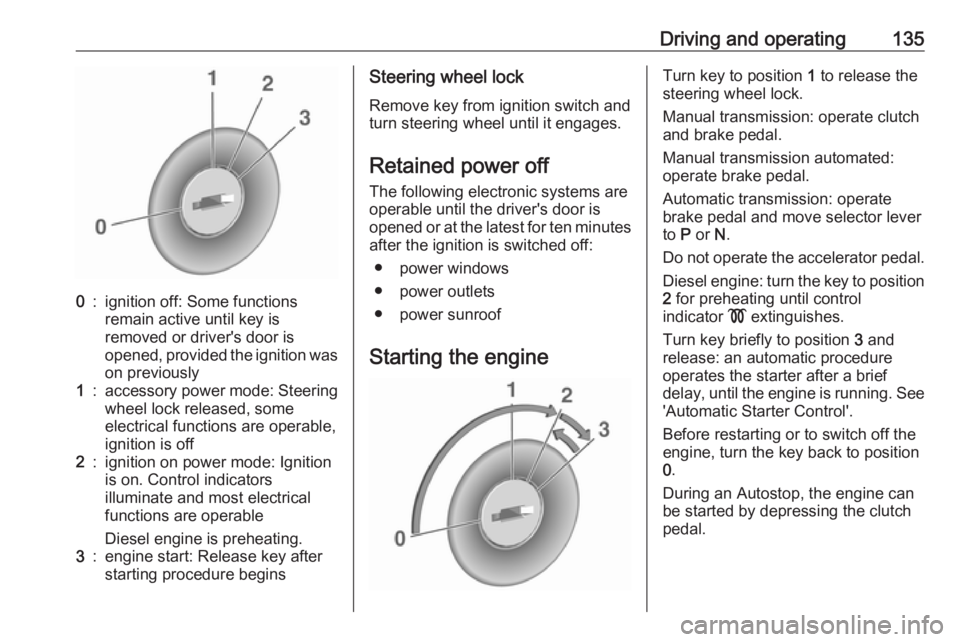
Driving and operating1350:ignition off: Some functions
remain active until key is
removed or driver's door is
opened, provided the ignition was
on previously1:accessory power mode: Steering wheel lock released, some
electrical functions are operable,
ignition is off2:ignition on power mode: Ignition
is on. Control indicators
illuminate and most electrical
functions are operable
Diesel engine is preheating.3:engine start: Release key after
starting procedure beginsSteering wheel lock
Remove key from ignition switch and
turn steering wheel until it engages.
Retained power off The following electronic systems areoperable until the driver's door is
opened or at the latest for ten minutes
after the ignition is switched off:
● power windows
● power outlets
● power sunroof
Starting the engineTurn key to position 1 to release the
steering wheel lock.
Manual transmission: operate clutch
and brake pedal.
Manual transmission automated:
operate brake pedal.
Automatic transmission: operate
brake pedal and move selector lever
to P or N.
Do not operate the accelerator pedal. Diesel engine: turn the key to position2 for preheating until control
indicator ! extinguishes.
Turn key briefly to position 3 and
release: an automatic procedure operates the starter after a brief
delay, until the engine is running. See
'Automatic Starter Control'.
Before restarting or to switch off the
engine, turn the key back to position
0 .
During an Autostop, the engine can
be started by depressing the clutch
pedal.
Page 140 of 269
138Driving and operatingOtherwise an Autostop will be
inhibited.
Certain settings of the climate control
system may inhibit an Autostop. See
'Climate control' chapter for further
information 3 126.
Immediately after motorway driving
an Autostop may be inhibited.
New vehicle running-in 3 134.
Vehicle battery discharge protection To ensure reliable engine restarts,
several vehicle battery discharge
protection features are implemented
as part of the stop-start system.
Power saving measures
During an Autostop, several electrical
features, e.g. the rear window
heating, are disabled or switched into a power saving mode. The fan speed
of the climate control system is
reduced to save power.
Restart of the engine by the driverVehicles with manual transmission
Depress the clutch pedal to restart the
engine.When the engine is restarted, control
indicator D in the Driver Information
Centre extinguishes.
If the selector lever is shifted out of
neutral before depressing the clutch
pedal first, control indicator -
illuminates or is shown as a symbol in
the Driver Information Centre.
Control indicator - 3 93.Vehicles with manual transmission
automated
Release the brake pedal or move
selector lever out of D to restart the
engine.
When the engine is restarted, control
indicator D in the Driver Information
Centre extinguishes.
Restart of the engine by the stop-
start system
The selector lever must be in neutral
to enable an automatic restart.
If one of the following conditions occurs during an Autostop, the
engine will be restarted automatically
by the stop-start system:
● The stop-start system is manually deactivated.
● The bonnet is opened.
● The driver's seat belt is unfastened and the driver's door
is opened.
● The engine temperature is too low.
● The charging level of the vehicle battery is below a defined level.
● The brake vacuum is not sufficient.
● The vehicle is driven at least at walking speed.
● The climate control system requests an engine start.
● The air conditioning is manually switched on.
If the bonnet is not fully closed, a
warning message is displayed in the
Driver Information Centre.
If an electrical accessory, e.g. a
portable CD player, is connected to
the power outlet, a brief power drop
during restart might be noticeable.
Page 192 of 269
190Vehicle careVehicle careGeneral Information...................191
Accessories and vehicle modifications .......................... 191
Vehicle storage ........................191
End-of-life vehicle recovery .....192
Vehicle checks ........................... 192
Performing work ......................192
Bonnet ..................................... 192
Engine oil ................................. 193
Engine coolant ......................... 194
Washer fluid ............................ 195
Brakes ..................................... 196
Brake fluid ............................... 196
Vehicle battery ......................... 196
Diesel fuel system bleeding .....198
Wiper blade replacement ........198
Bulb replacement .......................199
Halogen headlights ..................199
Xenon headlights .....................201
Fog lights ................................. 202
Front turn signal lights .............203
Tail lights ................................. 203
Side turn signal lights ..............205
Centre high-mounted brake light ......................................... 206Number plate light...................206
Interior lights ............................ 206
Instrument panel illumination ...206
Electrical system ........................207
Fuses ....................................... 207
Engine compartment fuse box . 208
Instrument panel fuse box .......210
Vehicle tools .............................. 212
Tools ........................................ 212
Wheels and tyres .......................213
Winter tyres ............................. 213
Tyre designations ....................213
Tyre pressure .......................... 213
Tyre pressure monitoring system .................................... 215
Tread depth ............................. 219
Changing tyre and wheel size . 219
Wheel covers ........................... 219
Tyre chains .............................. 220
Tyre repair kit .......................... 220
Wheel changing .......................225
Spare wheel ............................ 228
Jump starting ............................. 230
Towing ....................................... 231
Towing the vehicle ...................231
Towing another vehicle ...........232Appearance care .......................233
Exterior care ............................ 233
Interior care ............................. 236