clock OPEL CORSA E 2019 Manual user
[x] Cancel search | Manufacturer: OPEL, Model Year: 2019, Model line: CORSA E, Model: OPEL CORSA E 2019Pages: 231, PDF Size: 6.87 MB
Page 65 of 231
Instruments and controls63Instruments and
controlsControls ....................................... 64
Steering wheel adjustment ........64
Steering wheel controls .............64
Heated steering wheel ...............64
Horn ........................................... 65
Windscreen wiper and washer ..65
Rear window wiper and washer ...................................... 66
Outside temperature ..................67
Clock ......................................... 68
Power outlets ............................. 69
Cigarette lighter ......................... 70
Ashtrays .................................... 70
Warning lights, gauges and indi‐ cators ........................................... 71
Instrument cluster ......................71
Speedometer ............................. 71
Odometer .................................. 71
Trip odometer ............................ 71
Tachometer ............................... 72
Fuel gauge ................................ 72
Fuel selector .............................. 73
Engine coolant temperature gauge ....................................... 74Service display.......................... 74
Control indicators ......................75
Turn lights .................................. 77
Seat belt reminder .....................78
Airbag and belt tensioners .........78
Airbag deactivation ....................79
Charging system .......................79
Malfunction indicator light ..........79
Service vehicle soon .................79
Brake and clutch system ...........79
Operate pedal ............................ 80
Antilock brake system (ABS) .....80
Gear shifting .............................. 80
Power steering .......................... 80
Lane departure warning ............80
Parking assist ............................ 80
Electronic Stability Control and Traction Control system ...........81
Exhaust filter .............................. 81
Tyre pressure monitoring system ...................................... 81
Engine oil pressure ....................81
Low fuel ..................................... 82
Immobiliser ................................ 82
Reduced engine power .............82
Autostop .................................... 82
Exterior light .............................. 82
High beam ................................. 82
Front fog lights ........................... 82
Rear fog light ............................. 82Cruise control............................ 83
Vehicle detected ahead .............83
Speed limiter ............................. 83
Traffic sign assistant ..................83
Door open .................................. 83
Displays ....................................... 83
Driver Information Centre ..........83
Info Display ................................ 88
Vehicle messages ........................89
Warning chimes .........................91
Battery voltage .......................... 92
Vehicle personalisation ................92
Telematics service .......................95
OnStar ....................................... 95
Page 70 of 231
68Instruments and controlsIf outside temperature drops to 3 °C,
a warning message is displayed in the
Driver Information Centre.9 Warning
The road surface may already be
icy even though the display
indicates a few degrees above
0 °C.
Clock
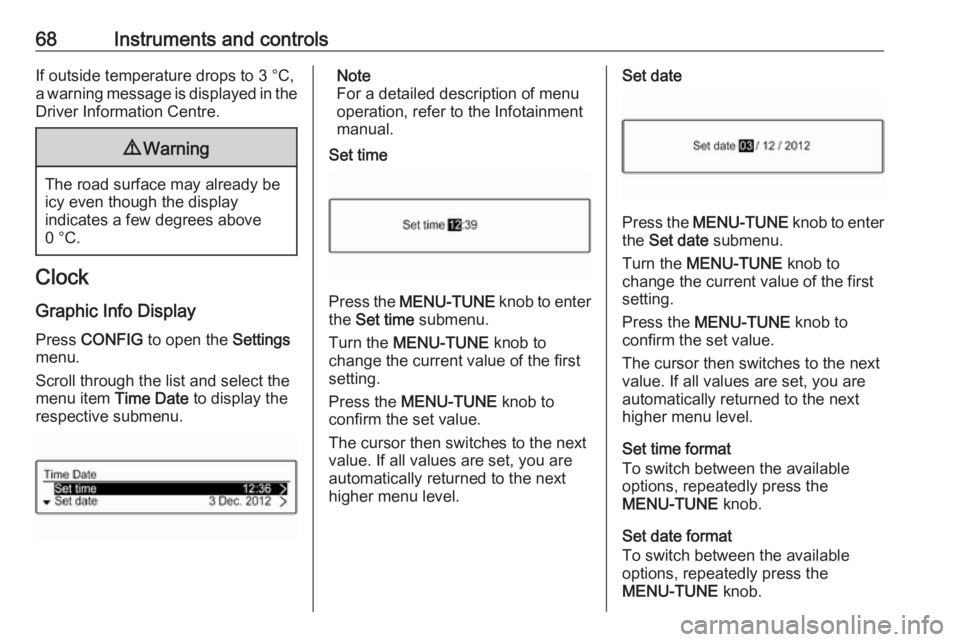
Graphic Info Display Press CONFIG to open the Settings
menu.
Scroll through the list and select the
menu item Time Date to display the
respective submenu.
Note
For a detailed description of menu
operation, refer to the Infotainment
manual.
Set time
Press the MENU-TUNE knob to enter
the Set time submenu.
Turn the MENU-TUNE knob to
change the current value of the first setting.
Press the MENU-TUNE knob to
confirm the set value.
The cursor then switches to the next
value. If all values are set, you are
automatically returned to the next
higher menu level.
Set date
Press the MENU-TUNE knob to enter
the Set date submenu.
Turn the MENU-TUNE knob to
change the current value of the first setting.
Press the MENU-TUNE knob to
confirm the set value.
The cursor then switches to the next
value. If all values are set, you are
automatically returned to the next
higher menu level.
Set time format
To switch between the available
options, repeatedly press the
MENU-TUNE knob.
Set date format
To switch between the available
options, repeatedly press the
MENU-TUNE knob.
Page 71 of 231
Instruments and controls69RDS clock synchronization
The RDS signal of most VHF
transmitters automatically sets the
time. RDS time synchronisation can take a few minutes. Some
transmitters do not send a correct
time signal. In such cases, it is
recommended to switch off the
automatic time synchronisation.
To switch between the options On
and Off, repeatedly press the
MENU-TUNE knob.
Colour Info Display
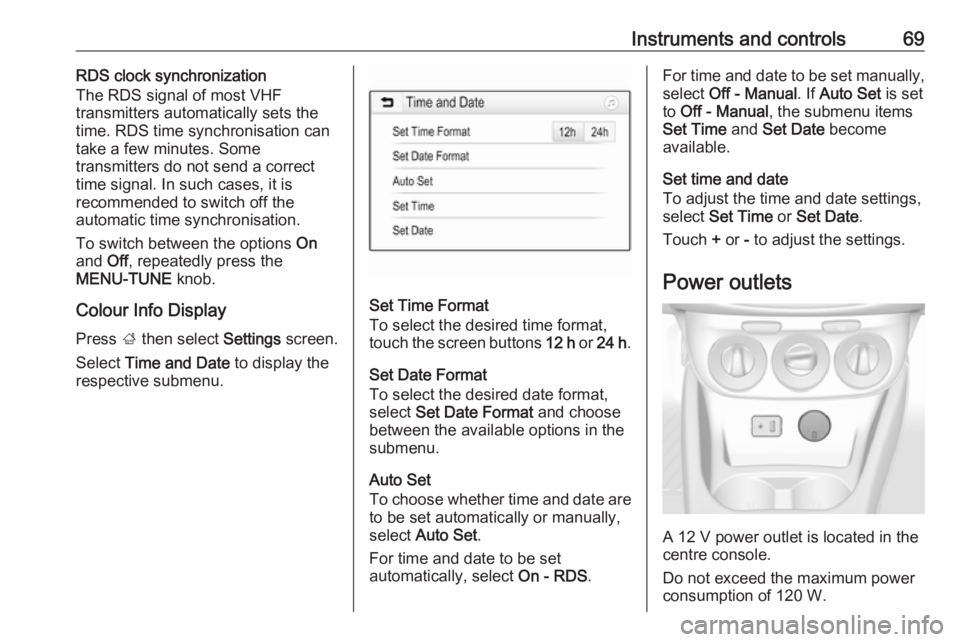
Press ; then select Settings screen.
Select Time and Date to display the
respective submenu.
Set Time Format
To select the desired time format,
touch the screen buttons 12 h or 24 h .
Set Date Format To select the desired date format,
select Set Date Format and choose
between the available options in the
submenu.
Auto Set
To choose whether time and date are to be set automatically or manually,
select Auto Set .
For time and date to be set
automatically, select On - RDS.
For time and date to be set manually,
select Off - Manual . If Auto Set is set
to Off - Manual , the submenu items
Set Time and Set Date become
available.
Set time and date
To adjust the time and date settings, select Set Time or Set Date .
Touch + or - to adjust the settings.
Power outlets
A 12 V power outlet is located in the
centre console.
Do not exceed the maximum power
consumption of 120 W.
Page 104 of 231
102LightingHigh beam
To switch from low to high beam,
push stalk.
To switch to low beam, push stalk again or pull.
Headlight flash To activate the headlight flash, pull
stalk.
Headlight range adjustment
Manual headlight range
adjustment
To adapt headlight range to the
vehicle load to prevent dazzling: turn
thumb wheel ? to required position.
0:front seats occupied1:all seats occupied2:all seats occupied and load
compartment laden3:driver's seat occupied and load
compartment ladenHeadlights when driving
abroad
The asymmetrical headlight beam
extends visibility at the edge of the
road at the passenger side.
However, when driving in countries
where traffic drives on the opposite
side of the road, adjust the headlights to prevent dazzling of oncoming
traffic.
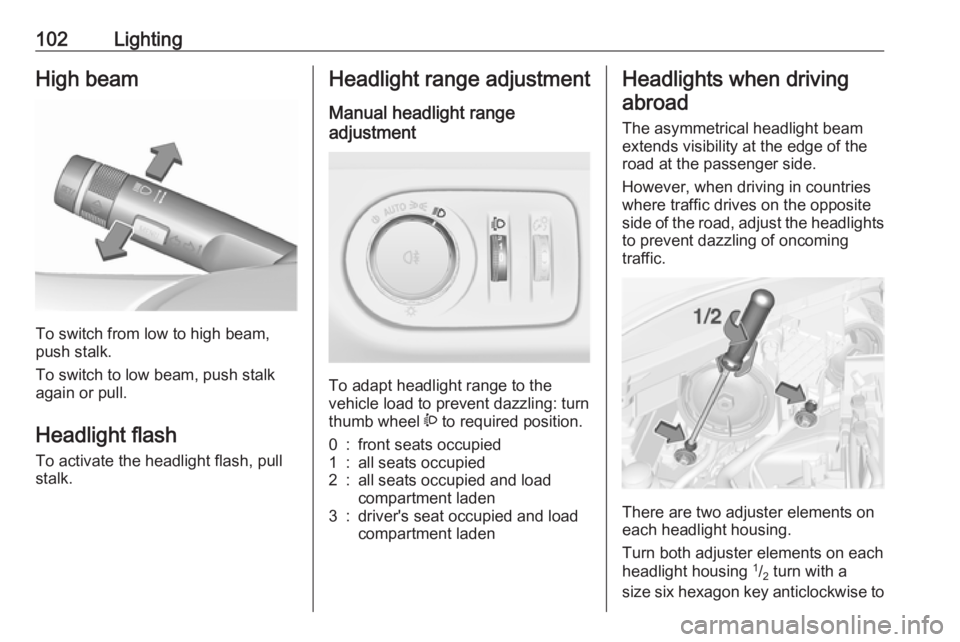
There are two adjuster elements on
each headlight housing.
Turn both adjuster elements on each headlight housing 1
/2 turn with a
size six hexagon key anticlockwise to
Page 105 of 231
Lighting103set to right-hand traffic mode.
Therefore, insert the key in the guide as shown in the illustration.
Alternatively, a Phillips head
screwdriver size three can be used for
setting.
To reset to left-hand traffic mode, turn
adjuster elements 1
/2 turn clockwise.
Daytime running lights Daytime running light increases
visibility of the vehicle during daylight.
They are switched on automatically
when ignition is on.
Versions with automatic light control
The system switches automatically
between daytime running light and
headlights, depending on the lighting
conditions and information given by
the rain sensor system.
Automatic light control 3 101.
Xenon lighting system Xenon lighting system includes:● xenon headlights for low and high
beam
● corner lighting
● reversing function
Xenon headlights Xenon headlights for low and high
beam ensure better visibility under all
conditions.
Operation is the same as for halogen headlights.
Light switch 3 100.
High beam 3 102.
Headlight flash 3 102.
Headlight range adjustment 3 102.
Headlights when driving abroad
3 102.
Automatic light control 3 101.
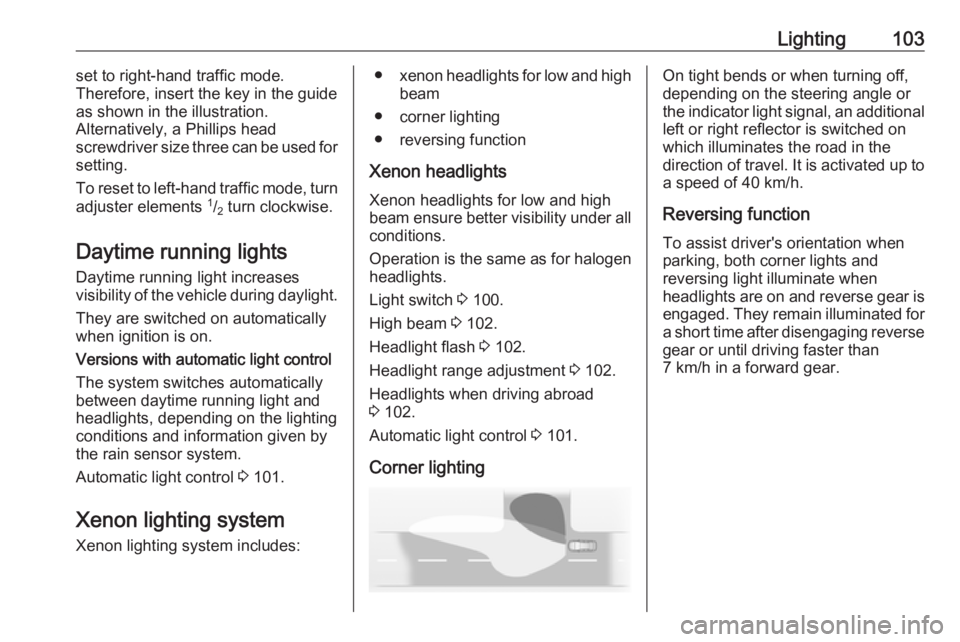
Corner lightingOn tight bends or when turning off,
depending on the steering angle or
the indicator light signal, an additional left or right reflector is switched on
which illuminates the road in the
direction of travel. It is activated up to
a speed of 40 km/h.
Reversing function
To assist driver's orientation when
parking, both corner lights and
reversing light illuminate when
headlights are on and reverse gear is
engaged. They remain illuminated for
a short time after disengaging reverse gear or until driving faster than
7 km/h in a forward gear.
Page 155 of 231
Driving and operating153
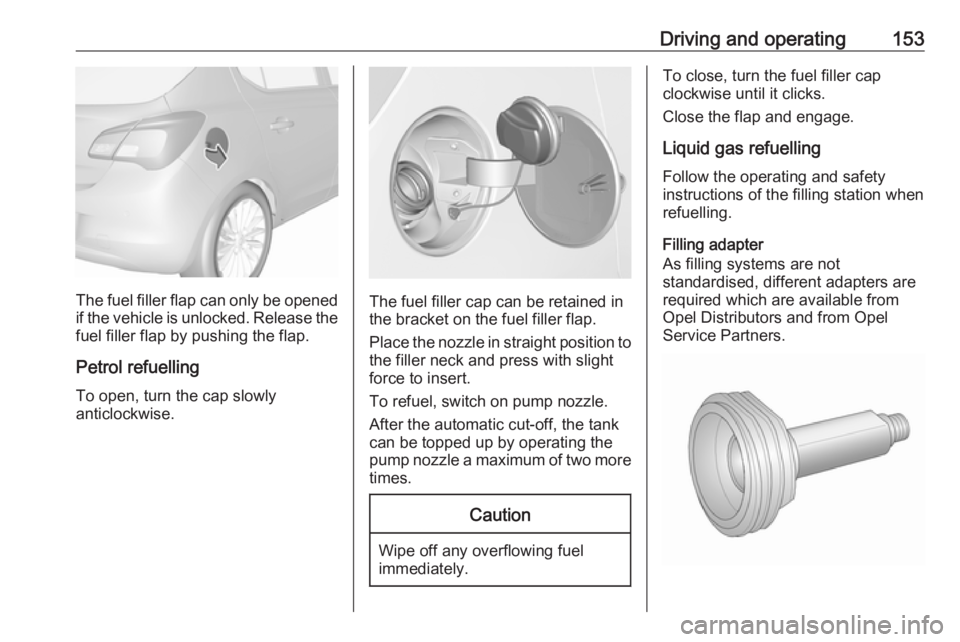
The fuel filler flap can only be opened
if the vehicle is unlocked. Release the
fuel filler flap by pushing the flap.
Petrol refuelling To open, turn the cap slowly
anticlockwise.The fuel filler cap can be retained in the bracket on the fuel filler flap.
Place the nozzle in straight position to
the filler neck and press with slight
force to insert.
To refuel, switch on pump nozzle.
After the automatic cut-off, the tank can be topped up by operating the
pump nozzle a maximum of two more times.
Caution
Wipe off any overflowing fuel
immediately.
To close, turn the fuel filler cap
clockwise until it clicks.
Close the flap and engage.
Liquid gas refuelling Follow the operating and safety
instructions of the filling station when
refuelling.
Filling adapter
As filling systems are not
standardised, different adapters are
required which are available from
Opel Distributors and from Opel
Service Partners.
Page 167 of 231

Vehicle care165Low beam
1. Rotate the cap (2) anticlockwiseand remove it.
2. Press the clip to disengage bulbholder. Withdraw the bulb holder
from the reflector.
3. Detach the bulb from the bulb holder and replace the bulb.
4. Insert the bulb holder with the clip
downwards and engage into the
reflector until it clicks.
5. Install cap.
High beam
1. Rotate the cap (3) anticlockwise and remove it.
Page 168 of 231

166Vehicle care2. Press the clip to disengage bulbholder. Withdraw the bulb holder
from the reflector.
3. Detach the bulb from the bulb holder and replace the bulb.
4. Insert the bulb holder with the clip
downwards and engage into the
reflector until it clicks.
5. Install cap.
Sidelight / daytime running light
with bulbs
1. Rotate bulb socket (1) anticlockwise to disengage.
2. Press both clips together andwithdraw the bulb socket from theheadlamp housing.
3. Remove the bulb from the socket by pulling.
4. Replace and insert new bulb into socket.
5. Insert the bulb socket into the headlamp housing and turn
clockwise.
Page 169 of 231
Vehicle care167Sidelight / daytime running light
with LEDs
Sidelights and daytime running lights
are designed as LEDs and cannot be
changed. Consult a workshop in case of a defective LED.
Xenon headlights9 Danger
Xenon headlights work under
extremely high electrical voltage.
Do not touch. Have bulbs replaced by a workshop.
Sidelight / daytime running lights are
designed as LEDs and cannot be
changed.
Bulbs for corner lighting can be
changed.
Front turn lights 3 168.
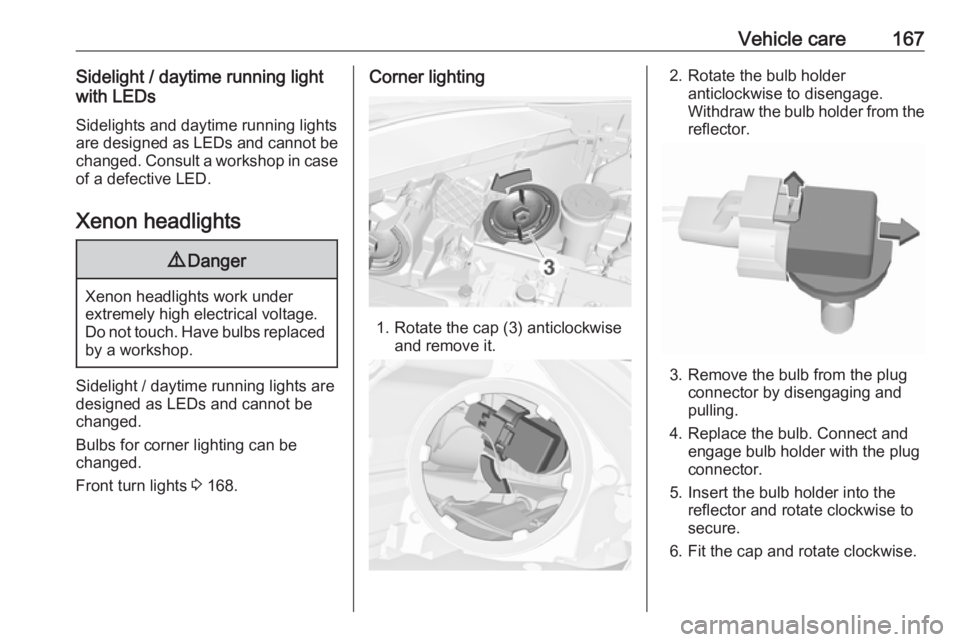
Corner lighting
1. Rotate the cap (3) anticlockwise
and remove it.
2. Rotate the bulb holderanticlockwise to disengage.
Withdraw the bulb holder from the
reflector.
3. Remove the bulb from the plug connector by disengaging and
pulling.
4. Replace the bulb. Connect and engage bulb holder with the plug
connector.
5. Insert the bulb holder into the reflector and rotate clockwise to
secure.
6. Fit the cap and rotate clockwise.
Page 170 of 231

168Vehicle careFront fog lightsThe bulbs are accessible from the
underside of the vehicle.
1. Turn the bulb holder anti- clockwise and remove it from the
reflector.
2. Disengage the bulb socket from the plug connector by pressing
the retaining lug.
3. Remove and replace the bulb socket with bulb and attach the
plug connector.
4. Insert the bulb socket into the reflector by turning clockwise and
engage.
Front turn lights Front turn lights consist of long-life
bulbs which cannot be changed.
Consult a workshop in case of a
defective long-life bulb.
Tail lights
1. Release the cover in the load compartment on the respective
side and remove.
On the right side, remove all
components, such as tyre repair
kit or tools, from the rear insert.
Compress this insert at the upper side and remove from the
sidewall.