OPEL CORSA F 2020 Manual user
Manufacturer: OPEL, Model Year: 2020, Model line: CORSA F, Model: OPEL CORSA F 2020Pages: 229, PDF Size: 21.14 MB
Page 111 of 229
Driving and operating109Refilling AdBlueCaution
Only use AdBlue that complies
with European standards
DIN 70 070 and ISO 22241-1.
Do not use additives.
Do not dilute AdBlue.
Otherwise the selective catalytic
reduction system could be
damaged.
Note
Whenever a filling pump with a
nozzle for passenger cars is not
available at a filling station, use only
AdBlue bottles or canisters with a
sealed refill adapter for refilling, to
prevent splashback and overspill,
and in order to ensure that the fumes
from the tank are captured and do
not emerge. AdBlue in bottles or
canisters is available in many filling
stations and can be purchased e.g. at Opel dealers and other retail
outlets.
Since AdBlue has a limited
durability, check the date of expiry
before refilling.
Note
Refill the tank to a level of at least
5 l to ensure that the new AdBlue
level is being detected.
In case AdBlue refill is not
successfully detected:
1. Continuously drive the vehicle for 10 min making sure that
vehicle speed is always higher
than 20 km/h.
2. If AdBlue refill is detected successfully, AdBlue supply-
driven warnings or limitations will
disappear.
If AdBlue refill is still not detected, seek the assistance of a workshop.
If AdBlue must be refilled at
temperatures below -11 °C, the
refilling of AdBlue may not be
detected by the system. In this
event, park the vehicle in a space
with a higher ambient temperature
until AdBlue is liquified.Note
When unscrewing the protective cap
from the filler neck, ammonia fumes
may emerge. Do not inhale as the
fumes have a pungent smell. The
fumes are not harmful by inhalation.
The AdBlue tank should be filled
completely. This must be done if the
warning message regarding
prevention of an engine restart is
already displayed.
The vehicle must be parked on a level surface.
The filler neck for AdBlue is located
behind the fuel filler flap.
The fuel filler flap can only be opened
if the vehicle is unlocked.
1. Switch off the ignition.
2. Close all doors to avoid ammonia fumes entering the interior of the
vehicle.
3. Release the fuel filler flap by pushing the flap 3 157.
Page 112 of 229
110Driving and operating
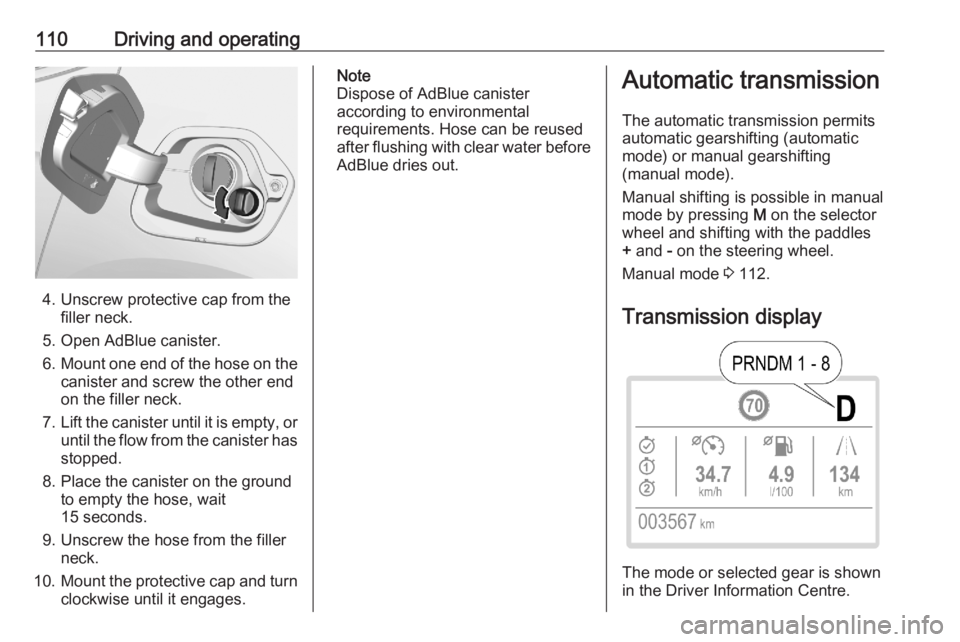
4. Unscrew protective cap from thefiller neck.
5. Open AdBlue canister.
6. Mount one end of the hose on the
canister and screw the other end
on the filler neck.
7. Lift the canister until it is empty, or
until the flow from the canister has stopped.
8. Place the canister on the ground to empty the hose, wait
15 seconds.
9. Unscrew the hose from the filler neck.
10. Mount the protective cap and turn
clockwise until it engages.
Note
Dispose of AdBlue canister
according to environmental
requirements. Hose can be reused
after flushing with clear water before
AdBlue dries out.Automatic transmission
The automatic transmission permits
automatic gearshifting (automatic
mode) or manual gearshifting
(manual mode).
Manual shifting is possible in manual
mode by pressing M on the selector
wheel and shifting with the paddles
+ and - on the steering wheel.
Manual mode 3 112.
Transmission display
The mode or selected gear is shown
in the Driver Information Centre.
Page 113 of 229

Driving and operating111In automatic mode, the driving
programme is indicated by D.
In manual mode, M and the number
of the selected gear is indicated.
R indicates reverse gear.
N indicates neutral position.
P indicates park position.
Gear selection
Move the selector lever or press the
respective buttons as shown in the
illustration above.
P:park position, front wheels are
locked, engage only when the
vehicle is stationary and the
parking brake is appliedR:reverse gear, engage only when
the vehicle is stationaryN:neutralD:automatic modeM:manual mode<:upshift in manual mode]:downshift in manual mode
The selector lever is locked in P.
Before unlocking the gearbox, ensure
that the ignition is on. Then, apply the
brake pedal and press UNLOCK.
Now, move the selector lever to the desired mode.
The engine can only be started with
the selector lever in P or N. When
position N is selected, press the brake
pedal or apply the parking brake
before starting.
Before enganing the reverse gear,
come to a total stop. Then, apply the
brake pedal and press UNLOCK.
Now, move the selector lever to R.
Do not accelerate while engaging a
gear. Never depress the accelerator
pedal and brake pedal at the same
time.
When a gear is engaged, the vehicle
slowly begins to creep when the
brake is released.
Engine braking To utilise the engine braking effect,
select a lower gear in good time when
driving downhill.
Manual mode 3 112.
Rocking the vehicle Rocking the vehicle is only
permissible if the vehicle is stuck in
sand, mud or snow. Move the selector
lever between D and R in a repeat
pattern. Do not race the engine and
avoid sudden acceleration.
Parking Apply the parking brake and press P.
Page 114 of 229
112Driving and operatingManual modeManual mode M can be activated
from position D in each driving
situation and speed.
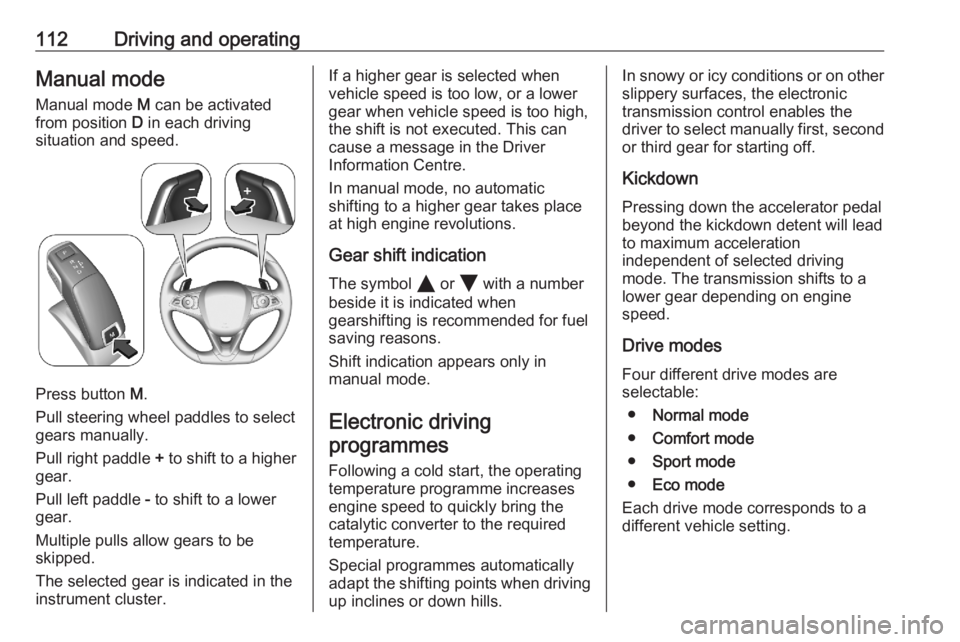
Press button M.
Pull steering wheel paddles to select
gears manually.
Pull right paddle + to shift to a higher
gear.
Pull left paddle - to shift to a lower
gear.
Multiple pulls allow gears to be
skipped.
The selected gear is indicated in the
instrument cluster.
If a higher gear is selected when
vehicle speed is too low, or a lower
gear when vehicle speed is too high,
the shift is not executed. This can
cause a message in the Driver
Information Centre.
In manual mode, no automatic
shifting to a higher gear takes place
at high engine revolutions.
Gear shift indication
The symbol Y or Z with a number
beside it is indicated when
gearshifting is recommended for fuel
saving reasons.
Shift indication appears only in
manual mode.
Electronic driving programmes
Following a cold start, the operatingtemperature programme increasesengine speed to quickly bring the
catalytic converter to the required
temperature.
Special programmes automatically
adapt the shifting points when driving
up inclines or down hills.In snowy or icy conditions or on other
slippery surfaces, the electronic
transmission control enables the
driver to select manually first, second or third gear for starting off.
Kickdown
Pressing down the accelerator pedal
beyond the kickdown detent will lead to maximum acceleration
independent of selected driving
mode. The transmission shifts to a lower gear depending on engine
speed.
Drive modes Four different drive modes are
selectable:
● Normal mode
● Comfort mode
● Sport mode
● Eco mode
Each drive mode corresponds to a
different vehicle setting.
Page 115 of 229
Driving and operating113
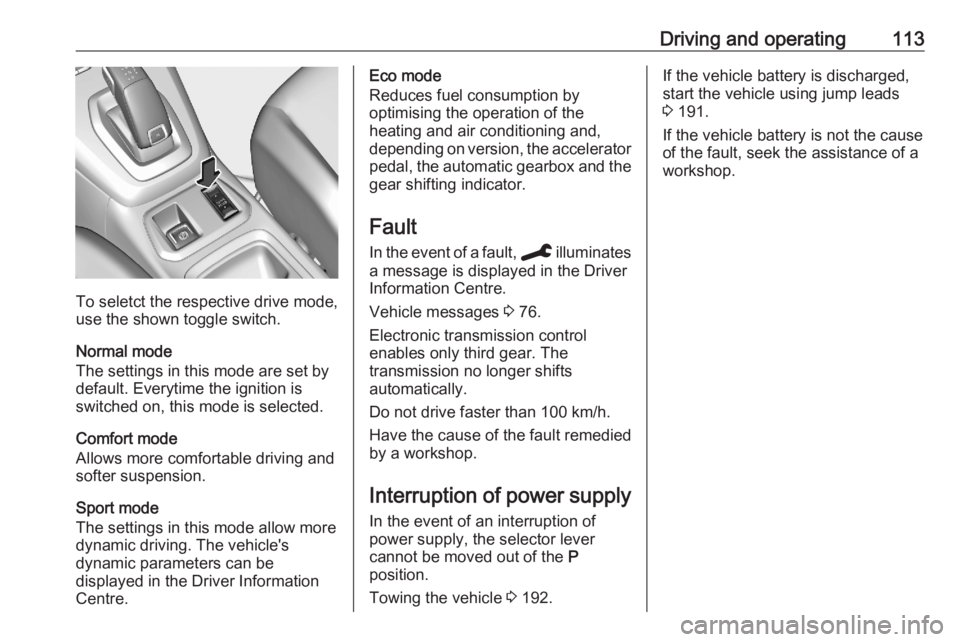
To seletct the respective drive mode,
use the shown toggle switch.
Normal mode
The settings in this mode are set by
default. Everytime the ignition is
switched on, this mode is selected.
Comfort mode
Allows more comfortable driving and softer suspension.
Sport mode
The settings in this mode allow more
dynamic driving. The vehicle's
dynamic parameters can be
displayed in the Driver Information
Centre.
Eco mode
Reduces fuel consumption by
optimising the operation of the
heating and air conditioning and,
depending on version, the accelerator
pedal, the automatic gearbox and the gear shifting indicator.
Fault
In the event of a fault, C illuminates
a message is displayed in the Driver
Information Centre.
Vehicle messages 3 76.
Electronic transmission control
enables only third gear. The
transmission no longer shifts
automatically.
Do not drive faster than 100 km/h.
Have the cause of the fault remedied by a workshop.
Interruption of power supply In the event of an interruption of
power supply, the selector lever
cannot be moved out of the P
position.
Towing the vehicle 3 192.If the vehicle battery is discharged,
start the vehicle using jump leads
3 191.
If the vehicle battery is not the cause
of the fault, seek the assistance of a
workshop.
Page 116 of 229

114Driving and operatingManual transmission
To engage reverse on 5-speed
transmission, depress the clutch
pedal and move the selector lever to
the right and rear.
To engage reverse on 6-speed
transmission, depress the clutch
pedal, pull the ring under the selector
lever and move the selector lever
quite to the left and front.
If the gear does not engage, set the
selector lever to neutral, release the
clutch pedal and depress again. Then
repeat gear selection.
Do not slip the clutch unnecessarily.
When operating, depress the clutch pedal completely. Do not use the
pedal as a foot rest.
When clutch slip is detected for a
specific time, the engine power will be reduced. A warning is displayed in the
Driver Information Centre. Release
the clutch.Caution
It is not advisable to drive with the hand resting on the selector lever.
Gear shift indication 3 70.
Stop-start system 3 103.
Page 117 of 229
Driving and operating115Brakes
Antilock brake system
Antilock brake system (ABS)
prevents the wheels from locking.
ABS starts to regulate brake pressure as soon as a wheel shows a tendency to lock. The vehicle remains
steerable, even during hard braking.
ABS control is made apparent
through a pulse in the brake pedal
and the noise of the regulation
process.
For optimum braking, keep the brake
pedal fully depressed throughout the
braking process, despite the fact that
the pedal is pulsating. Do not reduce
the pressure on the pedal.
When braking in an emergency, the
hazard warning flashers are switched
on automatically depending on the
force of deceleration. They are
switched off automatically the first
time you accelerate.
After starting off, the system performs a self-test which may be audible.
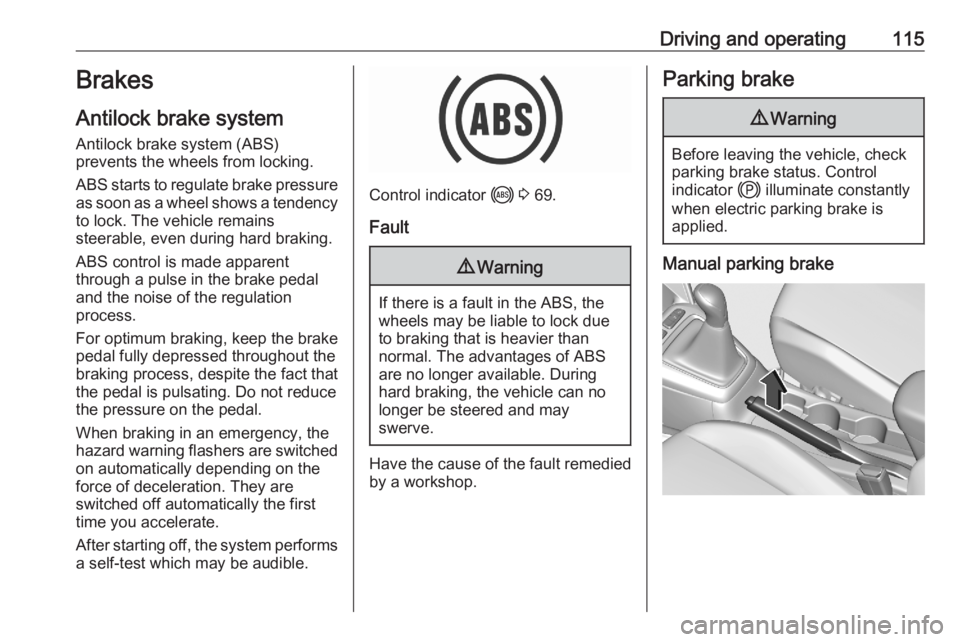
Control indicator i 3 69.
Fault
9 Warning
If there is a fault in the ABS, the
wheels may be liable to lock due
to braking that is heavier than
normal. The advantages of ABS are no longer available. During
hard braking, the vehicle can no longer be steered and may
swerve.
Have the cause of the fault remedied
by a workshop.
Parking brake9 Warning
Before leaving the vehicle, check
parking brake status. Control
indicator j illuminate constantly
when electric parking brake is
applied.
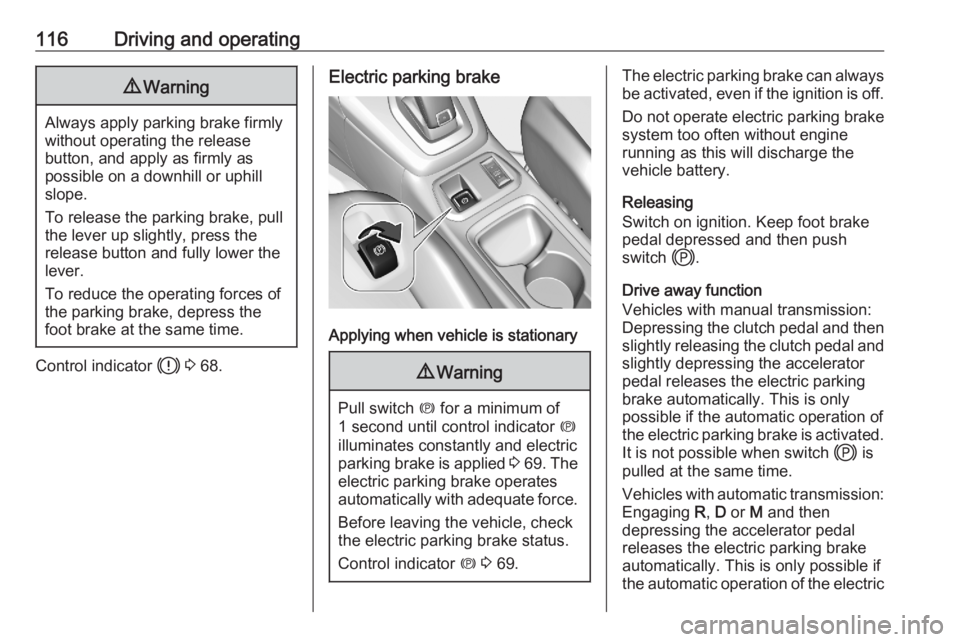
Manual parking brake
Page 118 of 229
116Driving and operating9Warning
Always apply parking brake firmly
without operating the release
button, and apply as firmly as
possible on a downhill or uphill
slope.
To release the parking brake, pull
the lever up slightly, press the
release button and fully lower the
lever.
To reduce the operating forces of
the parking brake, depress the
foot brake at the same time.
Control indicator h 3 68.
Electric parking brake
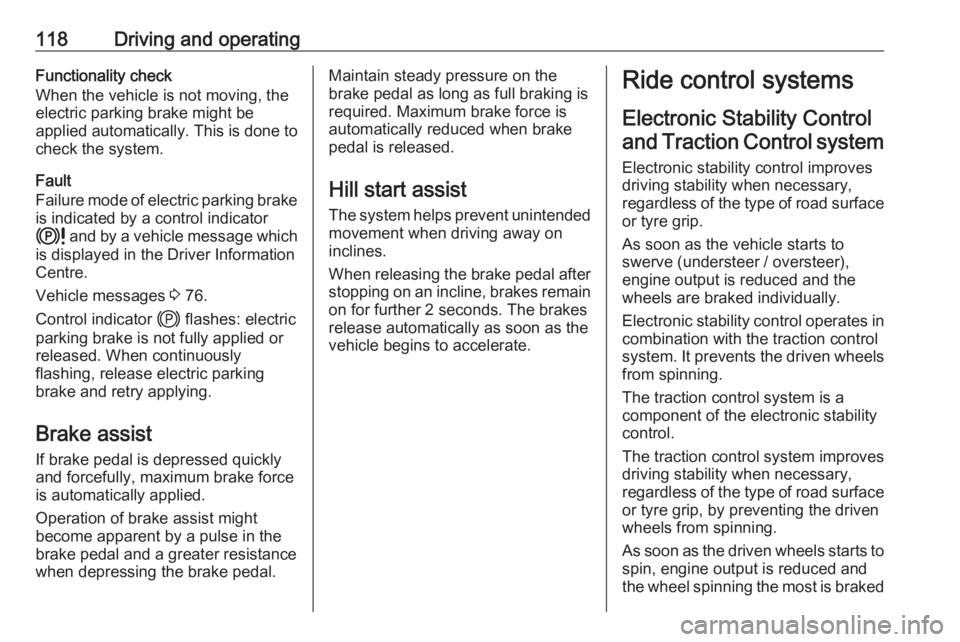
Applying when vehicle is stationary
9 Warning
Pull switch m for a minimum of
1 second until control indicator m
illuminates constantly and electric
parking brake is applied 3 69 . The
electric parking brake operates automatically with adequate force.
Before leaving the vehicle, check
the electric parking brake status.
Control indicator m 3 69.
The electric parking brake can always
be activated, even if the ignition is off.
Do not operate electric parking brake
system too often without engine
running as this will discharge the
vehicle battery.
Releasing
Switch on ignition. Keep foot brake
pedal depressed and then push
switch j.
Drive away function
Vehicles with manual transmission:
Depressing the clutch pedal and then slightly releasing the clutch pedal and
slightly depressing the accelerator
pedal releases the electric parking
brake automatically. This is only
possible if the automatic operation of
the electric parking brake is activated. It is not possible when switch j is
pulled at the same time.
Vehicles with automatic transmission: Engaging R, D or M and then
depressing the accelerator pedal
releases the electric parking brake
automatically. This is only possible if
the automatic operation of the electric
Page 119 of 229

Driving and operating117parking brake is activated. It is not
possible when switch j is pulled at
the same time.
Braking when vehicle is moving
When the vehicle is moving and the
switch j is kept pulled, the electric
parking brake system will decelerate the vehicle. As soon as the switch
j is released, braking will be
stopped.
The antilock brake system and the
Electronic Stability Control stabilise
the vehicle while the switch j is kept
pulled. If an error of the electric
parking brake occurs, a warning
message is displayed in the driver
information centre. If the antilock
brake system and the Electronic
Stability Control fail, one or both
indicators i and J illuminate in the
instrument cluster. In this case,
stability can only be provided by
repeatedly pulling and pushing the
switch j until the vehicle is
immobilised.Automatic operation
Automatic operation includes
automatic application and automatic
release of the electric parking brake.
The electric parking brake can also be
applied or released manually by using
the switch j.
Automatic application: ● The electric parking brake is automatically applied when the
vehicle is stationary and the
ignition is switched off.
● j illuminates in the instrument
cluster and a display message
pops up to confirm the
application.
Automatic release: ● Parking brake releases automatically after moving off.
● j extinguishes in the
instrument cluster and a display
message pops up to confirm the
release.If the vehicle is equipped with an
automatic transmission and the brake is not released automatically, make
sure the front doors are correctly
closed.Deactivation of automatic operation 1. Start the engine.
2. If the parking brake is released, apply the parking brake pulling the
switch j.
3. Take your foot off the brake pedal.
4. Press the switch j for at least
10 seconds and maximum 15 seconds.
5. Release the switch j.
6. Press and hold the brake pedal. 7. Pull the switch j for 2 seconds.
The deactivation of the automatic operation of the electric parking brake
is confirmed by o illuminating in the
instrument cluster 3 69. The electric
parking brake can only be applied and released manually.
To reactivate the automatic
operation, repeat the steps described above.
Page 120 of 229
118Driving and operatingFunctionality check
When the vehicle is not moving, the
electric parking brake might be
applied automatically. This is done to
check the system.
Fault
Failure mode of electric parking brake
is indicated by a control indicator
k and by a vehicle message which
is displayed in the Driver Information
Centre.
Vehicle messages 3 76.
Control indicator j flashes: electric
parking brake is not fully applied or released. When continuously
flashing, release electric parking
brake and retry applying.
Brake assist If brake pedal is depressed quickly
and forcefully, maximum brake force
is automatically applied.
Operation of brake assist might
become apparent by a pulse in the
brake pedal and a greater resistance when depressing the brake pedal.Maintain steady pressure on the
brake pedal as long as full braking is
required. Maximum brake force is
automatically reduced when brake
pedal is released.
Hill start assist The system helps prevent unintendedmovement when driving away on
inclines.
When releasing the brake pedal after
stopping on an incline, brakes remain
on for further 2 seconds. The brakes
release automatically as soon as the
vehicle begins to accelerate.Ride control systems
Electronic Stability Control
and Traction Control system
Electronic stability control improves
driving stability when necessary,
regardless of the type of road surface
or tyre grip.
As soon as the vehicle starts to
swerve (understeer / oversteer),
engine output is reduced and the
wheels are braked individually.
Electronic stability control operates in combination with the traction control
system. It prevents the driven wheels
from spinning.
The traction control system is a
component of the electronic stability
control.
The traction control system improves
driving stability when necessary, regardless of the type of road surface
or tyre grip, by preventing the driven
wheels from spinning.
As soon as the driven wheels starts to spin, engine output is reduced and
the wheel spinning the most is braked