OPEL CORSA F 2020 Manual user
Manufacturer: OPEL, Model Year: 2020, Model line: CORSA F, Model: OPEL CORSA F 2020Pages: 229, PDF Size: 21.14 MB
Page 151 of 229
Driving and operating149Standard view
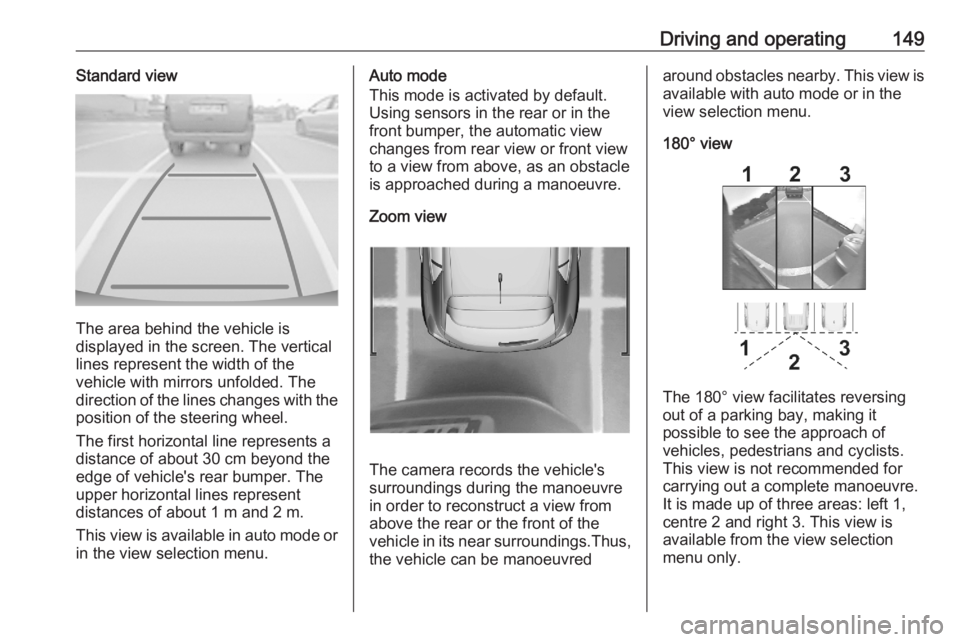
The area behind the vehicle is
displayed in the screen. The vertical
lines represent the width of the
vehicle with mirrors unfolded. The
direction of the lines changes with the position of the steering wheel.
The first horizontal line represents a
distance of about 30 cm beyond the
edge of vehicle's rear bumper. The
upper horizontal lines represent
distances of about 1 m and 2 m.
This view is available in auto mode or
in the view selection menu.
Auto mode
This mode is activated by default.
Using sensors in the rear or in the
front bumper, the automatic view
changes from rear view or front view
to a view from above, as an obstacle is approached during a manoeuvre.
Zoom view
The camera records the vehicle's
surroundings during the manoeuvre
in order to reconstruct a view fromabove the rear or the front of the
vehicle in its near surroundings.Thus,
the vehicle can be manoeuvred
around obstacles nearby. This view is available with auto mode or in the
view selection menu.
180° view
The 180° view facilitates reversing
out of a parking bay, making it
possible to see the approach of
vehicles, pedestrians and cyclists.
This view is not recommended for
carrying out a complete manoeuvre.
It is made up of three areas: left 1,
centre 2 and right 3. This view is
available from the view selection menu only.
Page 152 of 229
150Driving and operatingDeactivation
Panoramic view system is
deactivated when:
● towing an electrically connected trailer, bicycle carrier, etc.
● a certain forward speed is exceeded or if reverse gear is not
engaged for 7 seconds
● by pressing the icon q in the left
upper corner of the touch screen
General information9 Warning
The panoramic view system does
not replace driver vision. It will not display children, pedestrians,
cyclists, crossing traffic, animals,
or any other objects outside of the camera view area, e. g. below the
bumper, or underneath the
vehicle.
Do not drive or park the vehicle
using only the panoramic view
system.
Always check the surrounding of
the vehicle before driving.
Displayed images may be further
or closer than they appear. The
area displayed is limited and
objects that are close to either
edge of the bumper or under the
bumper are not displayed on the
screen.
System limitations
Caution
For optimal operation of the
system, it is important to keep the
lense of the camera in the tailgate between the number plate lightsand the lense in the front grill
below the emblem always clean.
Rinse the lenses with water and
wipe with a soft cloth.
Do not clean the lenses with a
steam-jet or high-pressure jet
cleaner.
The panoramic view system may not
operate properly when:
● The surrounding is dark.
● The sun or the beam of headlights is shining directly into
the camera lenses.
● Weather limits visibility, such as fog, rain, or snow.
● The camera lenses are blocked by snow, ice, slush, mud, dirt.
● The vehicle had an accident. ● There are extreme temperature changes.
Rear view camera The rear view camera assists the
driver when reversing by displaying a
view of the area behind the vehicle.
The view of the camera is displayed
in the Info Display.9 Warning
The rear view camera does not
replace driver vision. Note that
objects that are outside the
Page 153 of 229
Driving and operating151camera's field of view and the
parking assist sensors, e.g. below
the bumper or underneath the
vehicle, are not displayed.
Do not reverse or park the vehicle using only the rear view camera.
Always check the surrounding of
the vehicle before driving.
Switching on
Rear view camera is automatically
activated when reverse gear is
engaged.
Functionality
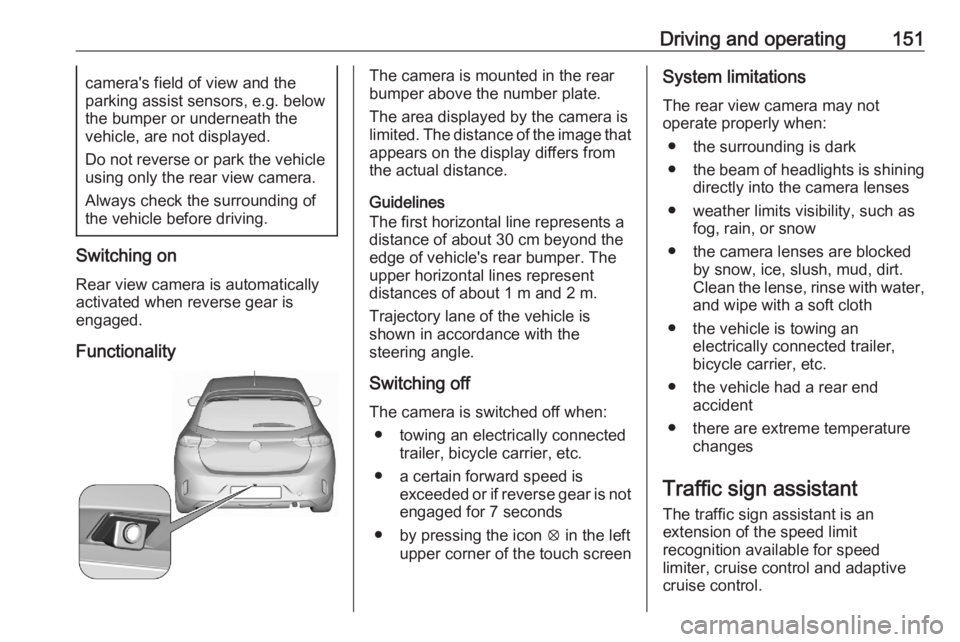
The camera is mounted in the rear
bumper above the number plate.
The area displayed by the camera is
limited. The distance of the image that
appears on the display differs from
the actual distance.
Guidelines
The first horizontal line represents a
distance of about 30 cm beyond the
edge of vehicle's rear bumper. The
upper horizontal lines represent
distances of about 1 m and 2 m.
Trajectory lane of the vehicle is
shown in accordance with the
steering angle.
Switching off
The camera is switched off when: ● towing an electrically connected trailer, bicycle carrier, etc.
● a certain forward speed is exceeded or if reverse gear is not
engaged for 7 seconds
● by pressing the icon q in the left
upper corner of the touch screenSystem limitations
The rear view camera may not
operate properly when:
● the surrounding is dark
● the beam of headlights is shining
directly into the camera lenses
● weather limits visibility, such as fog, rain, or snow
● the camera lenses are blocked by snow, ice, slush, mud, dirt.Clean the lense, rinse with water,
and wipe with a soft cloth
● the vehicle is towing an electrically connected trailer,
bicycle carrier, etc.
● the vehicle had a rear end accident
● there are extreme temperature changes
Traffic sign assistant
The traffic sign assistant is an
extension of the speed limit
recognition available for speed
limiter, cruise control and adaptive
cruise control.
Page 154 of 229

152Driving and operating
The system recognises the traffic
signs above and displays them in the
Driver Information Centre.
9 Warning
The actual traffic sign always
takes priority over the traffic sign displayed in the Driver Information Centre.
If the vehicle enters a road of whichthe entry is prohibited, the no entry
traffic symbol and a warning message are displayed in the Driver
Information Centre. If the system
detects one of the other traffic signs,
the respective traffic sign is displayed
in the Driver Information Centre.
Speed limiter 3 122
Cruise control 3 120
Adaptive cruise control 3 124
Lane keep assist
Lane keep assist supports the driver
to avoid unintended leaving of the
lane. The front camera observes road
edges, as well as the lane markings
between which the vehicle is driving.
If the vehicle approaches a road edge or a lane marking, the steering wheel
is gently turned to position so that the
vehicle turns back into the lane. The
driver will then notice a turning
movement of the steering wheel. Turn steering wheel in same direction, if
the system does not steer sufficiently.
Turn steering wheel gently into
opposite direction, if lane change is
intended.
When the system steers to correct the trajectory of the vehicle, L flashes
yellow in the instrument cluster.
Unintended lane departure is not
assumed by the system when the turn lights are operated and during few
seconds after turn lights have been
switched off.Note
The system may be switched off if it
detects lanes which are too narrow,
too wide or too curved.
Following preconditions have to be
fulfilled:
● vehicle speed must be between 65 km/h and 180 km/h
● the driver must hold the steering wheel
● the turn lights are not activated
● the electronic stability control is activated and not in operation
● the vehicle is not connected to a trailer or an electric bicycle carrier
● normal driving behaviour (system
detects dynamic driving style, i.e. pressure on the brake or
accelerator pedal)
● roads with good lane markings ● no spare wheel is used
● the driver is not taking the hands off the steering wheel for a longer
time period
● the vehicle is not driven in a tight
corner
Page 155 of 229

Driving and operating153Activation
If the system is activated, the LED in
the button j is not illuminated. To
activate the system when the system
is deactivated, press j.
The system is operational at vehicle
speeds between 65 km/h and
180 km/h and if lane markings are
detectable. The driver must hold the
steering wheel. The electronic
stability control system must be
activated.
The control indicator L flashes
yellow during trajectory correction.
If the driver wishes to maintain the
trajectory of the vehicle, he can
interrupt the correction by keeping a
firm grip on the steering wheel, e.g.
during an avoiding manoeuvre. The
correction is interrupted if the turn
lights are operated. If the vehicle is
equipped with active side blind spot detection, the interruption of the lane
correction might be cancelled.
Side blind zone assistant 3 146.
There is no correction triggered when
the turn lights are operated and
during few seconds after turn lights
have been switched off.
If the system detects that the driver is not holding the steering wheel
permanently, it interrupts the
correction. A warning message in the
Driver Information Centre
accompanied by a warning chime
alerts the driver when immediate
driver´s action is required.Deactivation
To deactivate the system, press and
hold j. Deactivation of the system is
confirmed by the illuminated LED in
the button and L illuminates yellow
in the instrument cluster.
Fault
In the event of a fault, L and C
appear in the instrument panel,
accompanied by a display message
and a warning chime. Contact a
dealer or a qualified workshop to have the system checked.
System limitations The system performance may be
affected by:
● a dirty or foggy windscreen or if the windscreen is affected by
foreign objects, e.g. stickers
● close vehicles ahead
● banked roads
● winding or hilly roads
● road edges
● sudden lighting changes
Page 156 of 229

154Driving and operating● adverse environmentalconditions, e.g. heavy rain or
snow
● vehicle modifications, e.g. tyres
Switch off the system if the system is
disturbed by tar marks, shadows,
road cracks, temporary or
construction lane markings, or other
road imperfections.9 Warning
Always keep your attention on the
road and maintain proper vehicle
position within the lane, otherwise
vehicle damage, injury or death
could occur.
Lane keep assist does not
continuously steer the vehicle.
The system may not keep the
vehicle in the lane or give an alert,
even if a lane marking is detected.
The steering of the lane keep
assist may not be sufficient to
avoid a lane departure.
The system may not detect hands-
off driving due to external
influences like road condition and
surface and weather. The driver has full responsibility to control the vehicle and is always required to
keep the hands on the steering
wheel while driving.
Using the system while towing a
trailer or on slippery roads could
cause loss of control of the vehicle
and a crash. Switch the system off.
Driver alert
The driver alert system monitores the driving time and the vigilance of the
driver. Monitoring the vigilance of the
driver is based on the trajectory
variations of the vehicle compared to
the lane markings.
The system includes a driving time
alert combined with driver drowsiness detection.
9 Warning
The system cannot replace the
need for vigilance on the part of
the driver. Taking a break is
recommended as soon as feeling tired or at least every 2 hours. Do
not drive when feeling tired.
Activation or Deactivation
The system can be activated or
deactivated in the vehicle
personalisation 3 77.
The state of the system stays in
memory when the ignition is switched
off.
Driving time alert
The driver gets notified by a pop-up reminder symbol Y in the Driver
Information Centre simultaneously with an acoustic alert if the driver has
not taken a break after 2 hours of
driving at a speed above 65 km/h. The alert is repeated hourly until the
vehicle is stopped, no matter how
vehicle speed evolves.
Page 157 of 229
Driving and operating155The counting of driving time alert is
reset when the ignition has been
switched off for a few minutes.
Driver drowsiness detection
The system monitors the driver's level
of vigilance at speeds above
65 km/h. A camera at the top of the
windscreen detects variations in
trajectory compared to the lane
markings.
If the trajectory of the vehicle
suggests a certain level of
drowsiness or inattention by the
driver, the system triggers the first
level of alert. The driver is notified by
a message and an audible signal is
given.
After three first level alerts, the
system triggers a new alert with a message, accompanied by a more
pronounced audible signal.
In certain driving conditions (poor
road surface or strong winds), the
system may give alerts independent of the driver's level of vigilance.The driver drowsiness detection is
reinitialised when the ignition has
been switched off for a few minutes or the speed remains below 65 km/h for
a few minutes.
System limitationsIn the following situations, the system
may not operate properly or even not
operate at all:
● poor visibility caused by inadequate lighting of the
roadway, falling snow, heavy
rain, dense fog etc.
● dazzle caused by headlamps of an oncoming vehicles, low sun,
reflections on damp roads,
leaving a tunnel, alternating
shade and light etc.
● windscreen area in front of the camera covered by dirt, snow,
stickers etc.
● no lane markings detected or multiple lane markings due to
roadworks
● close vehicles ahead
● winding roads or narrow roadsFuel
Fuel for petrol engines
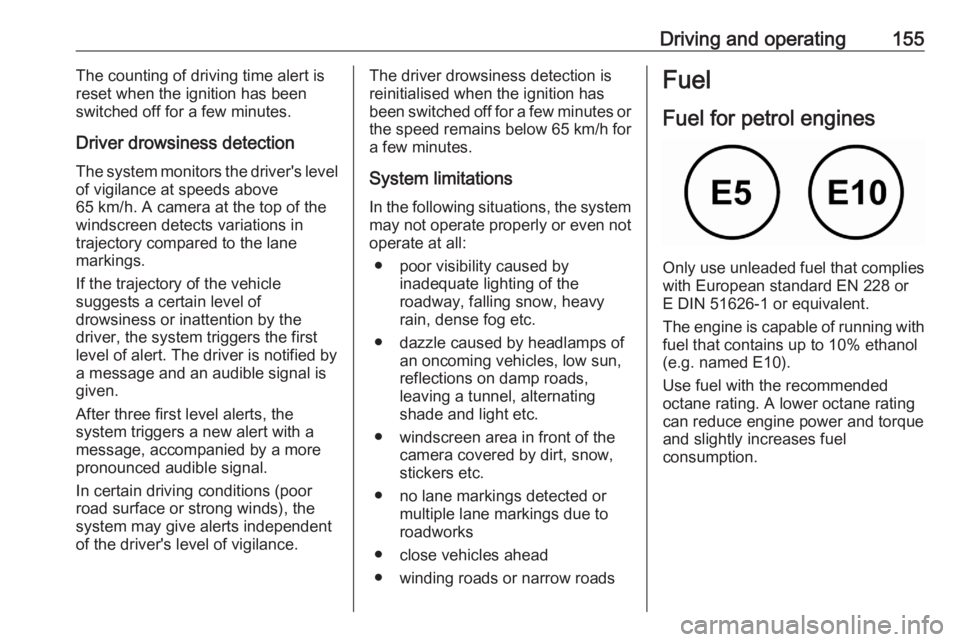
Only use unleaded fuel that complies
with European standard EN 228 or
E DIN 51626-1 or equivalent.
The engine is capable of running with
fuel that contains up to 10% ethanol
(e.g. named E10).
Use fuel with the recommended octane rating. A lower octane rating can reduce engine power and torque
and slightly increases fuel
consumption.
Page 158 of 229

156Driving and operatingCaution
Do not use fuel or fuel additives
that contain metallic compounds
such as manganese-based
additives. This may cause engine
damage.
Caution
Use of fuel with a lower octane
rating than the lowest possible
rating could lead to uncontrolled combustion and engine damage.
The engine specific requirements
regarding octane rating are given in
the engine data overview 3 207. A
country-specific label at the fuel filler
flap can supersede the requirement.
In certain countries, the use of a
particular fuel, e.g. a specific octane
rating, may be required to ensure
proper engine operation.
Fuel for diesel engines
The Diesel engines are compatible
with bio-fuels that conform to current and future European standards and
and can be obtained from filling
stations:
Diesel fuel that meets standard
EN590 mixed with a biofuel that
meets standard EN14214 (possibly
containing up to 7% Fatty Acid Methyl
Ester).
Diesel fuel that meets standard
EN16734 mixed with a biofuel that
meets standard EN14214 (possibly
containing up to 10% Fatty Acid
Methyl Ester).
Paraffinic Diesel fuel that meets
standard EN15940 mixed with a
biofuel that meets standard
EN14214 (possibly containing up to
7% Fatty Acid Methyl Ester).
The use of B20 or B30 fuel meeting standard EN16709 is possible in your
Diesel engines. However, this use,
even occasional, requires strict
Page 159 of 229
Driving and operating157application of the special servicingconditions referred to as "Arduous
conditions".
For more information, contact a
dealer or a qualified workshop.Caution
The use of any other type of (bio)
fuel (vegetable or animal oils, pure
or diluted, domestic fuel etc.) is
strictly prohibited (risk of damage
to the engine and fuel system).
Note
The only Diesel additives authorised for use are those that meet the
B715000 standard.
Low temperature operation
At temperatures below 0 °C, some
diesel products with biodiesel blends may clog, freeze or gel, which mayaffect the fuel supply system. Starting
and engine operation may not work
properly. Make sure to fill winter
grade diesel fuel at ambient
temperatures below 0 °C.
Arctic grade diesel fuel can be used
in extreme cold temperatures below
-20 °C. Using this fuel grade in warm
or hot climates is not recommended
and may cause engine stalling, poor starting or damage on the fuel
injection system.
Refuelling9 Danger
Before refuelling, switch off
ignition and any external heaters
with combustion chambers.
Follow the operating and safety
instructions of the filling station
when refuelling.
9 Danger
Fuel is flammable and explosive.
No smoking. No naked flames or
sparks.
If you can smell fuel in your
vehicle, have the cause of this
remedied immediately by a
workshop.
A label with symbols at the fuel filler
flap is indicating the allowed fuel
types. In Europe the pump nozzles of the filling stations are marked with
these symbols. Refuel only the
allowed fuel type.Caution
In case of misfuelling, do not
switch on ignition.
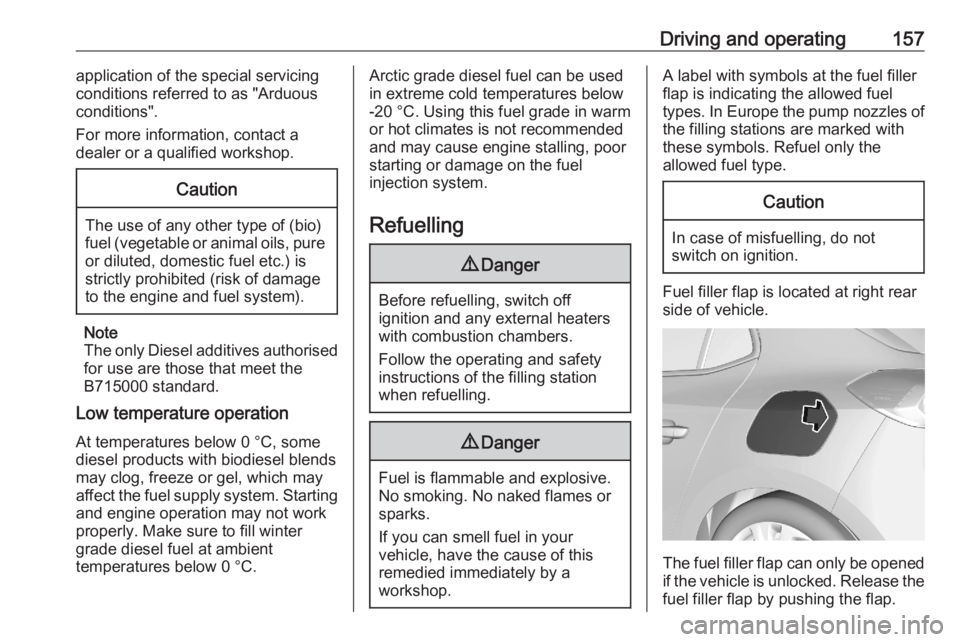
Fuel filler flap is located at right rear
side of vehicle.
The fuel filler flap can only be opened
if the vehicle is unlocked. Release the
fuel filler flap by pushing the flap.
Page 160 of 229
158Driving and operatingPetrol and diesel refuelling
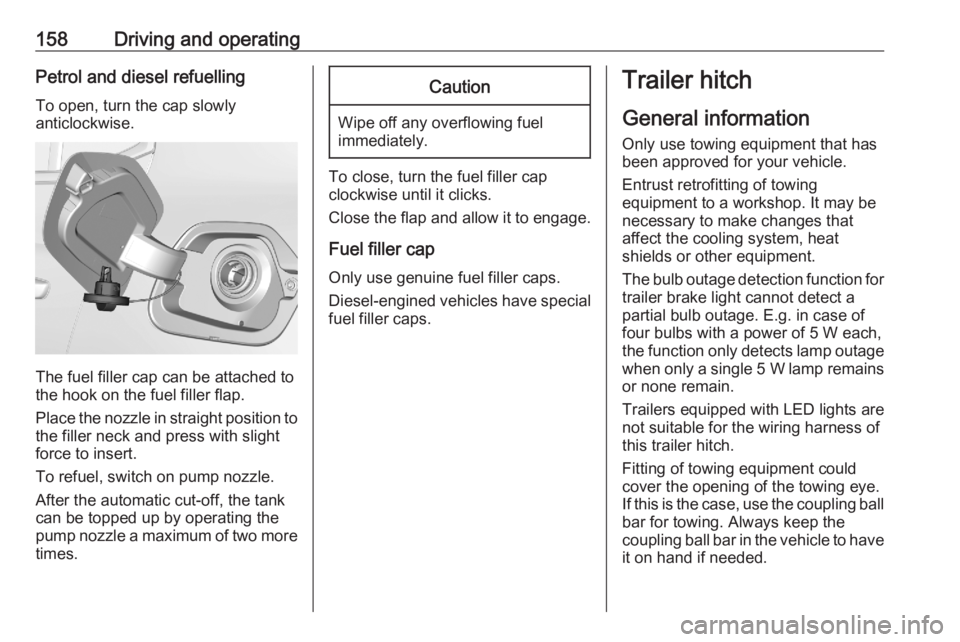
To open, turn the cap slowly
anticlockwise.
The fuel filler cap can be attached to
the hook on the fuel filler flap.
Place the nozzle in straight position to the filler neck and press with slight
force to insert.
To refuel, switch on pump nozzle.
After the automatic cut-off, the tank can be topped up by operating the
pump nozzle a maximum of two more
times.
Caution
Wipe off any overflowing fuel
immediately.
To close, turn the fuel filler cap
clockwise until it clicks.
Close the flap and allow it to engage.
Fuel filler cap
Only use genuine fuel filler caps.
Diesel-engined vehicles have special fuel filler caps.
Trailer hitch
General information
Only use towing equipment that has
been approved for your vehicle.
Entrust retrofitting of towing
equipment to a workshop. It may be
necessary to make changes that
affect the cooling system, heat
shields or other equipment.
The bulb outage detection function for
trailer brake light cannot detect a
partial bulb outage. E.g. in case of
four bulbs with a power of 5 W each,
the function only detects lamp outage when only a single 5 W lamp remains
or none remain.
Trailers equipped with LED lights are
not suitable for the wiring harness of
this trailer hitch.
Fitting of towing equipment could
cover the opening of the towing eye.
If this is the case, use the coupling ball
bar for towing. Always keep the
coupling ball bar in the vehicle to have it on hand if needed.