window OPEL CROSSLAND X 2017 Owner's Manual
[x] Cancel search | Manufacturer: OPEL, Model Year: 2017, Model line: CROSSLAND X, Model: OPEL CROSSLAND X 2017Pages: 245, PDF Size: 7.58 MB
Page 37 of 245
Keys, doors and windows35AlarmWhen triggered, the alarm hornsounds and the hazard warning lights flash simultaneously. The number
and duration of alarm signals are
stipulated by legislation.
The anti-theft alarm system can be
deactivated by pressing c, by
pressing the switch on the door
handle with electronic key system or
switching on the ignition.
The anti-theft alarm system can be
deactivated by pressing c, by
pressing on one of the front door
handles at the markings with
electronic key system or switching on
the ignition.
A triggered alarm, which has not been interrupted by the driver, will be
indicated by the hazard warning
lights. They will flash quickly three
times the next time the vehicle is unlocked with the radio remote
control. Additionally a warning
message is displayed in the Driver
Information Centre after switching on
the ignition.
Vehicle messages 3 98.If the vehicle's battery is to be
disconnected (e.g. for maintenance
work), the alarm siren must be
deactivated as follows: switch the
ignition on then off, then disconnect
the vehicle's battery within
15 seconds.
Immobiliser The system is part of the ignition
switch and checks whether the
vehicle is allowed to be started with the key being used.
The immobiliser is activated
automatically after the key has been
removed from the ignition switch.
Note
Radio Frequency Identification
(RFID) tags may cause interference
with the key. Do not have it placed near the key when starting the
vehicle.
Note
The immobiliser does not lock the doors. You should always lock the
vehicle after leaving it and switch on the anti-theft alarm system 3 25,
3 33.Exterior mirrors
Convex shape
The convex exterior mirror on the
driver's side contains an aspherical
area and reduces blind spots. The
shape of the mirror makes objects
appear smaller, which will affect the
ability to estimate distances.
Side blind spot alert 3 159.
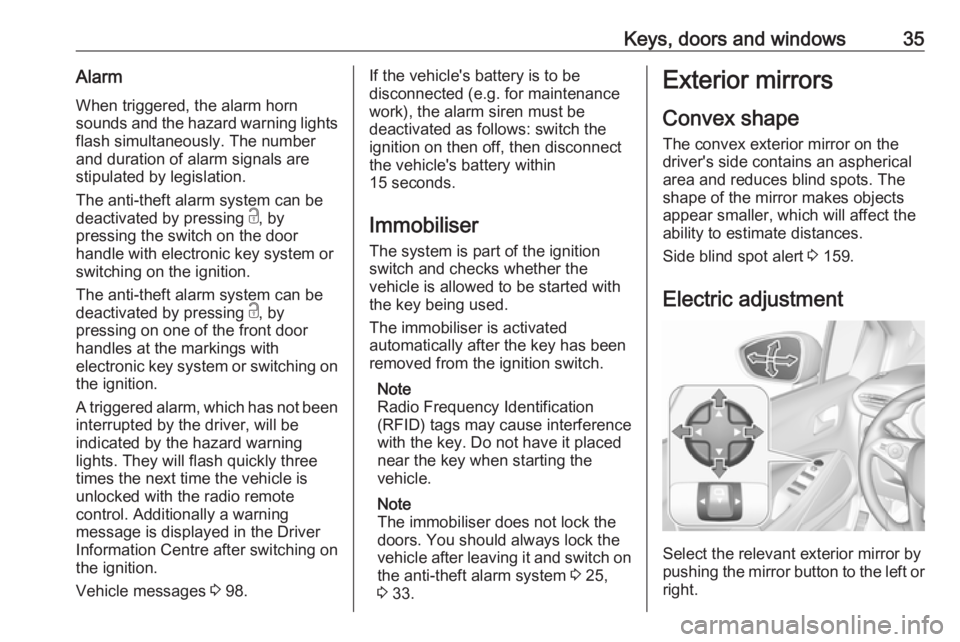
Electric adjustment
Select the relevant exterior mirror by
pushing the mirror button to the left or right.
Page 38 of 245
36Keys, doors and windowsThen swivel the control to adjust the
mirror.
Folding mirrors
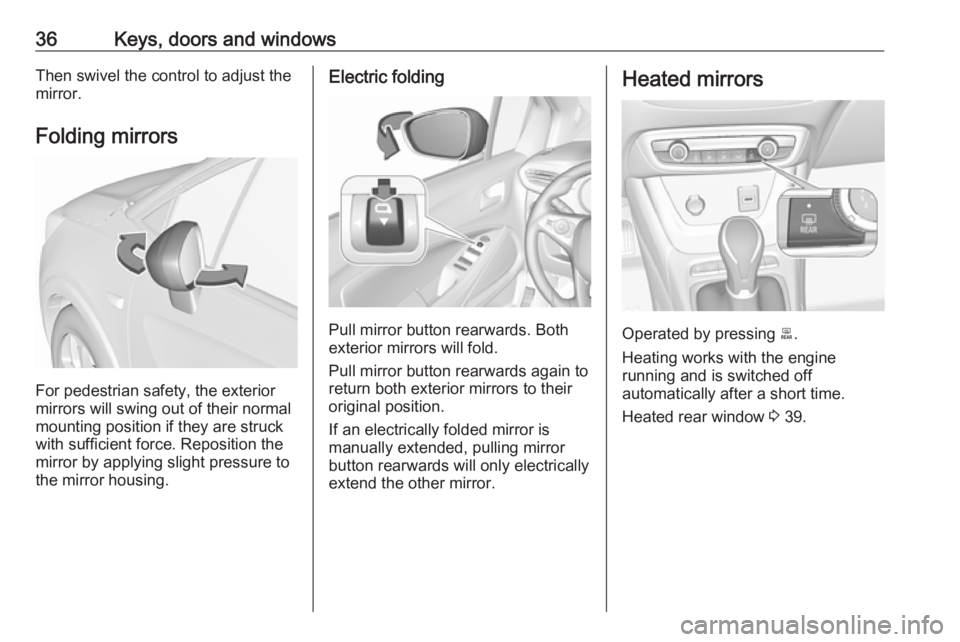
For pedestrian safety, the exterior
mirrors will swing out of their normal
mounting position if they are struck
with sufficient force. Reposition the mirror by applying slight pressure tothe mirror housing.
Electric folding
Pull mirror button rearwards. Both
exterior mirrors will fold.
Pull mirror button rearwards again to return both exterior mirrors to their
original position.
If an electrically folded mirror is
manually extended, pulling mirror
button rearwards will only electrically
extend the other mirror.
Heated mirrors
Operated by pressing b.
Heating works with the engine
running and is switched off
automatically after a short time.
Heated rear window 3 39.
Page 39 of 245
Keys, doors and windows37Interior mirrors
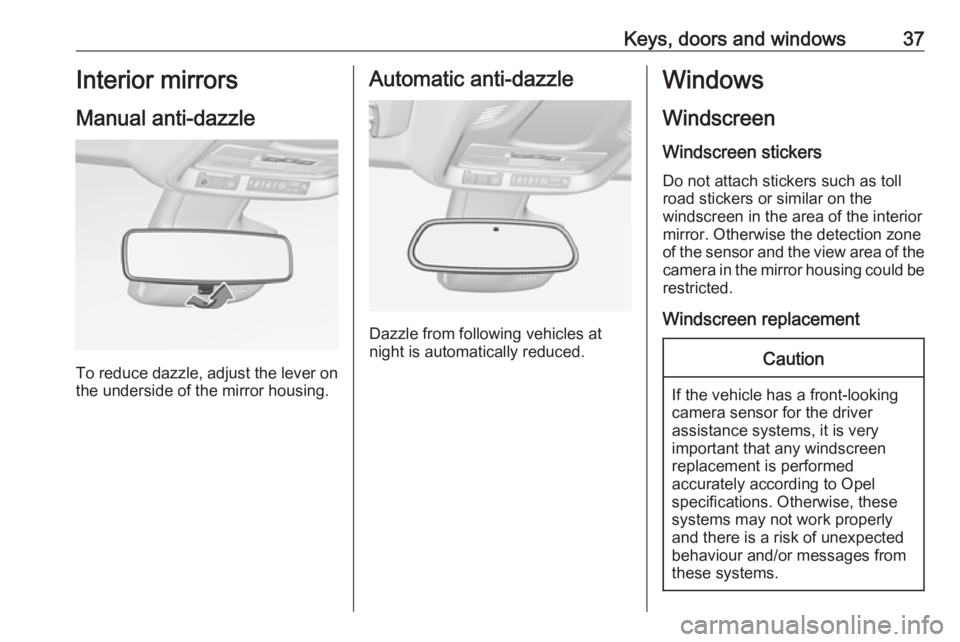
Manual anti-dazzle
To reduce dazzle, adjust the lever on the underside of the mirror housing.
Automatic anti-dazzle
Dazzle from following vehicles at
night is automatically reduced.
Windows
Windscreen Windscreen stickers
Do not attach stickers such as toll
road stickers or similar on the
windscreen in the area of the interior
mirror. Otherwise the detection zone
of the sensor and the view area of the camera in the mirror housing could be
restricted.
Windscreen replacementCaution
If the vehicle has a front-looking
camera sensor for the driver
assistance systems, it is very
important that any windscreen
replacement is performed
accurately according to Opel
specifications. Otherwise, these
systems may not work properly
and there is a risk of unexpected
behaviour and/or messages from
these systems.
Page 40 of 245
38Keys, doors and windowsCaution
If the vehicle is equipped with a
Head-up display, it is very
important that any windscreen
replacement is performed
accurately according to Opel
specifications. Otherwise, the
system may not work properly and the image may look out of focus.
Power windows
9 Warning
Take care when operating the
power windows. Risk of injury,
particularly to children.
If there are children on the rear seats, switch on the child safety
system for the power windows.
Keep a close watch on the
windows when closing them.
Ensure that nothing becomes
trapped in them as they move.
Switch on ignition to operate power
windows.
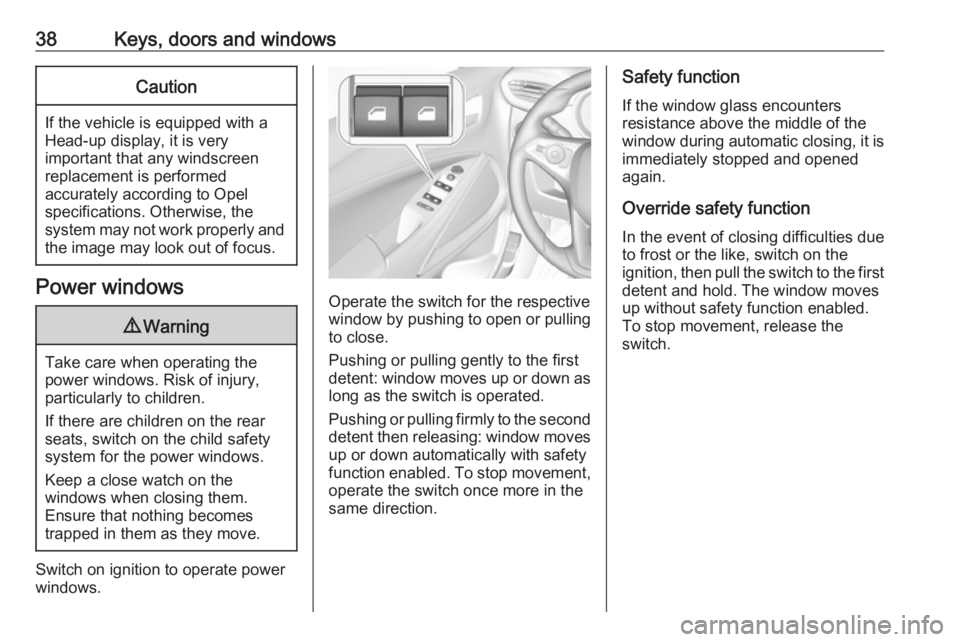
Operate the switch for the respective
window by pushing to open or pulling to close.
Pushing or pulling gently to the first
detent: window moves up or down as long as the switch is operated.
Pushing or pulling firmly to the second
detent then releasing: window moves
up or down automatically with safety
function enabled. To stop movement,
operate the switch once more in the
same direction.
Safety function
If the window glass encounters
resistance above the middle of the
window during automatic closing, it is
immediately stopped and opened again.
Override safety function
In the event of closing difficulties due
to frost or the like, switch on the
ignition, then pull the switch to the first
detent and hold. The window moves
up without safety function enabled.
To stop movement, release the
switch.
Page 41 of 245
Keys, doors and windows39Child safety system for rear
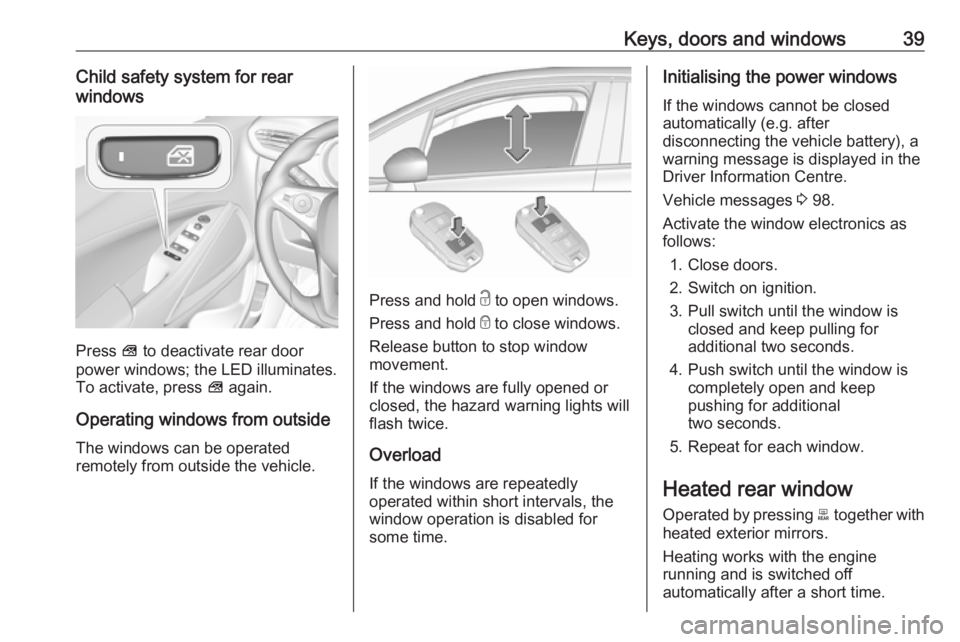
windows
Press V to deactivate rear door
power windows; the LED illuminates.
To activate, press V again.
Operating windows from outside
The windows can be operated
remotely from outside the vehicle.
Press and hold c to open windows.
Press and hold e to close windows.
Release button to stop window
movement.
If the windows are fully opened or
closed, the hazard warning lights will
flash twice.
Overload
If the windows are repeatedly
operated within short intervals, the
window operation is disabled for
some time.
Initialising the power windows
If the windows cannot be closed
automatically (e.g. after
disconnecting the vehicle battery), a
warning message is displayed in the
Driver Information Centre.
Vehicle messages 3 98.
Activate the window electronics as
follows:
1. Close doors.
2. Switch on ignition.
3. Pull switch until the window is closed and keep pulling for
additional two seconds.
4. Push switch until the window is completely open and keep
pushing for additional
two seconds.
5. Repeat for each window.
Heated rear window Operated by pressing b together with
heated exterior mirrors.
Heating works with the engine
running and is switched off
automatically after a short time.
Page 42 of 245
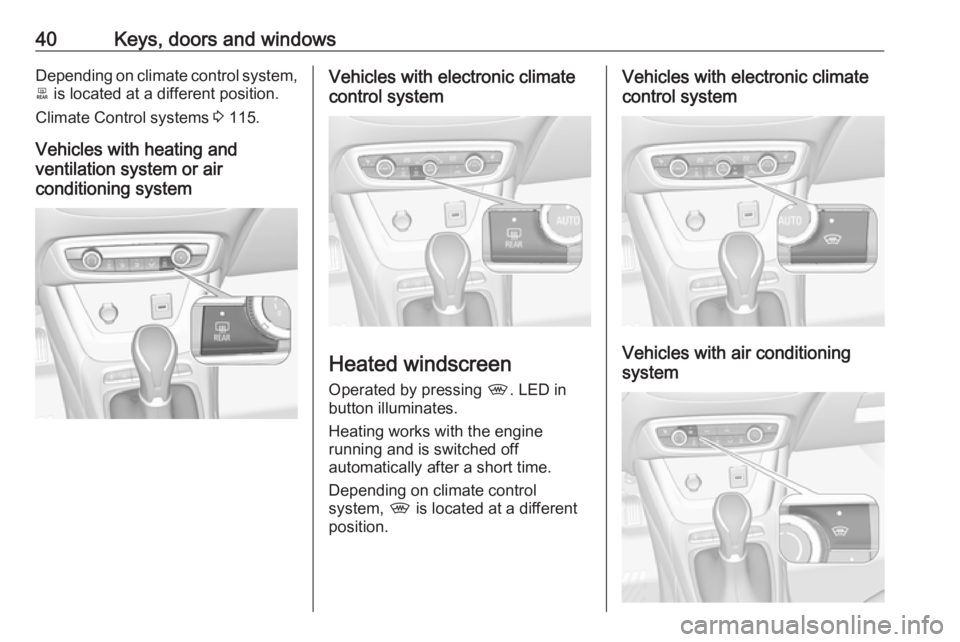
40Keys, doors and windowsDepending on climate control system,b is located at a different position.
Climate Control systems 3 115.
Vehicles with heating and
ventilation system or air
conditioning systemVehicles with electronic climate
control system
Heated windscreen
Operated by pressing ,. LED in
button illuminates.
Heating works with the engine
running and is switched off
automatically after a short time.
Depending on climate control
system, , is located at a different
position.
Vehicles with electronic climate
control system
Vehicles with air conditioning
system
Page 43 of 245
Keys, doors and windows41Sun visors
The sun visors can be folded down or swivelled to the side to prevent
dazzling.
The covers of the mirrors should be closed when driving.
A ticket holder is located on the
backside of the sun visor.Roof
Glass panel Do not affix any stickers to the roof.
Do not cover the vehicle using a
tarpaulin.
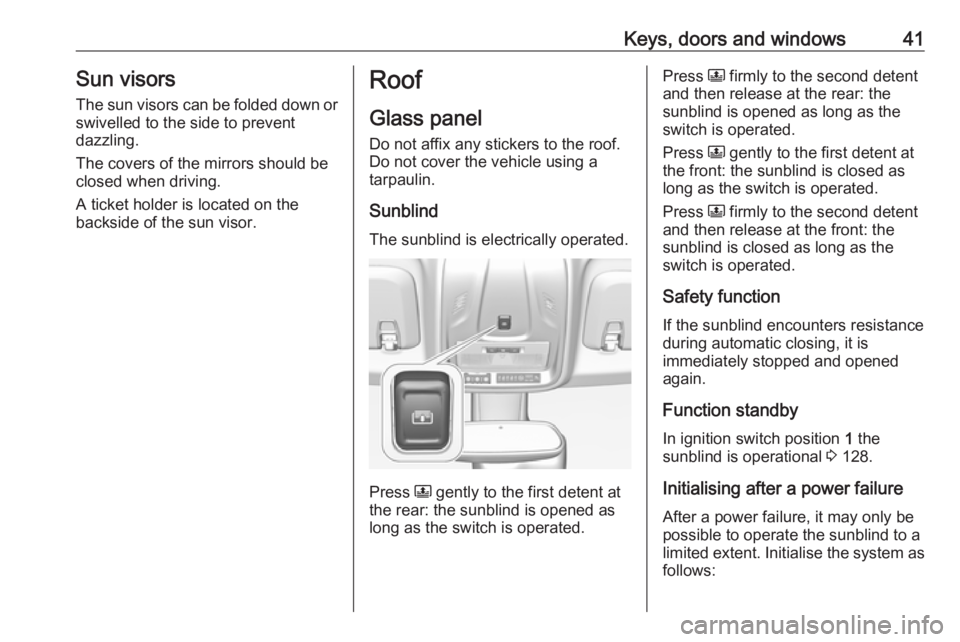
Sunblind The sunblind is electrically operated.
Press N
gently to the first detent at
the rear: the sunblind is opened as
long as the switch is operated.
Press N firmly to the second detent
and then release at the rear: the
sunblind is opened as long as the
switch is operated.
Press N gently to the first detent at
the front: the sunblind is closed as
long as the switch is operated.
Press N firmly to the second detent
and then release at the front: the
sunblind is closed as long as the
switch is operated.
Safety function
If the sunblind encounters resistance during automatic closing, it is
immediately stopped and opened again.
Function standby In ignition switch position 1 the
sunblind is operational 3 128.
Initialising after a power failure
After a power failure, it may only be
possible to operate the sunblind to a limited extent. Initialise the system as follows:
Page 44 of 245
42Keys, doors and windows1. Turn key in ignition switch toposition 1.
2. Press N twice gently to the first
detent at the rear, the sunblind
opens slightly.
3. Immediately press N twice gently
to the first detent at the front, the
sunblind closes slightly.
After step 3 the sunblind is in
initialising mode without safety
function.
4. Press N gently to the first detent
at the rear until the sunblind is
completely opened.
5. Press N gently to the first detent
at the front until the sunblind is
completely closed.
After this procedure, the sunblind is
initialised with safety function
activated.
When N is pressed firmly to the
second detent during initialising, the
procedure is cancelled.
Page 75 of 245
Instruments and controls73Instruments and
controlsControls ....................................... 74
Steering wheel adjustment ........74
Steering wheel controls .............74
Heated steering wheel ...............74
Horn ........................................... 75
Windscreen wiper/washer .........75
Rear window wiper/washer .......77
Outside temperature ..................77
Clock ......................................... 78
Power outlets ............................. 78
Inductive charging .....................79
Ashtrays .................................... 79
Warning lights, gauges and indi‐ cators ........................................... 80
Instrument cluster ......................80
Speedometer ............................. 83
Odometer .................................. 84
Trip odometer ............................ 84
Tachometer ............................... 84
Fuel gauge ................................ 85
Engine coolant temperature gauge ....................................... 85
Service display .......................... 85
Control indicators ......................86Turn signal................................. 86
Seat belt reminder .....................87
Airbag and belt tensioners .........87
Airbag deactivation ....................88
Charging system .......................88
Malfunction indicator light ..........88
Service vehicle soon .................88
Stop engine ............................... 88
System check ............................ 89
Brake and clutch system ...........89
Antilock brake system (ABS) .....89
Gear shifting .............................. 89
Lane departure warning ............89
Electronic Stability Control and Traction Control system ...........90
Electronic Stability Control and Traction Control system off ......90
Engine coolant temperature ......90
Preheating ................................. 90
Diesel particle filter ....................90
AdBlue ....................................... 90
Deflation detection system ........91
Engine oil pressure ....................91
Low fuel ..................................... 91
Autostop .................................... 91
Exterior light .............................. 91
High beam ................................. 92
High beam assist .......................92
Low beam .................................. 92
Fog light ..................................... 92Rear fog light............................. 92
Rain sensor ............................... 92
Cruise control ............................ 92
Speed limiter ............................. 92
Traffic sign assistant ..................92
Door open .................................. 92
Information displays .....................93
Driver Information Centre ..........93
Info display ................................ 95
Head-up display ........................97
Vehicle messages ........................98
Warning chimes .........................99
Battery voltage .......................... 99
Vehicle personalisation ..............100
Telematics service .....................103
OnStar ..................................... 103
Page 79 of 245
Instruments and controls77Pull lever. Washer fluid is sprayed
onto the windscreen and the wiper
wipes a few times.
Washer fluid 3 179.
Rear window wiper/washer
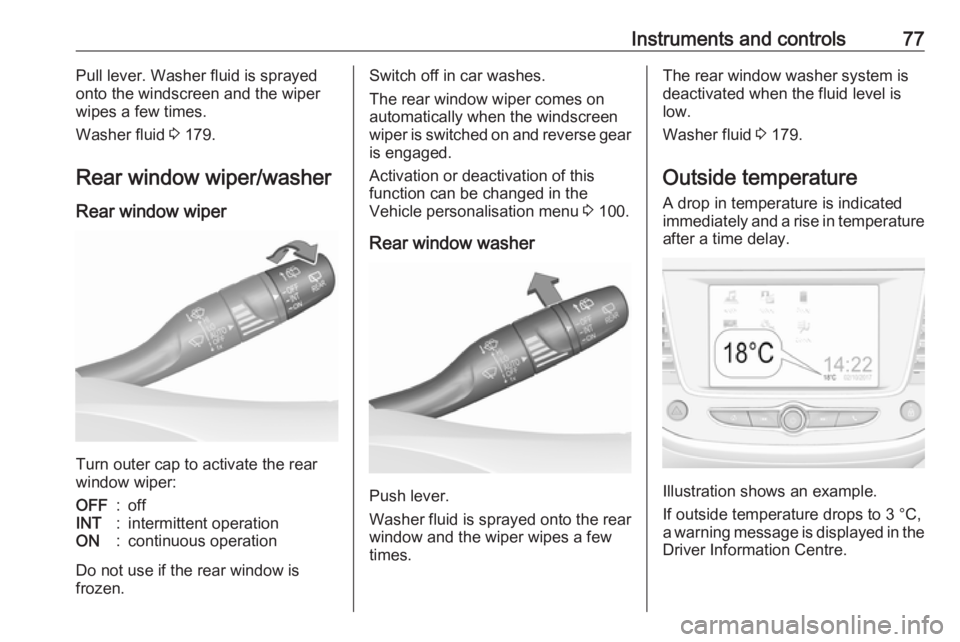
Rear window wiper
Turn outer cap to activate the rear
window wiper:
OFF:offINT:intermittent operationON:continuous operation
Do not use if the rear window is
frozen.
Switch off in car washes.
The rear window wiper comes on
automatically when the windscreen
wiper is switched on and reverse gear
is engaged.
Activation or deactivation of this
function can be changed in the
Vehicle personalisation menu 3 100.
Rear window washer
Push lever.
Washer fluid is sprayed onto the rear
window and the wiper wipes a few
times.
The rear window washer system is
deactivated when the fluid level is
low.
Washer fluid 3 179.
Outside temperature A drop in temperature is indicated
immediately and a rise in temperature
after a time delay.
Illustration shows an example.
If outside temperature drops to 3 °C,
a warning message is displayed in the Driver Information Centre.