steering OPEL CROSSLAND X 2018.5 Manual user
[x] Cancel search | Manufacturer: OPEL, Model Year: 2018.5, Model line: CROSSLAND X, Model: OPEL CROSSLAND X 2018.5Pages: 261, PDF Size: 8.04 MB
Page 168 of 261
166Driving and operating
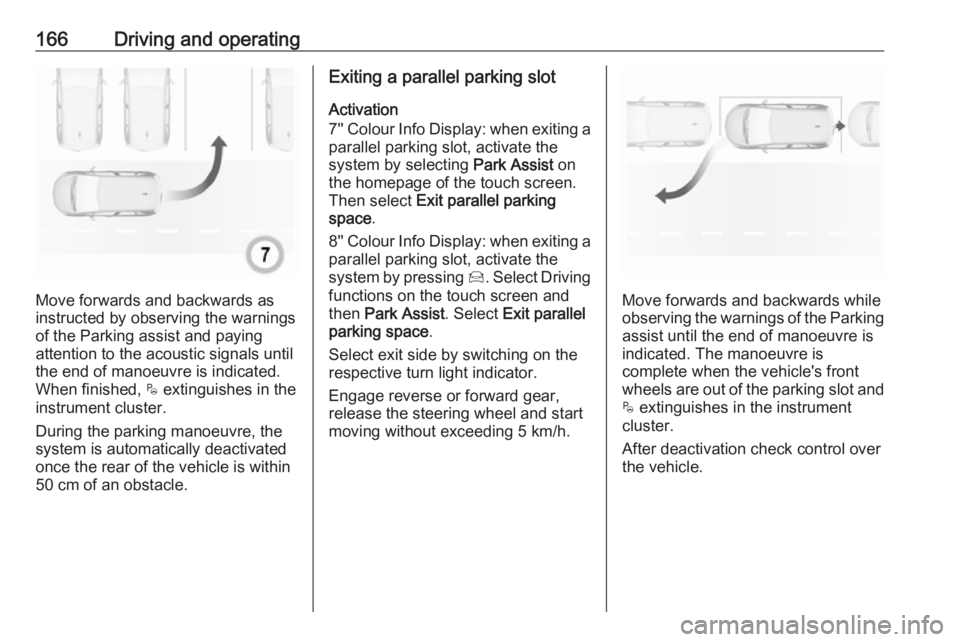
Move forwards and backwards as
instructed by observing the warnings of the Parking assist and paying
attention to the acoustic signals until
the end of manoeuvre is indicated.
When finished, $ extinguishes in the
instrument cluster.
During the parking manoeuvre, the
system is automatically deactivated
once the rear of the vehicle is within
50 cm of an obstacle.
Exiting a parallel parking slot
Activation
7'' Colour Info Display: when exiting a parallel parking slot, activate the
system by selecting Park Assist on
the homepage of the touch screen.
Then select Exit parallel parking
space .
8'' Colour Info Display: when exiting a parallel parking slot, activate the
system by pressing Í. Select Driving
functions on the touch screen and
then Park Assist . Select Exit parallel
parking space .
Select exit side by switching on the
respective turn light indicator.
Engage reverse or forward gear,
release the steering wheel and start
moving without exceeding 5 km/h.
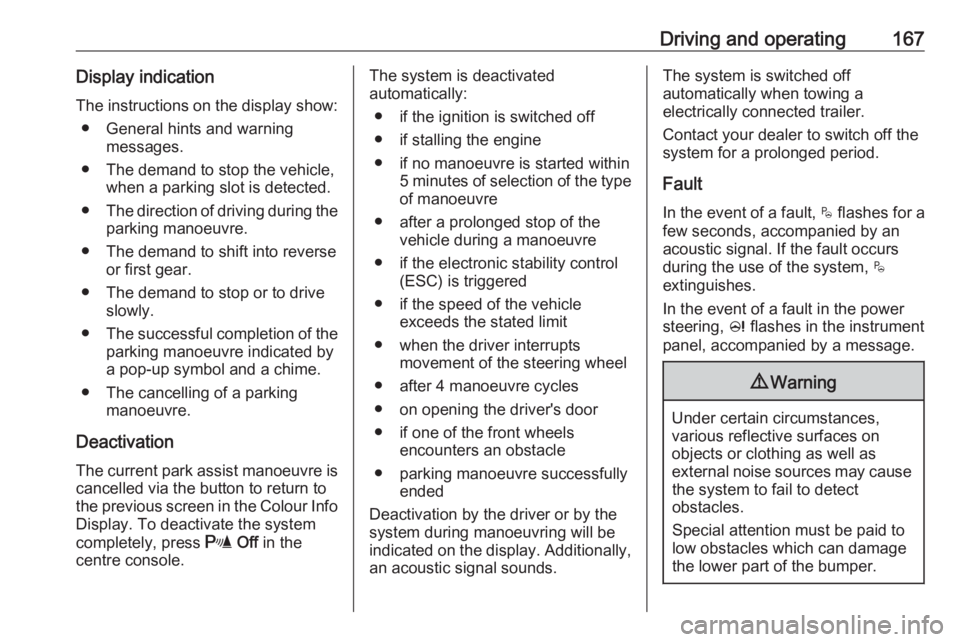
Move forwards and backwards while
observing the warnings of the Parking
assist until the end of manoeuvre is
indicated. The manoeuvre is
complete when the vehicle's front
wheels are out of the parking slot and $ extinguishes in the instrument
cluster.
After deactivation check control over
the vehicle.
Page 169 of 261
Driving and operating167Display indicationThe instructions on the display show: ● General hints and warning messages.
● The demand to stop the vehicle, when a parking slot is detected.
● The direction of driving during the
parking manoeuvre.
● The demand to shift into reverse or first gear.
● The demand to stop or to drive slowly.
● The successful completion of the
parking manoeuvre indicated by
a pop-up symbol and a chime.
● The cancelling of a parking manoeuvre.
Deactivation The current park assist manoeuvre is
cancelled via the button to return to
the previous screen in the Colour Info Display. To deactivate the system
completely, press r Off in the
centre console.The system is deactivated
automatically:
● if the ignition is switched off
● if stalling the engine
● if no manoeuvre is started within 5 minutes of selection of the typeof manoeuvre
● after a prolonged stop of the vehicle during a manoeuvre
● if the electronic stability control (ESC) is triggered
● if the speed of the vehicle exceeds the stated limit
● when the driver interrupts movement of the steering wheel
● after 4 manoeuvre cycles
● on opening the driver's door
● if one of the front wheels encounters an obstacle
● parking manoeuvre successfully ended
Deactivation by the driver or by the system during manoeuvring will beindicated on the display. Additionally,
an acoustic signal sounds.The system is switched off
automatically when towing a
electrically connected trailer.
Contact your dealer to switch off the
system for a prolonged period.
Fault
In the event of a fault, $ flashes for a
few seconds, accompanied by an
acoustic signal. If the fault occurs
during the use of the system, $
extinguishes.
In the event of a fault in the power
steering, c flashes in the instrument
panel, accompanied by a message.9 Warning
Under certain circumstances,
various reflective surfaces on
objects or clothing as well as
external noise sources may cause the system to fail to detect
obstacles.
Special attention must be paid to
low obstacles which can damage
the lower part of the bumper.
Page 173 of 261
Driving and operating171Rear view
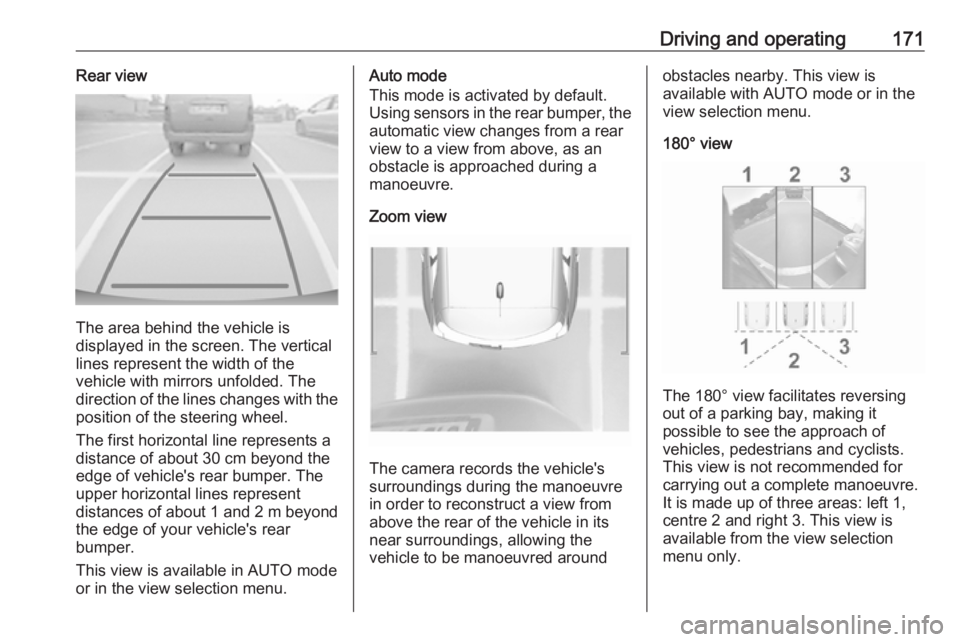
The area behind the vehicle is
displayed in the screen. The vertical
lines represent the width of the
vehicle with mirrors unfolded. The
direction of the lines changes with the position of the steering wheel.
The first horizontal line represents a
distance of about 30 cm beyond the
edge of vehicle's rear bumper. The
upper horizontal lines represent
distances of about 1 and 2 m beyond
the edge of your vehicle's rear
bumper.
This view is available in AUTO mode
or in the view selection menu.
Auto mode
This mode is activated by default.
Using sensors in the rear bumper, the automatic view changes from a rear
view to a view from above, as an
obstacle is approached during a
manoeuvre.
Zoom view
The camera records the vehicle's
surroundings during the manoeuvre in order to reconstruct a view fromabove the rear of the vehicle in its
near surroundings, allowing the
vehicle to be manoeuvred around
obstacles nearby. This view is
available with AUTO mode or in the
view selection menu.
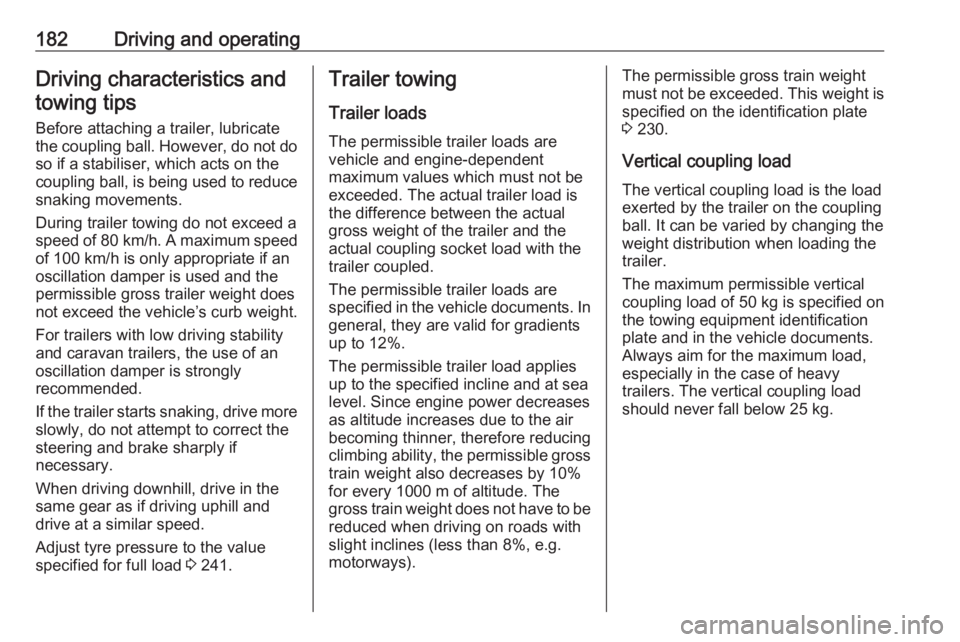
180° view
The 180° view facilitates reversing
out of a parking bay, making it
possible to see the approach of
vehicles, pedestrians and cyclists.
This view is not recommended for
carrying out a complete manoeuvre.
It is made up of three areas: left 1,
centre 2 and right 3. This view is
available from the view selection menu only.
Page 184 of 261
182Driving and operatingDriving characteristics andtowing tips
Before attaching a trailer, lubricate the coupling ball. However, do not do
so if a stabiliser, which acts on the coupling ball, is being used to reduce snaking movements.
During trailer towing do not exceed a
speed of 80 km/h. A maximum speed
of 100 km/h is only appropriate if an
oscillation damper is used and the
permissible gross trailer weight does
not exceed the vehicle’s curb weight.
For trailers with low driving stability
and caravan trailers, the use of an
oscillation damper is strongly
recommended.
If the trailer starts snaking, drive more slowly, do not attempt to correct the
steering and brake sharply if
necessary.
When driving downhill, drive in the
same gear as if driving uphill and
drive at a similar speed.
Adjust tyre pressure to the value
specified for full load 3 241.Trailer towing
Trailer loads The permissible trailer loads are
vehicle and engine-dependent
maximum values which must not be
exceeded. The actual trailer load is
the difference between the actual
gross weight of the trailer and the
actual coupling socket load with the
trailer coupled.
The permissible trailer loads are
specified in the vehicle documents. In general, they are valid for gradients
up to 12%.
The permissible trailer load applies
up to the specified incline and at sea
level. Since engine power decreases
as altitude increases due to the air
becoming thinner, therefore reducing
climbing ability, the permissible gross
train weight also decreases by 10%
for every 1000 m of altitude. The
gross train weight does not have to be reduced when driving on roads with
slight inclines (less than 8%, e.g.
motorways).The permissible gross train weight
must not be exceeded. This weight is
specified on the identification plate
3 230.
Vertical coupling load
The vertical coupling load is the load
exerted by the trailer on the coupling
ball. It can be varied by changing the
weight distribution when loading the
trailer.
The maximum permissible vertical
coupling load of 50 kg is specified on
the towing equipment identification
plate and in the vehicle documents.
Always aim for the maximum load,
especially in the case of heavy
trailers. The vertical coupling load
should never fall below 25 kg.
Page 206 of 261
204Vehicle care
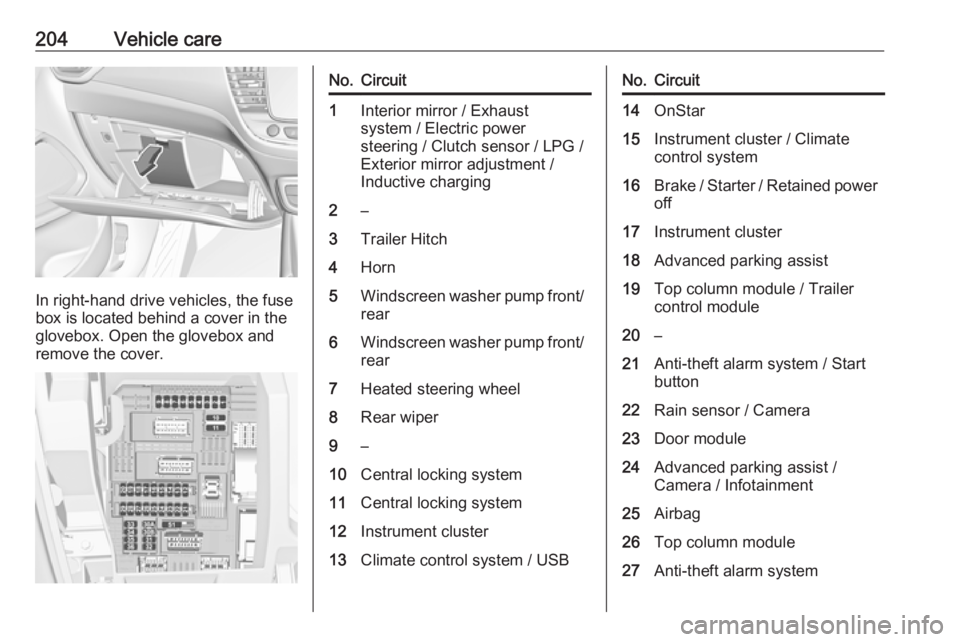
In right-hand drive vehicles, the fuse
box is located behind a cover in the
glovebox. Open the glovebox and
remove the cover.
No.Circuit1Interior mirror / Exhaust
system / Electric power
steering / Clutch sensor / LPG /
Exterior mirror adjustment /
Inductive charging2–3Trailer Hitch4Horn5Windscreen washer pump front/
rear6Windscreen washer pump front/ rear7Heated steering wheel8Rear wiper9–10Central locking system11Central locking system12Instrument cluster13Climate control system / USBNo.Circuit14OnStar15Instrument cluster / Climate
control system16Brake / Starter / Retained power off17Instrument cluster18Advanced parking assist19Top column module / Trailer
control module20–21Anti-theft alarm system / Start
button22Rain sensor / Camera23Door module24Advanced parking assist /
Camera / Infotainment25Airbag26Top column module27Anti-theft alarm system
Page 213 of 261
Vehicle care211Tyre chains
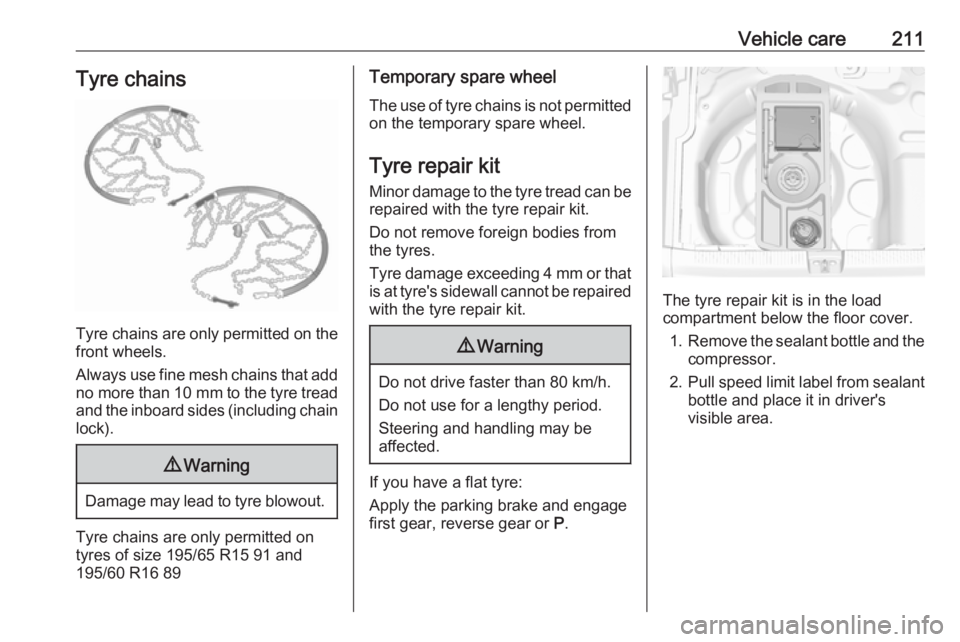
Tyre chains are only permitted on the
front wheels.
Always use fine mesh chains that add no more than 10 mm to the tyre tread
and the inboard sides (including chain lock).
9 Warning
Damage may lead to tyre blowout.
Tyre chains are only permitted on
tyres of size 195/65 R15 91 and
195/60 R16 89
Temporary spare wheel
The use of tyre chains is not permitted on the temporary spare wheel.
Tyre repair kit
Minor damage to the tyre tread can be
repaired with the tyre repair kit.
Do not remove foreign bodies from
the tyres.
Tyre damage exceeding 4 mm or that
is at tyre's sidewall cannot be repaired with the tyre repair kit.9 Warning
Do not drive faster than 80 km/h.
Do not use for a lengthy period.
Steering and handling may be
affected.
If you have a flat tyre:
Apply the parking brake and engage
first gear, reverse gear or P.
The tyre repair kit is in the load
compartment below the floor cover.
1. Remove the sealant bottle and the
compressor.
2. Pull speed limit label from sealant
bottle and place it in driver's
visible area.
Page 223 of 261
Vehicle care221Towing
Towing the vehicle
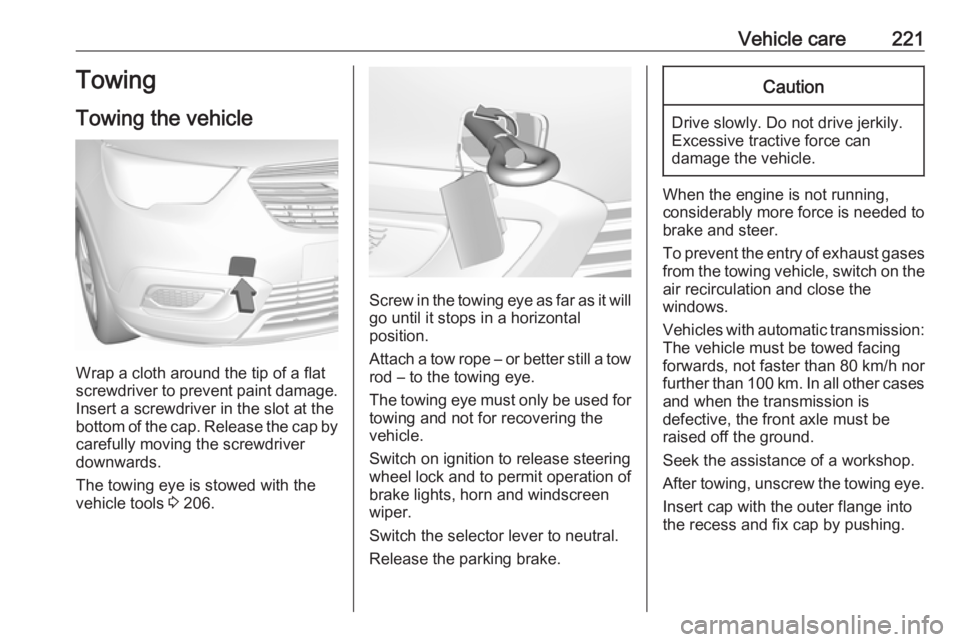
Wrap a cloth around the tip of a flat
screwdriver to prevent paint damage.
Insert a screwdriver in the slot at the
bottom of the cap. Release the cap by carefully moving the screwdriver
downwards.
The towing eye is stowed with the vehicle tools 3 206.
Screw in the towing eye as far as it will
go until it stops in a horizontal
position.
Attach a tow rope – or better still a tow
rod – to the towing eye.
The towing eye must only be used for
towing and not for recovering the
vehicle.
Switch on ignition to release steering
wheel lock and to permit operation of
brake lights, horn and windscreen
wiper.
Switch the selector lever to neutral.
Release the parking brake.
Caution
Drive slowly. Do not drive jerkily.
Excessive tractive force can
damage the vehicle.
When the engine is not running,
considerably more force is needed to
brake and steer.
To prevent the entry of exhaust gases from the towing vehicle, switch on the
air recirculation and close the
windows.
Vehicles with automatic transmission: The vehicle must be towed facing
forwards, not faster than 80 km/h nor further than 100 km. In all other cases
and when the transmission is
defective, the front axle must be
raised off the ground.
Seek the assistance of a workshop.
After towing, unscrew the towing eye.
Insert cap with the outer flange into
the recess and fix cap by pushing.
Page 252 of 261
250Customer information● Faults and defects in importantsystem components (e.g. lights,
brakes),
● System reactions in special driving situations (e.g. triggeringof an airbag, actuation of the
stability control systems),
● Information on events damaging the vehicle.
In special cases (e.g. if the vehicle
has detected a malfunction), it may be
necessary to save data that would
otherwise just be volatile.
When you use services, the operating data saved can be read together with
the vehicle identification number and
used if necessary. Staff working for
the service net-work (e.g. garages,
manufacturers) or third parties (e.g.
breakdown services) can read the
data from the vehicle. Services
include repair services, maintenance processes, warranty cases and
quality assurance measures.
Data is generally read via the OBD
(On-Board Diagnostics) port
prescribed by law in the vehicle. The operating data which has been read
out documents the technical conditionof the vehicle or individual
components and assists with fault
diagnosis, compliance with warranty
obligations and quality improvement.
This data, in particular information on component stress, technical events,
operator errors and other faults, is
transmitted to the manufacturer
where appropriate, together with the
vehicle identification number. The
manufacturer is also subject to
product liability. The manufacturer
potentially also needs operating data
from vehicles for product recalls.
Fault memories in the vehicle can be
reset by a service company when
carrying out servicing or repairs.
Comfort and infotainment
functions
Comfort settings and custom settings can be stored in the vehicle and
changed at any time.Depending on the equipment level in
question, these include
● Seat and steering wheel position settings,
● Chassis and air conditioning settings,
● Custom settings such as interior lighting.
You can input your own data in the
infotainment functions for your
vehicle as part of the selected
features.
Depending on the equipment level in
question, these include
● Multimedia data such as music, videos or photos for playback in
an integrated multimedia system,
● Address book data for use with an integrated hands-free system
or an integrated navigation
system,
● Input destinations,
● Data on the use of online services.
This data for comfort and
infotainment functions can be stored
locally in the vehicle or be kept on a
Page 258 of 261

256Headlights................................... 109Head restraint adjustment .............8
Head restraints ............................ 42
Head-up display............................ 98 Heated mirrors ............................. 35
Heated rear window ..................... 38
Heated steering wheel .................73
Heated windscreen .......................39
Heating ........................................ 46
Heating and ventilation system . 118
High beam ........................... 93, 110
High beam assist ..........................93
Hill start assist ........................... 148
Horn ....................................... 14, 74
I
Identification plate .....................230
Ignition switch positions .............131
Immobiliser .................................. 34
Indicators ...................................... 84
Inductive charging ........................78
Info Display ................................... 97
Instrument cluster ........................80
Instrument panel fuse box .........203
Instrument panel illumination .....201
Instrument panel illumination control .................................... 115
Instrument panel overview ........... 10
Interior care ............................... 225
Interior lighting ............................ 115Interior lights ...................... 115, 201
Interior mirrors .............................. 36
Interruption of power supply ......145
Introduction .................................... 3
J Jump starting ............................. 219
K Keys ............................................. 21
Keys, locks ................................... 21
L
Lane departure warning .......91, 174
Lashing eyes ............................... 68
LED headlights ........................... 196
Lighting features .........................116
Light switch ................................ 109
Load compartment ................30, 64
Load compartment cover .............67
Loading information .....................70
Low beam ..................................... 93
Low fuel ....................................... 93
LPG ...................................... 85, 177
M Malfunction indicator light ............90
Manual anti-dazzle ......................36
Manual mode ............................. 144
Manual transmission .................. 146Mirror adjustment ........................... 9
Misted light covers .....................114
N New vehicle running-in ..............131
Number plate light .....................201
O Object detection systems ...........160
Odometer ..................................... 84 Oil, engine .......................... 228, 232
OnStar ........................................ 105
Outside temperature ....................76
Overrun cut-off ........................... 136
P Panoramic view system ..............170
Parking ................................ 19, 138
Parking assist ............................ 160
Parking brake ............................ 148
Parking lights ............................. 114
Particulate filter ........................... 139
Performance .............................. 237
Performing work ........................188
Power button .............................. 132
Power outlets ............................... 77
Power saving mode ....................133
Power windows ............................ 37
Preheating ................................... 92
Puncture ..................................... 215
Page 259 of 261
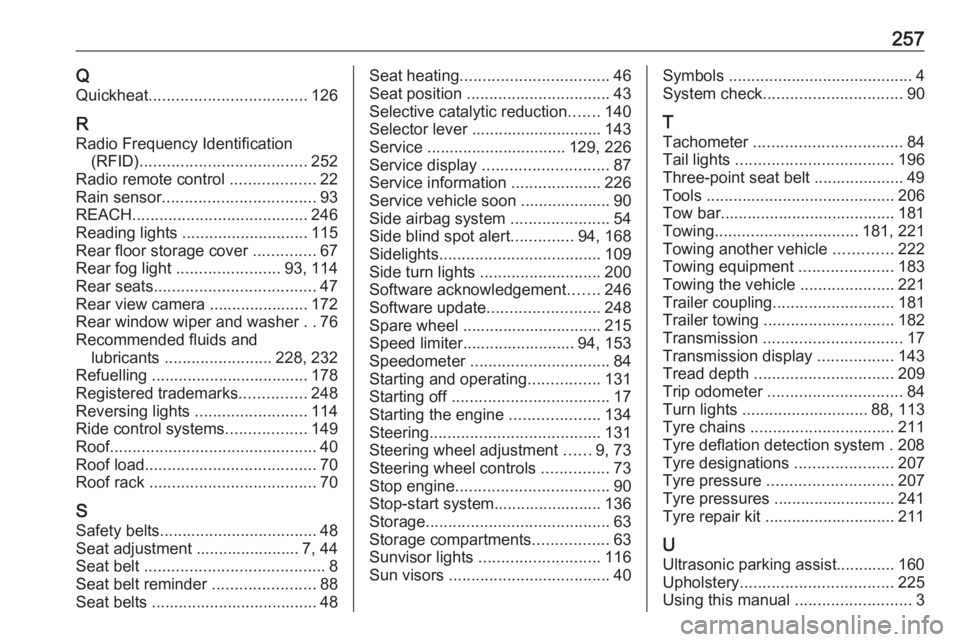
257QQuickheat ................................... 126
R
Radio Frequency Identification (RFID) ..................................... 252
Radio remote control ...................22
Rain sensor .................................. 93
REACH ....................................... 246
Reading lights ............................ 115
Rear floor storage cover ..............67
Rear fog light ....................... 93, 114
Rear seats .................................... 47
Rear view camera ...................... 172
Rear window wiper and washer ..76
Recommended fluids and lubricants ........................ 228, 232
Refuelling ................................... 178
Registered trademarks ...............248
Reversing lights .........................114
Ride control systems ..................149
Roof .............................................. 40
Roof load ...................................... 70
Roof rack ..................................... 70
S
Safety belts ................................... 48
Seat adjustment ....................... 7, 44
Seat belt ........................................ 8
Seat belt reminder .......................88
Seat belts ..................................... 48Seat heating ................................. 46
Seat position ................................ 43
Selective catalytic reduction .......140
Selector lever ............................. 143
Service ............................... 129, 226
Service display ............................ 87
Service information ....................226
Service vehicle soon .................... 90
Side airbag system ......................54
Side blind spot alert ..............94, 168
Sidelights .................................... 109
Side turn lights ........................... 200
Software acknowledgement .......246
Software update ......................... 248
Spare wheel ............................... 215
Speed limiter......................... 94, 153
Speedometer ............................... 84
Starting and operating ................131
Starting off ................................... 17
Starting the engine ....................134
Steering ...................................... 131
Steering wheel adjustment ......9, 73
Steering wheel controls ...............73
Stop engine .................................. 90
Stop-start system........................ 136
Storage ......................................... 63
Storage compartments .................63
Sunvisor lights ........................... 116
Sun visors .................................... 40Symbols ......................................... 4
System check ............................... 90
T
Tachometer ................................. 84
Tail lights ................................... 196
Three-point seat belt .................... 49
Tools .......................................... 206
Tow bar....................................... 181 Towing ................................ 181, 221
Towing another vehicle .............222
Towing equipment .....................183
Towing the vehicle .....................221
Trailer coupling ........................... 181
Trailer towing ............................. 182
Transmission ............................... 17
Transmission display .................143
Tread depth ............................... 209
Trip odometer .............................. 84
Turn lights ............................ 88, 113
Tyre chains ................................ 211
Tyre deflation detection system . 208
Tyre designations ......................207
Tyre pressure ............................ 207
Tyre pressures ........................... 241
Tyre repair kit ............................. 211
U Ultrasonic parking assist............. 160
Upholstery .................................. 225
Using this manual ..........................3